Configuring integration with Microsoft Azure Active Directory
Integration is based on two-way communication between ASAP and Azure AD. This connection on the Active Directory side is configured in the Microsoft Azure Administration Console and involves the following stages:
- adding the ASAP platform to the list of applications authorized to interact with Active Directory services
- configuring authentication settings via SAML
On the ASAP platform side, you must provide the Azure AD service URL, platform ID in Azure AD, and the content of the certificate used to encrypt communications between the platform and Azure AD.
To configure integration with Microsoft Azure Active Directory:
- Sign in to the Microsoft Azure Active Directory administration console as an admin.
- Add the Kaspersky Automated Security Awareness Platform application to the list of Active Directory applications. To do this, perform the following actions:
- In the left panel, select the Enterprise applications section.
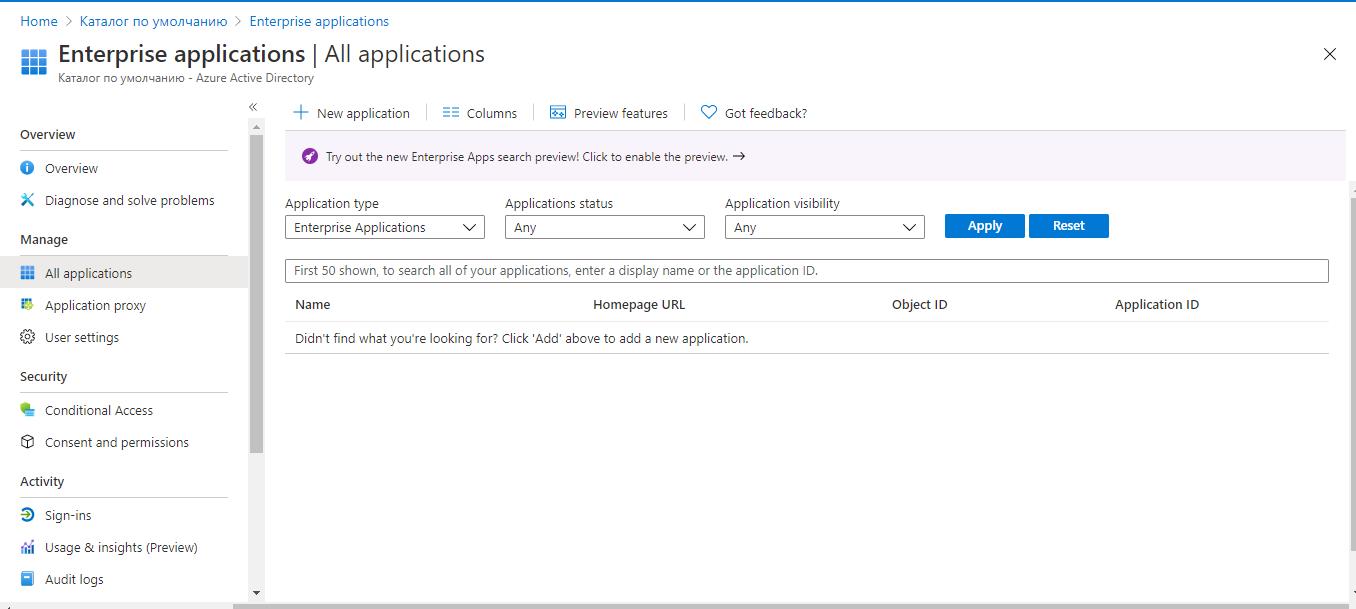
- Click New application.
The Browse Azure AD Gallery (Preview) will open.
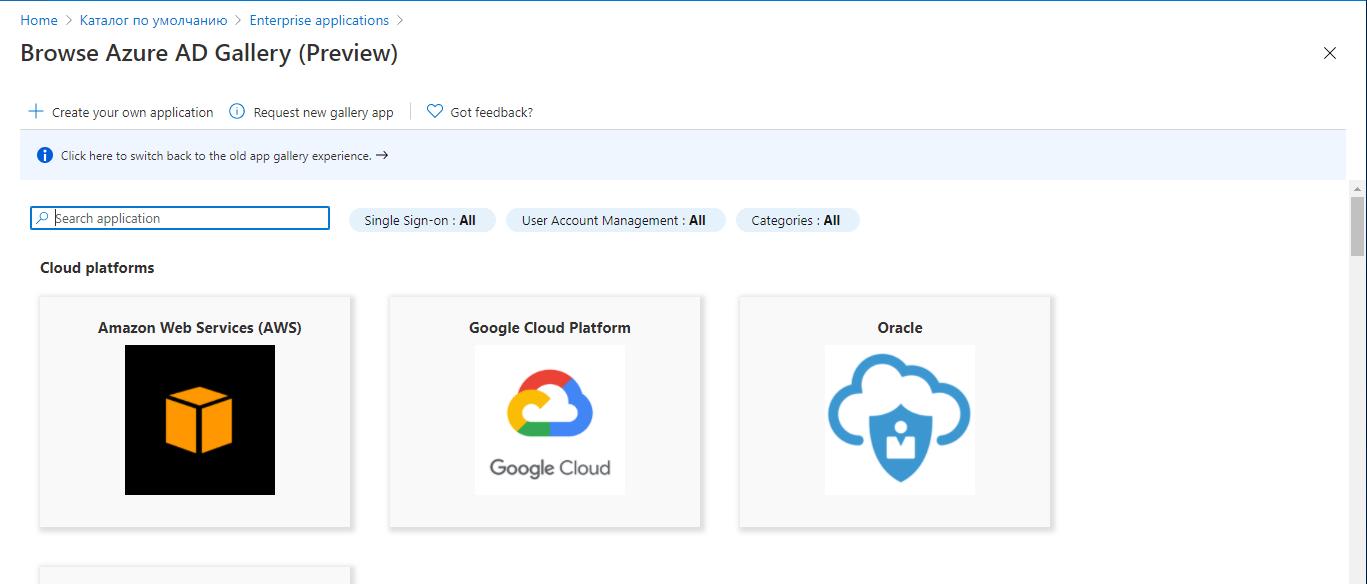
- Click Create your own application.
The Create your own application will open.
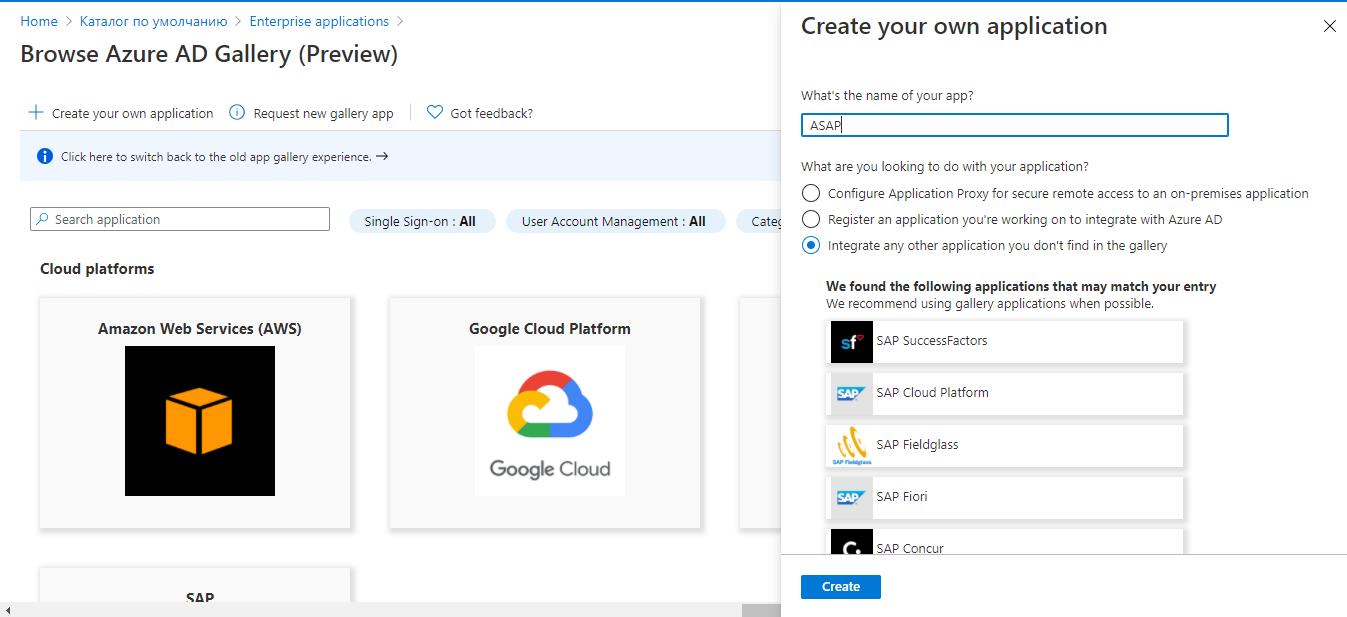
- In the What's the name of your app field, enter any name you want to use to find the added application in the list of Active Directory applications.
- Click Create.
The added application will appear in the workspace in the Enterprise applications section. The Overview window will open.
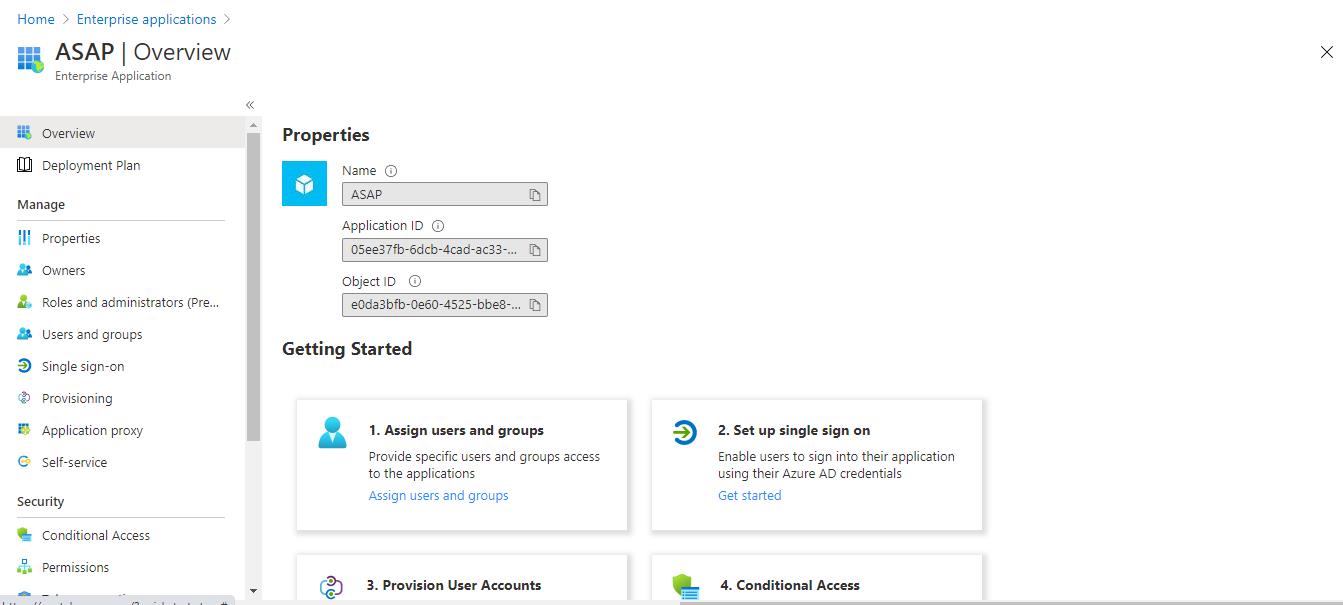
- In the left panel, select the Enterprise applications section.
- In the left panel, select the Single sign-on section.
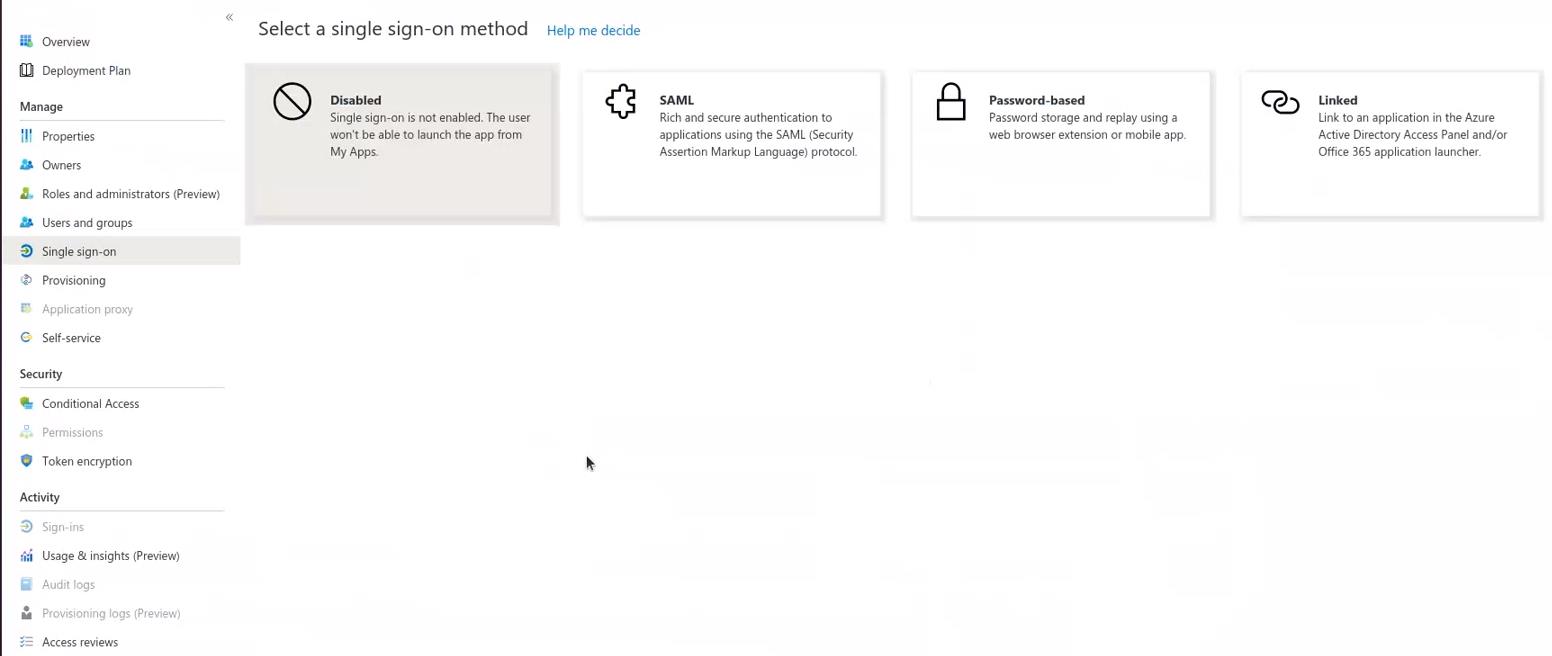
- In the workspace, select SAML as the authentication method.
The SAML-based Sign-on page opens.
- In the Basic SAML Configuration settings section, click the Edit button.
The Basic SAML Configuration window opens.
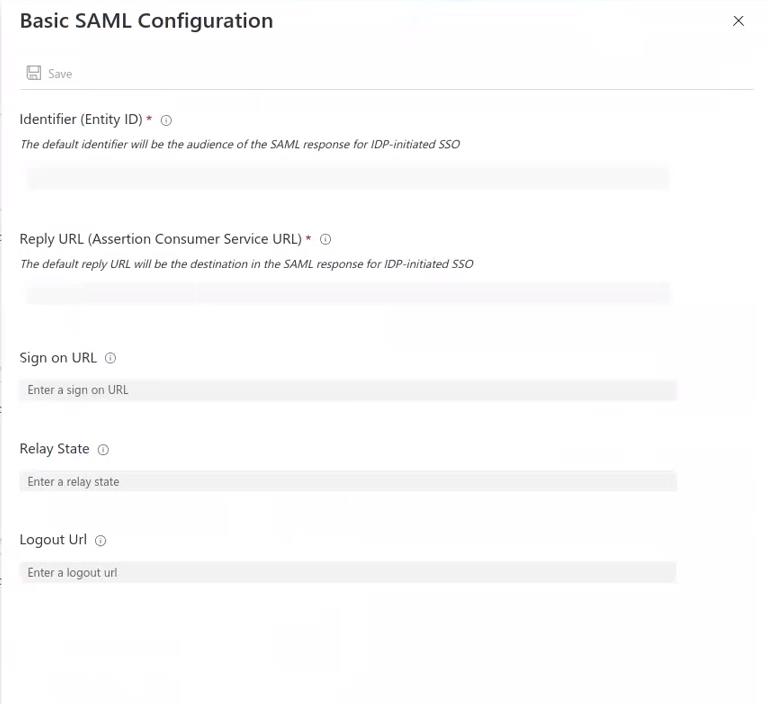
- In the Identifier field, enter any arbitrary name to serve as the ASAP platform ID for the Azure AD service.
- Copy the ID from the previous step and paste it in the ASAP web interface in the Company settings section → SSO in the Entity ID field.
- In the Azure AD console in the Reply URL field, enter the ASAP URL (ACS claim handler service address) where the SAML token is located.
You can copy this address in the ASAP web interface in the Company settings section → SSO → SSO Callback (ACS) URL by clicking the
 button.
 - In the Sign on URL field, enter the URL that users will use to log in to the training portal.
You can copy this address in the ASAP web interface in the Company settings section → SSO → SSO Sign-in URL by clicking the
button.Entering this address in a browser will redirect the user to Azure AD to log in with a Microsoft account.
- In the Logout Url field, enter the URL that will be used to send responses to the platform when the SAML session ends.
You can copy this address in the ASAP web interface in the Company settings section → SSO → SSO Sign-out URL by clicking the
button.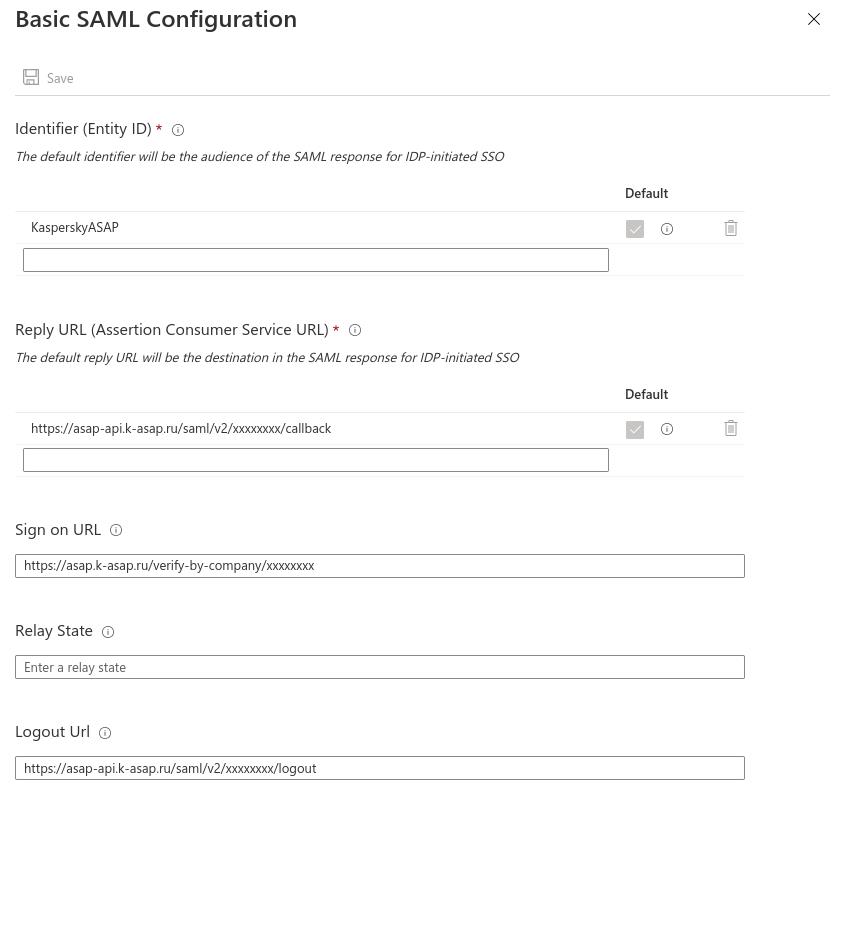
- Click Save.
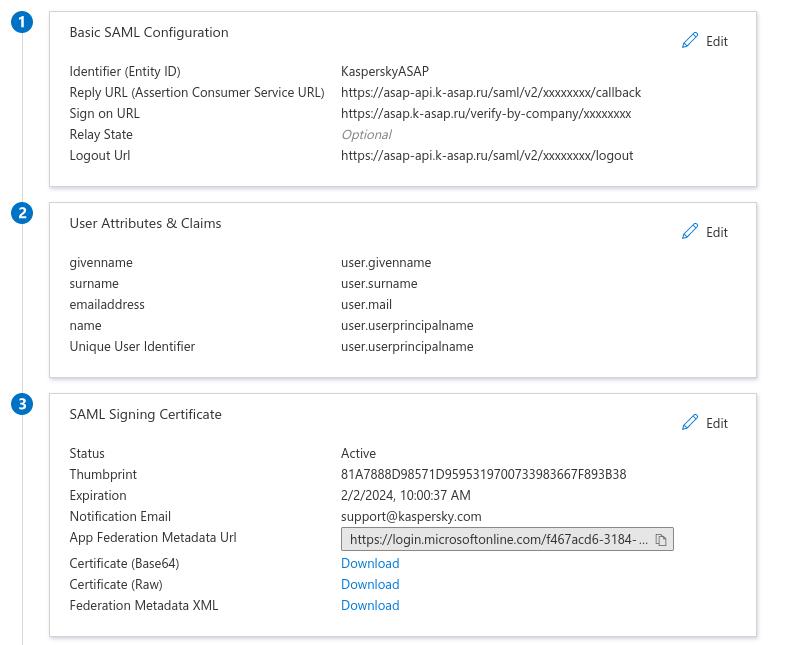
- If required, change the SAML values of the account attributes in the User Attributes & Claims section.
Don't change the emailaddress and Unique User Identifier attributes in order to ensure proper integration with the platform
- In the SAML Signing Certificate setting section, download the SAML token-signing certificate (Base64 format) sent to the platform.
- In any convenient way (for example, by opening the certificate file in a text editor) copy the contents of the certificate and paste them in the ASAP web interface in the Company settings section → SSO in the Signing certificate field.
- In the Set up <application name in Azure AD> field of settings, copy the URL of the Azure AD service in the Login URL field and paste it in the ASAP web interface in the Company settings section→ SSO in the Identity provider URL field. Click Save.
Integration of the ASAP platform with Microsoft Azure Active Directory is now configured. Enable SSO in the ASAP web interface so users can log in to the training portal via SSO.
To the top