Creating and viewing reports
This section explains how to create and view reports in RSA NetWitness. To learn how to import an existing report to RSA NetWitness, see the section about importing a preconfigured report to RSA NetWitness.
To create a new report in RSA NetWitness:
- On the RSA NetWitness menu, select Dashboard > Reports. (In RSA NetWitness 11, you select Monitor > Reports.)
The Manage tab is displayed.
- Select a rule on the basis of which you will create a report (for example,
CyberTrace Detect Botnet). - For the selected rule, click the Settings split button (
 ) and then select Create Report.
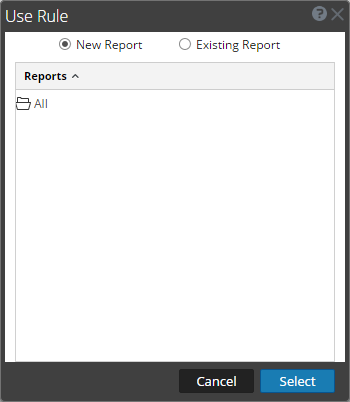
 - In the Use Rule window, select the New Report option and then click the Select button.

Use Rule window
- On the New Report tab, select the way that you want the data to be displayed.
For the
CyberTrace Detect Botnetrule, you can display data in tabular form only. - Click the Schedule button.
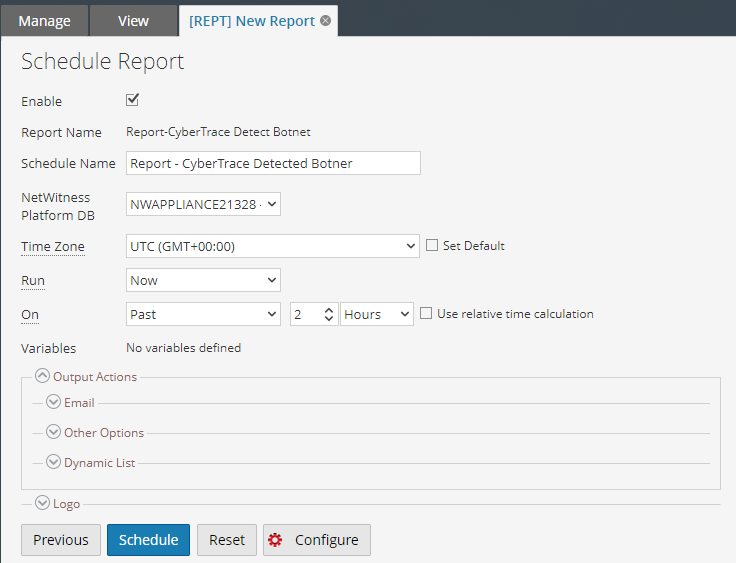
The Schedule Report form appears.
- In the Schedule Report form, specify the following data:
- Schedule name
- Data source (database from the NetWitness DB drop-down list)
- Time when the report must be generated
- Period during which the data to be displayed is collected
- Actions to be performed with the report (for example, to send it by email).

Schedule Report form
- Click Schedule.
Viewing a report
To view a created report:
- On the RSA NetWitness menu, select Dashboard > Reports. (In RSA NetWitness 11, you select Monitor > Reports.)
The Manage tab is displayed.

The Manage tab
- Click Reports.
The Reports view is displayed.

Reports view
- In the Reports pane, pause the mouse over a report, click the Settings split button (
 ), and select View Scheduled Reports.
 - Select your schedule report and click View.