Assigning a static IP address and network mask
To assign a static IP address and network mask:
- Select the Use DHCP setting (see figure below).
Assigning a static IP address and network mask is recommended if you are configuring Kaspersky Secure Mail Gateway in production mode.
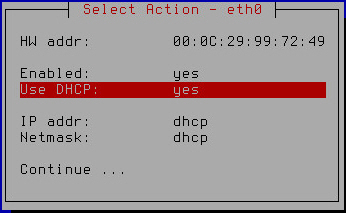
Assigning a static IP address and network mask
- Press Enter.
A window opens prompting you to confirm assignment of static settings for the network interface (see figure below).
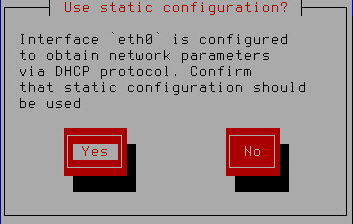
Confirming assignment of static settings for the network interface
- Click Yes.
A window for entering the static IP address and network mask opens (see figure below).
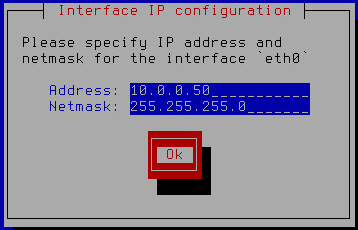
Specifying a static IP address and network mask
- In the Address field, type the IP address that you want to assign for Kaspersky Secure Mail Gateway.
- In the Netmask field, type the mask of the network on which you are using Kaspersky Secure Mail Gateway.
- Click OK.
The Initial Configuration Wizard of Kaspersky Secure Mail Gateway returns to the network interface configuration window (see figure below).
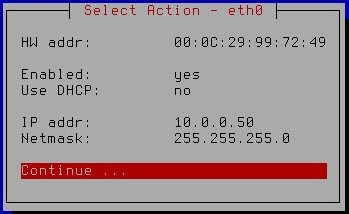
Finishing configuration of the network interface
- Verify that the network settings are correct.
- Select Continue.
- Press Enter.
The Initial Configuration Wizard of the Kaspersky Secure Mail Gateway virtual machine proceeds to the next step.