Assigning DNS addresses using the DHCP server
To assign the DNS address using the DHCP server:
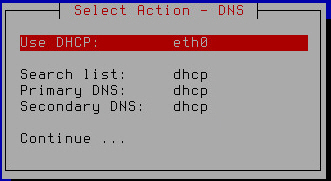
- Select the name of your network interface (for example: eth0) in the list of settings for using the DHCP server for assigning DNS addresses (see figure below) .
You may need to use the DHCP server for assigning DNS addressed if you are configuring Kaspersky Secure Mail Gateway in test mode.

Enabling the use of the DHCP server for assigning DNS addresses
- Press Enter.
A window for configuring DNS settings with the use of the DHCP server opens (see figure below).
Finishing configuration of DNS settings with the use of the DHCP server
- Make sure that the values of the Search list, Primary DNS, Secondary DNS settings are set to dhcp.
- Select Continue.
- Press Enter.
A window with the settings of the Kaspersky Secure Mail Gateway network opens (see figure below).
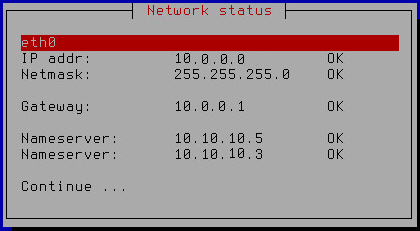
Kaspersky Secure Mail Gateway network settings
- Select Continue.
- Press Enter.
The Initial Configuration Wizard of the Kaspersky Secure Mail Gateway virtual machine restarts the virtual machine with the new values of settings and proceeds to the next step.