Connecting to Kaspersky Business Hub
When you start Kaspersky Security Integration Tool for MSP, the connection settings window opens. In this window, specify the settings to connect to Kaspersky Business Hub.
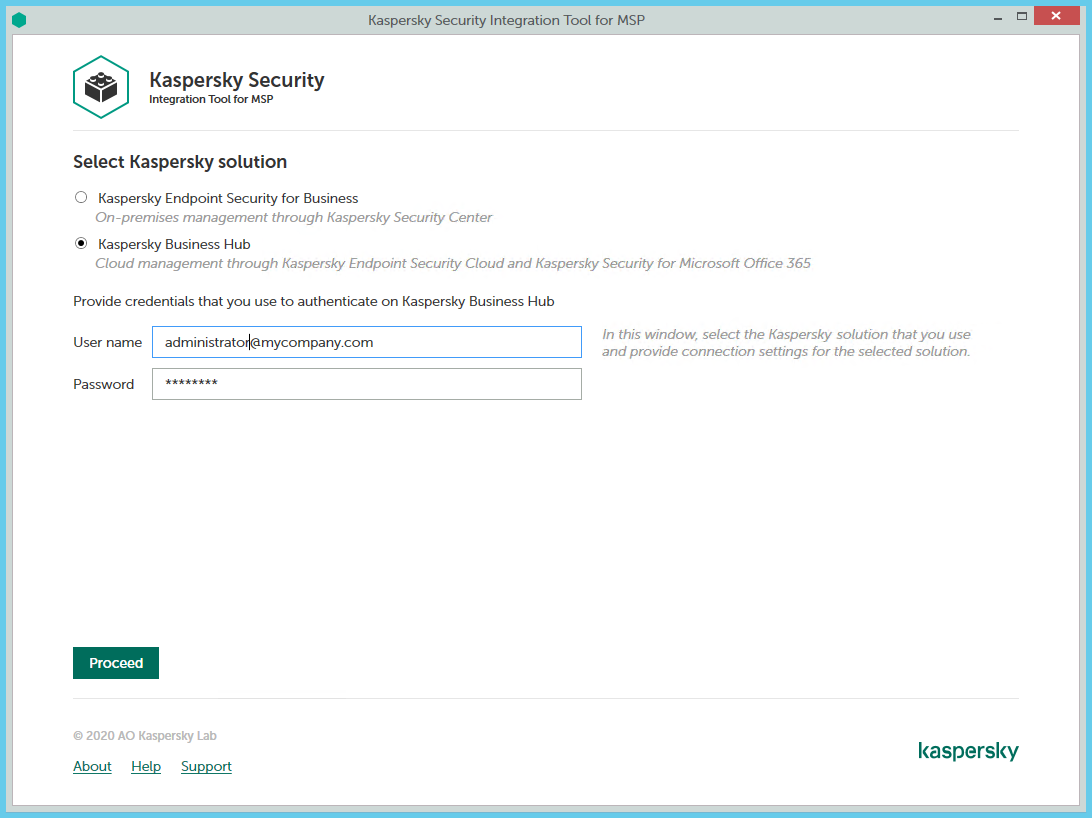
Connecting to Kaspersky Business Hub
To connect to Kaspersky Business Hub:
- In the Start menu, select Kaspersky Security Integration Tool for MSP.
- In the window that opens, select the Kaspersky Business Hub solution.
- Specify the following connection settings:
- User name—Email address that you use to connect to Kaspersky Business Hub. This field cannot be blank.
- Password—Password that you use to connect to Kaspersky Business Hub. This field cannot be blank.
- Click the Proceed button to connect to Kaspersky Business Hub by using the specified settings.
The system validates the provided settings and establishes connection to Kaspersky Business Hub.