Kaspersky Security Integrations for MSP
- What's new
- Kaspersky Security Plug-in for ConnectWise Automate
- Deployment schemas of Kaspersky Security Plug-in for ConnectWise Automate
- Installing and removing Kaspersky Security Plug-in for ConnectWise Automate
- Getting started with Kaspersky Security Plug-in for ConnectWise Automate
- Prerequisites
- Getting started if Kaspersky Security Center Administration Server is used
- Getting started if Kaspersky Endpoint Security Cloud is used
- Accessing the Kaspersky Security Plug-in for ConnectWise Automate dashboard
- Connecting to Kaspersky solutions
- Viewing information on Kaspersky dashboard
- Running Kaspersky management commands
- Monitoring and alerting
- Deploying Kaspersky security applications from the Control Center
- Plug-in modifications to ConnectWise Automate configuration
- Enabling and disabling tracing
- Information about third-party code
- Kaspersky Security Integration with ConnectWise Manage
- Deployment schemas of Kaspersky Security Integration with ConnectWise Manage
- Integration scenario
- Installing and removing Kaspersky Security Integration with ConnectWise Manage
- Updating Kaspersky Security Integration with ConnectWise Manage
- Interface of Kaspersky Security Integration with ConnectWise Manage
- Getting started
- Managing integrations
- Configuring integration in Kaspersky Security Integration with ConnectWise Manage
- Configuring integration by using the registry
- Managing administrators
- Enabling and disabling tracing
- Reporting
- Custom fields in ConnectWise Manage
- Information about third-party code
- Kaspersky Security Integration with Autotask
- Deployment schemas of Kaspersky Security Integration with Autotask
- Integration scenario
- Installing and removing Kaspersky Security Integration with Autotask
- Updating Kaspersky Security Integration with Autotask
- Interface of Kaspersky Security Integration with Autotask
- Getting started
- Managing integrations
- Configuring integration in Kaspersky Security Integration with Autotask
- Configuring integration by using the registry
- Managing administrators
- Enabling and disabling tracing
- Reporting
- User-defined fields in Autotask
- Information about third-party code
- Kaspersky Security Integration with Tigerpaw
- Integration scenario
- Installing and removing Kaspersky Security Integration with Tigerpaw
- Interface of Kaspersky Security Integration with Tigerpaw
- Getting started
- Managing integrations
- Configuring integration in Kaspersky Security Integration with Tigerpaw
- Mapping accounts and enabling automatic billing
- Setting up service order creation
- Mapping Tigerpaw price book items to security applications
- Viewing accounts not integrated with Kaspersky security applications
- Configuring integration by using the registry
- Managing administrators
- Enabling and disabling tracing
- Custom fields in Tigerpaw
- Information about third-party code
- Kaspersky Security Integration with SolarWinds N-central
- Prerequisites
- Integration scenario
- Deploying Kaspersky Security Integration with SolarWinds N-central
- Running an automation policy
- Viewing the anti-virus protection status of a device
- Adding a dashboard
- Scenario: Deploying Kaspersky security applications from SolarWinds N-central
- Creating a stand-alone installation package
- Deploying a Kaspersky security application
- Upgrading Kaspersky Security Integration with SolarWinds N-central
- Kaspersky Lab End User License Agreement
- Kaspersky Security Integration with SolarWinds RMM
- Prerequisites
- Scenario: Integrating Kaspersky security applications into SolarWinds RMM
- Deploying Kaspersky Security Integration with SolarWinds RMM
- Running an automated task
- Viewing the anti-virus protection status of a device
- Scenario: Deploying Kaspersky security applications from SolarWinds RMM
- Creating a stand-alone installation package
- Deploying a Kaspersky security application
- Kaspersky Lab End User License Agreement
- Contact Technical Support
- Glossary
- Trademark notices
Adding Kaspersky Business Hub companies to the integration
After an integration with Autotask is created, a window opens where you can add Kaspersky Business Hub companies to the integration. Kaspersky Business Hub companies are then mapped to the Autotask accounts.
You cannot add separate Kaspersky Endpoint Security Cloud workspaces or Kaspersky Security for Microsoft Office 365 workspaces to the integration. You can add only entire Kaspersky Business Hub companies. All workspaces created for a company in Kaspersky Business Hub are added to the integration.
Adding companies to the integration
To add Kaspersky Business Hub companies to the integration:
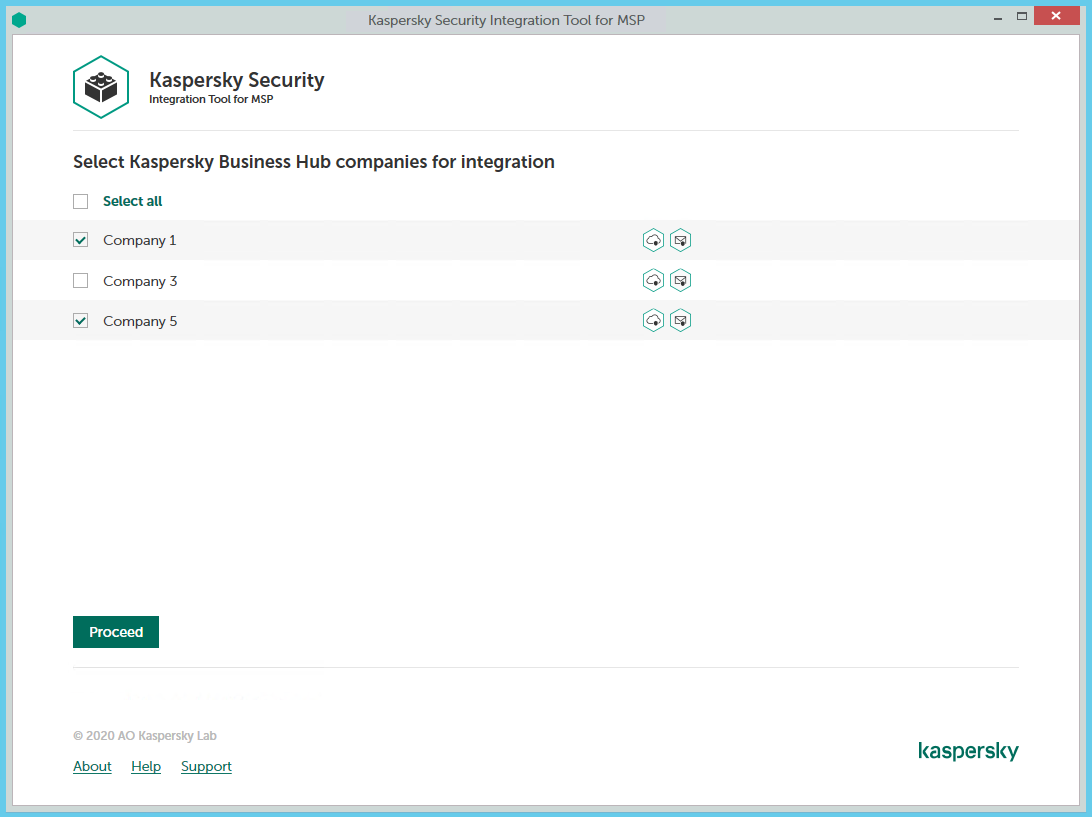
- In the window, which lists Kaspersky Business Hub companies, select the check boxes next to the existing companies to add them to the integration. Icons next to the name of each company show which workspaces are created for this company in Kaspersky Business Hub.
If you want to add all companies to the integration, select the Select all check box.
- Click Proceed.
You will now be able to map these companies to Autotask accounts.
Each Kaspersky Business Hub company can be added to one integration only. That is, if a company is added to an integration, it is not displayed in a list of companies available for another integration.