Kaspersky Security Integrations for MSP
- What's new
- Kaspersky Security Plug-in for ConnectWise Automate
- Deployment schemas of Kaspersky Security Plug-in for ConnectWise Automate
- Installing and removing Kaspersky Security Plug-in for ConnectWise Automate
- Getting started with Kaspersky Security Plug-in for ConnectWise Automate
- Prerequisites
- Getting started if Kaspersky Security Center Administration Server is used
- Getting started if Kaspersky Endpoint Security Cloud is used
- Accessing the Kaspersky Security Plug-in for ConnectWise Automate dashboard
- Connecting to Kaspersky solutions
- Viewing information on Kaspersky dashboard
- Running Kaspersky management commands
- Monitoring and alerting
- Deploying Kaspersky security applications from the Control Center
- Plug-in modifications to ConnectWise Automate configuration
- Enabling and disabling tracing
- Information about third-party code
- Kaspersky Security Integration with ConnectWise Manage
- Deployment schemas of Kaspersky Security Integration with ConnectWise Manage
- Integration scenario
- Installing and removing Kaspersky Security Integration with ConnectWise Manage
- Updating Kaspersky Security Integration with ConnectWise Manage
- Interface of Kaspersky Security Integration with ConnectWise Manage
- Getting started
- Managing integrations
- Configuring integration in Kaspersky Security Integration with ConnectWise Manage
- Configuring integration by using the registry
- Managing administrators
- Enabling and disabling tracing
- Reporting
- Custom fields in ConnectWise Manage
- Information about third-party code
- Kaspersky Security Integration with Autotask
- Deployment schemas of Kaspersky Security Integration with Autotask
- Integration scenario
- Installing and removing Kaspersky Security Integration with Autotask
- Updating Kaspersky Security Integration with Autotask
- Interface of Kaspersky Security Integration with Autotask
- Getting started
- Managing integrations
- Configuring integration in Kaspersky Security Integration with Autotask
- Configuring integration by using the registry
- Managing administrators
- Enabling and disabling tracing
- Reporting
- User-defined fields in Autotask
- Information about third-party code
- Kaspersky Security Integration with Tigerpaw
- Integration scenario
- Installing and removing Kaspersky Security Integration with Tigerpaw
- Interface of Kaspersky Security Integration with Tigerpaw
- Getting started
- Managing integrations
- Configuring integration in Kaspersky Security Integration with Tigerpaw
- Mapping accounts and enabling automatic billing
- Setting up service order creation
- Mapping Tigerpaw price book items to security applications
- Viewing accounts not integrated with Kaspersky security applications
- Configuring integration by using the registry
- Managing administrators
- Enabling and disabling tracing
- Custom fields in Tigerpaw
- Information about third-party code
- Kaspersky Security Integration with SolarWinds N-central
- Prerequisites
- Integration scenario
- Deploying Kaspersky Security Integration with SolarWinds N-central
- Running an automation policy
- Viewing the anti-virus protection status of a device
- Adding a dashboard
- Scenario: Deploying Kaspersky security applications from SolarWinds N-central
- Creating a stand-alone installation package
- Deploying a Kaspersky security application
- Upgrading Kaspersky Security Integration with SolarWinds N-central
- Kaspersky Lab End User License Agreement
- Kaspersky Security Integration with SolarWinds RMM
- Prerequisites
- Scenario: Integrating Kaspersky security applications into SolarWinds RMM
- Deploying Kaspersky Security Integration with SolarWinds RMM
- Running an automated task
- Viewing the anti-virus protection status of a device
- Scenario: Deploying Kaspersky security applications from SolarWinds RMM
- Creating a stand-alone installation package
- Deploying a Kaspersky security application
- Kaspersky Lab End User License Agreement
- Contact Technical Support
- Glossary
- Trademark notices
Mapping accounts and enabling automatic billing
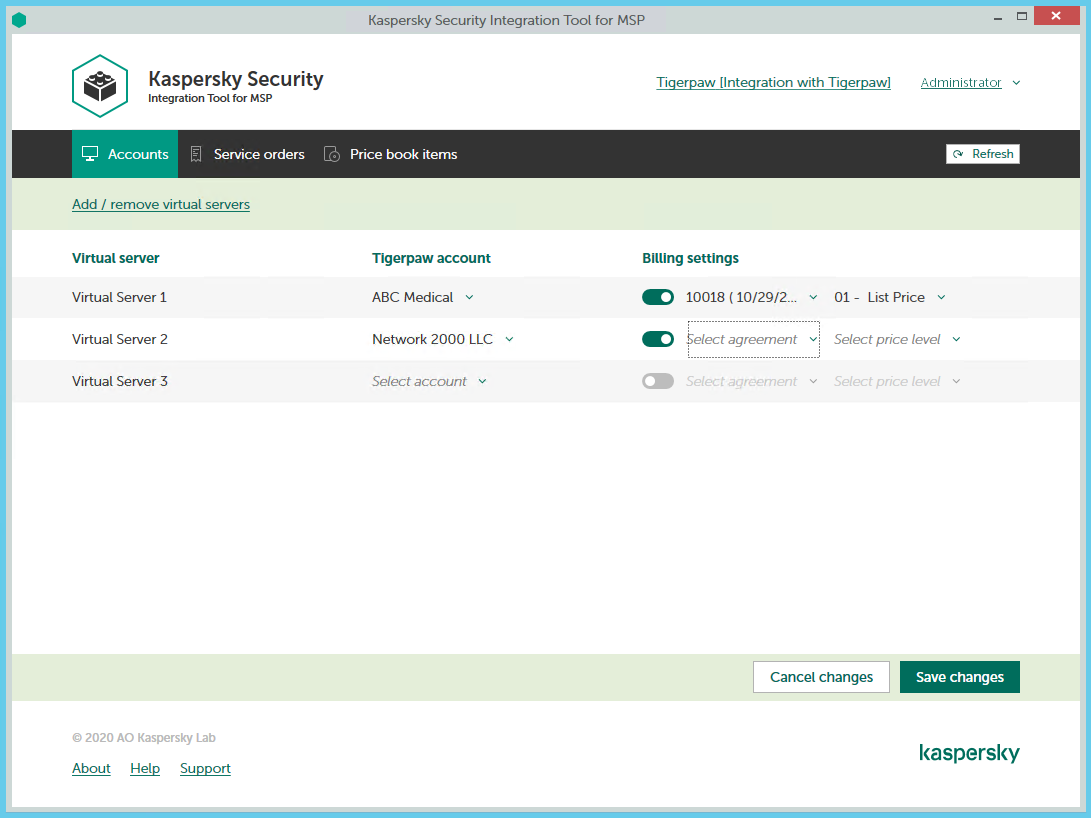
Use the Accounts tab in the Kaspersky Security Integration Tool for MSP window to set up and modify mapping between accounts in Tigerpaw and virtual servers or companies in your Kaspersky solution. To set up mapping, accounts must be created in Tigerpaw, while virtual servers must be added to Kaspersky Security Center Administration Server or companies must be created in Kaspersky Business Hub.
On the Accounts tab, you can also enable automatic billing for your Tigerpaw accounts. This means that information about the number of licenses for Kaspersky security applications provided during the current billing period can be updated regularly and automatically in Tigerpaw. Timely updating lets you prepare customer invoices more quickly and easily.
When you click the Accounts tab, a list is displayed, showing virtual servers or companies and their corresponding Tigerpaw accounts. You can add existing virtual servers or companies to the integration and map Tigerpaw accounts to them. You can also delete mapping between a virtual server or company and its corresponding account. In this case, neither the virtual server / company nor the account is deleted; instead, the link between them is broken.
Mapping accounts and enabling automatic billing
The following sections explain how to add or remove virtual servers or companies to / from the integration and how to configure automatic billing.
In this section |