Configuring a cluster in Amazon EKS
This section explains how to create and configure a cluster in Amazon EKS.
To deploy Kaspersky Scan Engine Docker images to AWS, a cluster must be present in Amazon EKS. If there is no cluster or if the existing clusters cannot be used for Kaspersky Scan Engine, perform the actions below.
To create and configure a cluster in Amazon EKS:
- In the AWS management console, select Amazon EKS.
- Select Create cluster.
The Cluster configuration window opens.
- In the Cluster configuration window, specify the following settings:
- Cluster name
For example, specify
scanengine. - Kubernetes version to work with a cluster:
1.16 - Amazon EKS cluster IAM role that must be used in this cluster.
For more information, refer to the AWS documentation: Amazon EKS cluster IAM role.
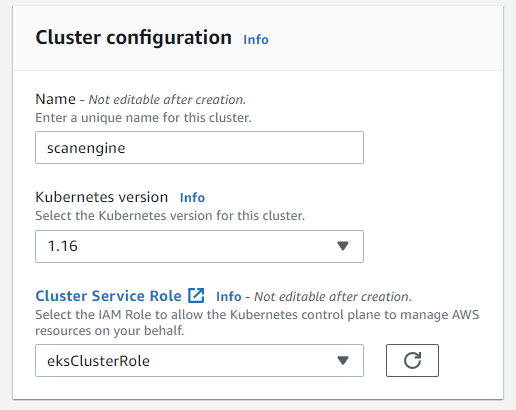
Cluster configuration window
- Cluster name
- Click Next.
- In the next window, specify the following settings:
- Which Amazon Virtual Private Cloud (VPC) must be used in the cluster
For more information about Amazon VPC, refer to the AWS documentation: Cluster VPC considerations.
- Which subnets of the specified VPC must be used in the cluster
For more information, refer to the AWS documentation: Working with VPCs and subnets.
- (Optional) Security groups that must be used in the cluster
For more information about Amazon EKS security groups, refer to the AWS documentation: Amazon EKS security group considerations.
- Type of access for the cluster:
- public
- public and private
- private
For more information about AWS types of access, refer to the AWS documentation: Amazon EKS cluster endpoint access control.
- (Optional) If you choose public access, specify the IP addresses that can access your cluster.
- Which Amazon Virtual Private Cloud (VPC) must be used in the cluster
- Click Next.
- (Optional) Configure logging.
- Click Next.
- Check that the settings are configured properly, and then click Create.
Wait until the status of the cluster changes from Creating to Active. Sometimes this process may take longer than five minutes.
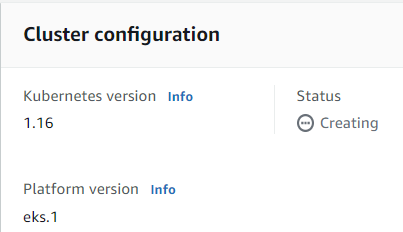
Creating a configuration
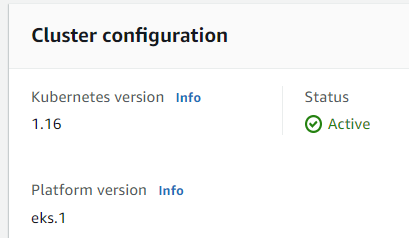
Active configuration
- Select the Compute tab and click Add Node Group.

The Group configuration window opens.
- In the Group configuration window, specify the following settings:
- In the Name field, a name for this Node Group
For example, specify
httpd. - In the Node IAM Role field, specify the Amazon EKS node IAM role
For more information about the Amazon EKS node IAM roles, refer to the AWS documentation: Amazon EKS node IAM role.
- In the Subnets list, specify the subnets that must be available for Node Group
- (Optional) Choose whether to allow remote access to the nodes
If you want to allow remote access to the nodes, refer to the AWS documentation: Connecting to your Linux instance using SSH.
- If needed, configure the rest of the optional settings
- In the Name field, a name for this Node Group
- Click Next.
- In the next window, specify the following settings:
- In the AMI type field, specify Amazon Linux 2 (AL2_x86_64)
- In the Instance type field, specify a value no less than t3.small
- In the Disk size field, specify a value no less than 5 GiB
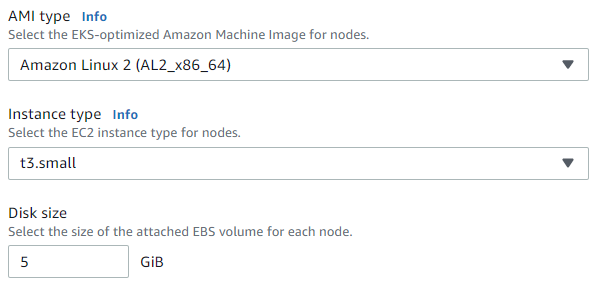
AMI settings
- Click Next.
The Group size window opens.
- In the Group size window, specify the following settings:
- In the Minimum size field, specify
1 - In the Maximum size field, specify
1 - In the Desired size field, specify
1
You can change these settings according to your needs after the installation is finished.
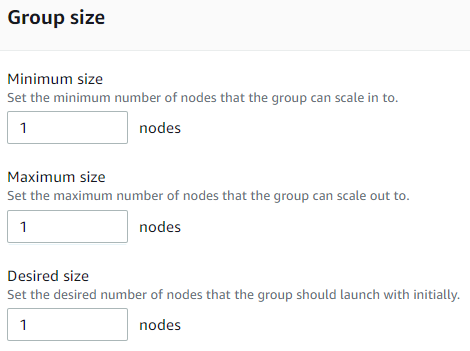
Group size window
- In the Minimum size field, specify
- Check that the Node Group settings are configured properly, and then click Create.
Wait until the status of Node Group changes from Creating to Active. Sometimes this process may take longer than five minutes.

Creating a configuration
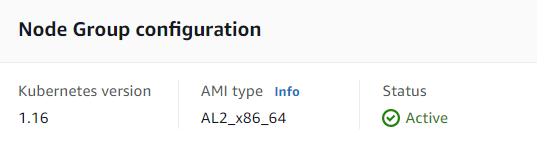
Active configuration
After these actions are performed, the Kubernetes cluster with Node Group will be available in AWS, so you can deploy Kaspersky Scan Engine.
In the LoadBalancer settings, specify the 300 value in the Idle timeout field. This might be done to prevent Amazon LoadBalancer from interrupting the connection while scanning large objects in Kaspersky Scan Engine. For more information, refer to the AWS documentation: Connection idle timeout.