Adding the ALERT_ID and ALERT_URL incident fields
To add the ALERT_ID incident field in the R-Vision IRP:
- In the R-Vision IRP web interface, under Settings → Incident management → Incident fields, select the No group fields group.
- Click the plus icon in the right part of the screen.
The right part of the screen will display the settings area for the incident field you are creating.
- In the Title field, enter the name of the field (for example:
Alert ID). - In the Type drop-down list, select Text field.
- In the Parsing Tag field, enter
ALERT_ID.
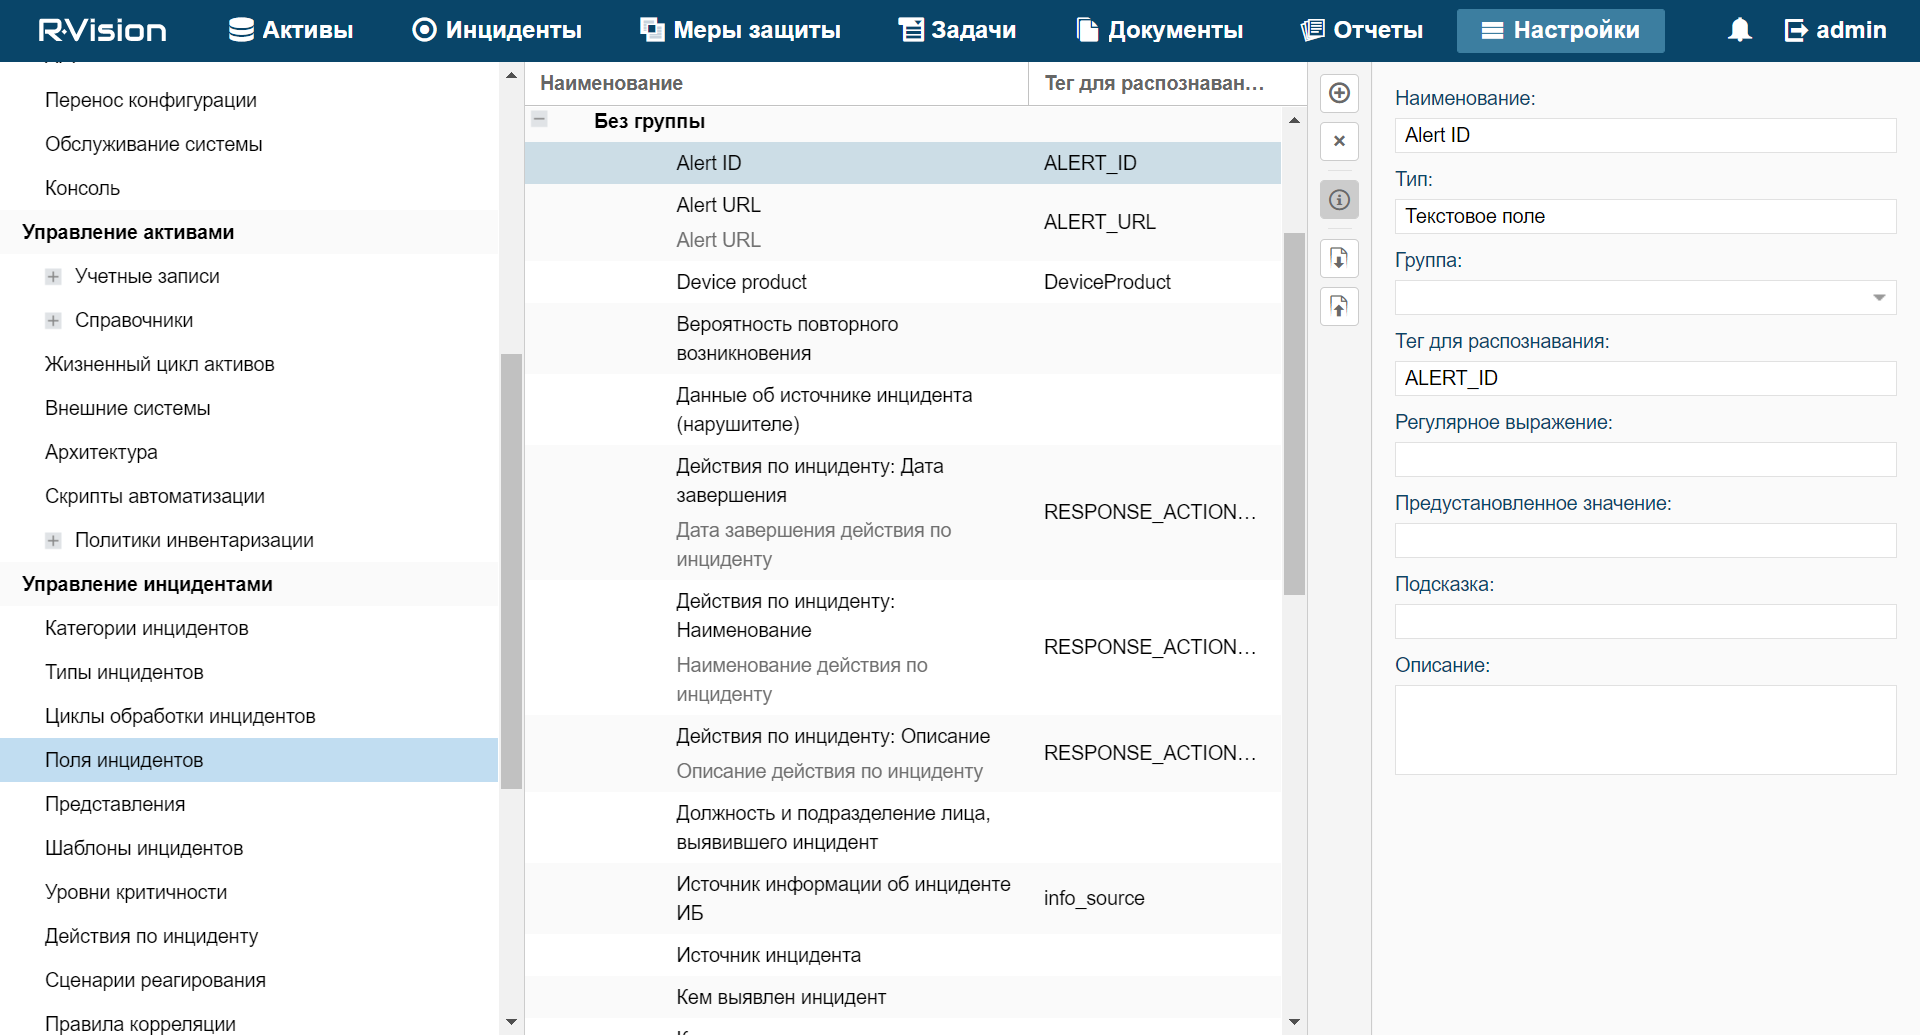
ALERT_ID field added to R-Vision IRP incident.
ALERT_ID field in R-Vision IRP version 4.0
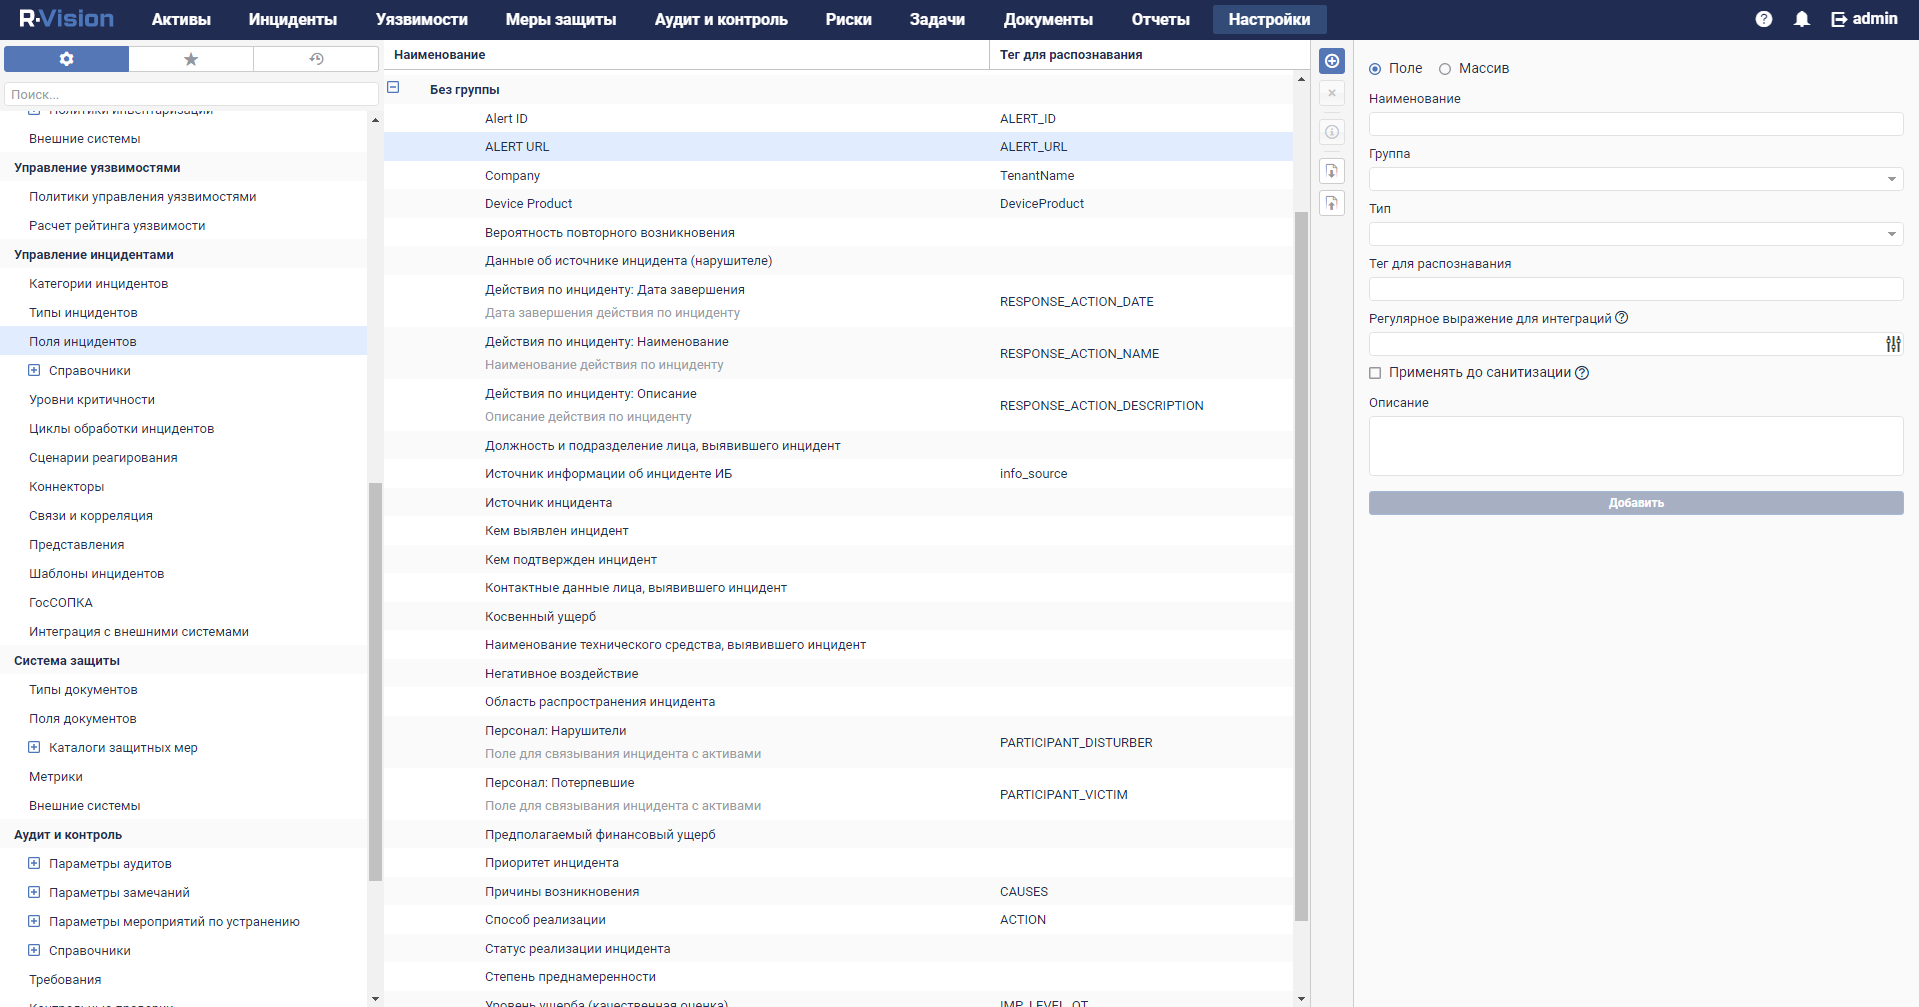
ALERT_ID field in R-Vision IRP version 5.0
To add the ALERT_URL incident field in the R-Vision IRP:
- In the R-Vision IRP web interface, under Settings → Incident management → Incident fields, select the No group fields group.
- Click the plus icon in the right part of the screen.
The right part of the screen will display the settings area for the incident field you are creating.
- In the Title field, enter the name of the field (for example:
Alert URL). - In the Type drop-down list, select Text field.
- In the Parsing Tag field, enter
ALERT_URL. - Select the Display links and Display URL as links check boxes.
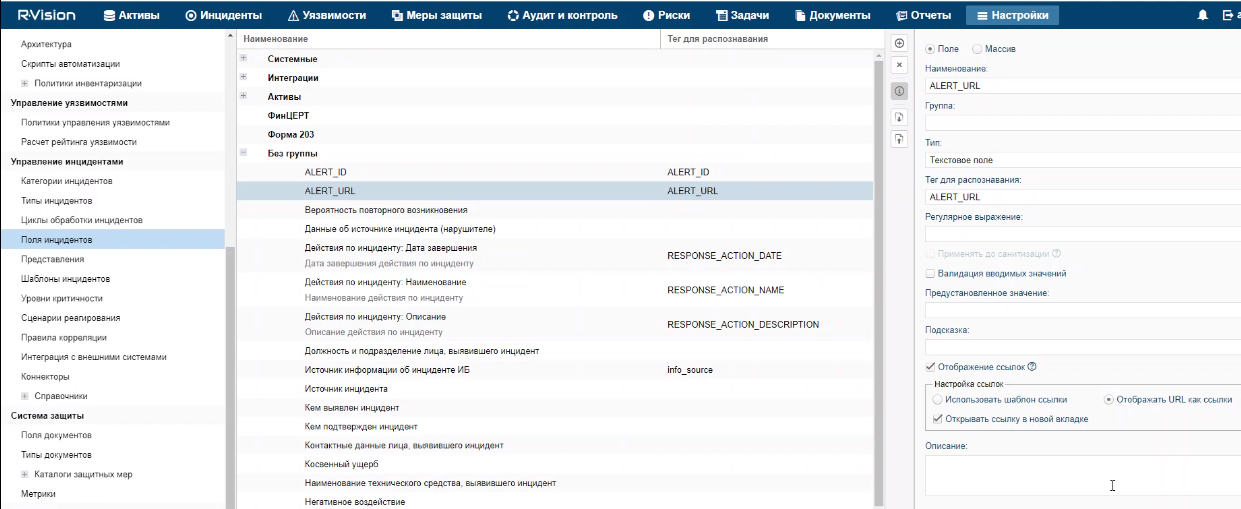
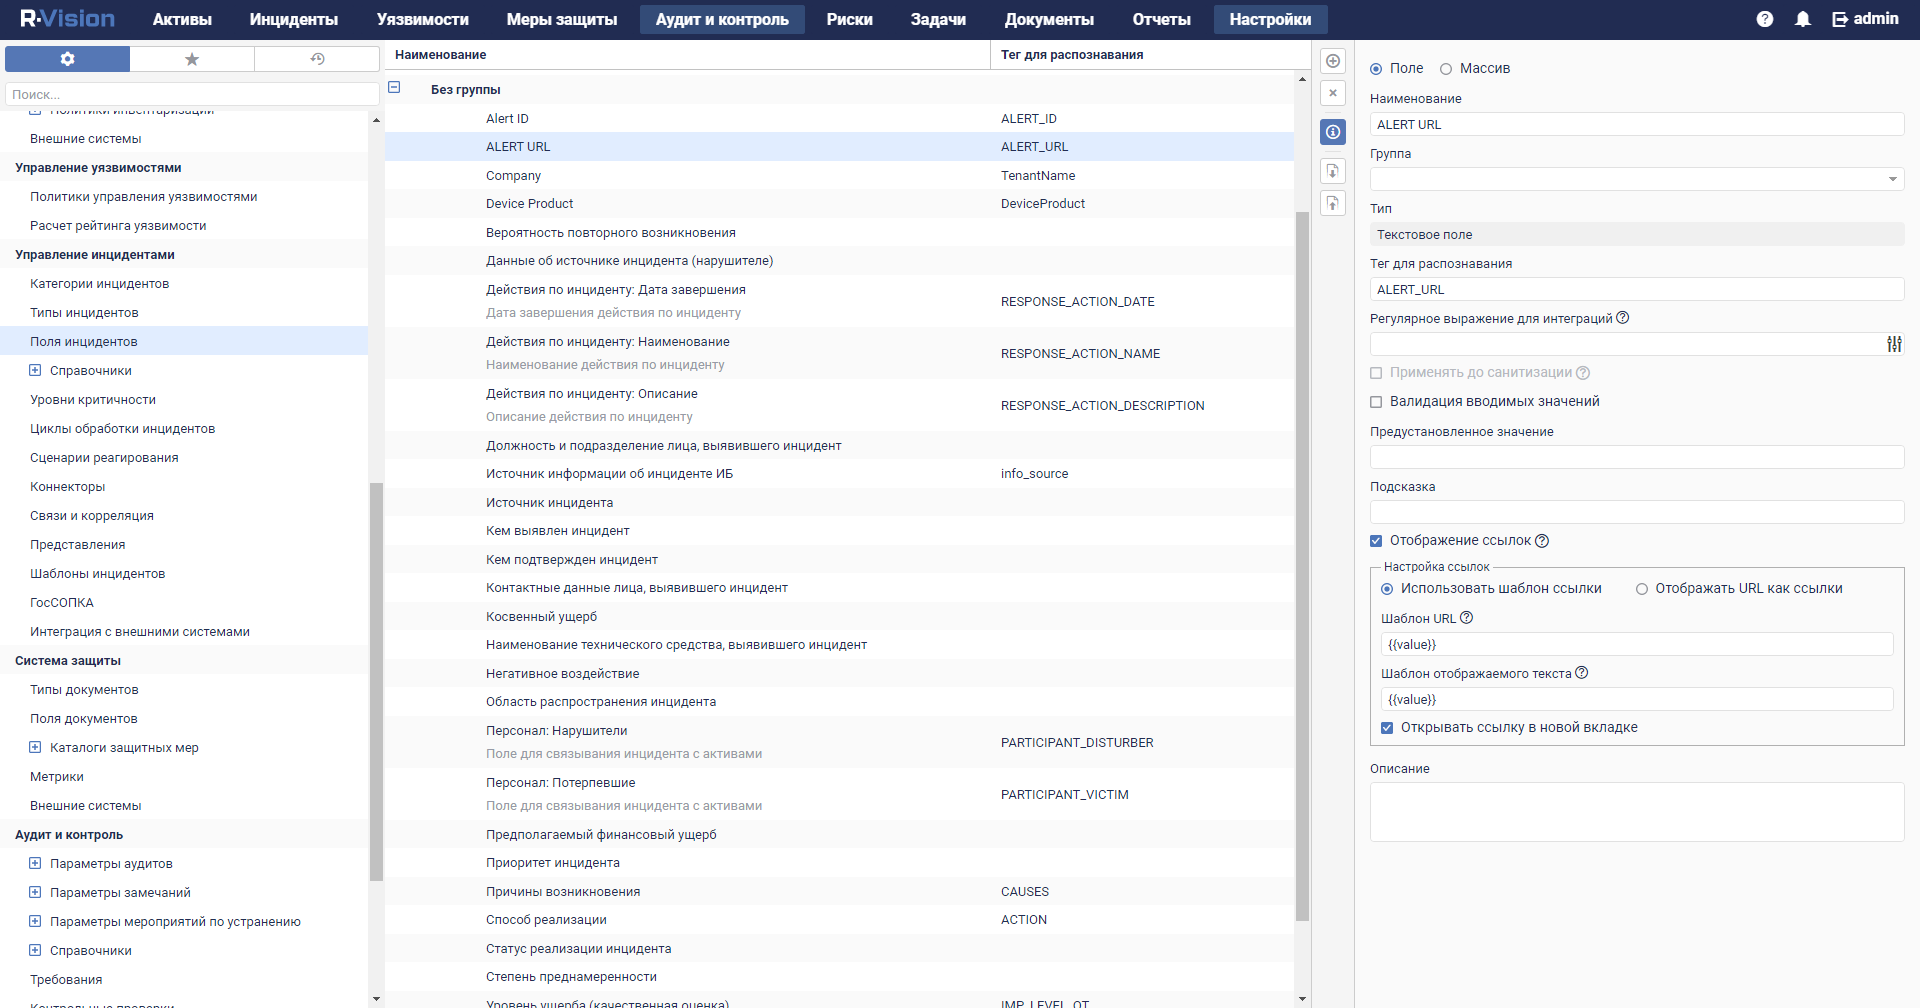
ALERT_URL field added to R-Vision IRP incident.
ALERT_URL field in R-Vision IRP version 4.0
ALERT_URL field in R-Vision IRP version 5.0
If necessary, you can likewise configure the display of other data from a KUMA alert in an R-Vision IRP incident.
Page top


