Creating connector in R-Vision IRP
To create connector in R-Vision IRP:
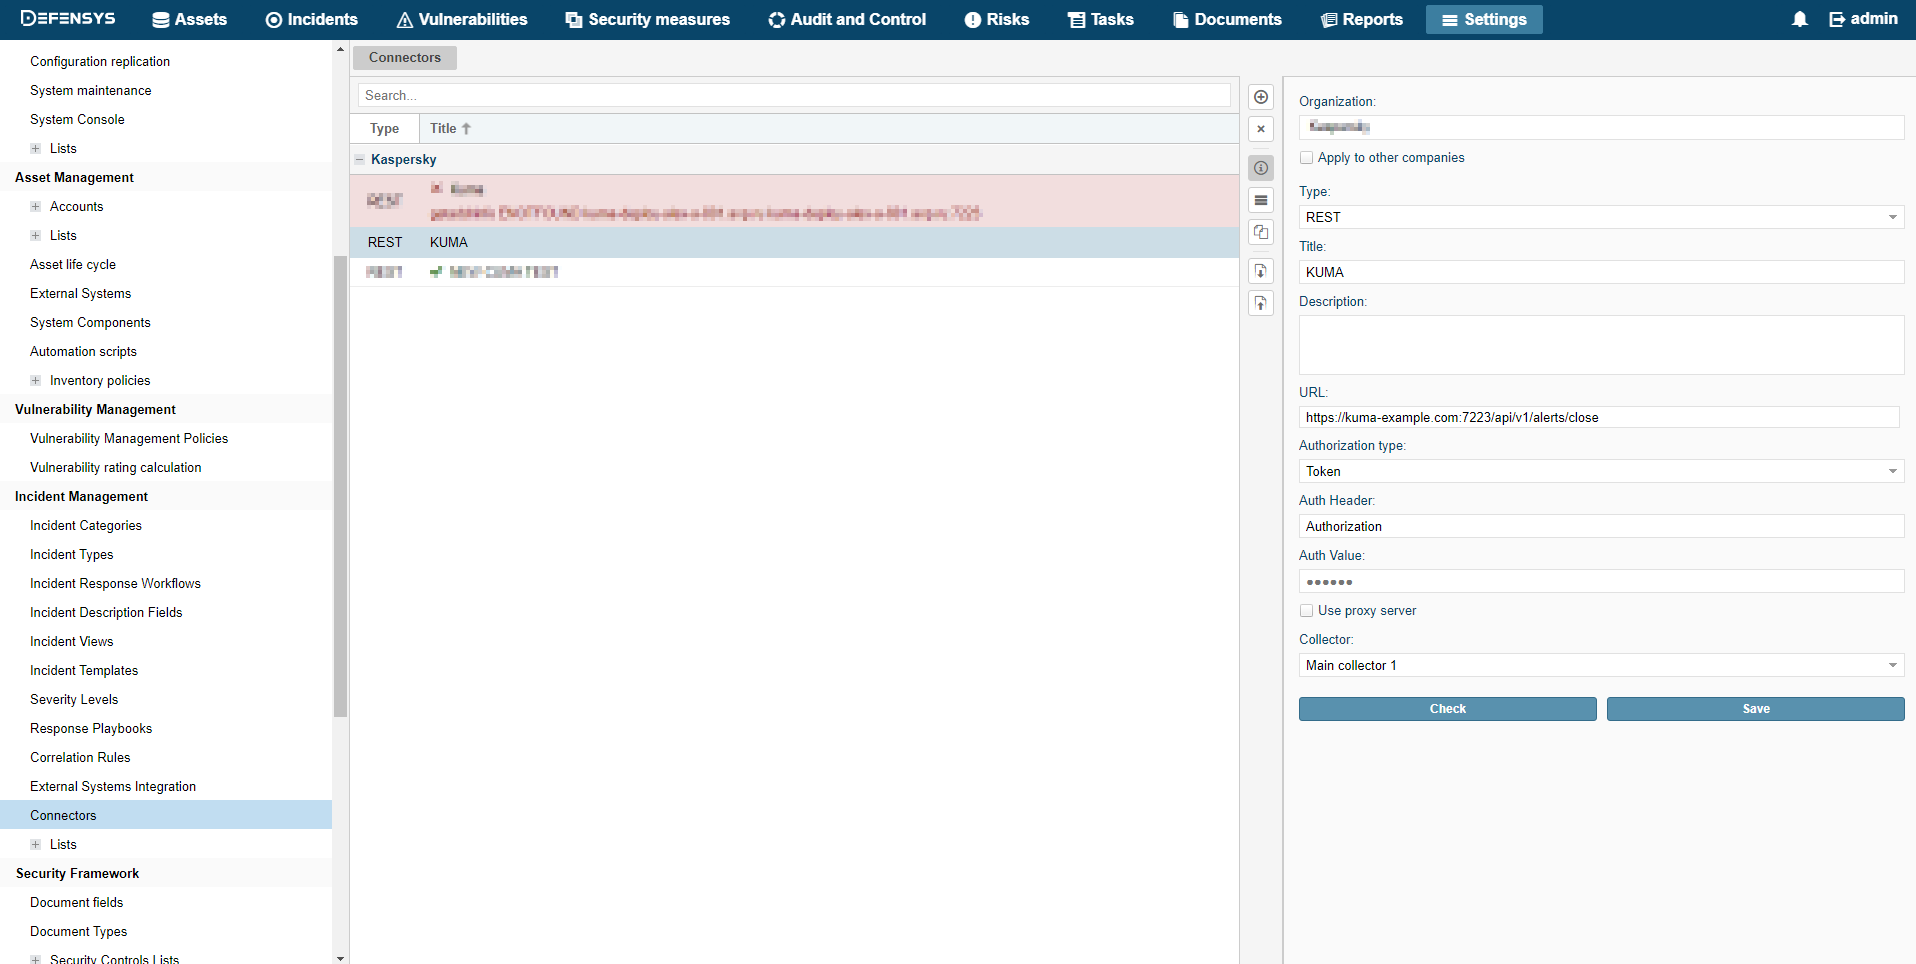
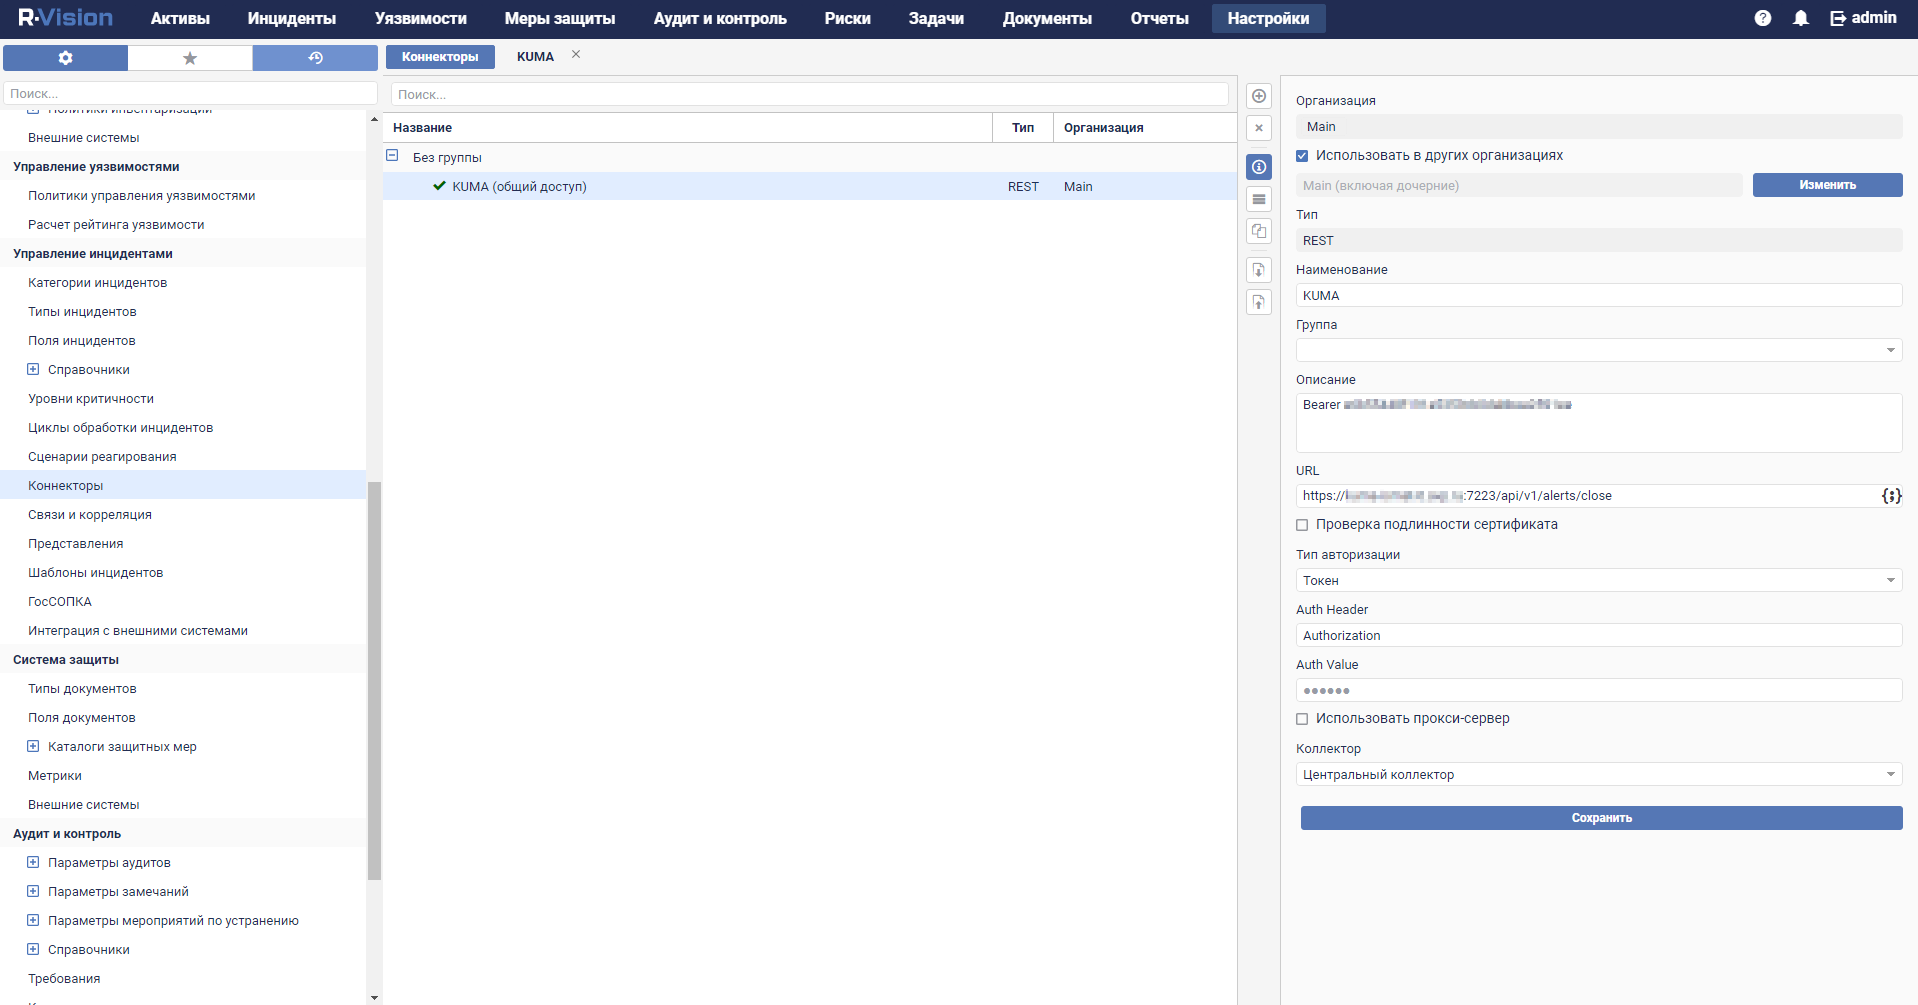
- In the R-Vision IRP web interface, under Settings → Incident management → Connectors, click the plus icon.
- In the Type drop-down list, select REST.
- In the Name field, specify the connector name, such as
KUMA. - In the URL field type API request to close an alert in the format
<KUMA Core server FQDN>:<Port used for API requests (7223 by default)>/api/v1/alerts/close.Example:
https://kuma-example.com:7223/api/v1/alerts/close - In the Authorization type drop-down list, select Token.
- In the Auth header field type
Authorization. - In the Auth value field enter the token of KUMA user with general administrator role in the following format:
Bearer <KUMA General administrator token> - In the Collector drop-down list select previously created collector.
- Click Save.
The connector has been created.
Connector in R-Vision IRP version 4.0
Connector in R-Vision IRP version 5.0
When connector is created you must configure sending API queries for closing alerts in KUMA.
To configure API queries in R-Vision IRP:
- In the R-Vision IRP web interface, under Settings → Incident management → Connectors open for editing a newly created connector.
- In the request type drop-down list, select POST.
- In the Params field type API request to close an alert in the format
<KUMA Core server FQDN>:<Port used for API requests (7223 by default)>/api/v1/alerts/close.Example:
https://kuma-example.com:7223/api/v1/alerts/close - On the HEADERS tab add the following keys and values:
- Key
Content-Type; value:application/json. - Key
Authorization; value:Bearer <KUMA general administrator token>.The token of the KUMA general administrator can be obtained in the KUMA web interface under Settings → Users.
- Key
- On the BODY → Raw tab type contents of the API request body:
{"id":"{{tag.ALERT_ID}}","reason":"<Reason for closing the alert. Available values: "Incorrect Correlation Rule", "Incorrect Data", "Responded".> "} - Click Save.
The connector is configured.
Connector in R-Vision IRP version 4.0
Connector in R-Vision IRP version 5.0
Page top


