Specifying certificates for trusted Administration Servers in Kaspersky Security Center 13.2 Web Console
The existing Administration Server certificate is automatically replaced with a new one before the certificate expiration date. You can also replace the existing Administration Server certificate with a custom one. Every time the certificate is changed, the new certificate must be specified in the settings of Kaspersky Security Center 13.2 Web Console. Otherwise, Kaspersky Security Center 13.2 Web Console will not be able to connect to the Administration Server.
If Kaspersky Security Center 13.2 Web Console and the Administration Server are installed on the same device, Kaspersky Security Center 13.2 Web Console receives the new certificate automatically. If Kaspersky Security Center 13.2 Web Console is installed on a different device, you must specify the local path to the new Administration Server certificate.
To specify a new certificate for the Administration Server:
- On the device where the Administration Server is installed, copy the certificate file, for example, to a mass storage device.
By default, the certificate file is stored in the following folder:
- For Windows—%ALLUSERSPROFILE%\Application Data\KasperskyLab\adminkit\1093\cert
- For Linux—/var/opt/kaspersky/klnagent_srv/1093/cert/
- On the device where Kaspersky Security Center 13.2 Web Console is installed, place the certificate file in a local folder.
- Run the ksc-web-console-<version number>.<build number>.exe installation file under an account with administrative privileges.
This starts the Setup Wizard.
- On the first page of the Wizard, select the Upgrade option.
Follow the instructions of the Wizard.
- On the Trusted Administration Servers page of the Wizard, select the required Administration Server and click the Edit button.
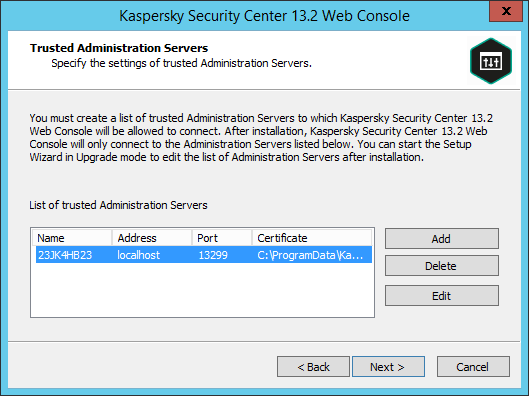
Specifying trusted Administration Servers
- In the Edit Administration Server window that opens, click the Browse button, specify the path to the new certificate file, and then click the Update button to apply changes.
- On the Ready for Kaspersky Security Center 13.2 Web Console modification page of the Wizard, click the Upgrade button to start the upgrade.
- After the application reconfiguration successfully completes, click the Finish button.
- Log in to Kaspersky Security Center 13.2 Web Console.
Kaspersky Security Center 13.2 Web Console works with the specified certificate.