Kaspersky Security Integrations for MSP
- What's new
- Kaspersky Security Plug-in for ConnectWise Automate
- Deployment schemas of Kaspersky Security Plug-in for ConnectWise Automate
- Installing and removing Kaspersky Security Plug-in for ConnectWise Automate
- Getting started with Kaspersky Security Plug-in for ConnectWise Automate
- Prerequisites
- Getting started if Kaspersky Security Center Administration Server is used
- Getting started if Kaspersky Endpoint Security Cloud is used
- Accessing the Kaspersky Security Plug-in for ConnectWise Automate dashboard
- Connecting to Kaspersky solutions
- Viewing information on Kaspersky dashboard
- Running Kaspersky management commands
- Monitoring and alerting
- Deploying Kaspersky security applications from the Control Center
- Plug-in modifications to ConnectWise Automate configuration
- Enabling and disabling tracing
- Information about third-party code
- Kaspersky Security Integration with ConnectWise Manage
- Deployment schemas of Kaspersky Security Integration with ConnectWise Manage
- Integration scenario
- Installing and removing Kaspersky Security Integration with ConnectWise Manage
- Updating Kaspersky Security Integration with ConnectWise Manage
- Interface of Kaspersky Security Integration with ConnectWise Manage
- Getting started
- Managing integrations
- Configuring integration in Kaspersky Security Integration with ConnectWise Manage
- Configuring integration by using the registry
- Managing administrators
- Enabling and disabling tracing
- Reporting
- Custom fields in ConnectWise Manage
- Information about third-party code
- Kaspersky Security Integration with Autotask
- Deployment schemas of Kaspersky Security Integration with Autotask
- Integration scenario
- Installing and removing Kaspersky Security Integration with Autotask
- Updating Kaspersky Security Integration with Autotask
- Interface of Kaspersky Security Integration with Autotask
- Getting started
- Managing integrations
- Configuring integration in Kaspersky Security Integration with Autotask
- Configuring integration by using the registry
- Managing administrators
- Enabling and disabling tracing
- Reporting
- User-defined fields in Autotask
- Information about third-party code
- Kaspersky Security Integration with Tigerpaw
- Integration scenario
- Installing and removing Kaspersky Security Integration with Tigerpaw
- Interface of Kaspersky Security Integration with Tigerpaw
- Getting started
- Managing integrations
- Configuring integration in Kaspersky Security Integration with Tigerpaw
- Mapping accounts and enabling automatic billing
- Setting up service order creation
- Mapping Tigerpaw price book items to security applications
- Viewing accounts not integrated with Kaspersky security applications
- Configuring integration by using the registry
- Managing administrators
- Enabling and disabling tracing
- Custom fields in Tigerpaw
- Information about third-party code
- Kaspersky Security Integration with SolarWinds N-central
- Prerequisites
- Integration scenario
- Deploying Kaspersky Security Integration with SolarWinds N-central
- Running an automation policy
- Viewing the anti-virus protection status of a device
- Adding a dashboard
- Scenario: Deploying Kaspersky security applications from SolarWinds N-central
- Creating a stand-alone installation package
- Deploying a Kaspersky security application
- Upgrading Kaspersky Security Integration with SolarWinds N-central
- Kaspersky Lab End User License Agreement
- Kaspersky Security Integration with SolarWinds RMM
- Prerequisites
- Scenario: Integrating Kaspersky security applications into SolarWinds RMM
- Deploying Kaspersky Security Integration with SolarWinds RMM
- Running an automated task
- Viewing the anti-virus protection status of a device
- Scenario: Deploying Kaspersky security applications from SolarWinds RMM
- Creating a stand-alone installation package
- Deploying a Kaspersky security application
- Kaspersky Lab End User License Agreement
- Contact Technical Support
- Glossary
- Trademark notices
Kaspersky Security Plug-in for ConnectWise Automate > Connecting to Kaspersky solutions > Connecting to Kaspersky Endpoint Security Cloud
Connecting to Kaspersky Endpoint Security Cloud
After you assign the "bridge" role to the computer, open the Kaspersky tab of this computer. On the Kaspersky tab, specify your credentials to be used by the bridge to connect to Kaspersky Endpoint Security Cloud.
To connect to Kaspersky Endpoint Security Cloud:
- Click the Kaspersky tab.
Connecting to Kaspersky Endpoint Security Cloud
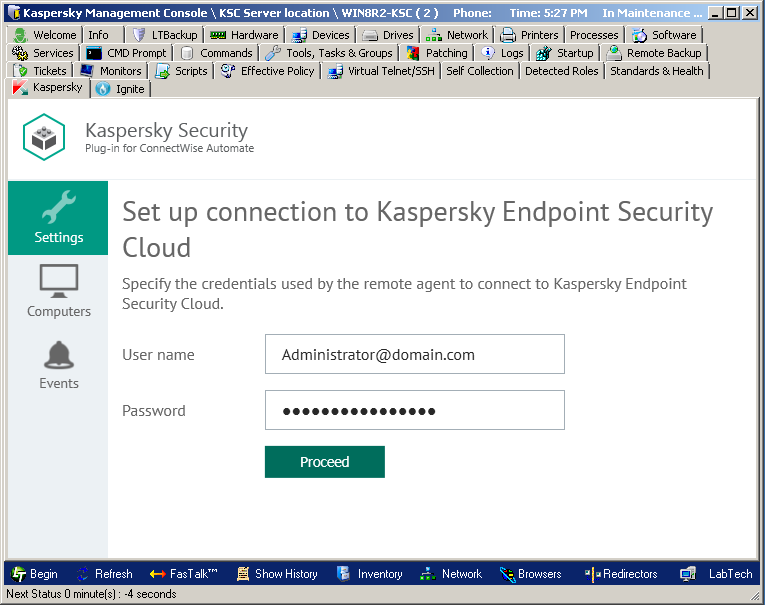
- On the Settings tab, specify the following connection settings:
- User name—Email address used for your Kaspersky Endpoint Security Cloud account. This field cannot be blank.
- Password—Password to connect to Kaspersky Endpoint Security Cloud. This field cannot be blank.
- Click Proceed to connect to Kaspersky Endpoint Security Cloud using the specified settings.
Selecting integration and specifying integration settings
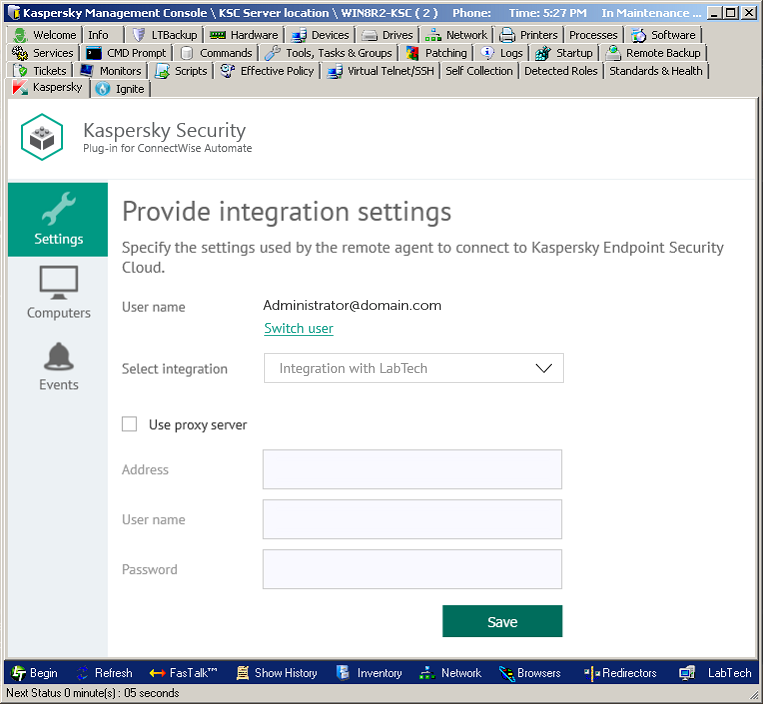
- In the Provide integration settings section that is displayed, select the previously configured integration in the Select Integration drop-down list.
You can view the identifier of your integration by clicking the Integration ID link.
- If you cannot find the required integration in the drop-down list, make sure that the user account provided in step 2 has access to this integration. To change the user specified in step 2 and connect to the integration using other credentials, click Switch user and in the Set up connection to Kaspersky Endpoint Security Cloud section specify the user name and password as instructed in step 2.
- If you want the Kaspersky Endpoint Security Cloud Bridge computer to establish connection through the proxy server, in the Provide integration settings section select the Use proxy server check box and provide the following proxy server settings:
- Address—Network address of the proxy server. Provide the address in the following format: host:port.
- User name—User name to connect to the proxy server.
- Password—Password to connect to the proxy server.
- Click Save to save the connection settings you provided.
The system validates the settings. If the settings you provided are correct, connection with Kaspersky Endpoint Security Cloud is established.
See also |
Article ID: 141456, Last review: Aug 3, 2020