How to install and configure a connection gateway in Kaspersky Security Center
Latest update: October 17, 2023
ID: 13756
Show applications and versions that this article concerns
- Kaspersky Security Center 14.2 (version 14.2.0.26967)
- Kaspersky Security Center 14 (version 14.0.0.10902)
- Kaspersky Security Center 13.2 (version 13.2.0.1511)
- Kaspersky Security Center 13.1 (version 13.1.0.8324)
- Kaspersky Security Center 13 (version 13.0.0.11247)
How to install the Network Agent locally in connection gateway mode
- Run the installation file on the device that will become the connection gateway.
By default, the installation file is located at:
\\<Administration Server address>\KLSHARE\Packages\NetAgent_<version number>
Follow the installation wizard instructions and click Next after every step.
\\<Administration Server address>\KLSHARE\Packages\NetAgent_<version number>
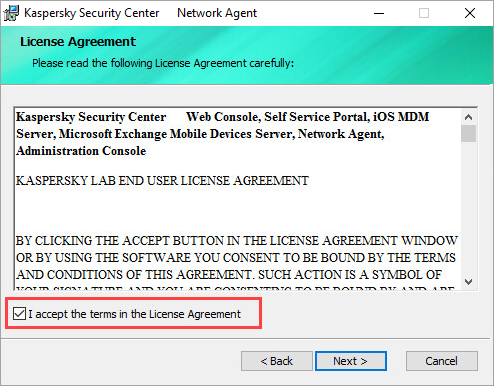
- Read the license agreement and select the I accept the terms in the License Agreement checkbox.
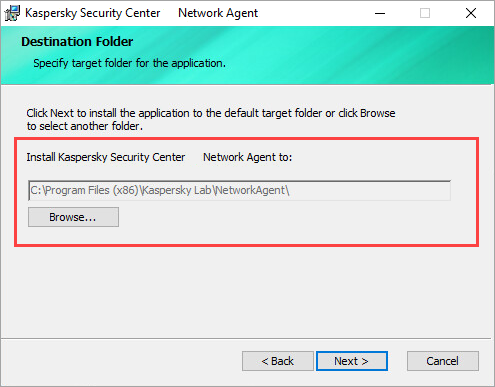
- Select a folder for the installation.
- Enter the address in the Server address field and clear the Allow Network Agent to open UDP port checkbox.
- If necessary, add the proxy server parameters.
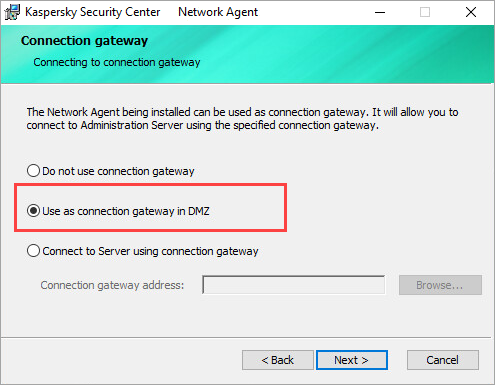
- Select Use as connection gateway in DMZ.
- Select how you want to obtain the Administration Server certificate.
- If you use tags, enter them here.
- If necessary, select the advanced settings.
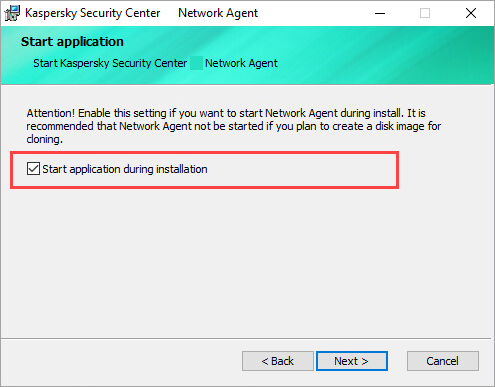
- Select the Start application during installation checkbox.
- Click Install.
How to configure the Network Agent in connection gateway mode
- Open Kaspersky Security Center.
- Right-click Managed devices and select New → Group.
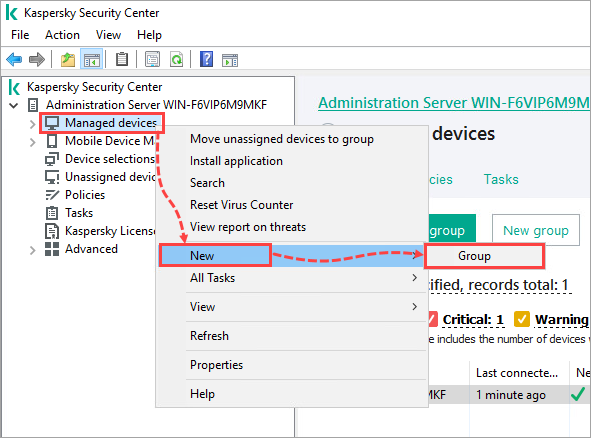
- Name the new group External devices and click ОК.
- Open the properties of the Administration Server.
- Go to the Distribution points tab, select Manually assign distribution points and click Add.
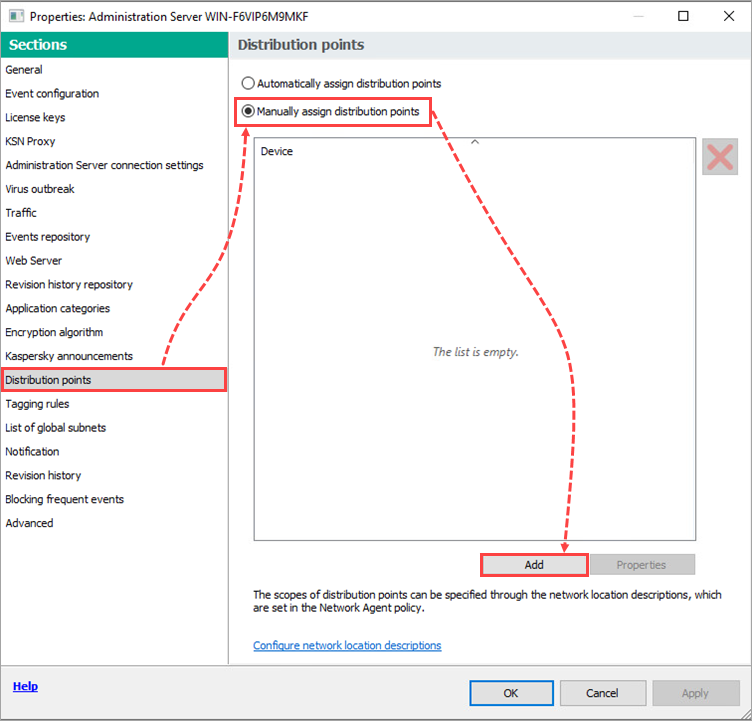
- In the drop-down menu for the field Device to act as distribution point, select Add connection gateway in DMZ by address.
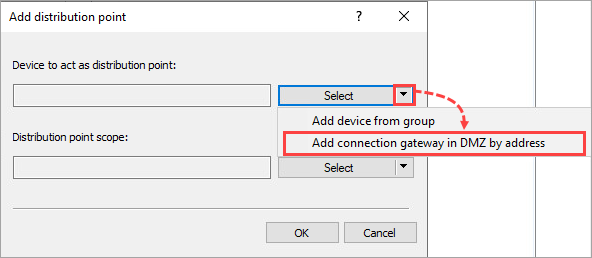
- Enter the connection gateway address and click OK.
- Click Select near the Distribution point scope field, select the set of devices associated with this connection gateway and click ОК.
When the network is scanned again, the Administration Server will detect the connection gateway by its IP address and place it in Unassigned devices. - Add the connection gateway to the External devices group created at step 3.
- Go to Distribution points and click Add.
- In the drop-down menu for the field Device to act as distribution point, select Add device from group.
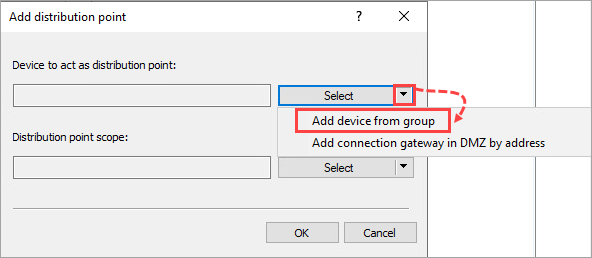
- Add the connection gateway from the External devices group and click OK. Repeat step 8.
- Select the connection gateway you have just added and open its Properties.
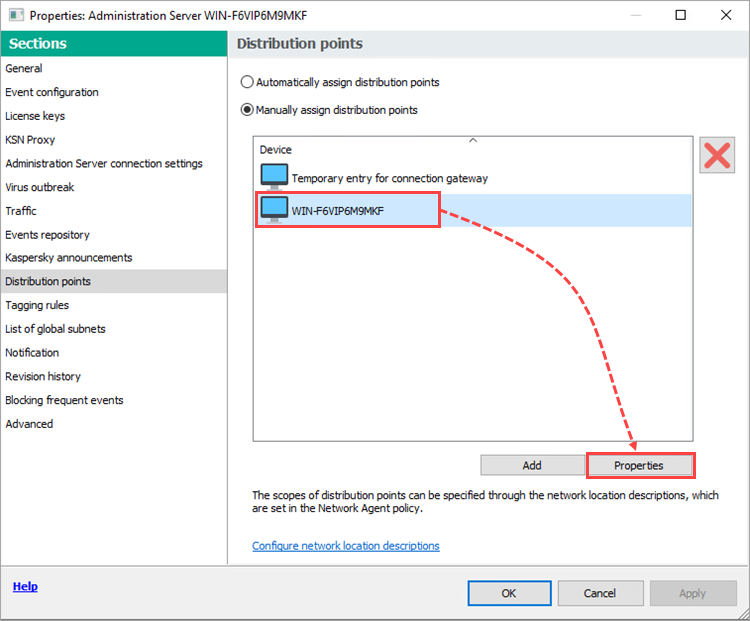
- Go to the Gateway tab. Select the Connection gateway checkbox and enter the address in the Gateway address for remote devices field.
- Select the Establish connection to gateway from Administration Server (if gateway is in DMZ) checkbox and click OK.
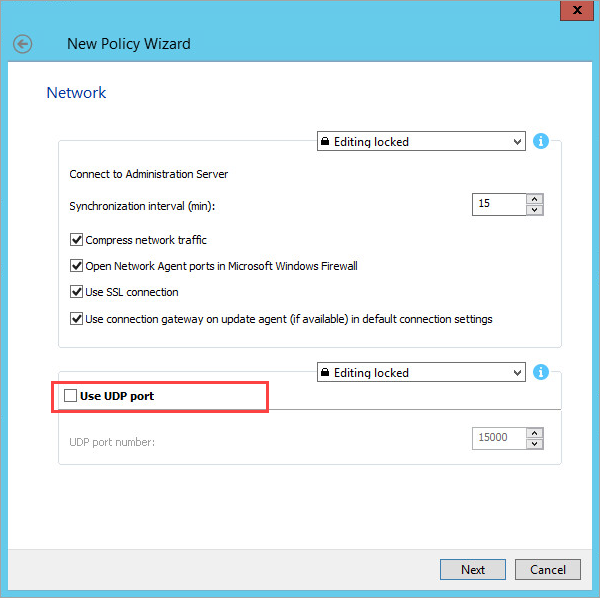
You can also create a Network Agent policy for the connection gateway. Once you reach the Network step in the policy creation process, clear the Use UDP port checkbox.
Connection settings analysis
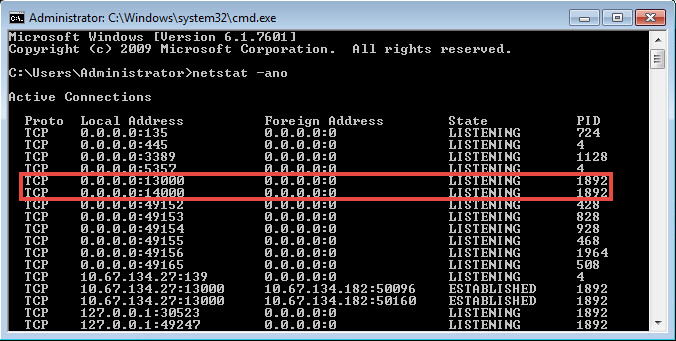
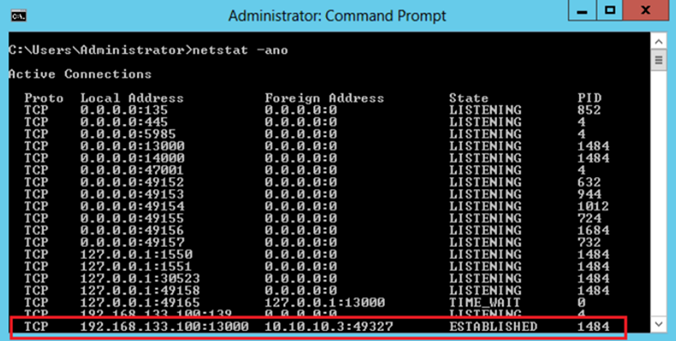
- To check the status of the ports, execute the command:
netstat -ano
- The Network Agent connects to the Administration Server via ports TCP 13000 and TCP 14000.
- The Connection gateway connects to the Administration Server via port TCP 13000.
- Use the klnagchk utility for connection diagnostics using these instructions. First run the utility on the device where the Administration Agent is installed in connection gateway mode, and then run it on the device on a managed device which will be connected through the gateway.
