Configuring integration with Active Directory Federation Services
Integration is based on two-way communication between ASAP and AD FS. This connection on the Active Directory side is configured in the AD FS console and involves the following stages:
- adding trust relationships for the ASAP platform
- creating rules to obtain the required information about users from Active Directory to complete the authentication procedure
- exporting the certificate of the identity provider
On the ASAP side, the URL of the AD FS service, platform ID in AD FS, and the content of the identity provider certificate exported from AD FS are required.
To configure platform integration with Active Directory Federation Services:
- In the AD FS Management Console, right-click the Relying Party Trust folder in the folder tree and select Add Relying Party Trust in the context menu.
The trust relationship adding wizard will launch.
- In the greetings window, select Claims aware and click the Next button.
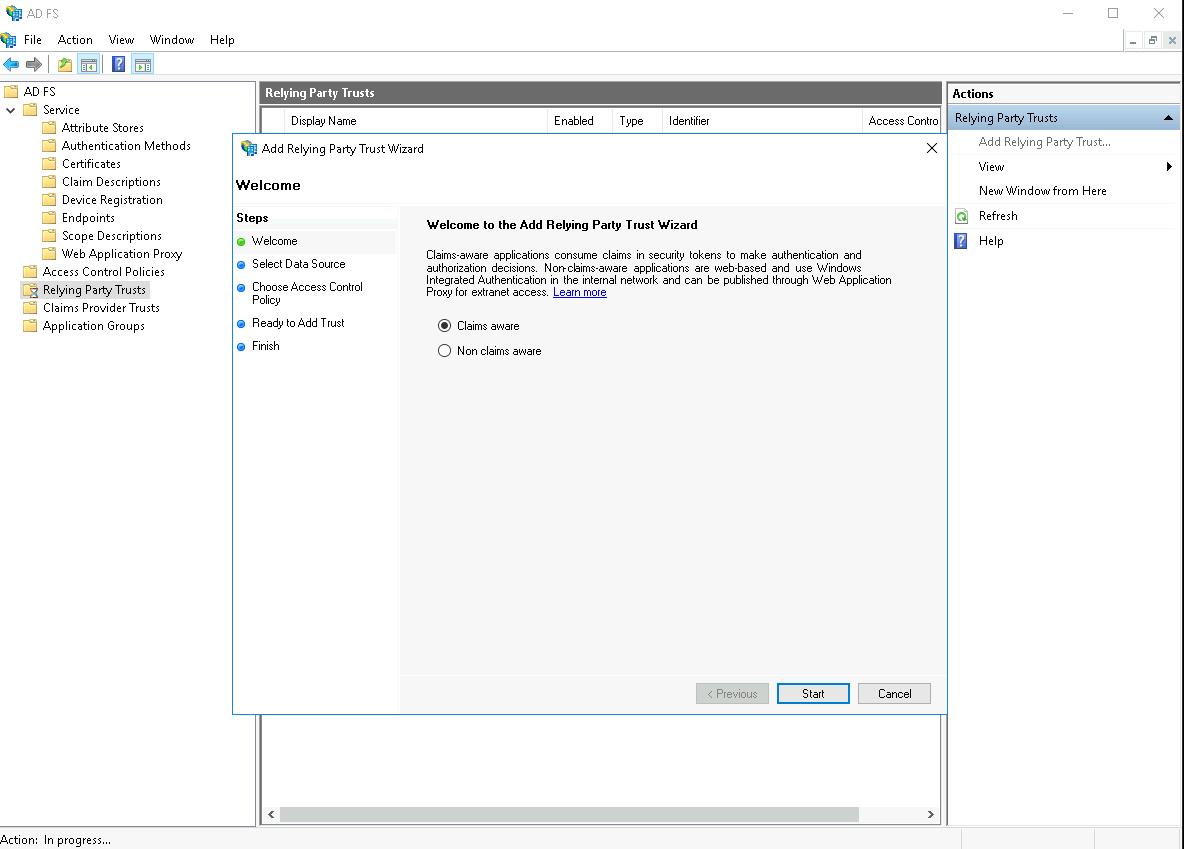
This brings you to the Select Data Source stage.
- Select the Enter data about the relying party manually option to enter your ASAP platform information manually, then click the Next button.
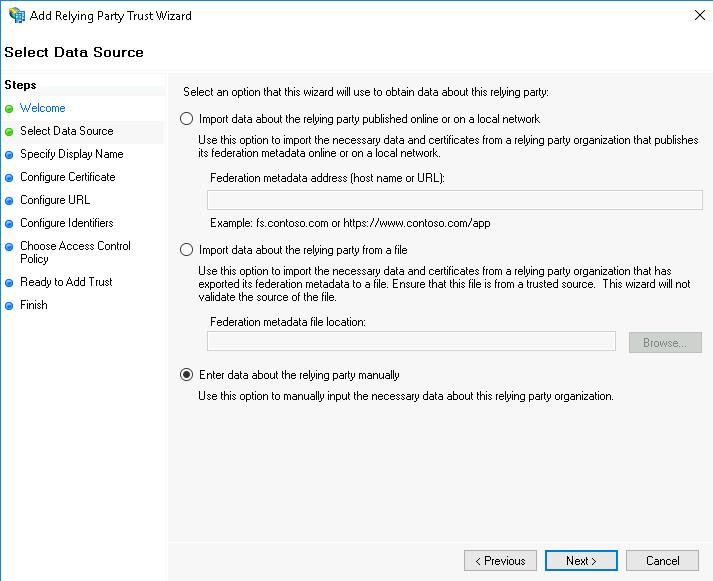
This brings you to the Specify Display Name step.
- In the Display name field enter the name to be displayed for the ASAP platform in the AD FS console, and click the Next button.
If required, you can specify any additional information in the Notes field.
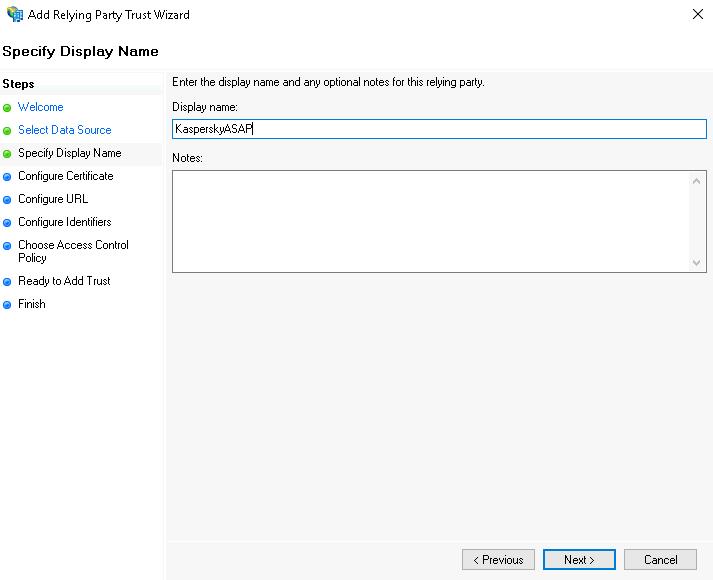
This brings you to the Configure Certificate step.
- Click the Next button.
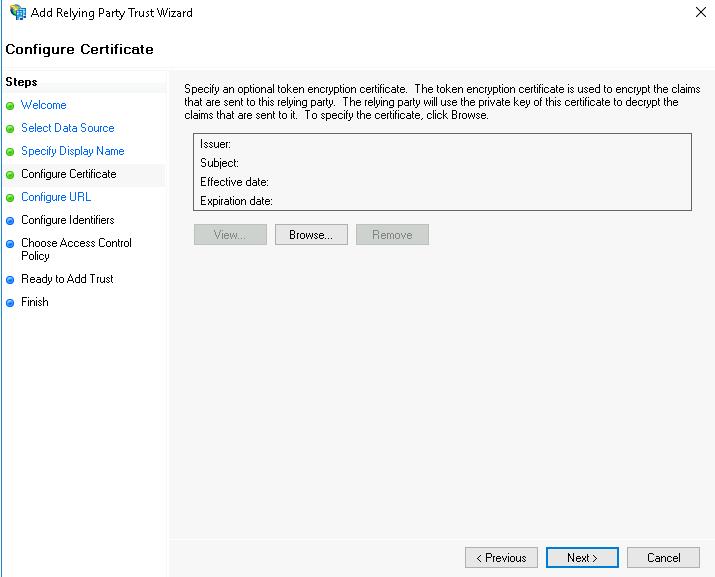
This brings you to the Configure URL step.
- Check the Enable support for the SAML 2.0 WebSSO protocol box to enable SAML support.
- In the Relying party SAML 2.0 SSO service URL field, enter the URL of the SAML service on the ASAP server and click the Next button.
Copy this address in the ASAP web interface in the Company settings section → SSO → SSO Callback (ACS) URL by clicking the
 button.
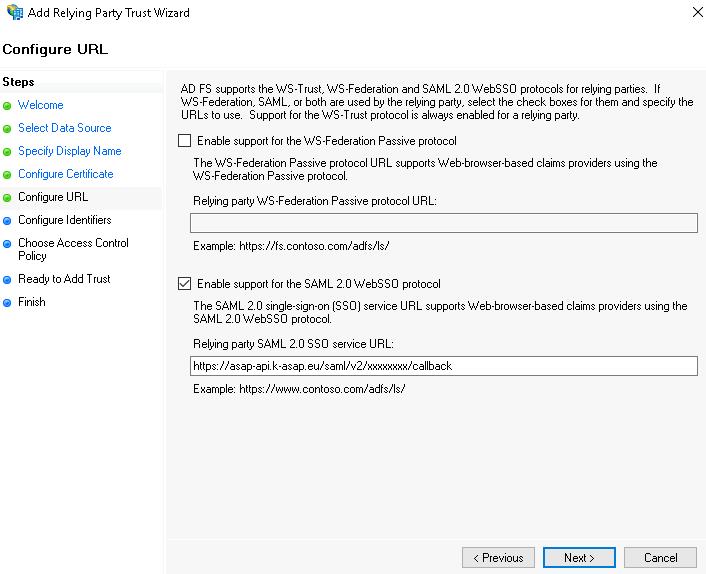
This brings you to the Configure Identifiers step.
- Set the ASAP Platform ID in AD FS. To do this, perform the following actions:
- In the Relying party trust identifier field, enter any name you want as the ASAP platform identifier for the AD FS service.
- Click the Add button.
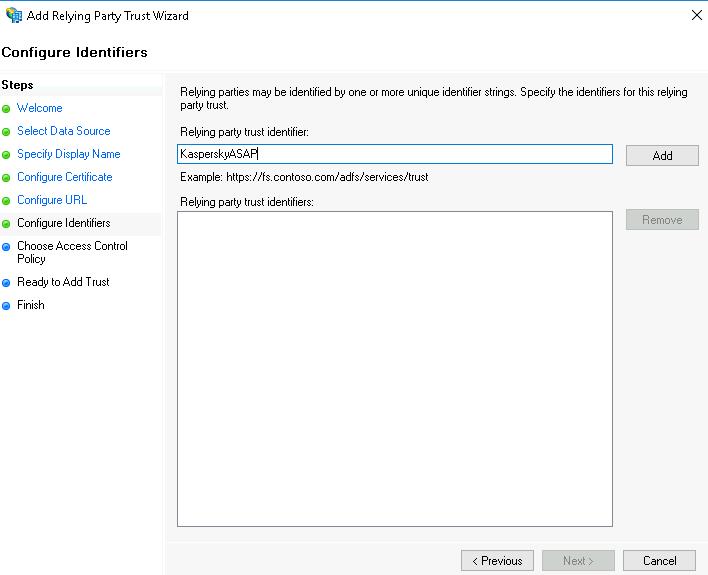
The new ID will be displayed in the Relying party trust identifiers field.
Memorize or write down this ID so you can enter it later in the ASAP web interface.
- Click the Next button.
This brings you to the Choose Access Control Policy step.
- Select an access management policy in accordance with your company's security requirements and click the Next button.

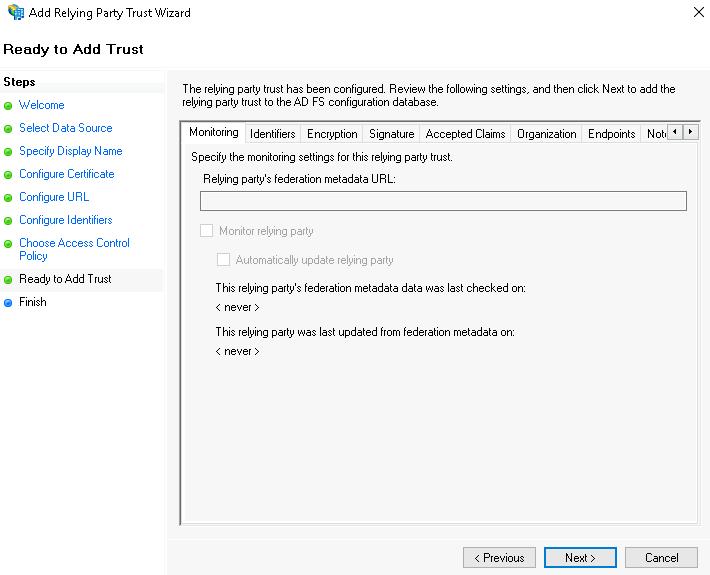
This brings you to the Ready to Add Trust step.
- View the settings specified earlier. If everything was configured correctly, click the Next button.
This brings you to the Finish step.
- In the final window of the master, click the Close button.
The trust relationship adding wizard will close. The ASAP platform is now shown in the Relying Party Trusts list.
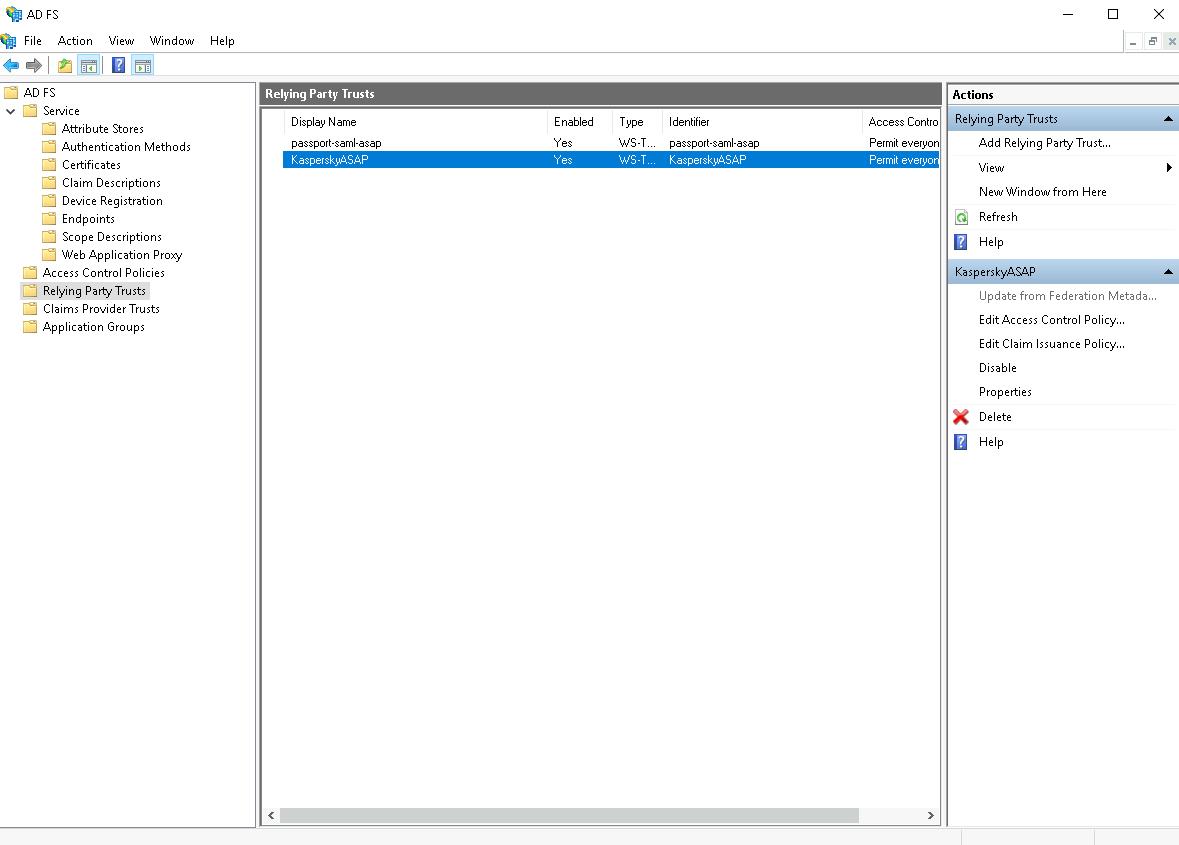
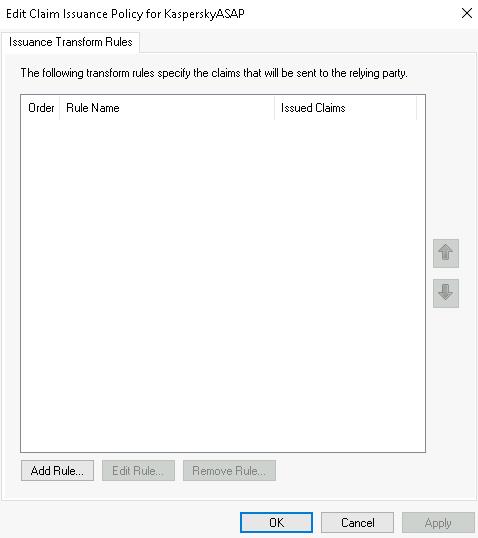
- In the AD FS console, select the ASAP platform in the Relying Party Trusts list and in the right Actions panel click Edit Claim Issuance Policy, to configure the rules to retrieve user information from AD FS for authentication.
The Edit Claim Issuance Policy for <ID name> window will open.
If in the final window of the adding trust relationship wizard the Configure claims issuance policy for this application box was checked, this window will open automatically.
- Add a rule to retrieve user email addresses from AD FS. To do this, perform the following actions:
- Click the Add rule button.
The add rule wizard will start at the Choose Rule Type step.
- In the Claim rule template drop-down list, select the Send LDAP Attributes as Claims template and click the Next button.
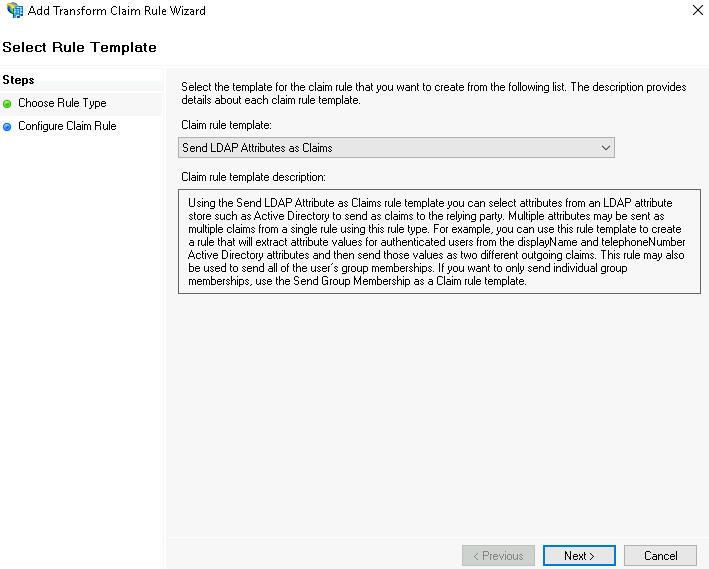
This brings you to the Configure Claim Rule step.
- In the Claim rule name field, enter the rule name (for example,
Email). - In the Mapping of LDAP attributes to outgoing claim types chart, select E-Mail Addresses in the LDAP Attribute column and E-Mail Address in the Outgoing Claim Type column.
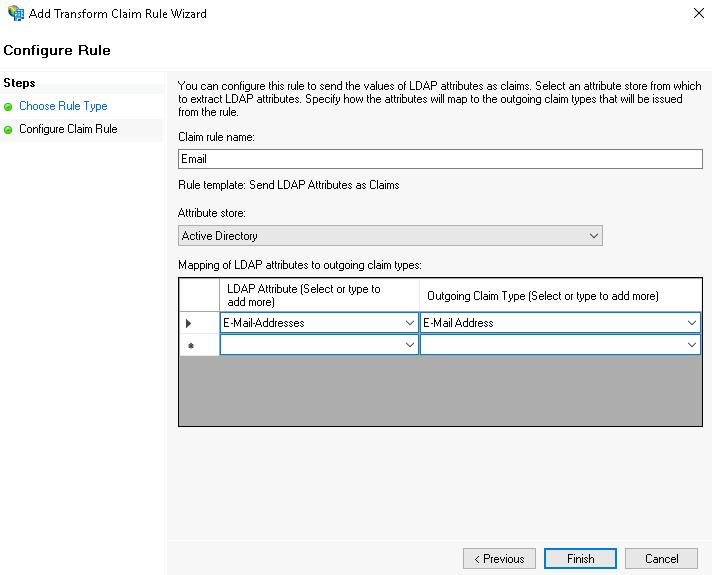
- Click the Finish button.
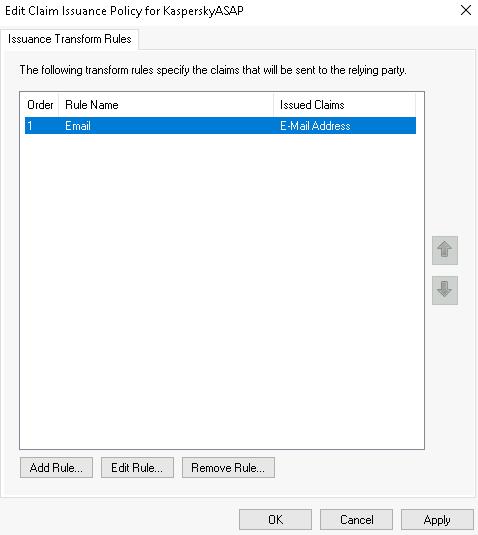
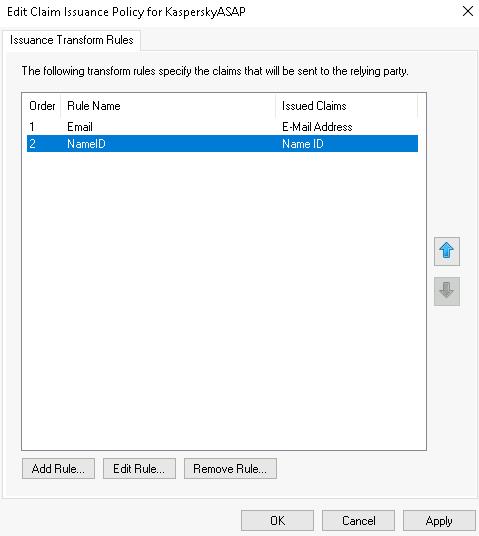
The add rule wizard will close. The added rule will be shown in the Edit Claim Issuance Policy for <ID name> window in the Issuance Transform Rules tab.
- Click the Add rule button.
- Add a rule to retrieve user IDs from AD FS based on their email address. To do this, perform the following actions:
- Click the Add rule button.
The add rule wizard will start at the Choose Rule Type step.
- In the Claim rule template drop-down list, select the Transform an Incoming Claim template and click the Next button.
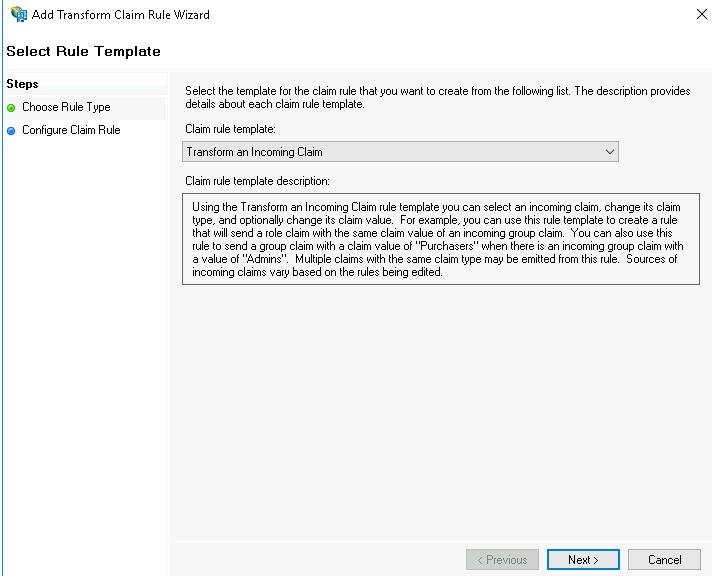
This brings you to the Configure Claim Rule step.
- In the Claim rule name field, enter the rule name (for example,
NameID). - In the Incoming claim type drop-down list, select E-Mail Address.
- In the Outgoing claim type drop-down list, select Name ID.
- In the Outgoing name ID format drop-down list, select Email.
- Select Pass through all claim values.
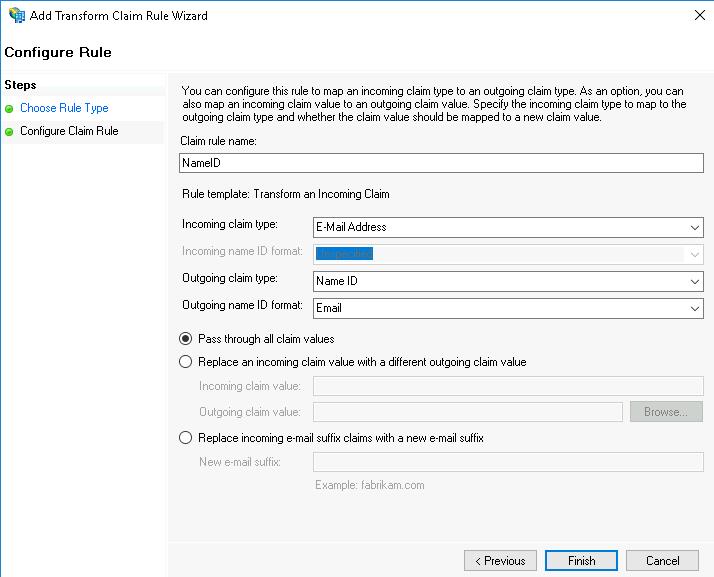
- Click the Finish button.
The add rule wizard will close. The added rule will be shown in the Edit Claim Issuance Policy for <ID name> window in the Issuance Transform Rules tab.
- Click the Add rule button.
- Click the OK button.
The rules will be created.
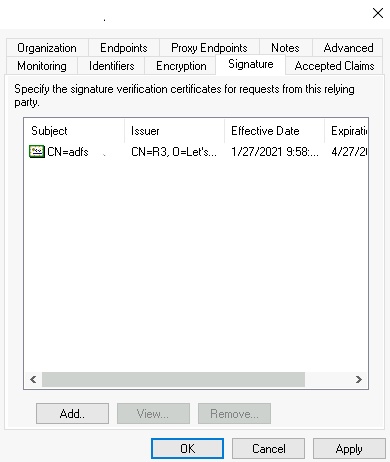
- In the AD FS console in the Relying Party Trusts folder, right-click on the ASAP platform and select Properties.
The AD FS ASAP Platform Properties window will open.
- In the Signature tab, upload your company's certificate by clicking the Addbutton, followed by OK.
- In the folder tree, select Service → Certificates.
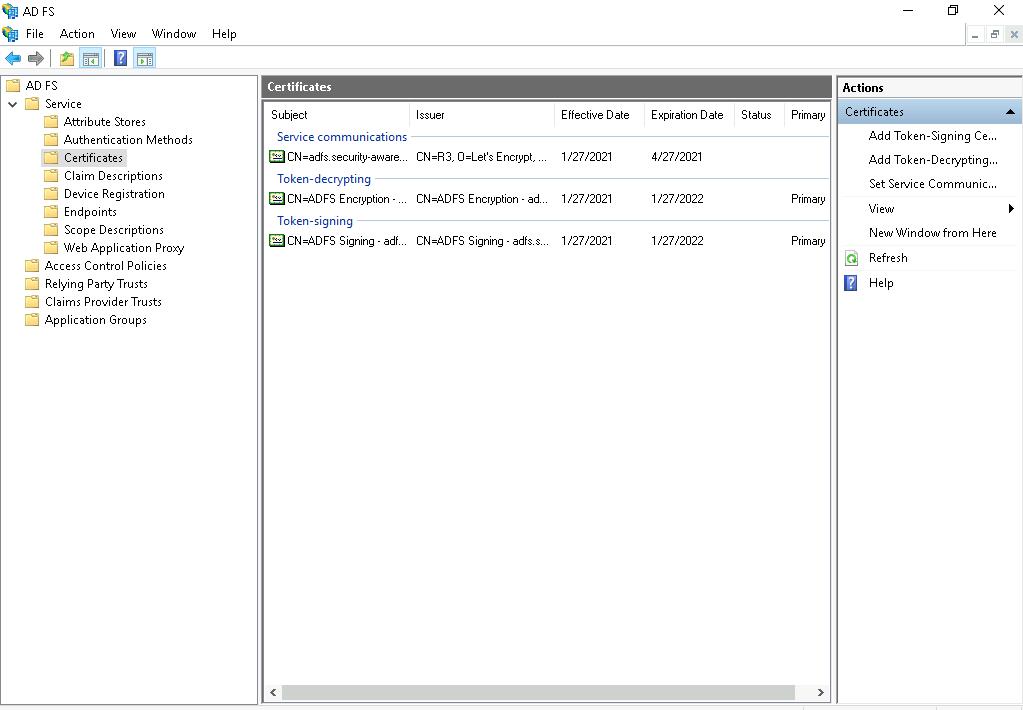
- Double click the Token-signing certificate.
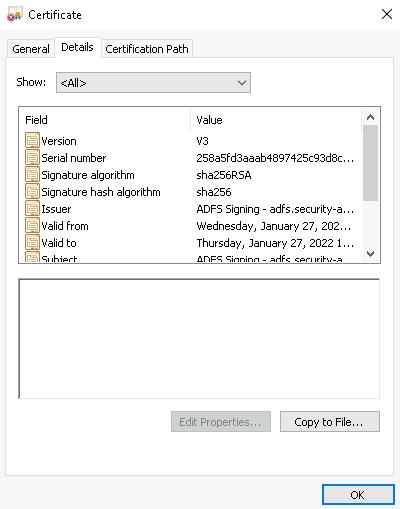
A window with information about the certificate will open in the General tab.
- In the Details tab, click the Copy to file button.
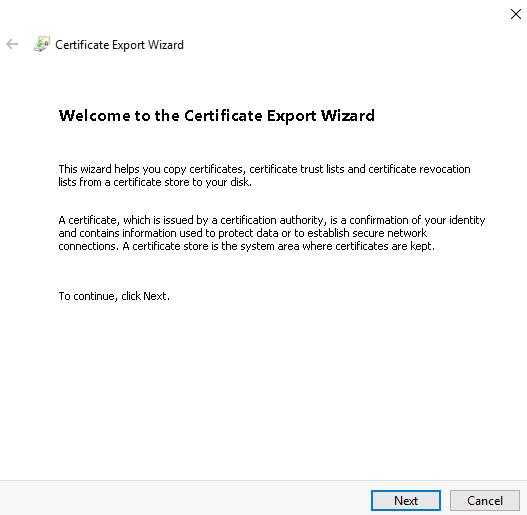
The certificate export wizard starts.
- In the welcome window of the Setup Wizard, click the Next button.
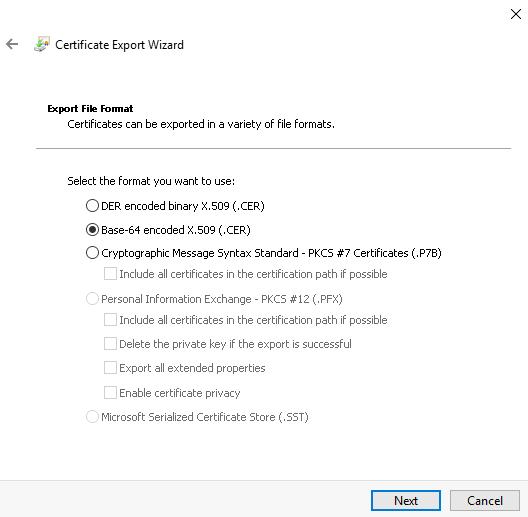
This brings you to the Export File Format step.
- Select the Base-64 encoded X.509 (.CER) file format and click the Next button.
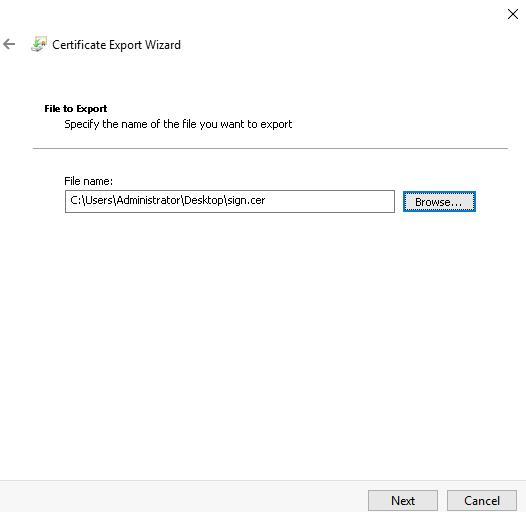
This brings you to the File to Export step.
- In the File name field, enter the path to the file where you want to export the certificate manually or by clicking the Browse button, followed by Next.
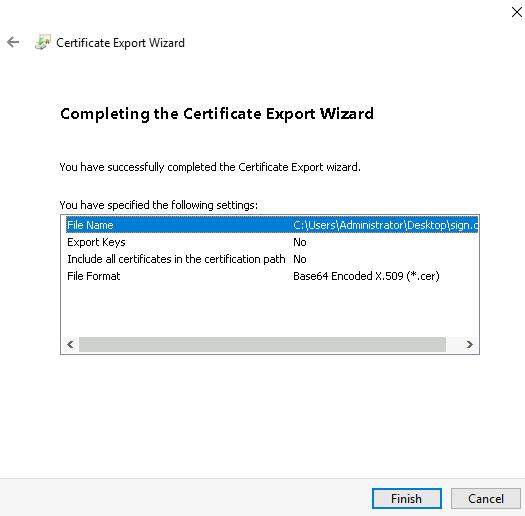
This brings you to the Completing the Certificate Export Wizard step.
- Check the export settings. If everything is accurate, click the Finish button.
- In the confirmation window, click the OK button.
The certificate will be exported to the select file.
Configuration on the ASAP platform side
- In the ASAP web interface in the Company settings section, select the SSO tab.
- In the Identity provider URL field, enter the URL in the following format:
<local ADFS address>/adfs/ls/IdpInitiatedSignOn.aspxFor example,
https://adfs.example.com/adfs/ls/IdpInitiatedSignOn.aspx. - In the Entity ID field, enter the ASAP platform ID in AD FS that you specified in the Add Trust Wizard during the Configure Identifiers step.
- In the Signing certificate field, enter the content of the identity provider certificate exported from AD FS.
- Click Save.
ASAP integration with Active Directory Federation Services is now configured. Enable SSO in the ASAP web interface so users can log in to the training portal via SSO.
To the top