Creating a policy
You can create policies; you can also modify and delete existing policies.
To create a policy:
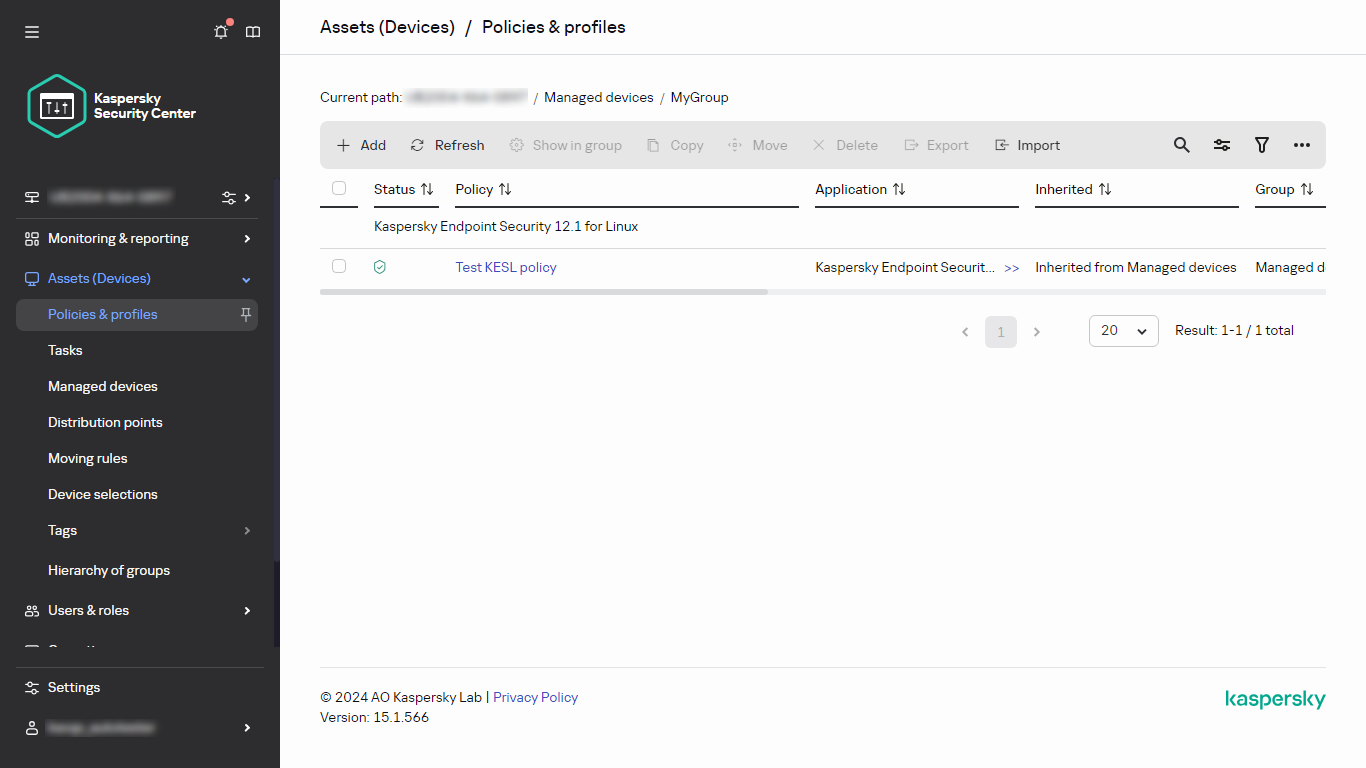
- In the main menu, go to Assets (Devices) → Policies & profiles.
- Select the administration group for which the policy is to be created:
- For the root group.
In this case you can proceed to the next step.
- For a subgroup:
- Click the current path link at the top of the window.
- In the panel that opens, click the link with the name of the required subgroup.
The current path changes to reflect the selected subgroup.

- For the root group.
- Click Add.
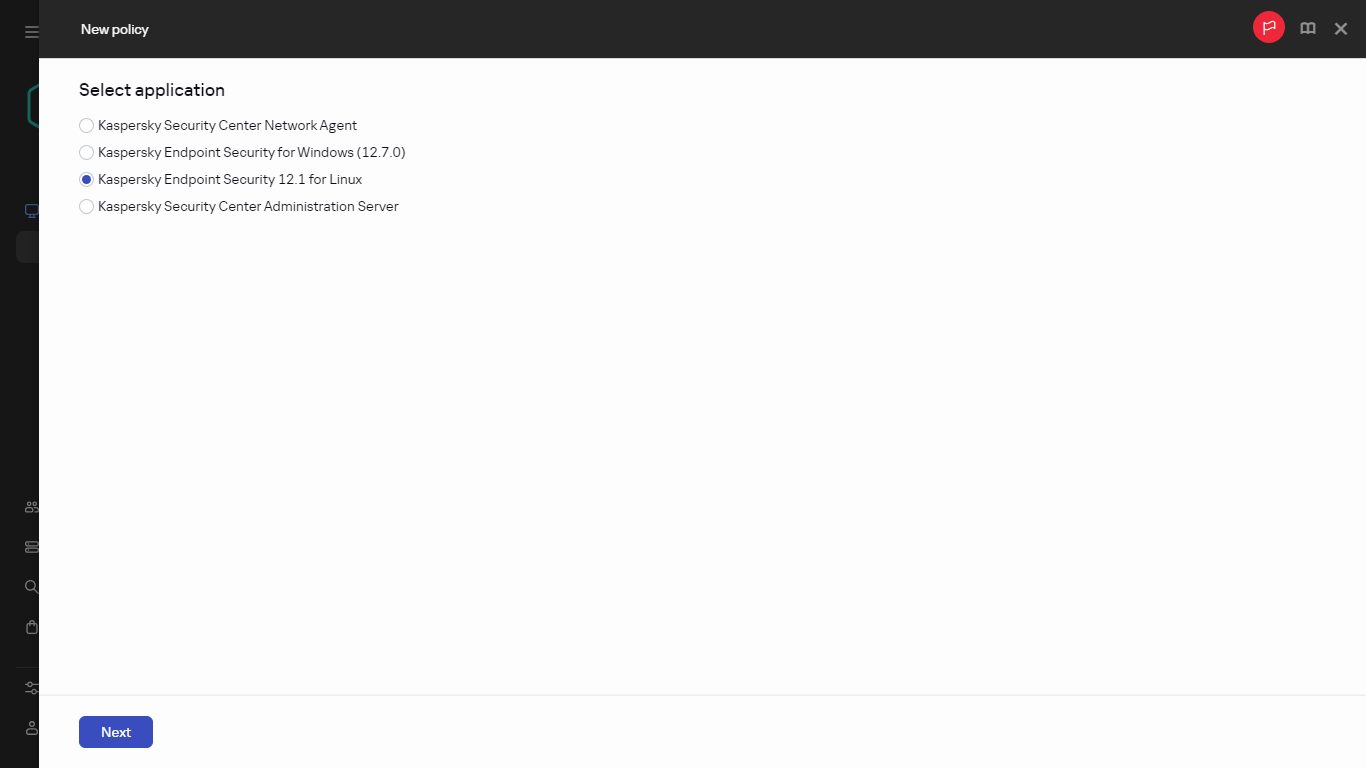
The Select application window opens.

- Select the application for which you want to create a policy.
- Click Next.
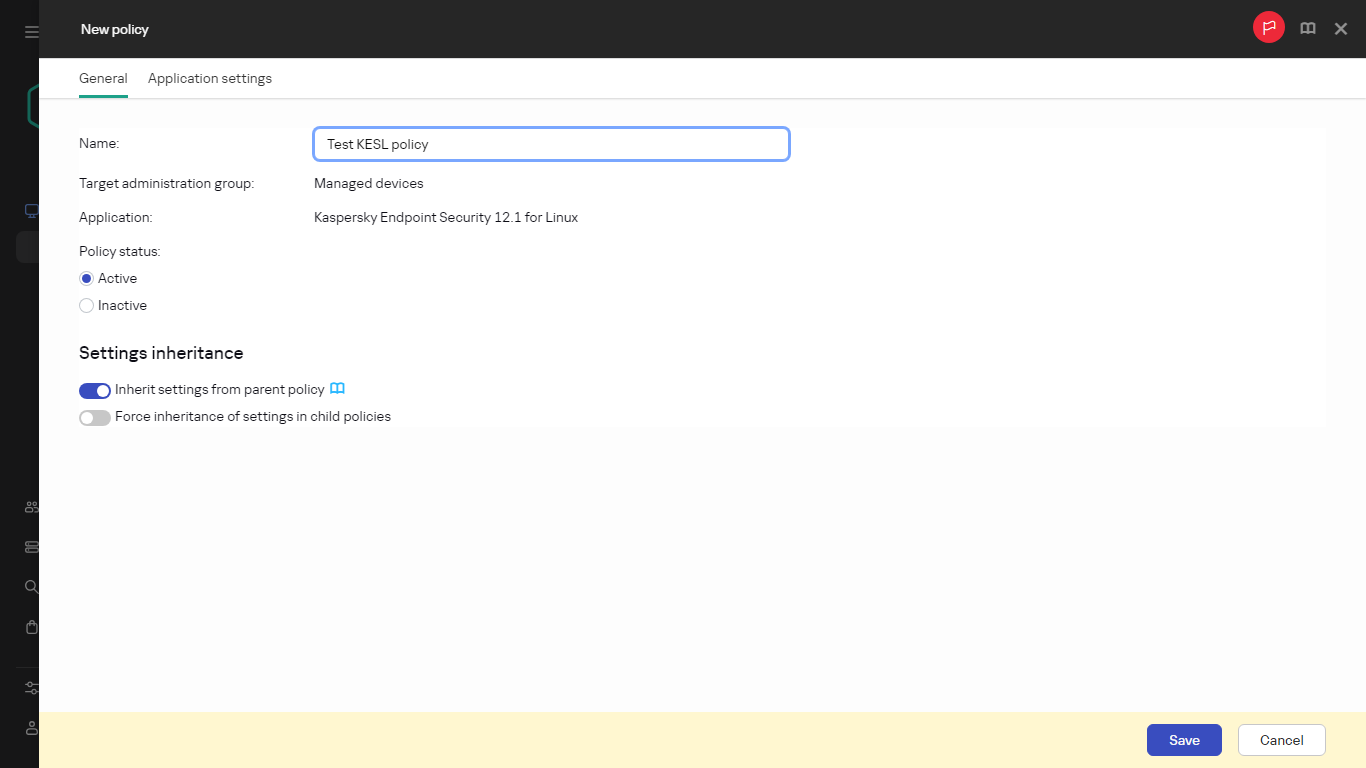
The new policy settings window opens with the General tab selected. If you want, change the default name, default status, and default inheritance settings of the policy.

- Select the Application settings tab.
Or, you can click Save and exit. The policy will appear in the list of policies, and you can edit its settings later.
- On the Application settings tab, in the left pane select the category that you want and in the results' pane on the right, edit the settings of the policy. You can edit policy settings in each category (section).
The set of settings depends on the application for which you create a policy. For details, refer to the following:
- Administration Server configuration
- Network Agent policy settings
- Kaspersky Endpoint Security for Linux Help
- Kaspersky Endpoint Security for Windows Help
For details about settings of other security applications, refer to the documentation for the corresponding application.
When editing the settings, you can click Cancel to cancel the last operation.
- Click Save to save the policy.
The policy will appear in the list of policies.