Kaspersky Thin Client personalization: administration group
In the Web Console, you can use policies to upload your images and set them as desktop background or lock screen of Kaspersky Thin Client. The following file formats are supported: JPEG, PNG, JPG. The maximum file size is 15 MB. You can also delete uploaded images from the Web Console.
By default, a standard background is set on the desktop and the lock screen of Kaspersky Thin Client. If you've set a background, you can reset your personalization settings to revert to the default background.
You cannot change the background in the Kaspersky Thin Client interface. Instead, you can change the background of screens only via the Web Console. The image set via the Web Console also changes to the standard background if the factory reset is made.
To change the lock screen or desktop background of Kaspersky Thin Client via the Web Console:
- In the main window of the Web Console, select Assets (Devices) → Policies & profiles.
- Click the policy name for the Kaspersky Security Management Suite web plug-in.
- In the window that opens, select the Application settings tab.
- Select the Personalization section (see the figure below).
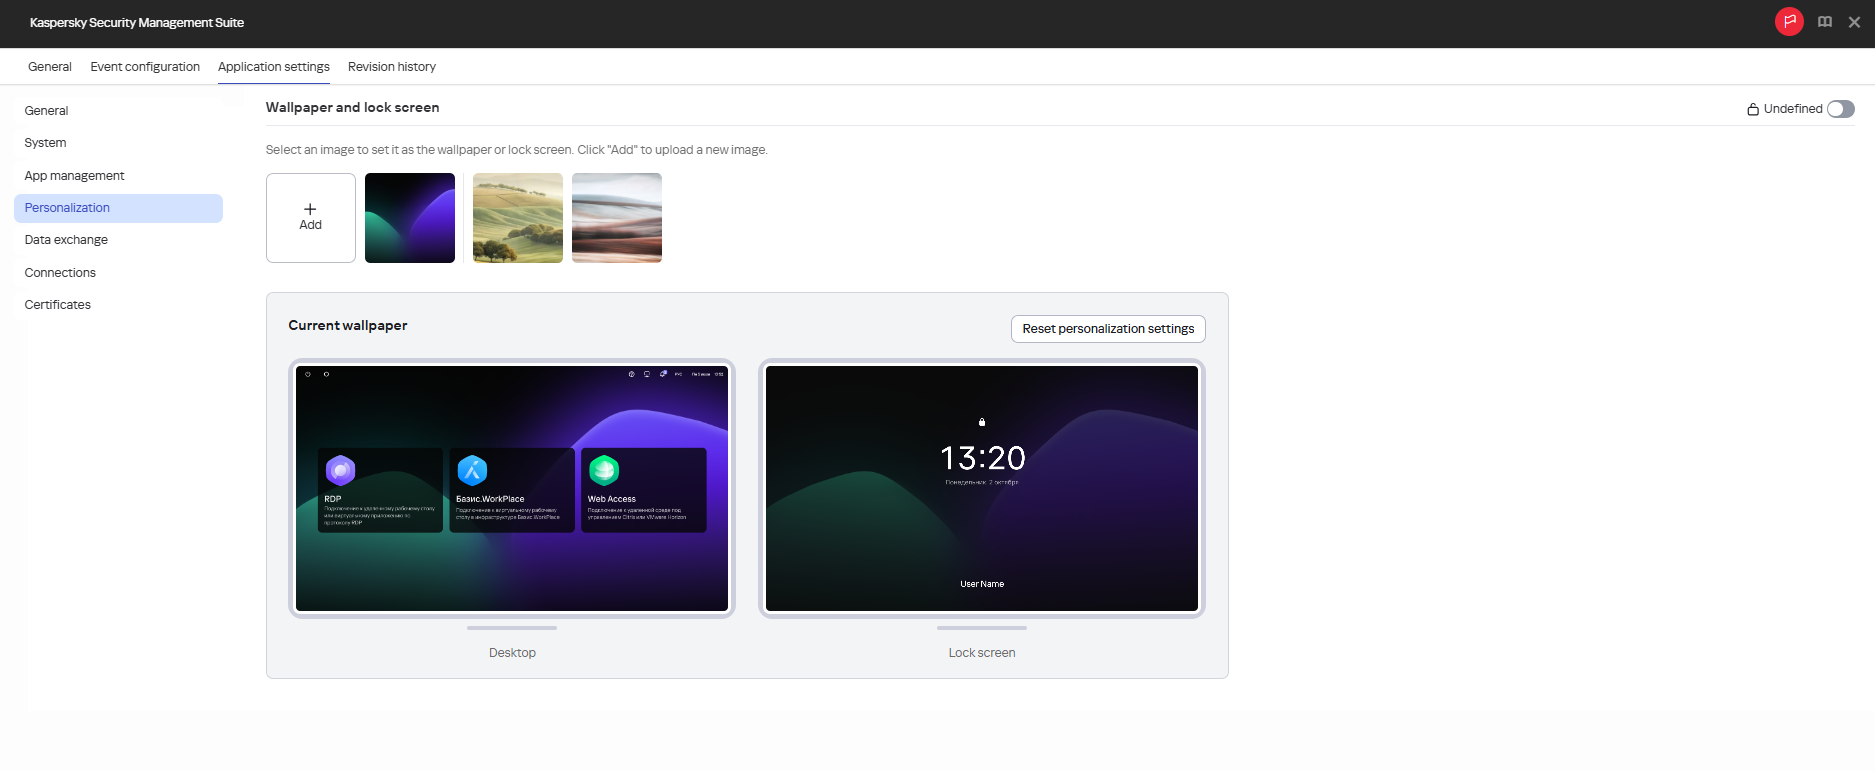
Window for configuring personalization settings of Kaspersky Thin Client via the Web Console: administration group
- To change your desktop or lock screen background, follow these steps:
- Select the image you want to set as a background.
- If you want to upload a new image to the Web Console, click the Add button.
In the window that opens, drag the desired image to the upload area or click Upload a file or drag and drop it here, then select the desired image in the window that opens.
- If you want to use an image that has already been uploaded to the Web Console, click the image's thumbnail.
A preview window will appear for the placement of the selected image on the Kaspersky Thin Client screens.
If you want to save the image in the Web Console without setting it as the background, go to step c. of these instructions.
- If you want to upload a new image to the Web Console, click the Add button.
- Check the boxes next to the screens on which you want to set the image as a background:
- Desktop: the image will be set as the desktop background of Kaspersky Thin Client.
- Lock screen: the image will be set as the lock screen background.
- Click Save in the preview window.
The main screen of the Personalization section will be displayed. The background will be set to screens you selected.
- Select the image you want to set as a background.
- To delete an image uploaded to the Web Console, hover over the image's thumbnail and click the
 button that appears.
Confirm your actions in the window that appears.
The image will be permanently deleted from the Web Console. If the image was selected as the background on any screen, the standard background will be set in its place.
- To revert all screens to standard background, click Reset personalization settings and confirm your actions in the window that opens.
- A standard background will be set on the desktop and the lock screen of Kaspersky Thin Client.
- If you want the configured settings to be applied to Kaspersky Thin Client installed in child administration groups and do not want them to be available for editing in Kaspersky Thin Client in the current administration group, move the toggles next to the relevant blocks of settings to the Enforced position.
- Click Save in the lower part of the Personalization section window.
The changes will be saved and applied to thin clients added to the administration group within an hour after synchronization of Kaspersky Security Center with Kaspersky Thin Client.
Page top