Contents
- Frequently asked questions
- Data provision
- Data provision under the End User License Agreement
- Data provision under the End User License Agreement on the territory of the European Union, the United Kingdom, Brazil, Vietnam, or by California residents
- Saving data to the application operation report
- Data provision to Kaspersky Security Network
- Locally processed data
- Saving data for Technical Support
- About using the application in the European Union, the United Kingdom, Brazil, Vietnam, or by California residents
- What's new
- Comparison of application functions depending on the type of operating system
- Hardware and software requirements
- Compatibility with other Kaspersky applications
- How to install or remove the application
- Application licensing
- Remote management of computer protection
- Basic functionality of the application
- Assessing computer protection status and resolving security issues
- How to fix security issues on your PC
- Application activity log and detailed report
- How to configure the application interface
- How to restore the default settings of the application
- How to apply the application settings on another computer
- How to pause and resume computer protection
- Searching the functionality of the application
- Security
- Scanning the computer
- How to run a Full Scan
- How to run a Custom Scan
- How to run a Quick Scan
- How to run a removable drive scan
- How to run a Context Menu File or Folder Scan
- How to enable or disable a background scan
- How to create a scan schedule
- How to search for vulnerabilities in applications installed on your computer
- How to exclude a file, folder, or threat type from scanning
- Scanning files in OneDrive cloud storage
- Updating anti-virus databases and application modules
- Intrusion Prevention
- Network Monitor
- Pre-Kaspersky virus removal
- How to restore a deleted or disinfected file
- Protecting email
- Participating in Kaspersky Security Network
- Protection using hardware virtualization
- Protection using Antimalware Scan Interface (AMSI)
- Scanning the computer
- Performance
- App Updater
- Backup and Restore
- About Backup and Restore
- How to create a backup task
- Step 1. Select files
- Step 2. Select folders for backup
- Step 3. Select file types for backup
- Step 4. Select backup storage
- Step 5. Creating a backup schedule
- Step 6. Setting a password to protect backup copies
- Step 7. File versions storage settings
- Step 8. Entering the backup task name
- Step 9. Wizard completion
- How to start a backup task
- Restoring data from a backup copy
- Restoring data from FTP storage
- Restoring data from a backup copy using Kaspersky Restore Utility
- About Online storage
- How to activate Online storage
- Current Activity
- Do not Disturb Mode
- How to reserve operating system resources
- Optimizing the load on the operating system
- Privacy
- Kaspersky VPN
- Private Browsing
- Password Manager
- Safe Money
- Webcam and Mic Control
- Detection of stalkerware and other applications
- Anti-Banner
- Unwanted App Installation Blocker
- Adware Remover
- How to change Application Manager settings
- Secret Vault
- File Shredder
- Privacy Cleaner
- Protecting personal data on the Internet
- About protection of personal data on the Internet
- About On-Screen Keyboard
- How to open On-Screen Keyboard
- How to configure the display of the On-Screen Keyboard icon
- About protection of data entered on the computer keyboard
- How to configure protection of data entered on the computer keyboard
- Checking a website for safety
- How to change encrypted connections settings
- Configuring notifications of vulnerabilities in Wi-Fi networks
- How to uninstall incompatible applications
- Using the application from the command prompt
- Contact Technical Support
- Limitations and warnings
- Other sources of information about the application
- Network settings for interaction with external services
- Glossary
- Activating the application
- Activation code
- Anti-virus databases
- Application modules
- Backup and Restore
- Blocking an object
- Compressed file
- Database of malicious web addresses
- Digital signature
- Disk boot sector
- Exploit
- False positive
- File mask
- Heuristic analyzer
- Hypervisor
- iChecker Technology
- Incompatible application
- Infected object
- Kaspersky Security Network (KSN)
- Kaspersky update servers
- Keylogger
- License term
- Miners
- Phishing
- Probable spam
- Probably infected object
- Protected Browser
- Protection components
- Protocol
- Quarantine
- Rootkit
- Script
- Secret Vault
- Security level
- Spam
- Startup objects
- Task
- Task settings
- The database of phishing links and fake cryptocurrency exchanges
- Threat level
- Traces
- Traffic scanning
- Trust group
- Trusted process
- Unknown virus
- Update
- Update package
- Virus
- Vulnerability
- Information about third-party code
- Trademark notices
Frequently asked questions
 Getting Started
- How to install the Kaspersky Protection extension in browsers
- How to manage computer protection remotely
- How to configure Kaspersky Small Office Security notifications
 Security
- How to run a Full Scan
- How to run a Quick Scan
- How to start an update of databases and application modules
- How to restore a deleted or disinfected file
- How to recover the operating system after infection
 Performance
- How to terminate an app that slows down your computer
- How to reserve operating system resources
- How to enable the Focused Work Mode
- How to update applications installed on the computer
- How to do backups
 Privacy
Data provision
This section contains information on the specific data that you provide to Kaspersky. The Saving data to the application operation report subsection contains data that are stored locally on your computer and are not sent to Kaspersky.
Data provision under the End User License Agreement
Information on the specific data that are provided to Kaspersky if you have installed a version of the application that is not intended for use in the European Union, the United Kingdom, Brazil, Vietnam, or by California residents is contained in the End User License Agreement (the license.txt file) in the application installation folder.
Page top
Data provision under the End User License Agreement on the territory of the European Union, the United Kingdom, Brazil, Vietnam, or by California residents
This section contains information on the specific data that are provided to Kaspersky if you have installed the application version which is intended for use in the European Union, the United Kingdom, Brazil, Vietnam, or by California residents.
The information mentioned in this section does not contain any personal data of the User.
The information received is protected by the Rightholder in the manner prescribed by the law and is required for the operation of the Software made available to use under the license.
Kaspersky may use the acquired statistical data based on the information received to monitor trends in computer security threats and publish reports on those threats.
Page top
Saving data to the application operation report
Report files can contain personal data obtained as a result of the operation of protection components, such as File Anti-Virus, Mail Anti-Virus, Safe Browsing, Anti-Spam, and Web Policy Management.
Report files can contain the following personal data:
- IP address of the user's device
- Online browsing history
- Blocked links
- Versions of the browser and operating system
- Names of cookies and other files and paths to them
- Email address, sender, message subject, message text, user names, and list of contacts
Report files are stored locally on your computer and are not transmitted to Kaspersky. Path to report files: %allusersprofile%\Kaspersky Lab\AVP21.14\Report\Database.
The maximum number of records that can be displayed in each section of the report file is 10000.
Reports are stored in the following files:
- reports.db
- reports.db-wal
- reports.db-shm (does not contain any personal data)
Report files are protected against unauthorized access if self-defense is enabled in Kaspersky Small Office Security. If self-defense is disabled, report files are not protected.
Page top
Data provision to Kaspersky Security Network
The scope of data transmitted to Kaspersky Security Network is described in the Kaspersky Security Network Statement.
To view the Kaspersky Security Network Statement:
- Open the main application window.
- Click the
 button in the lower part of the application window.
This opens the Settings window.
- Go to Security settings → Kaspersky Security Network.
The Kaspersky Security Network window opens showing the details of Kaspersky Security Network and Kaspersky Security Network participation settings.
- Click the Kaspersky Security Network Statement link to open the text of the Kaspersky Security Network Statement.
Locally processed data
This section contains information on data that is collected and processed locally. The data is used to send statistics about product errors to improve its functionality.
- Software component ID
- Version of the Software component
- Source file path
- Number of the string in the script where the error has occurred
- Name of the module in which the failure probably occurred
- Software module ID
- Nested error occurred during the application operation
- Error type
- Text of the error message
- Memory stack of the Software process failure
- Address for the Software module loading
- Process system ID (PID)
- Size of the object being processed
- Description of an object being processed as defined in the object properties
- Attribute data
Saving data for Technical Support
The application processes and stores the following personal data for further analysis by Technical Support:
- Data that is displayed in the application interface:
- Email address used to connect to Kaspersky Small Office Security Management Console
- Website addresses that were added to the exclusions (displayed in the Safe Browsing, Anti-Banner, Private Browsing, and Network components, and in the Reports window)
- License data
This data is stored locally in a non-modified form and can be viewed under any user account on the computer.
- Data on the system memory of Kaspersky Small Office Security processes at the moment when a memory dump is created.
- Data that is gathered when traces are enabled.
This data is stored locally in a modified form and can be viewed under any user account on the computer. This data is transmitted to Kaspersky only with your consent when contacting Technical Support. To learn more about the data, click the Support Statement link in the Support Tools window.
Page top
About using the application in the European Union, the United Kingdom, Brazil, Vietnam, or by California residents
The versions of the application that Kaspersky and our partners distribute in the European Union, the United Kingdom, Brazil, Vietnam (as well as the versions intended to be used by California residents) meet the requirements of the regulations governing the collection and processing of personal data that have been established in these regions.
To install the application, you must accept the End User License Agreement and the terms of the Privacy Policy.
In addition, the Setup Wizard prompts you to accept the following provisions regarding how your personal data is processed:
- Kaspersky Security Network Statement. This statement allows Kaspersky experts to promptly receive information about threats detected on your computer, about applications being run and signed applications being downloaded, as well as operating system information to improve your protection.
- Statement regarding data processing for marketing purposes. This statement allows us to create more valuable offers for you.
- Statement regarding data processing while using Anti-Spam. This statement allows Kaspersky experts to receive data in order to improve the Anti-Spam component.
You can accept or decline the Kaspersky Security Network Statement and Statement regarding data processing for marketing purposes at any time from the Settings → Security settings → Kaspersky Security Network window.
Page top
What's new
The following new features and improvements are introduced in Kaspersky Small Office Security:
- You can now search the functionality of the application.
- The Kaspersky application now complies with regulations governing the collection and processing of personal data in Vietnam.
- Now you can resize the security news window. This functionality is not always available.
- Problems with resizing the main window of the application have been resolved. The application now remembers the size of the screen in case of a restart.
- Improved text of the notification that suggests installing Kaspersky Password Manager. The installation status of the application is also displayed.
Functionality that was removed in the current and previous versions of the application
Page top
Comparison of application functions depending on the type of operating system
The table below compares Kaspersky Small Office Security functions depending on the type of operating system (personal computer or file server).
The list of functions is the same for Personal Computer and Terminal Server.
Comparison of Kaspersky Small Office Security functions
Functionality |
File Server |
Personal Computer |
|
|
|
|
|
|
|
|
|
|
|
|
|
|
|
|
|
|
|
|
|
|
|
|
|
|
|
|
|
|
|
|
|
|
|
|
|
|
|
|
|
|
|
|
|
|
|
|
|
|
|
|
|
|
|
|
|
|
|
|
|
|
|
|
|
|
|
|
|
|
|
|
|
|
|
|
|
|
|
|
|
|
|
|
|
|
|
|
|
|
|
|
|
|
|
|
|
|
|
|
|
|
|
|
|
|
|
|
|
|
|
|
|
|
|
|
|
|
|
|
|
|
|
|
|
|
|
|
|
|
|
|
|
|
Hardware and software requirements
General requirements
- 1500 MB free disk space on the hard drive
- Processor that supports the SSE2 instruction set (except ARM)
- Internet access (for the application installation and activation, for the use of Kaspersky Security Network, and for updating databases and application modules)
- Microsoft Windows Installer 4.5 or later
- Microsoft .NET Framework 4 or later
- Webcam access protection is provided only for compatible webcam models
When deploying on a personal computer
Operating system |
CPU |
Free RAM |
Restrictions |
|---|---|---|---|
Microsoft Windows 11 Home (21H2, 22H2, 23H2) |
1 GHz or higher |
4 GB (for a 64-bit operating system) |
Windows Subsystem for Linux 2 (WSL2) is not supported. |
Microsoft Windows 11 Enterprise (21H2, 22H2, 23H2) |
|||
Microsoft Windows 11 Pro (21H2, 22H2, 23H2) |
|||
Microsoft Windows 10 Home (versions: 1507, 1511, 1607, 1703, 1709, 1803, 1809, 1903, 1909, 2004, 20H2, 21H1, 21H2, 22H2) |
1 GHz or higher |
1 GB (for 32-bit operating systems) or 2 GB (for 64-bit operating systems) |
Windows Subsystem for Linux 2 (WSL2) is not supported. |
Microsoft Windows 10 Enterprise (versions: 1507, 1511, 1607, 1703, 1709, 1803, 1809, 1903, 1909, 2004, 20H2, 21H1, 21H2, 22H2) |
|||
Microsoft Windows 10 Pro (versions: 1507, 1511, 1607, 1703, 1709, 1803, 1809, 1903, 1909, 2004, 20H2, 21H1, 21H2, 22H2) |
|||
Microsoft Windows 8.1 (Service Pack 0 or later, Windows 8.1 Update) |
1 GHz or higher |
1 GB (for 32-bit operating systems) or 2 GB (for 64-bit operating systems) |
|
Microsoft Windows 8.1 Pro (Service Pack 0 or later, Windows 8.1 Update) |
|||
Microsoft Windows 8.1 Enterprise (Service Pack 0 or later, Windows 8.1 Update) |
|||
Microsoft Windows 8 (Service Pack 0 or later) |
1 GHz or higher |
1 GB (for 32-bit operating systems) or 2 GB (for 64-bit operating systems) |
|
Microsoft Windows 8 Pro (Service Pack 0 or later) |
|||
Microsoft Windows 8 Enterprise (Service Pack 0 or later) |
|||
Microsoft Windows 7 Starter (Service Pack 1 or later) |
1 GHz or higher
|
1 GB (for 32-bit operating systems) or 2 GB (for 64-bit operating systems)
|
|
Microsoft Windows 7 Home Basic (Service Pack 1 or later) |
|||
Microsoft Windows 7 Home Premium (Service Pack 1 or later) |
|||
Microsoft Windows 7 Professional (Service Pack 1 or later) |
|||
Microsoft Windows 7 Ultimate (Service Pack 1 or later) |
For the Safe Browsing, Anti-Banner, and Safe Money protection components to work, the Base Filtering Engine service must be running in the operating system.
Terminal server support
When installed on a personal computer, the application supports multisession terminal connections for the following operating systems:
- Microsoft Windows 10 Enterprise for Virtual Desktops (EVD)
- Microsoft Windows 7 Enterprise for Virtual Desktops (EVD)
- Microsoft Windows Server 2022
- Microsoft Windows Server 2019
- Microsoft Windows Server 2016
- Microsoft Windows Server 2012 R2
- Microsoft Windows Server 2012
- Microsoft Windows Server 2008 R2
Browser support
The following browsers support installing the Kaspersky Protection extension:
- Chromium-based Microsoft Edge 77.x – 117.x;
- Mozilla Firefox versions 52.x – 117.x, including Mozilla Firefox MSIX 94.x;
- Mozilla Firefox ESR 52.x, 60.x, 68.x, 78.x, 91.x, 102.x, 115.x;
- Google Chrome versions 48.x – 117.x.
The following browsers support On-Screen Keyboard and scanning of encrypted connections:
- Chromium-based Microsoft Edge 77.x – 117.x;
- Mozilla Firefox versions 52.x – 117.x, including Mozilla Firefox MSIX 94.x;
- Mozilla Firefox ESR 52.x, 60.x, 68.x, 78.x, 91.x, 102.x, 115.x;
- Google Chrome 48.x – 117.x.
The following browsers support Protected Browser mode:
- Microsoft Internet Explorer 8.0, 9.0, 10.0, 11.0;
- Chromium-based Microsoft Edge 77.x – 117.x;
- Mozilla Firefox versions 52.x – 117.x, excluding Mozilla Firefox MSIX 94.x in Protected Browser mode;
- Mozilla Firefox ESR 52.x, 60.x, 68.x, 78.x, 91.x, 102.x, 115.x;
- Google Chrome 48.x – 117.x;
- Yandex Browser 18.3.1 – 22.9.5, 23.x (with limitations).
Newer versions of browsers can be supported if the browser supports the corresponding technology.
Kaspersky Small Office Security supports Google Chrome and Mozilla Firefox in 32-bit and in 64-bit operating systems.
Requirements for tablet computers
- Microsoft Windows 7, Microsoft Windows 8, Microsoft Windows 8.1, Microsoft Windows 10, Microsoft Windows 11;
- Intel Celeron processor with a clock speed of 1.66 GHz or faster;
- 1000 MB free RAM.
Requirements for netbooks
- Intel Atom CPU 1.60 GHz or faster;
- 1024 MB free RAM;
- 10.1-inch display with 1024x768 screen resolution;
- Intel GMA 950 graphics core or later.
The requirements for Kaspersky Password Manager are available in the help files of this application.
When deploying on a file server
Kaspersky Small Office Security cannot be installed on Microsoft Windows Server Datacenter and on file servers running in Server Core mode.
Operating system |
CPU |
Free RAM |
|---|---|---|
Microsoft Windows Server 2022 Standard |
64-bit (x64) processor with a clock speed of 1.4 GHz or higher |
2 GB |
Microsoft Windows Server 2019 Essentials / Standard RTM |
64-bit (x64) processor with a clock speed of 1.4 GHz or higher |
2 GB |
Microsoft Windows Server 2016 Essentials / Standard RTM |
64-bit (x64) processor with a clock speed of 1.4 GHz or higher |
2 GB |
Microsoft Windows Server 2012 R2 Foundation / Essentials / Standard |
64-bit (x64) processor with a clock speed of 1.4 GHz or higher |
4 GB |
Microsoft Windows Server 2012 Foundation / Essentials / Standard |
64-bit (x64) processor with a clock speed of 1.4 GHz or higher |
4 GB |
Microsoft Windows Small Business Server 2011 Essentials / Standard Service Pack 1 or later |
64-bit (x64) processor with a clock speed of 2 GHz or higher |
8 GB |
Microsoft Windows Server 2008 R2 Foundation / Standard / Enterprise Service Pack 1 or later |
64-bit (x64) processor with a clock speed of 1.4 GHz or higher or dual-core processor with a clock speed of 1.4 GHz or higher |
512 MB |
Compatibility with other Kaspersky applications
Kaspersky VPN functionality is not available in some regions.
Kaspersky Small Office Security is compatible with the following Kaspersky applications:
- Kaspersky Safe Kids 1.5 and Safe Kids 2023
- Kaspersky Password Manager 10.0, 10.1, 10.2, 10.3, 2023, 2023.1, 2023.2
- Kaspersky Software Updater 2.1
- Kaspersky Virus Removal Tool 2015, 2020
- Kaspersky VPN Secure Connection 4.0, 5.0, 5.1, 5.2, 5.3, 5.4, 5.5, 5.6, 5.7, 5.8, 5.9, 5.13, 5.14, 5.15
Kaspersky Small Office Security that is installed on a file server is compatible with Kaspersky Security for Microsoft Exchange Servers 9.0 Maintenance Release 6 or higher (including hotfix 1) and Kaspersky Security for Microsoft Exchange Servers 9.0 Maintenance Release 6. For proper operation of Kaspersky Small Office Security File Server together with those applications:
- Disable Mail Anti-Virus.
- Disable Safe Browsing or in the Safe Browsing settings add the web addresses of Exchange Web Services to the list of trusted URLs (Safe Browsing settings → Advanced Settings → Trusted URLs).
How to install the application
Kaspersky created a special version of the application for residents of the U.S. state of California. If you are a resident of the U.S. state of California, you need to download and install this version of the application.
The application is installed to your computer in interactive mode using the Setup Wizard.
Installation on a file server or personal computer is performed from the same installation package. The application will operate in Personal Computer mode if option Use to protect Terminal server - RDTS is selected during installation. For more details, please refer to the Comparison of application functions depending on the type of operating system section.
The Wizard consists of a series of windows (steps). The number and sequence of steps in the Wizard depend on the region where you install the application. In some regions, the Wizard prompts you to accept additional agreements regarding how your personal data is processed. To stop the Wizard's activity at any step of installation, close the Wizard window.
If the application will be used to protect more than one computer (with the maximum number of computers defined by the terms of the End User License Agreement), the installation procedure will be identical on all computers.
To install the application on your computer,
- If you are using an installation disk, insert the disk into the disk drive and follow the instructions on your screen.
- If you have downloaded the application from the Internet, launch it. The application is then installed using the standard Setup Wizard. In this case, the Wizard displays several additional installation steps for some localization languages.
You can also install the application from the command prompt.
The Setup Wizard goes through the following steps:
- Starting installation
During this step, the Wizard prompts you to install the application.
During installation of Kaspersky Small Office Security, you can additionally install the following applications:
- Kaspersky VPN Secure Connection, which enables Kaspersky VPN functionality using Virtual Private Network (VPN) technology.
Kaspersky VPN functionality is not available in some regions.
- Kaspersky Password Manager for protecting passwords.
You can uninstall Kaspersky VPN Secure Connection and Kaspersky Password Manager independently of Kaspersky Small Office Security.
Depending on the installation type and the localization language, during this step the Wizard may prompt you to view the End User License Agreement concluded between you and Kaspersky, and ask whether you want to participate in Kaspersky Security Network.
- Installing the application
Installation of the application can take some time. Wait for it to finish. Upon installation completion, the Setup Wizard automatically proceeds to the next step.
- Completing the installation
During this step, the Wizard informs you of the completion of application installation.
All necessary application components will be automatically started immediately after installation is complete.
In some cases, you may need to restart your operating system to complete installation.
Along with the application, plug-ins for browsers are installed to ensure safe Internet browsing.
How to activate the application
The Activation Wizard is started at the first launch of Kaspersky Small Office Security.
Activation is the process of making operational a fully functional version of the application for a specified period of time.
Remote management of licensing and protection of connected devices becomes available only after you create the account of the organization's manager or administrator on Kaspersky Small Office Security Management Console. You can create an account in the account connection window during application activation. This account will be used to install Kaspersky Small Office Security on computers and mobile devices of employees. After creating the account, register your license for Kaspersky Small Office Security on Kaspersky Small Office Security Management Console.
To activate the application:
The following options for Kaspersky Small Office Security activation are offered:
- If you have purchased a license to use the application, enter the activation code in the text box and click Activate.
- If your account has a current license, click Receive license from your account.
Enter your email address and password and connect to the Kaspersky Small Office Security Management Console to activate the application.
- If you want to install a trial version of the application before you make the decision to purchase a license, click Try for free. You will be able to use the application and all of its features during a short evaluation period. When the trial license expires, the trial version of the application cannot be activated for a second time.
During application activation, you may have to register on Kaspersky Small Office Security Management Console. You can create an account in the connection window.
An Internet connection is required for activation of the application.
Page top
Kaspersky Protection browser extension
In order for Kaspersky Small Office Security to fully support browsers, the Kaspersky Protection extension must be installed and enabled in the browsers. The Kaspersky Protection extension injects a script into the web page opened in Protected Browser and into traffic. The application uses this script to interact with the web page and to transmit data to banks whose websites are protected by the Safe Money component. The application protects data transmitted by the script using a digital signature. The application can embed the script without using the Kaspersky Protection extension.
The application signs data transmitted by the script using the installed anti-virus databases and requests to Kaspersky Security Network. The application sends requests to Kaspersky Security Network regardless of whether or not you accepted the terms of the Kaspersky Security Network Statement.
When working with your browser, the Kaspersky Protection extension allows you to:
Inform about suspected phishing
To report a suspected phishing website:
- Make sure you are on the page that you suspect is a phishing page.
- In the toolbar of the browser, click
 Kaspersky Protection.
 - In the extension menu, select Inform about suspected phishing.
- This opens a window; make sure the window displays the web address of the website you suspect of phishing.
- Click Inform.
Your report will be delivered to Kaspersky Security Network.
To inform about a website problem:
- Make sure you are on the page that you want to report as problematic.
- In the toolbar of the browser, click Kaspersky Protection.
- In the extension menu, select Inform about website problem.
- This opens a window; make sure the window displays the web address of the website.
- Describe the problem in the text box.
- Click Inform.
The message is delivered.
Installing the Kaspersky Protection extension in Chromium-based Microsoft Edge, Mozilla Firefox, and Google Chrome
Automatic installation of Kaspersky Protection extension in Chromium-based Microsoft Edge, Mozilla Firefox, and Google Chrome is not available. You must download and install the Kaspersky Protection extension manually. You can download and install the extension from the notification window that is displayed when you start the browser for the first time after installing the application. Alternatively, you can download and install the extension from the application window.
Yandex Browser support
When using Yandex Browser, the following application components are operating:
- Protected Browser;
- URL Advisor;
- Safe Browsing;
- Anti-Phishing.
The Private Browsing and Anti-Banner components operate but cannot be configured in Yandex Browser.
Internet Explorer support
Kaspersky Protection does not support Internet Explorer.
Page top
How to uninstall the application
After removing the application, your computer and personal data will be unprotected.
The application is removed using the Setup Wizard.
How to uninstall the application in Windows 7
How to uninstall the application in Windows 8 or later
Removal involves the following steps:
- To remove the application, you must enter the password for accessing the application settings. If you cannot specify the password for any reason, application removal will be prohibited.
This step is displayed if a password has been set for application removal.
- Saving data for future use
During this step you can specify which of the data used by the application you want to keep for further use during the next installation of the application (for example, when installing a newer version of the application).
You can save the following data:
- License details lets you use the existing license in the future, if it will not have expired at the time of installation, instead of activating the application.
- Quarantine files are files scanned by the application and moved to Quarantine.
After the application is removed from the computer, quarantined files become unavailable. To perform operations with these files, Kaspersky Small Office Security must be installed.
- Operational settings of the application are values of application settings selected when configuring the application.
You can also export the protection settings at the command prompt, by using the following command:
avp.com EXPORT <file_name>. - iChecker data are files that contain information about objects that have already been scanned using .
- Anti-Spam databases are databases with specimens of spam messages added by the user.
- Secret Vault are files placed in storage using Secret Vault functionality.
Transfer of the settings from a Personal Computer application to the File Server one and vice versa is not supported.
- Confirming removal
Since removing the application threatens the security of your computer and personal data, you will be asked to confirm your intention to remove the application. To do this, click the Remove button.
- Completing removal
During this step, the Wizard removes the application from your computer. Wait until removal is complete.
This functionality may be unavailable in some regions.
During removal of the application, you must restart your operating system. If you cancel an immediate restart, completion of the removal procedure is postponed until the operating system is restarted or the computer is turned off and then started up.
How to update Kaspersky Small Office Security
The application is updated automatically if you select the Automatically update mode in the update settings window (Security → Anti-Virus Database Update → Databases update schedule).
The application is automatically updated if you install a new version of the application over the previous one. When you update the application, all your settings are preserved.
If the user has paused scanning tasks at the moment when the update arrives, the application will force these tasks to stop and will run the update. Active scanning tasks are not forced to stop.
Installing Kaspersky Small Office Security over Kaspersky Small Office Security 5, 6 or 7
If you install Kaspersky Small Office Security on a computer where Kaspersky Small Office Security 5, 6, or 7 is already installed, the following types of data will be unavailable:
- Anti-Spam databases
- Files in Quarantine
If you have a current license for a previous version of Kaspersky Small Office Security, you do not need to activate the application. The Setup Wizard will automatically retrieve information about the license for the previous version of Kaspersky Small Office Security and apply it during installation of Kaspersky Small Office Security.
While downloading the update, the application compares the previous and new versions of the End User License Agreement, Kaspersky Security Network Statement, and Statement regarding data processing for marketing purposes. If the texts of agreements and/or statements are not identical, the application prompts you to read and accept them again.
Certain limitations apply to the upgrade from the previous version.
If you had previously created a container in Kaspersky Small Office Security 4, on first access to the container, Kaspersky Small Office Security converts it to a Secret Vault. Files in the Secret Vault become available when the conversion is complete. It may take a long time to convert containers to Secret Vaults.
The application can be upgraded if the following versions of Kaspersky Small Office Security are installed on your computer:
- Kaspersky Small Office Security 5
- Kaspersky Small Office Security 6
- Kaspersky Small Office Security 7
Limitations on upgrades from a previous version of the application
Upgrading from Kaspersky Small Office Security entails the following limitations and special considerations:
- After an upgrade from a previous version, Kaspersky Small Office Security starts automatically even if automatic startup of the application is disabled in the settings that have been saved. When the operating system restarts afterwards, Kaspersky Small Office Security does not start automatically if automatic startup of the application is disabled in the settings that have been saved.
- If there was no System Watcher component in the previous version of Kaspersky Small Office Security on a file server, this component will be enabled by default when upgrading to a new version. If you upgrade from a version of Kaspersky Small Office Security which already includes the System Watcher component, the settings of this component are saved.
About the End User License Agreement
The End User License Agreement (License Agreement) is a binding agreement between you and AO Kaspersky Lab that stipulates the terms on which you may use the application.
Carefully read the License Agreement before you start using the application.
By confirming that you agree with the License Agreement when installing the application or starting it for the first time, you accept the terms of the License Agreement. If you do not accept the terms of the License Agreement, cancel application installation and do not use the application.
Page top
About the license
Functionality is not available in some regions.
A license is a time-limited right to use Kaspersky Small Office Security, granted under the terms of the signed License Contract (End User License Agreement).
The scope of services and validity period depend on the license under which the application is used.
The following license types are provided:
- Trial
A free license intended for trying out the application. A trial license usually has a short term.
When a trial license expires, all Kaspersky Small Office Security features become disabled. To continue using the application, you need to purchase a commercial license.
You can use the application under a trial license for only one trial period.
- Commercial
A paid license.
When a commercial license expires, key features of the application become disabled. To continue using Kaspersky Small Office Security, you must renew your commercial license. After a commercial license expires, you cannot continue using the application and must remove it from your device.
We recommend renewing your license before it expires, to ensure uninterrupted protection against all security threats.
Before purchasing a license, you can get a free trial version of Kaspersky Small Office Security. The trial version of Kaspersky Small Office Security remains functional during a short evaluation period. After the evaluation period expires, all the features of Kaspersky Small Office Security are disabled. To continue using the application, you must purchase a license.
Kaspersky Small Office Security can be installed on the following devices:
- Microsoft Windows
- Microsoft Windows Server
- Android (Kaspersky Small Office Security version for that operating system)
- macOS (Kaspersky Small Office Security version for that operating system)
A license for Kaspersky Small Office Security entitles you to use Kaspersky Password Manager.
You also get access to Kaspersky Small Office Security Management Console for managing device protection.
Page top
About the subscription
The subscription determines your application usage settings (subscription expiration date and the number of protected devices).
You can subscribe through a service provider (for example, your Internet provider). You can pause or resume your subscription, renew it automatically, or cancel it. You can manage your subscription in your account on the website of the service provider through which you subscribed. Depending on the service provider, the set of subscription management options may vary.
To activate the subscription on your device, apply the activation code received from your service provider. In some cases, an activation code can be downloaded and applied automatically.
If another license is already active in the application when you get a subscription from a service provider, the application will be used with the subscription from the service provider. Your current license can be used on a different device until it expires.
A subscription can be unlimited (with no expiration date) or limited (for example, to one year). Unlimited subscriptions are renewed automatically as long as timely prepayment has been made to the service provider. To continue using the application after a limited subscription expires, you must take steps to renew it.
When using the application with a subscription that you got through a service provider, you cannot add a reserve activation code to keep the subscription going.
If you did not renew the subscription, or the service provider was unable to renew your subscription automatically, once it expires, you may be granted a grace period to renew the subscription; the functionality of the application remains available during the grace period. The application may switch to limited functionality mode when the grace period expires. If the service provider does not provide a grace period or a limited functionality mode, all functionality of the application stops being available when the subscription expires.
About the activation code
An activation code is a code that you receive when you purchase a license for Kaspersky Small Office Security. This code is required for activating the application.
The activation code is a unique sequence of twenty digits and Latin letters in the format xxxxx-xxxxx-xxxxx-xxxxx.
Depending on how you purchased the application, you can obtain the activation code in one of the following ways:
- When you purchase a boxed version of Kaspersky Small Office Security, an activation code is provided in the manual or on the retail box that contains the installation CD.
- When you purchase Kaspersky Small Office Security from an online store, an activation code is emailed to the address that you have specified when ordering.
The license term expiration countdown starts from the date when you activate the application. If you have purchased a license for the use of Kaspersky Small Office Security on several devices, the license term starts counting down from the moment you first apply the activation code.
We recommend that you create a Kaspersky Small Office Security Management Console account so that you do not lose your activation code when you reinstall your operating system, install the application on a new device or reinstall the application on your current device. You can create a Kaspersky Small Office Security Management Console account at the time of application installation and activation. If you didn't create a Kaspersky Small Office Security Management Console account at the time of application installation and activation, you can also create an account in the application after you install it.
If you delete your activation code by mistake or lose it, you can try to restore it.
Page top
How to restore activation codes
If you have lost an activation code that was previously provided to you, you can restore it using one of the following methods:
- If you have a Kaspersky Small Office Security Management Console account, you can find your activation codes in the Licenses section of the Kaspersky Small Office Security Management Console website.
- If you have do not have a Kaspersky Small Office Security Management Console account, but the application is installed and activated on one of your devices, you can create a Kaspersky Small Office Security Management Console account on this device and use it to connect to Kaspersky Small Office Security Management Console. The application sends information about your license to the account. The activation code will be displayed in the Licenses section of the Kaspersky Small Office Security Management Console website.
- If you have neither a Kaspersky Small Office Security Management Console account nor an activated application on any of your devices, then please contact Technical Support.
How to purchase or renew a license
If your license has expired, you can renew it in the user interface of the application. If you were using a trial version of the application, you can purchase a license.
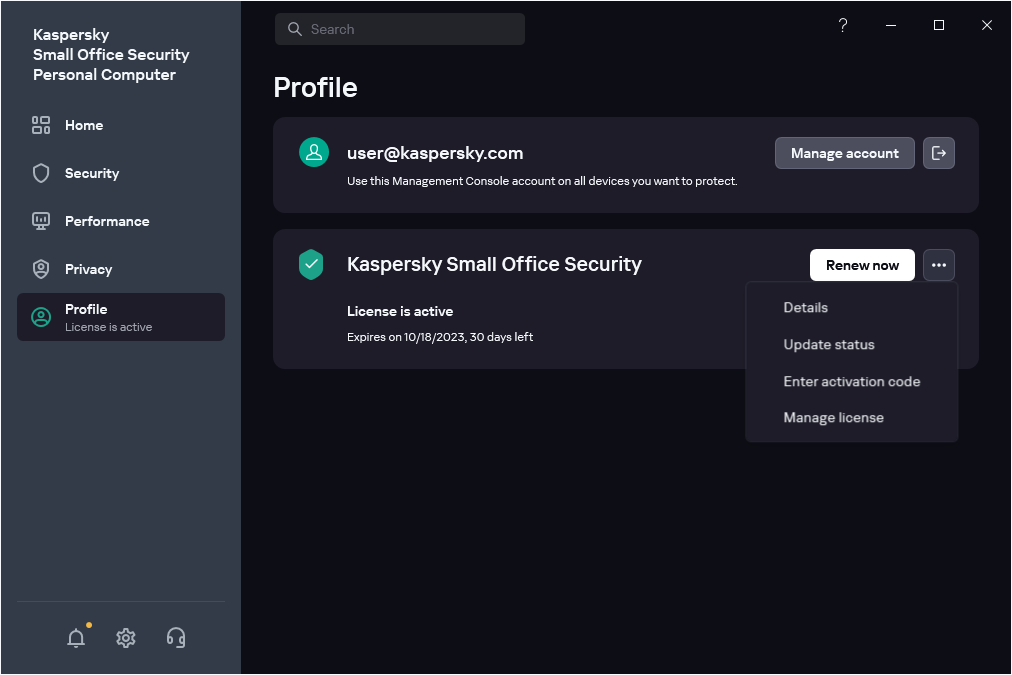
To purchase or renew a license:
- Open the main application window.
- Go to the Profile section and do one of the following:
- To renew the license, click Renew now.
- If your trial license has expired, click Buy now.
This opens the website of Kaspersky Online Store or a partner company where you can renew or purchase a license.
- When you renew or purchase the license, an activation code is sent to the specified email address.
- Activate the application using that activation code.
Renewing the license using a reserve activation code
If you have a new activation code, you can add it to the application to be used as a reserve code. When the current license expires, the application is activated automatically with the reserve activation code. This way, you can ensure uninterrupted protection for your device.
There are cases when you cannot add a reserve activation code.
To add a reserve activation code:
- Open the main application window.
- Go to the Profile section.
- Under license information, click the three dots and select Enter activation code.
- In the entry field, enter the activation code and click the Save activation code button.
The reserve activation code will be displayed in the License details window.
If you enter a reserve activation code that was issued for multiple devices, you must follow the steps to apply the reserve code on all devices where you want to renew the license automatically.
An attempt to activate and fully verify the reserve code will be made when the current license expires, or if the license key is removed from the device. The application verifies the expiration date of the reserve activation code, the maximum number of devices that the license can be used on, as well as the compatibility of the license with the installed version of the application. During the activation of a reserve activation code, a connection to the Kaspersky Small Office Security Management Console account may be required.
If the reserve activation code that you are adding has already been applied on this device or on another device, the activation date for the purpose of renewing the license using the reserve code is the date on which the application was activated with this code for the first time. To renew the license, add a reserve activation code that has an expiration date later than the expiration date of the license currently used by the application.
If the application did not automatically activate with a reserve activation code, you can activate it manually by clicking the Try again button. If the current license key is blocked, you can activate the application using a reserve activation code by clicking Activate now.
It can take up to 24 hours after purchase before the correct license status is displayed.
Page top
About limited functionality mode
The table below shows which Kaspersky Small Office Security features are available and which are unavailable when the application is in limited functionality mode. If the value in the Limited functionality mode column is "yes", this means that the relevant functionality is available in limited functionality mode. If the value in the Limited functionality mode column is "no", the relevant functionality is unavailable. Additional information is available in the Restrictions column.
Functions of Kaspersky Small Office Security in limited functionality mode
Functionality |
Restrictions |
Limited functionality mode |
|---|---|---|
Virus scan |
|
yes |
Updating anti-virus databases and application modules |
Only critical updates are available. |
no |
Application Vulnerability Scan |
|
yes |
Safe Browsing |
|
yes on Windows 7, 8 / no on Windows 10, 11 |
File Anti-Virus |
|
yes on Windows 7, 8 / no on Windows 10, 11 |
Mail Anti-Virus |
|
yes on Windows 7, 8 / no on Windows 10, 11 |
System Watcher |
|
yes on Windows 7, 8 / no on Windows 10, 11 |
Checking of the reputation of files in Kaspersky Security Network |
|
no |
Secure Data Input |
|
no |
Emergency Recovery |
Kaspersky Rescue Disk can be downloaded in the application interface. |
yes |
Exclusions and actions on object detection |
|
yes |
Network settings |
|
yes |
Reports and Quarantine |
|
yes |
Application display settings |
|
yes |
Do not Disturb Mode |
|
no |
Focused Work Mode |
|
no |
Intrusion Prevention |
|
yes on Windows 7, 8 / no on Windows 10, 11 |
Firewall |
|
yes |
Network Attack Blocker |
|
yes |
Anti-Spam |
|
yes |
Anti-Banner |
|
yes |
Safe Money |
|
no |
Private Browsing |
|
yes |
Privacy Cleaner |
|
no |
Webcam Protection |
|
yes on Windows 7, 8 / no on Windows 10, 11 |
Network Monitor |
|
yes |
Application Manager |
|
no |
Password Manager |
|
yes |
File Shredder |
|
yes |
Secret Vault |
Only access to data in previously created secret vaults is available. |
no |
Backup and Restore |
Only recovery of data from previously created backup copies is available. |
no |
App Updater |
|
no |
Microsoft Windows Troubleshooting |
|
yes |
Current Activity |
|
no |
Battery Saver |
|
no |
Stalkerware Detection |
|
no |
Unwanted App Installation Blocker |
|
no |
Adware Remover |
|
no |
AMSI Protection |
|
yes, only on Windows 10, 11 |
Manage Settings |
|
yes |
Password protection of application settings |
|
yes |
PC resource consumption settings |
|
yes |
History |
|
yes |
Recommendations |
|
yes |
Security news |
|
yes |
Web Policy Management |
Only report viewing is available. |
no |
Contacting Technical Support |
|
yes |
Remote management of computer protection
This section provides information on remote management of computer protection at your organization via Kaspersky Small Office Security Management Console.
About remote management of computer protection
If Kaspersky Small Office Security is installed on computers of your organization, you can manage protection of such computers remotely. Computer protection can be managed remotely via the Kaspersky Small Office Security Management Console website.
The sequence for configuring remote management of computers is as follows:
- Registering the administrator account via the Kaspersky Small Office Security Management Console website
- Registering the license for Kaspersky Small Office Security via the Kaspersky Small Office Security Management Console website
- Connecting devices whose protection you want to manage remotely to the Kaspersky Small Office Security Management Console website in the administrator account
The Kaspersky Small Office Security Management Console website lets you perform the following tasks vital to computer security at your organization:
- View the list of computer security problems and fix them remotely
- Scan the computer for viruses and other threats
- Update anti-virus databases and application modules
- Configure Kaspersky Small Office Security components
If a computer scan is started from the Kaspersky Small Office Security Management Console website, Kaspersky Small Office Security processes objects that are detected automatically without your involvement. On detecting a virus or other threat, Kaspersky Small Office Security attempts to perform disinfection without rebooting the computer. If disinfection without restarting the computer is impossible, the list of computer security problems on the Kaspersky Small Office Security Management Console website shows a message to the effect that the computer needs restarting to perform disinfection.
If the list of detected objects on the Kaspersky Small Office Security Management Console website includes more than 10 items, they are grouped. In this case, the detected objects can be processed via the website only together without the ability to examine each object separately. To view separately objects in this case, you are advised to use the interface of the application installed on the computer.
Page top
About Kaspersky Small Office Security Management Console account
To sign in to the Kaspersky Small Office Security Management Console website as well as to use the website and certain Kaspersky applications, you need an account.
If you do not have an account yet, you can create one on the website or in the application in the process of connecting the device to your account.
Connecting the computer to Kaspersky Small Office Security Management Console
You can sign in to the Kaspersky Small Office Security Management Console account using your email address and password, or with your Google, Facebook, or Apple account. If you already have an account, you can configure quick sign-in with your Google, Facebook, or Apple account in the window used for connecting your device to the Kaspersky Small Office Security Management Console account. This is possible if, when creating the Kaspersky Small Office Security Management Console account, you used the email address from your Google, Facebook, or Apple account.
Signing in with Facebook, Google and Apple is not available in some regions. For more details on restrictions in Russia, please see this article (available only in English and Russian).
To connect the computer to Kaspersky Small Office Security Management Console:
- Install Kaspersky Small Office Security on the computer whose protection you want to manage.
- Open the main application window.
- Go to the Profile section.
- In the Sign in to Management Console block, click the Sign in button.
- Enter the administrator password. This step is available if protection of access to application management is enabled.
- In the account connection window, select the connection method that you find the most convenient:
- Sign in with an email address. Enter your email address in the text box. A message with a password creation link is sent to the specified email address.
If you have configured two-step verification in your Kaspersky Small Office Security Management Console account, a text message containing the verification code is sent to your phone. In the entry field, enter the verification code and click Continue.
- Sign in with Google, Facebook, or Apple account.
- Click Sign in with Google, Sign in with Facebook, or Sign in with Apple.
This opens a browser window; in that window, sign in to your Google, Facebook, or Apple account and allow the application to gain access to your email address.
If you do not have a Google, Facebook, or Apple account, you can create one and proceed with configuring quick sign-in to Kaspersky Small Office Security Management Console.
If two-step verification is configured for your Kaspersky Small Office Security Management Console account, configure quick sign-in in your account on the Kaspersky Small Office Security Management Console website then go back to the application and sign in with Google, Facebook, or Apple.
If you are using the Microsoft Edge browser, to configure the sign-in to Kaspersky Small Office Security Management Console, you will need a version of Microsoft Edge based on Chromium 77.x or later. In case of a connection error, select a different browser as your default browser, install the latest version of the Microsoft Edge browser, or update the Microsoft Windows operating system.
- Go back to the application and proceed with creating the account by clicking Continue. Follow subsequent on-screen instructions.
Your device will be connected to your Kaspersky Small Office Security Management Console account. In addition, you can set up a password for your account on the Kaspersky Small Office Security Management Console website.
- Click Sign in with Google, Sign in with Facebook, or Sign in with Apple.
In some regions, the application prompts you to read and accept the Statement regarding data processing for purpose of using Web-Portal. If you accept the terms of the statement, click Accept.
- Sign in with an email address. Enter your email address in the text box. A message with a password creation link is sent to the specified email address.
After a successful connection, the Profile section displays information about your connection to Kaspersky Small Office Security Management Console. You can now manage protection of this computer remotely via Kaspersky Small Office Security Management Console.
Page top
How to configure checking password strength for remote access to the file server
Kaspersky Small Office Security checks the strength of the password of your Windows account that is used for remote access to the file server.
Kaspersky Small Office Security uses the following criteria to check password strength:
- Time of last password change
- Minimum number of characters that a password should contain
To configure password strength checking:
- Open the main application window.
- Click in the lower part of the main window.
This opens the Settings window.
- Go to the Privacy settings section.
- In the Privacy settings window, click the Secure Data Input button.
- In the Windows account password strength check section, perform the following actions:
- Select the Warn about out-of-date password in ... check box and then select a period of time after which the application will notify you about the outdated password.
- In the Recommend changing password in ... drop-down list, select a period of time after which the application will recommend you to change your password.
- Select the Warn if minimum allowed password length in Windows settings is less than ... check box if you want the application to check the minimum password length set in the Windows policy for this device. If the password length in the Windows policy is less than the value specified here, Kaspersky Small Office Security will show you a notification that suggests increasing the minimum password length in the Windows policy.
Basic functionality of the application
In this section you will learn about basic setup of the application, including configuring notifications and user interface, and how to fix security issues that may arise.
Assessing computer protection status and resolving security issues
Problems with computer protection are symbolized by an indicator located in the upper part of the main application window. Green indicates that your computer is protected. Yellow indicates that there are protection problems and red indicates that your computer's security is at serious risk. You are advised to fix problems and security threats immediately.
You can open the Notification Center window by clicking the Details button in the main application window. This window provides detailed information about the protection status of the computer and suggests possible actions for rectifying problems and threats.
Problems with protection are grouped by categories. For each problem, a list is displayed of actions that you can take to solve the problem.
The Status section displays information about the computer protection status and subscription status. If problems are detected that must be fixed, a Fix button is displayed next to the notification; you can fix security problems by clicking this button.
The Recommendations section lists actions that should be performed to optimize operation of the application and use it more effectively.
The News section displays cybersecurity news.
Clicking the Show N ignored notifications button displays notifications to which the Ignore action has been applied. Ignored notifications do not affect the color of the protection indicator in the main application window.
How to fix security issues on your PC
To fix security issues on your PC:
- Open the main application window.
- Click on the Details link in the upper part of the main application window to go to the Notification Center window.
- Go to the Status section. This section displays security issues on your PC.
- Select an issue from the list and click an action button, e.g. Fix.
- Select Ignore from the drop-down list if you do not want to fix this issue now. You can view the list of ignored notifications later by clicking the Show N ignored notifications button.
- Go to the Recommendations section. This section displays recommendations that are not mandatory but will help you optimize your usage of the application and better protect your PC.
- Select a suggestion from the list.
- Click the button next to a suggested action; for example, click the Enable button next to the Want to get rid of noisy pop-up ads? suggestion.
- Go to the News section. In this section, you will find cybersecurity news. Use the navigation buttons to read the next news item or to go back to the previous news.
Application activity log and detailed report
In the main window, you can view a brief overview of all actions performed by the application in the course of operation. This information helps you understand exactly how the application protects your device and your data.
To view the timeline:
- Open the main application window.
In the Home section, look under Timeline to see a brief activity history of the application.
- To view the activity history of the application, click View all.
This opens a window with a detailed description of actions taken by the application and the time when events occurred.
- To view a detailed report of the application, click View reports.
This takes you to the Reports window.
You can also view the detailed report by clicking Reports in the Security section. The Reports window displays data in the form of a table. For convenient viewing of reports, you can select various filtering options.
How to configure the application interface
This section contains information on how to configure the interface of the application.
How to configure application notifications
Notifications that appear in the taskbar notification area inform you of application events that require your attention. Depending on how critical the event is, you may receive the following types of notifications:
- Critical notifications inform you of events that have critical importance for the computer's security, such as detection of a malicious object or dangerous activity in the operating system. Windows used for critical notifications and pop-up messages are red.
- Important notifications inform you of events that are potentially important for the computer's security, such as detection of a probably infected object or suspicious activity in the operating system. Windows used for important notifications and pop-up messages are yellow.
- Information notifications inform you of events that do not have critical importance for the computer's security. Windows used for information notifications and pop-up messages are green.
If a notification is displayed on the screen, you should select one of the options that are suggested in the notification. The optimal option is the one recommended as the default by Kaspersky experts. A notification can be closed automatically when the computer is restarted, when Kaspersky Small Office Security is quit, or in Connected Standby mode in Windows 8. Intrusion Prevention notifications are closed automatically after 500 seconds. Notifications about the startup of the application are closed after 1 hour. When a notification is closed automatically, Kaspersky Small Office Security performs the default recommended action.
Click the links below to learn how to configure the application notifications.
How to configure delivery of notifications
To create notification rules:
- Open the main application window.
- Click in the lower part of the main window.
This opens the Settings window.
- Select the Interface settings section.
- In the Notifications block, click the Notification settings link to proceed to the notification settings window.
- Select the component in the list on the left.
The right part of the window displays a list of events that may occur during operation of this component.
- Choose an event from the list and select the following check boxes:
- Save in local report. When the event occurs, information about this event will be written to a report, which is stored on the local computer.
- Notify on screen. When the event occurs, a pop-up notification is shown above the application icon in the taskbar notification area.
You can use the drop-down list in the lower-left corner to indicate which notifications you want to save to the local report:
- Default. When this option is selected, the generated report will save the events chosen by Kaspersky experts.
- Manually. This option is selected automatically if you configure the capability to manually save events to a report.
- Critical. When this option is selected, the generated report will save Critical events (including Application malfunction events for the System audit and Intrusion Prevention component).
- Important. When this option is selected, the generated report will save Critical events (including Application malfunction events for the System audit and Intrusion Prevention component) and Warnings.
- Informational. When this option is selected, the generated report will save all events.
Notifications about all changes related to event The application works and processes data under relevant laws and uses the appropriate infrastructure, are always displayed on the screen in the taskbar area. Clearing the checkbox does not change the setting.
How to configure delivery of notifications containing news and special offers from Kaspersky
If you want to stay informed about the latest cybersecurity news and receive special offers from Kaspersky:
- Open the main application window.
- Click in the lower part of the main window.
This opens the Settings window.
- Go to the Interface settings section.
- In the News notifications block, select the Receive informational messages and advertisements from Kaspersky check box if you want to receive notifications about computer security news.
- In the Promotional materials section, perform one of the following:
- Select the Receive informational messages and advertisements from Kaspersky check box if you want to receive notifications about computer security news.
- Select the Show information about special offers on websites check box if you want to receive the best offers when visiting Kaspersky websites.
- Select the Receive informational messages and advertisements after the current license expires check box if you want to receive notifications about security news from Kaspersky after your license expires.
How to enable notification sounds
- Open the main application window.
- Click in the lower part of the main window.
This opens the Settings window.
- Select the Interface settings section.
- In the Notifications block, select the Enable notification sounds check box.
To change the default audio signal to the "pig squeal", type IDKFA in the About window.
Notification sounds are not played in Microsoft Windows 10.
How to change the application design theme
The capability to change the application design theme is not available in some regions.
To change the application design theme:
- Open the main application window.
- Click in the lower part of the main window.
This opens the Settings window.
- Select the Interface settings section.
- In the Design theme block, select the Use a custom design theme check box if you want to use a custom design theme. Click Select and enter the path to the ZIP archive or folder containing the files with the custom design theme.
The design theme is applied after application restart.
How to configure the application icon
In this section, you will learn about configuring the application icon on your desktop and in the notification area.
How to change the application icon
To change the application icon:
- Open the main application window.
- Click in the lower part of the main window.
This opens the Settings window.
- Select the Interface settings section.
- In the Application icon block, choose one of the following options:
- Standard icon. When this option is selected, the desktop and the notification area will display the standard application icon.
- Midori Kuma. When this option is selected, the desktop and the notification area will display the icon containing an image of the bear mascot known as Midori Kuma.
If you want to return to the traditional K-letter application icon, type IDDQD in the About window. To apply changes, you need to restart the computer.
In Windows 10, you need to manually restart your computer to apply changes. If you turn off / turn on the computer, changes will not be applied.
How to change the icon in the notification area depending on the protection status
To change the Kaspersky Small Office Security icon in the notification area depending on the application status:
- Open the main application window.
- Click in the lower part of the main window.
This opens the Settings window.
- Select the Interface settings section.
- In the Show application's status in notifications area block, choose a status and select a check box.
When the application switches to a state corresponding to the selected status, the application icon in the notification area will change.
How to password-protect access to the application management functions
A single computer may be shared by several users with various levels of experience and computer literacy. Unrestricted access of different users to the application and its settings may compromise the level of computer security.
To restrict access to the application, you can define an administrator password for the KLAdmin account. This user has unlimited rights to manage and modify the settings of the application, and to assign application access permissions to other users. After you create a password for KLAdmin, you can assign application access permissions to various users or groups of users.
To create a KLAdmin administrator password:
- Open the main application window.
- Click in the lower part of the main window.
This opens the Settings window.
- Select the Interface settings section.
- Switch the Password protection toggle to On.
- In the opened window, fill in the User name (KLAdmin is recommended), Enter password and Confirm password fields.
Tips on creating a strong password:
- The password must contain at least eight and no more than 128 characters.
- The password contains at least one number.
- The password contains both lowercase and uppercase letters.
- The password must contain at least one special character (for example: ! @ # $ % ^ & *).
- Click the Save button.
A forgotten password cannot be recovered. If you have forgotten your password, contact Technical Support to recover access to the application settings.
The user KLAdmin can assign permissions to the following users and user groups:
Everyoneuser group. This group includes all users of the operating system. If you grant this group permission to perform a particular action, then group users will always be allowed to perform this action, even if a specific user or a user group belonging to theEveryoneuser group does not have individual permission to perform the action. By default, members of theEveryonegroup are not allowed to perform any actions.<system user>. By default, the selected user is not allowed to perform any actions. This means that when you try to perform a prohibited action, you will be prompted to enter yourKLAdminaccount password.
How to add a user or user group
How to edit permissions for a user or user group
How to allow an action for an individual user or user group
How to forbid an action for an individual user or user group
When you try to perform any action from the list in the Add permissions for a user or a group window, the application will ask you to enter a password. In the password window, enter the username and password for the current user account. The action will be executed if the specified account has permission to perform this action. In the password window, you can specify the time interval during which the user will not have to reenter the password.
In the password window, you can switch the input language only by pressing ALT+SHIFT. Any other shortcuts will not switch the input language, even if that shortcut is configured in the operating system.
How to restore the default settings of the application
You can restore the application settings recommended by Kaspersky experts at any time. When the settings are restored, the Optimal security level is set for all protection components.
To restore the default settings of the application:
- Open the main application window.
- Click in the lower part of the main window.
This opens the Settings window.
- Select the Manage settings section.
- Click the Restore link to run the Settings Restore Wizard.
- Click the Next button.
The window of the Wizard shows the progress of restoring the application settings back to the default settings configured by Kaspersky experts.
- After the default application settings restoration process is finished, click Done.
How to apply the application settings on another computer
Having configured Kaspersky Small Office Security in a particular way, you can then apply the settings on another computer. As a result, Kaspersky Small Office Security will be configured identically on both computers.
Kaspersky Small Office Security settings are saved in a configuration file that you can move from one computer to another.
The settings of Kaspersky Small Office Security are moved from one computer to another in three steps:
- Save Kaspersky Small Office Security settings to configuration file.
- Move the configuration file to the other computer (for example, by email or on a removable drive).
- Import the settings from the configuration file to Kaspersky Small Office Security that is installed on the other computer.
To export Kaspersky Small Office Security settings:
- Open the main application window.
- Click in the lower part of the main window.
This opens the Settings window.
- In the Settings window select the Manage settings section.
- Select Export.
- The Save window opens.
- Specify a name for the configuration file and click the Save button.
The application settings are now saved in the configuration file.
You can also export Kaspersky Small Office Security settings at the command prompt, by using the following command: avp.com EXPORT <file_name>.
During export of Kaspersky Small Office Security settings, website addresses that you added to Safe Money are saved only for the current user. During import of settings on another computer, website addresses are not saved.
To import settings to Kaspersky Small Office Security that is installed on another computer:
- On the other computer, open the main window of Kaspersky Small Office Security.
- Click in the lower part of the window.
This opens the Settings window.
- In the Settings window select the Manage settings section.
- Select Import.
The Open window opens.
- Specify a configuration file and click the Open button.
The settings are imported to Kaspersky Small Office Security that is installed on the other computer.
How to pause and resume computer protection
Pausing protection means temporarily disabling all protection components for some time.
When protection is paused or Kaspersky Small Office Security is not running, the activity of the applications running on your computer is monitored. Information about the results of monitoring of application activity is saved in the operating system. When Kaspersky Small Office Security is started again or protection is resumed, the application uses this information to protect your computer from malicious actions that may have been performed when protection was paused or when Kaspersky Small Office Security was not running. Information about the results of monitoring of application activity is stored indefinitely. This information is deleted if Kaspersky Small Office Security is removed from your computer.
To pause computer protection:
- In the context menu of Kaspersky Small Office Security icon located in the taskbar notification area, select the Pause protection item.
The Pause protection window opens.
- In the Pause protection window, select the time interval after which protection will be resumed:
- Pause for – protection is enabled after expiration of the time interval selected from the drop-down list.
- Pause until application restart – protection is enabled after the application is started again or the operating system is restarted (if the application automatically starts on startup).
- Pause – protection will be resumed when you decide to resume it.
- Click the Pause protection button and confirm your choice in the window that opens.
Searching the functionality of the application
You can search the functionality of the application in the header of the main window. Clicking the text box takes you to the Search results window.
The application searches:
- For exact matches with the text you entered; typos are not taken into account
- Among all names of functions and settings
Search results are displayed as cards which take you to the relevant screen of the application when clicked.
Page top
Security
Today's hackers are getting smarter in their target to break into your devices. New ransomware, phishing and other malware types call out for new cybersecurity solutions to get you a step ahead the growing threats. We created Kaspersky Small Office Security to help you stay on top of today's threats. Find out what you can do to feel secured.
Scanning the computer
During scanning, the application searches for infected files and malware. There are several types of scans that vary in their search duration and scope.
- Full Scan. Scans all areas of the computer. This scan requires a lot of time to complete.
- Quick Scan. Scans objects that are loaded when the operating system starts as well as system memory and boot files. This scan does not require a lot of time to complete.
- Selective Scan. Scans the selected file or folder.
- Removable drives scan. Scan of removable drives, such as hard drives and USB sticks connected to the computer.
- Instant File Scan. This option scans files from the context menu.
- Background Scan. Scan of system memory, the system partition, boot sectors, and startup objects, as well as rootkits search.
This functionality is unavailable if Kaspersky Small Office Security is installed on a file server.
- Application Vulnerability Scan. Scan the computer for vulnerabilities in applications that malware can exploit to infect your system.
After you install the application, we recommend that you perform a full scan of your computer.
How to run a Full Scan
During a full scan, the application scans the following objects by default:
- System memory;
- Objects loaded on operating system startup;
- System backup storage;
- Hard drives and removable drives.
We recommend running a full scan immediately after installing the application to your computer.
To run a Full Scan:
- Open the main window of the application and go to the Security section.
- In the Scan block, click the Choose scan button.
This opens the Scan window.
- In the Scan window select the Full Scan section.
- In the drop-down list next to the Run button, select the action to perform when the scan is complete.
- Click the Run button.
The application starts a full scan of your computer.
How to run a Custom Scan
A Selective Scan lets you scan a file, folder, or drive for viruses and other threats.
To run a Custom Scan:
- Open the main application window.
- Go to the Security section.
- In the Scan block, click the Choose scan button.
This opens the Scan window.
- In the Scan window select the Selective Scan section.
- Click the Select button and specify an object in the file or folder selection window that opens.
- Click the Run button.
How to run a Quick Scan
During a quick scan, the application scans the following objects by default:
- Objects loaded on operating system startup;
- System memory;
- Disk boot sectors.
To run a Quick Scan:
- Open the main window of the application and perform the following actions:
- Go to Home section, and click the Quick Scan button.
- Go to the Security section.
- In the Scan block, click the Choose scan button.
- This opens the Scan window.
- In the Scan window select the Quick Scan section.
- In the Quick Scan section, click the Run button.
The application starts a quick scan of your computer.
How to run a removable drive scan
Removable drives that you connect to the computer may contain viruses or other applications that present a threat. Kaspersky Small Office Security scans removable drives to prevent your computer from becoming infected. You can configure a removable drive scan to be started manually or automatically when a removable drive is connected to the computer. Automatic scanning of removable drives is enabled by default.
To run a removable drive scan manually:
- Open the main application window.
- Go to the Security section.
- In the Scan block, click the Choose scan button.
This opens the Scan window.
- In the Scan window select the Removable Drive Scan section.
- In the drop-down list, select the drive letter of the external device and click on the Run button.
The application will start scanning the connected device.
How to run a Context Menu File or Folder Scan
To run a Context Menu File or Folder Scan:
- Right-click on the file or folder that needs to be scanned.
- In the context menu that opens, select Scan for viruses.
The application will start scanning the selected file or folder.
In Microsoft Windows 11, you must expand the context menu of an object to see the application commands.
How to enable or disable a background scan
A Background scan is an automatic scan mode that does not display notifications. This scan requires fewer computer resources than other types of scans (for example, Full Scan). When in this mode, the application scans the system memory, system volumes, boot sectors and startup objects, and searches for rootkits.
This functionality is unavailable if Kaspersky Small Office Security is installed on a file server.
A background scan is started in the following cases:
- After the databases and application modules are updated
- 30 minutes after application launch
- Every six hours
- If the computer remains idle for five or more minutes (after the screen saver is started)
A background scan is interrupted when any of the following conditions is met:
- The computer becomes active again.
- The computer (laptop) switches to battery mode.
If a background scan has not been performed for over ten days, the scan is not stopped. When running a background scan, the application does not scan files whose contents are located in OneDrive cloud storage.
To enable or disable a background scan:
- Open the main application window.
- Go to the Security section.
- In the Scan block, click the Choose scan button.
This opens the Scan window.
- Click the icon in the Background scan block.
This opens the Background scan settings window.
- In the Background scan settings window, switch the toggle to On or Off.
How to create a scan schedule
To create a scan schedule:
- Open the main application window.
- Go to the Security section.
- In the Scan block, click the Choose scan button.
This opens the Scan window.
- In the Scan window, select the type of scan and click the icon.
- In the opened window, click the Scan schedule link to proceed to the Scan schedule window.
- In the Scan schedule window, in the Run scan list, select a period, such as Daily, and specify the time to start the scan.
A scan schedule cannot be created for the Scan from Context Menu or Background Scan.
How to search for vulnerabilities in applications installed on your computer
Applications installed on your computer may have vulnerabilities that can be exploited by malware. Scanning your computer will help find these vulnerabilities and prevent infection of your computer.
To run the Application Vulnerability Scan:
- Open the main application window.
- Go to the Security section.
- In the Scan block, click the Choose scan button.
This opens the Scan window.
- In the Scan window select the Application Vulnerability Scan section.
- Click the Run button.
The application starts scanning your computer for vulnerabilities in applications.
How to exclude a file, folder, or threat type from scanning
To exclude a file, folder, or threat type from scanning:
- Open the main application window.
- Click in the lower part of the main window.
This opens the Settings window.
- Go to Security settings → Exclusions and actions on object detection.
- Click the Manage exclusions link to open the Exclusions window.
- Click the Add button.
- Add an exclusion in one of the following ways:
- Click Browse and select the folder or file that you want to exclude from scanning. Click the Select button.
- In the File or folder field, enter the full name or mask of the file or folder.
- In the Object field, enter the full name or mask of the threat type in accordance with the Kaspersky classification of detected object.
- If you fill in both fields, File or folder and Object, the specified file or folder is not scanned for the specified threat type.
- In the File hash field, enter the hash if you want files to be excluded from scanning by their hashes.
- Clear the check boxes for protection components that the exclusion rule must not apply to. Enter a comment if you like.
- Select the Active status for the rule and click Add.
Specified objects are excluded from scanning.
For details about the settings, see the Exclusions and actions on object detection window
Scanning files in OneDrive cloud storage
In Windows 10 RS3 or later, Kaspersky Small Office Security does not scan files in OneDrive cloud storage. If the application detects such files during a scan, it shows a notification stating that the files in cloud storage were not scanned.
The following components do not scan files in OneDrive cloud storage:
- Full Scan
- Selective Scan
- Quick Scan
- Background Scan
The report on the operation of Kaspersky Small Office Security contains a list of files in OneDrive cloud storage that were skipped during scan.
Files downloaded from OneDrive cloud storage to a local computer are scanned by real-time protection components. If a file scan was postponed and the file has been uploaded back to OneDrive cloud storage before the scan is started, this file may be skipped during a scan.
When running applications and scripts, the Intrusion Prevention and System Watcher components download applications from the OneDrive cloud storage to the local computer to scan.
In order to make sure that OneDrive files are displayed in Explorer, turn on the Files on demand in the OneDrive client application feature. If you are connected to the Internet, you can use them just like any other files on your computer.
Page top
Updating anti-virus databases and application modules
This section contains information about database and application module updates.
About updating databases and application modules
The installation package of the application includes databases and application modules. Using these databases:
- The application detects the majority of threats using Kaspersky Security Network, which requires an Internet connection.
- The application detects adware, auto dialers, and other legitimate software that can be used by intruders to damage your computer or personal data.
To get full protection, we recommend updating the anti-virus databases and application modules as soon as the application has been installed.
Databases and application modules are updated in stages:
- The application starts updating databases and application modules according to the specified settings: automatically, on schedule, or on demand. The application contacts an update source that stores an anti-virus databases and application modules update package. To complete the installation of the update package for application modules, the computer must be restarted.
- The application compares the existing databases with the databases available at the update source. If the databases are different, the application downloads the missing parts of the databases.
The application then uses the updated databases and application modules to scan the computer for viruses and other threats.
Update sources
You can use the following update sources:
- Kaspersky update servers
- HTTP or FTP server
- Network folder
Special considerations involved in updating anti-virus databases and application modules
Updates of anti-virus databases and application modules are subject to the following restrictions and specifics:
- Anti-virus databases are considered out of date after one day and extremely out of date after seven days.
- To download an update package from Kaspersky servers, an Internet connection is required.
- Updates of anti-virus databases and application modules are unavailable in the following cases:
- The license has expired, and the grace period or limited functionality mode is not available.
- A metered mobile Internet connection is used. This limitation applies on computers running under Microsoft Windows 8 or more recent versions of this operating system if automatic updates or scheduled updates are enabled and a traffic limit has been set for a metered mobile connection. If you want the application to update anti-virus databases and application modules in this case, clear the Limit traffic on metered connections check box in Settings → Security settings → Advanced settings → Network settings.
- The application is used under subscription from a service provider, and you have suspended your subscription on the website of the service provider.
Installing an update package
When an update package (patch) is received, the application installs it automatically. To complete the installation of an update package, you must restart the computer. Until the computer is restarted, the application icon in the notification area is red, and the application Notification Center window displays a prompt to restart the computer.
How to start an update of databases and application modules
By default, databases and application modules are updated automatically. You do not need to take any action. If automatic updates are disabled, you can update application databases and modules manually.
To start an update of databases and application modules:
- Open the main application window.
- Go to the Security section.
- In the Anti-Virus Database Update window, click the Update button.
Intrusion Prevention
Kaspersky Small Office Security helps to minimize the risk associated with using unknown applications (such as the risk of infection with viruses and other malware).
Kaspersky Small Office Security includes components and tools that allow checking an application's reputation and controlling its activities on your computer.
About Intrusion Prevention
The Intrusion Prevention component prevents applications from performing actions that may be dangerous for the operating system, and controls access to operating system resources (including file resources located on remote computers) and your personal data.
Intrusion Prevention tracks actions performed in the operating system by applications installed on the computer and regulates them based on rules. These rules restrict suspicious activity of applications, including access by applications to protected resources, such as files and folders, registry keys, and network addresses.
On 64-bit operating systems, applications' rights for the following actions cannot be configured:
- Direct access to physical memory
- Managing printer driver
- Service creation
- Service reading
- Service editing
- Service reconfiguration
- Service management
- Service start
- Service removal
- Access to internal browser data
- Access to critical objects of the operating system
- Access to password storage
- Setting debug privileges
- Use of program interfaces of the operating system
- Use of program interfaces of the operating system (DNS)
- Use of program interfaces of other applications
- Change system modules (KnownDlls)
- Start drivers
On 64-bit Microsoft Windows 8 and Microsoft Windows 10, applications' rights for the following actions cannot be configured:
- Sending windows messages to other processes
- Suspicious operations
- Installation of keyloggers
- Interception of inbound stream events
- Making of screenshots
Applications' network activity is controlled by the Firewall component.
When an application is started on the computer for the first time, Intrusion Prevention checks the safety of the application and assigns it to a group (Trusted, Untrusted, High Restricted, or Low Restricted). The group defines the rules that Kaspersky Small Office Security applies for controlling the activity of the application.
Kaspersky Small Office Security assigns applications to trust groups (Trusted, Untrusted, High Restricted, or Low Restricted) only if Intrusion Prevention or Firewall is enabled, and also when both these components are enabled. If both these components are disabled, the functionality that assigns applications to trust groups does not work.
You can edit application control rules manually.
The rules you create for applications are inherited by child applications. For example, if you deny all network activity for cmd.exe, that activity will also be denied for notepad.exe when it is started using cmd.exe. When an application is not a child of the application it runs from, rules are not inherited.
Page top
How to change Intrusion Prevention settings
To change Intrusion Prevention settings:
- Open the main application window.
- Click in the lower part of the main window.
This opens the Settings window.
- Select the Security settings section.
- Select the Intrusion Prevention component.
- In the Intrusion Prevention settings window, click the Manage applications link to open the Manage applications window.
- Select the application you need in the list and double-click its name to open the Application rules window.
- To configure the rules for access by an application to operating system resources:
- On the Files and system registry tab, select the relevant resource category.
- Click the icon in the column with an available action for the resource (Read, Write, Delete, or Create) to open the menu. In the menu, select the relevant item (Inherit, Allow, Ask user, or Deny).
- To configure the rights of an application to perform various actions in the operating system:
- On the Rights tab, select the relevant category of rights.
- In the Action column, click the icon to open the menu and select the relevant item (Inherit, Allow, Ask user, or Deny).
- To configure the rights of an application to perform various actions on the network:
- On the Network rules tab, click the Add button.
This opens the Network rule window.
- In the window that opens, specify the required rule settings and click Save.
- Assign a priority to the new rule. To do so, select the rule and move it up or down the list.
- On the Network rules tab, click the Add button.
- To exclude certain application actions from the scan, on the Exclusions tab, select the check boxes for actions that you do not want to be controlled.
- Click the Save button.
All exclusions created in the Intrusion Prevention rules are accessible in Kaspersky Small Office Security settings window, in the Exclusions and actions on object detection section.
Intrusion Prevention monitors and restricts the actions of the application in accordance with the specified settings.
Checking application reputation
Kaspersky Small Office Security allows you to verify the reputation of applications with users all over the world. The reputation of an application comprises the following criteria:
- Name of the vendor;
- Information about the (if the application is digitally signed);
- Information about the group to which the application has been assigned by Intrusion Prevention or most users of Kaspersky Security Network;
- Number of users of Kaspersky Security Network who use the application (available if the application has been included in the Trusted group in the Kaspersky Security Network database);
- Time at which the application become known to Kaspersky Security Network;
- Countries in which the application is the most widespread.
Checking of application reputation is available if you have agreed to participate in Kaspersky Security Network.
To learn the reputation of an application:
Open the context menu of the application’s executable file and select Check reputation in KSN.
This opens a window with information about the reputation of the application in Kaspersky Security Network.
Network Monitor
Network Monitor allows you to view your PC's network activity data in real time, block network activity, or create network and packet rules for applications installed on your PC.
To go to the Network Monitor settings:
- Open the main application window.
- Go to the Security section.
- In the Network Monitor block, click the View button.
This opens the Network Monitor window.
The Network activity section displays all the currently active network connections. It displays both the inbound and outbound connections. You can use the Block all network activity link to block all network connections.
The Open ports section lists all the open network ports. You can also use this section to create network and packet rules for applications.
The Network traffic section displays the volume of inbound and outbound network traffic between your PC and other computers on your network.
The Blocked computers section contains a list of IP addresses for remote computers from which the Network Attack Blocker has detected network attack attempts and has blocked their network activity.
Page top
Controlling users' activity on the computer and on the Internet
This section provides information about how to control users' actions on the computer and on the Internet by using Kaspersky Small Office Security.
Page top
Using Web Policy Management
Web Policy Management allows monitoring actions performed by users on the local computer and online. You can use Web Policy Management to restrict access to Internet resources and applications, as well as view reports on users' activities.
Internet users face multiple threats:
- Loss of time and / or money when visiting chat rooms, gaming resources, online stores, and auctions
- Downloading of files infected with malware
Web Policy Management allows you to reduce the risks posed by computer and Internet use. To do this, the following functions are available:
- Limiting the time for computer and Internet use
- Creating lists of allowed and blocked games and applications, as well as temporarily restricting use of allowed applications
- Creating lists of allowed and blocked websites and selectively blocking categories of websites with inappropriate content
- Enabling safe search mode on search engines (links to websites with questionable content are not displayed in search results)
- Restricting file downloads from the Internet
- Blocking sending of certain personal data
You can configure features of Web Policy Management for each user account on a computer individually. If a user uses two accounts, for example, a local account of the operating system and a Microsoft user account, Web Policy Management settings should be configured for the Microsoft user account.
You can also view Web Policy Management reports on the activities of monitored users.
When the time zone changes, or when switching to and from daylight savings time, the following rules apply for using the computer and Internet, as well as for starting games and applications:
- If the date is not changed when the time zone changes, the current countdown until blocking continues without changes. The same rule applies when switching to or from daylight savings time.
- If the date is increased or decreased when the time zone changes, the time spent by the user is zeroed out and the countdown until blocking begins again.
Web Policy Management is unavailable if Kaspersky Small Office Security is installed on a file server.
Page top
Proceeding to the Web Policy Management settings
To go to the Web Policy Management settings:
- Open the main application window.
- Go to the Security section.
- In the Web Policy Management block, click the Enable button.
- If access to Web Policy Management settings is not password-protected, the application prompts the user to set a password. Select one of the following options:
- To protect access to Web Policy Management settings with a password:
- Fill out the Password and Confirm password fields and click Continue.
- In the Password scope window, click the Create password button.
- In the Enter password window, confirm the password and click the Sign in button.
- If you do not want to password-protect access to Web Policy Management settings, click the Skip link to continue to the Web Policy Management settings.
The Web Policy Management window opens.
- To protect access to Web Policy Management settings with a password:
- Select a user account and click the Configure restrictions link to open the Web Policy Management settings window.
Controlling computer use
Web Policy Management allows you to limit the amount of time spent by the user at the computer. You can specify a time interval during which Web Policy Management should block access to the computer (bedtime), as well as a daily time limit on total computer use. You can specify different limit amounts for weekdays and for weekends.
To configure time limits on computer use:
- Go to the Web Policy Management settings window.
- In the Web Policy Management settings window, select the Computer section.
- To specify a time interval during which Web Policy Management will block access to the computer, in the Weekdays and Weekends sections, select the Block access from N to N check box.
- In the drop-down list next to the Block access from N check box, specify the block start time.
- In the to N drop-down list, specify the block end time.
Web Policy Management blocks the user's access to the computer during the specified time interval.
- You can also set up a schedule of computer use by using a table. To view the table, click the
 button.
Web Policy Management blocks the user's access to the computer by schedule specified in the table.
- To set a time limit on total computer use during the day, in the Weekdays and Weekends sections, select the Allow access for no longer than N hours per day check box and, from the drop-down list next to the check box, select a time interval.
Web Policy Management blocks the user's access to the computer when the total computer use during a day exceeds the specified amount of time.
- To set up breaks in the user's sessions of computer use, in the Time breaks section, select the Take a break <time> for <duration> check box and then, from the drop-down lists next to the check box, select values for the frequency of breaks (for example, every hour) and their length (for example, 10 minutes).
- Flip the toggle switch in the upper part of the window to Control is enabled
 .
.
Web Policy Management blocks the user's access to the computer in accordance with the specified settings.
Page top
Controlling Internet use
By using Web Policy Management, you can limit time spent on the Internet and prohibit users from accessing certain categories of websites or specified websites. You can also prohibit the user from downloading files of certain types (such as archives or videos) from the Internet.
How to limit Internet use time
To limit the time for Internet use:
- Go to the Web Policy Management settings window.
- In the Web Policy Management settings window, select the Internet section.
- If you want to limit the total time for Internet use on weekdays, in the Internet access restriction section, select the Restrict access on weekdays to N hours per day check box and then, from the drop-down list next to the check box, select a value for the time limit.
- If you want to limit the total time for Internet use on weekends, select the Restrict access on weekends to N hours per day check box and then, from the drop-down list next to the check box, select a value for the time limit.
- Flip the toggle switch in the upper part of the window to Control is enabled .
Web Policy Management will limit the total amount of time spent on the Internet by the user, in accordance with the values that you have specified.
How to restrict visits of specific websites
To restrict visits to specific websites:
- Go to the Web Policy Management settings window.
- In the Web Policy Management settings window, select the Internet section.
- To keep adult content from being displayed in search results, in the Control web browsing section select the Enable Safe Search in search engines check box.
When you search for information on such websites as Google, YouTube (only for users who have not signed in to the youtube.com website under their account) Bing, Yahoo!, and Yandex, no adult content will be displayed in the search results.
- To block access to websites of certain categories:
- In the Control web browsing section, select the Control access to websites check box.
- Select the Block access to websites from selected categories option and click the Select categories of websites link to open the Block access to website categories window.
- Select the check boxes next to categories of websites that you want to block.
Web Policy Management will block all of the user's attempts to open a website if its contents are classified as belonging to any of the blocked categories.
- To block access to specific websites:
- In the Control web browsing section, select the Control access to websites check box.
- Click the Manage exclusions link to open the Exclusions window.
- In the lower part of the window, click the Add button.
A window for adding a new web address mask opens.
- Enter the address of a website to which you want to prohibit visits, by filling in the Web address mask field.
- In the Scope section, define the scope of what you want to block: the entire website or the specified web page only.
- If you want to block the specified website, in the Action section, select Block.
- Click the Add button.
The specified website appears in the list in the Exclusions window. Close the Exclusions window.
- Flip the toggle switch in the upper part of the window to Control is enabled .
Web Policy Management will block attempts to open websites in accordance with the specified settings.
How to block downloading of specific types of files
To prohibit downloading certain types of files from the Internet:
- Go to the Web Policy Management settings window.
- In the Web Policy Management settings window, select the Internet section.
- In the Block file downloading section, select the check boxes next to file types for which you want to block downloads.
- Flip the toggle switch in the upper part of the window to Control is enabled .
Web Policy Management will block downloads of files of the specified types from the Internet.
Controlling startup of games and applications
By using Web Policy Management, you can allow or prohibit the user to start games depending on their age rating. You can also prohibit the user from starting specified applications (such as games or IM clients) or limit the time allowed for using applications.
How to block games with age-inappropriate content
To block games with age-inappropriate content:
- Go to the Web Policy Management settings window.
- In the Web Policy Management settings window, select the Applications section.
- If you want to block all games that contain content inappropriate for the user's age, select the Restrict startup of games for users younger than check box and, from the drop-down list next to the check box, select an age restriction option.
- If you want to block games with content of a certain category:
- Select the Block games from adult categories check box.
- Click the Select categories of games link to open the Block games by categories window.
- Select the check boxes next to the content categories corresponding to games that you want to block.
- Return to the Applications section.
- If you want to use the rating system to block games, select the type of ratings and game content categorization in the Use this rating system to block games drop-down list:
- Detect automatically – Web Policy Management selects the type of game ratings depending on your location: the Pan European Game Information (PEGI) content rating system or the rating system for the USA and Canada (ESRB).
- PEGI – Web Policy Management uses the European rating system when configuring permissions to start games.
- ESRB – Web Policy Management uses the rating system for the USA and Canada when configuring permissions to start games.
- Flip the toggle switch in the upper part of the window to Control is enabled .
How to restrict startup of a specific application
To restrict startup of a specific application:
- Go to the Web Policy Management settings window.
- In the Web Policy Management settings window, select the Applications section.
- Click the Configure link to open the Application usage window.
- Click the Add application button to open the Open window and select the executable file of the application.
The selected application appears in the Application usage list. Kaspersky Small Office Security automatically adds this application to a certain category, for example, Games.
- Perform the following actions:
- To block application startup, select the Block item in the drop-down list next to the application name.
- To block all applications that belong to a specified category, select the check box next to the name of that category in the list (for example, you can block applications of the Games category).
- To allow application startup, select the Allow item in the drop-down list next to the application name.
- To set restrictions for the duration of application usage, select the Restrict item in the drop-down list next to the application name.
The Application usage restriction window opens.
Perform the following actions:
- If you want to set a time limit on use of an application on weekdays and weekends, in the Weekdays and Weekends sections, select the Allow access for no longer than <N> hours per day check box and, in the drop-down list specify the number of hours that the user is allowed to use the application each day. You can also specify the time when the user is allowed / prohibited to use the application, by using the Exact usage time table.
- If you want to set periods when the application is paused, in the Time breaks section, select the Take a break <time> for <interval> check box and, from the drop-down lists, select values for how frequent and how long the interval must be.
- Click the Save button.
- Close the Application usage window.
- Flip the toggle switch in the upper part of the window to Control is enabled .
Web Policy Management will apply the specified restrictions when the user accesses the application.
Monitoring message contents
By using Web Policy Management, you can monitor and prohibit the user's attempts to insert specified personal data (such as names, phone numbers, bank card numbers) into messages.
How to configure control of personal data transfer
To configure control of personal data transfer:
- Go to the Web Policy Management settings window.
- In the Web Policy Management settings window, select the Content Control section.
- In the Personal data transfer control section, select the Block personal data transfer to third parties check box.
- Click the Edit list of personal data link to open the List of personal data window.
- In the lower part of the window, click the Add button.
A window opens for adding personal data.
- Select a type of personal data (for example, "phone number") by clicking the corresponding link or enter a description in the Field name field.
- Specify personal data (such as your last name or phone number) in the Value field.
- Click the Add button.
The personal data is listed in the List of personal data window.
- Close the List of personal data window.
- Flip the toggle switch in the upper part of the window to Control is enabled .
Web Policy Management monitors and blocks the user's attempts to use the specified personal data in messaging via the Internet.
Viewing the report on a user's activity
You can access reports on the activity of each user account that is controlled by Web Policy Management, with separate reporting on each category of controlled events.
To view a report on the activity of a controlled user account:
- Go to the Web Policy Management settings window.
- Select a user account and click the View report link to go to the reports window.
- In the section with the relevant type of restriction (for example, Internet), open the report on monitored actions by clicking the Details link.
The window displays a report on monitored actions of the user.
Page top
Pre-Kaspersky virus removal
This section contains information on restoring the operating system after it has been infected with malware.
Recovering the operating system after infection
If you suspect that the operating system of your computer has been corrupted or modified due to malware activity or a system failure, use the Microsoft Windows Troubleshooting Wizard, which clears the system of any traces of malicious objects. Kaspersky recommends that you run the Wizard after the computer has been disinfected to make sure that all threats and damage caused by infections have been fixed.
The Wizard checks whether there are any changes to the system, which can include access to the network being blocked, file name extensions for known formats being changed, Control Panel being blocked, etc. There are different reasons for these different kinds of damage. These reasons may include malware activity, incorrect system configuration, system failures, or malfunctioning applications for system optimization.
After the review is complete, the Wizard analyzes the information to evaluate whether there is system damage that requires immediate attention. Based on the review, the Wizard generates a list of actions that are necessary to eliminate the damage. The Wizard groups these actions by category based on the severity of the problems detected.
Troubleshooting the operating system by using the Microsoft Windows Troubleshooting Wizard
To run the Microsoft Windows Troubleshooting Wizard:
- Open the main application window.
- Go to Security → Microsoft Windows Troubleshooting.
- Click Find damage.
The Microsoft Windows Troubleshooting Wizard window opens.
The Wizard consists of a series of pages (steps), which you can navigate through by clicking the Back and Next buttons. To close the Wizard after it finishes, click the Done button. To stop the Wizard at any stage, click the Cancel button.
Let us review the steps of the Wizard in more detail.
Start recovery of the operating system
- Select one of the two options for Wizard operation:
- Search for damage caused by malware activity. The Wizard will search for problems and possible damages.
- Roll back changes. The Wizard will roll back the fixes applied to previously identified problems and damages.
- Click Next.
Search for problems
If you selected the Search for damage caused by malware activity option, the Wizard searches for problems and possible damages that should be fixed. When the search is complete, the Wizard proceeds automatically to the next step.
Select actions to fix damage
All damage found at the previous step is grouped based on the type of danger that it poses. For each damage group, Kaspersky recommends a set of actions to repair the damage.
There are three groups:
- Strongly recommended actions eliminate problems that pose a serious security threat. You are advised to repair all damage in this group.
- Recommended actions are aimed at repairing damage that may pose a threat. You are also advised to repair damage in this group.
- Additional actions repair operating system damage that is not dangerous now, but may pose a threat to the computer's security in the future.
Expand the list of the selected group to view damage within the group.
To get the Wizard to fix a specific type of damage, select the check box next to the damage description. By default, the Wizard fixes damage belonging to the groups of recommended and strongly recommended actions. If you do not want to fix a specific type of damage, clear the check box next to it.
It is strongly recommended that you not clear the check boxes selected by default, as doing so will leave your computer vulnerable to threats.
After you define the set of actions for the Wizard to perform, click the Next button.
Fix damage
The Wizard performs the actions selected during the previous step. It may take a while to fix damage. After fixing damage, the Wizard automatically proceeds to the next step.
Wizard completion
Click the Done button to exit the Wizard.
Operating system emergency recovery
Kaspersky Rescue Disk is intended for emergency recovery of the operating system. You can use Kaspersky Rescue Disk for scanning and disinfecting infected computer that cannot be disinfected using other methods (for example, with anti-virus applications).
More details on using Kaspersky Rescue Disk are available on the Kaspersky Support website.
Page top
How to restore a deleted or disinfected file
Backup copies of deleted or disinfected files are placed in a special folder on your computer, named Quarantine. Backup copies of files are stored in a special format that is not dangerous to your computer. You can restore deleted or disinfected file from the backup copy stored in Quarantine.
We recommend that you avoid restoring deleted or disinfected files since they may pose a threat to your computer.
The application does not disinfect Windows Store apps. If scanning results indicate that such an app is dangerous, it is deleted from your computer. When a Windows Store app is deleted, Kaspersky Small Office Security does not create a backup copy of it. To restore such objects, you must use the recovery tools included with the operating system (for detailed information, see the documentation for the operating system that is installed on your computer) or update apps via the Windows Store.
To restore deleted or disinfected file:
- Open the main application window.
- Go to the Security section.
- In the upper-right corner of the application window, click the Quarantine button.
This opens the Quarantine window.
- In the Quarantine window that opens, select the required file from the list and click the Restore button.
Protecting email
This section provides information about how to protect your email against spam, viruses, and other threats.
Configuring Mail Anti-Virus
Kaspersky Small Office Security allows scanning email messages for dangerous objects by using Mail Anti-Virus. Mail Anti-Virus starts when the operating system is started and remains constantly in the RAM of the computer, scanning all email messages that are sent or received over the POP3, SMTP, IMAP, and NNTP protocols, as well as via encrypted connections (SSL) over the POP3, SMTP, and IMAP protocols.
By default, Mail Anti-Virus scans both incoming and outgoing messages. If necessary, you can enable scanning of incoming messages only.
To configure Mail Anti-Virus:
- Open the main application window.
- Click in the lower part of the main window.
This opens the Settings window.
- Select the Security settings section.
- In the Security settings window, select the Mail Anti-Virus component.
This takes you to the Mail Anti-Virus settings window.
- Make sure that the switch in the upper part of the window that enables / disables Mail Anti-Virus, is enabled.
- Select a security level:
- Optimal. When this security level is set, Mail Anti-Virus scans incoming and outgoing messages and attached archives, and performs heuristic analysis with the Medium scan level of detail.
- Low. If you select this security level, Mail Anti-Virus scans incoming messages only, without scanning attached archives.
- Extreme. When this security level is set, Mail Anti-Virus scans incoming and outgoing messages and attached archives, and performs heuristic analysis with the Deep scan level of detail.
- In the Action on threat detection section, select the action that you want Mail Anti-Virus to perform when an infected object is detected (for example, disinfect).
If no threats are detected in an email message, or if all infected objects have been successfully disinfected, the message becomes available for further access. If the component fails to disinfect an infected object, Mail Anti-Virus renames or deletes the object from the message and adds a notification to the message subject line, stating that the message has been processed by Kaspersky Small Office Security. Before deleting an object, Kaspersky Small Office Security creates a backup copy of it and places a copy in Quarantine.
When you upgrade to a more recent application version, the user-configured Mail Anti-Virus settings are not saved. The new application version will use the default Mail Anti-Virus settings.
If Kaspersky Small Office Security detects the password for the archive in the message text during scanning, the password is used to scan the contents of that archive for malware. The password is not saved. The archive is unpacked before scanning. If the application crashes while unpacking the archive, you can manually delete the files that are unpacked at the following path: %systemroot%\temp. The files have the PR prefix.
Blocking unwanted email (spam)
If you receive large amounts of unwanted messages (spam), we recommend that you enable the Anti-Spam component and set the Optimal security level for it.
This functionality is unavailable if Kaspersky Small Office Security is installed on a file server.
To enable Anti-Spam and set the Optimal security level:
- Open the main application window.
- Click in the lower part of the main window.
This opens the Settings window.
- Select the Privacy settings section.
- Select the Anti-Spam component.
The window displays the settings of Anti-Spam.
- Enable Anti-Spam using the switch.
- In the Security level section, make sure that the Optimal security level is set.
The following limitations apply to Anti-Spam:
- The Anti-Spam component can only analyze messages that are fully downloaded from the mail server, regardless of the protocol used.
- The Anti-Spam component does not check mail transferred using MAPI protocol.
The Anti-Spam component is disabled when you upgrade to a more recent application version. You can enable the component manually.
In some versions of the application, to enable the Anti-Spam component, you must accept the terms of the Statement regarding data processing for Anti-Spam.
Participating in Kaspersky Security Network
Kaspersky Small Office Security uses cloud protection to make protection of your computer more effective. Cloud protection is implemented using the Kaspersky Security Network infrastructure that uses data received from users all over the world.
Kaspersky Security Network (KSN) is the cloud-based knowledge base of Kaspersky containing information about the reputation of applications and websites. The use of data from Kaspersky Security Network ensures faster responses by Kaspersky Small Office Security to new threats, improves the performance of some protection components, and reduces the likelihood of false positives.
Users' participation in Kaspersky Security Network allows Kaspersky to promptly receive information about types and sources of new threats, develop solutions for neutralizing them, and minimize the number of false positives. Participation in Kaspersky Security Network lets you access reputation statistics for applications and websites.
If you participate in Kaspersky Security Network, you automatically send information about the configuration of your operating system and the start and completion time of processes in Kaspersky Small Office Security to Kaspersky.
How to enable or disable participation in Kaspersky Security Network
Participation in Kaspersky Security Network is voluntary. You can enable or disable the use of Kaspersky Security Network (KSN) when installing Kaspersky Small Office Security and/or at any moment after the application is installed.
To enable or disable participation in Kaspersky Security Network:
- Open the main application window.
- Click in the lower part of the main window.
This opens the Settings window.
- Go to Security settings → Kaspersky Security Network.
The Kaspersky Security Network window opens showing the details of Kaspersky Security Network and Kaspersky Security Network participation settings.
- Enable or disable participation in Kaspersky Security Network by using the toggle in the upper part of the window:
- If you want to participate in Kaspersky Security Network, set the toggle to On.
A window with the text of the Kaspersky Security Network Statement opens. If you accept the terms of the statement, click I agree.
- If you do not want to participate in Kaspersky Security Network, set the toggle to Off.
- If you want to participate in Kaspersky Security Network, set the toggle to On.
In some versions of Kaspersky Small Office Security, the Kaspersky Security Network window shows the Kaspersky Security Network Statement instead of information about Kaspersky Security Network.
To accept Kaspersky Security Network Statement:
- Click the Accept button in the Kaspersky Security Network Statement section.
Kaspersky Security Network Statement opens. This statement allows Kaspersky experts to promptly receive information about threats detected on your computer, about applications being run and signed applications being downloaded, as well as operating system information to improve your protection.
- If you accept the terms of the statement, click the Accept button.
To decline the Kaspersky Security Network Statement,
click the Decline button in the Kaspersky Security Network Statement section.
How to check the connection to Kaspersky Security Network
Your connection to Kaspersky Security Network may be lost for the following reasons:
- You do not participate in Kaspersky Security Network.
- Your computer is not connected to the Internet.
- Current key status does not allow connecting to Kaspersky Security Network. For example, a connection to KSN may be unavailable due to the following reasons:
- The application is not activated.
- License or subscription has expired.
License key issues have been identified (for example, the key has been added to denylist).
To check the connection to Kaspersky Security Network:
- Open the main application window.
- Click in the lower part of the main window.
This opens the Settings window.
Go to Security settings → Kaspersky Security Network.
The Kaspersky Security Network window shows the status of your connection to Kaspersky Security Network.
In some cases, Kaspersky may temporarily restrict requests to Kaspersky Security Network concerning the reputation of files. When temporary restrictions are imposed on requests for information from Kaspersky Security Network, the corresponding notification is displayed.
Protection using hardware virtualization
In this section, you will learn how you can protect your computer using hardware virtualization.
About protection using hardware virtualization
When Kaspersky Small Office Security is installed in 64-bit Microsoft Windows 8, Microsoft Windows 8.1 or Microsoft Windows 10, it uses
technology for additional protection against complex malware that could intercept your personal data by using the clipboard or phishing.Protection using hardware virtualization is enabled by default. If protection has been disabled manually, you can enable it in the application settings window.
On computers running 64-bit Microsoft Windows 8, Microsoft Windows 8.1 or Microsoft Windows 10, the protection provided by Kaspersky Small Office Security hardware virtualization (hypervisor) has the following limitations:
- This feature is not available when a third-party hypervisor is running, such as the hypervisor used by the VMware virtualization software. After you close the third-party hypervisor, protection against screenshots becomes available again.
- The feature is not available if the CPU of your computer does not support hardware virtualization technology. For more details on whether your CPU supports hardware virtualization, please refer to the documentation shipped with your computer or to the website of the CPU manufacturer.
- The feature is not available if a third-party hypervisor (such as the VMware hypervisor) is running when you start Protected Browser.
- The feature is not available if hardware virtualization is disabled on your computer. For details on how to enable hardware virtualization on your computer, please refer to your computer's technical documentation or visit the website of your processor's manufacturer.
- The feature is not available if Device Guard is enabled in the Microsoft Windows 10 operating system.
- The feature is not available if Virtualization Based Security (VBS) is enabled in the Microsoft Windows 10 operating system.
How to enable protection using hardware virtualization
To enable protection using hardware virtualization:
- Open the main application window.
- Click in the lower part of the main window.
This opens the Settings window.
- Go to Privacy settings → Secure Data Input.
- Select the Use hardware virtualization if available check box. This check box is displayed when the application is installed on a 64-bit version of Windows 8, Windows 8.1 and Windows 10.
- Select the Use advanced features of hardware virtualization check box if you want to turn hardware virtualization on when the operating system starts.
If hardware virtualization is disabled on your computer, protection using hardware virtualization will be disabled.
Protection using Antimalware Scan Interface (AMSI)
This section informs you that third-party applications such as Microsoft Office can send scripts to Kaspersky Small Office Security to be scanned using the Antimalware Scan Interface (AMSI), and describes how to disable protection using the AMSI in Kaspersky Small Office Security.
About protection using Antimalware Scan Interface
Antimalware Scan Interface (AMSI) allows a third-party application that supports AMSI to send objects (for example, PowerShell scripts) to Kaspersky Small Office Security for additional scanning and to receive scan results for these objects. For example, Microsoft Office applications can be such third-party applications. For more information about the AMSI interface, refer to Microsoft documentation.
Antimalware Scan Interface allows only to detect a threat and notify a third-party application about the detected threat. After receiving the threat notification, the third-party application prevents malicious actions (for example, shuts down).
Kaspersky Small Office Security may decline a request from a third-party application if, for example, this application exceeds the maximum number of requests allowed for a period. In this case, Kaspersky Small Office Security displays a notification about the declined request. If you receive such a notification, you do not have to perform any actions.
Protection using Antimalware Scan Interface is available on Windows 10 Home / Pro / Education / Enterprise and Windows 11 Home / Pro / Enterprise operating systems.
Page top
How to enable protection using Antimalware Scan Interface
To enable protection using Antimalware Scan Interface:
- Open the main application window.
- Click in the lower part of the main window.
This opens the Settings window.
- Go to Security settings → AMSI Protection.
- In the Script scanner section, select the Scan scripts using Antimalware Scan Interface (AMSI) check box.
How to exclude a script from scanning using Antimalware Scan Interface
To exclude a script from scanning using Antimalware Scan Interface:
- Open the main application window.
- Click in the lower part of the main window.
This opens the Settings window.
- Go to Security settings → AMSI Protection.
- In the Script scanner section, select the Scan scripts using Antimalware Scan Interface (AMSI) check box.
- Click the Manage exclusions link to go to the Exclusions window.
- In the Exclusions window, click the Add button.
The Add new exclusion window opens.
- In the File or folder field, specify the folder with the script.
- In the Object field, specify the name of the script.
You can also add several files of the same type to the exclusions by using a mask.
- In the Protection components section, select the check box next to the File Anti-Virus component.
- Select the Active status.
The specified object will not be scanned using Antimalware Scan Interface.
Performance
If your device slows down or hangs up, you are not alone. Sometimes apps refuse to open or a browser will fail to respond at a crucial time. There are multiple reasons why it can happen. Ensure the stable operation of your device for many years to come.
App Updater
This section provides information on how you can use Kaspersky Small Office Security to update installed applications.
About App Updater
If you have not updated applications on your computer for a long time, these applications may contain vulnerabilities. Intruders can exploit such vulnerabilities to harm your computer or data.
Updating installed applications improves the security of your computer. Using Kaspersky Small Office Security, you can search for updates for installed applications and download and install the latest updates.
Kaspersky Small Office Security divides application updates into two types:
- Important – updates that fix vulnerabilities of installed applications and improve the security of your computer.
- Recommended – updates that improve the functionality and/or make changes to the installed applications.
Kaspersky Small Office Security regularly searches for updates. When Kaspersky Small Office Security finds a new update for an application installed on your computer, Kaspersky Small Office Security shows a pop-up notification in the notification area. Information about the availability, quantity, and type of available updates is displayed in the Notification Center. You can view, download, and install available updates via the Notification Center.
You can also manually start the search for application updates.
By default, Kaspersky Small Office Security automatically downloads and installs all updates for known applications if they do not require you to accept new end user license agreements. If Kaspersky Small Office Security is installed on a file server, updates for applications are not downloaded automatically.
In Windows 8 and later versions, Kaspersky Small Office Security pauses automatic downloads of application updates when a metered Internet connection is used. Downloading of updates is resumed once the unlimited connection is restored. If you have manually started the update, Kaspersky Small Office Security will download the update regardless of whether or not you are using a limited connection.
You may need administrator privileges on the computer to update certain applications.
Applications that you do not want to update or for which you do not want to install individual updates are placed by Kaspersky Small Office Security into the exclusions list. You can view and edit the list of exclusions.
Page top
How to change App Updater settings
To change App Updater settings:
- Open the main application window.
- Click in the lower part of the main window.
This opens the Settings window.
- Select the Performance settings section.
- Click App Updater.
This opens the App Updater settings window.
- If you do not want Kaspersky Small Office Security to automatically download and install application updates that do not require acceptance of a new end user license agreement, clear the Automatically download and install updates if you do not have to accept new license agreements check box.
This check box is selected by default.
- In the Search for application updates section, select which application updates will be downloaded and installed by Kaspersky Small Office Security:
- Select Important updates that improve computer security if you want Kaspersky Small Office Security to install only important updates that fix software vulnerabilities and improve the security of your computer.
- Select All updates for known applications if you want Kaspersky Small Office Security to install all software updates.
Search for application updates
To start the search for application updates:
- Open the main application window.
- Go to the Performance section.
- In the App Updater block, click the Search for updates button.
This starts the search for application updates.
How to configure the update search mode
To configure the update search mode for installed applications:
- Open the main application window.
- Click in the lower part of the main window.
This opens the Settings window.
- Select the Performance settings section.
- Click the App Updater button.
This opens the App Updater settings window.
- In the Update block, select the Enable search for application updates check box.
- Click the Set up updates search mode link to open the Updates search mode window.
- In the Search for updates drop-down list, select one of the following options:
- Automatically. If you select this option, Kaspersky Small Office Security will run a search for application updates at least once every 24 hours according to the internal settings of the application.
- Daily / Weekly / Monthly. If you select one of these options, Kaspersky Small Office Security will search for updates based on your defined schedule up to the exact minute. When one of these options is selected, the Postpone running after application startup for N minutes list is available.
- Select the Search for updates on the next day if computer is turned off check box to start a search when the computer is turned on after a scheduled search was missed. If the check box is not selected, the application will start the search for updates only at the scheduled time while the computer is turned on.
- To save the settings, click the Save button.
Viewing the list of application updates
Kaspersky Small Office Security regularly searches for updates for applications installed on your computer. Information about the number and types of updates available for applications can be viewed in Notification Center.
To view the list generated as a result of searching for application updates:
- Open the main application window.
- Click the Details button in the upper part of the window.
This opens the Notification Center window.
- In the Status section, click the Show button in the line with the message about available application updates.
This opens the App Updater window with a list of available application updates.
- To update all applications appearing in the list, click the Update all button (not available in some regions).
- To selectively update specific applications, perform one of the following actions:
- Click the Update button in the line containing the application that you want to update.
You are advised to read the end user license agreement before updating the application. End user license agreements are available in the License agreements drop-down list. By default, the language of the end user license agreement corresponds to the language of the application interface. If the end user license agreement in the language of the application interface is unavailable, the EULA text is provided in the language of Kaspersky Small Office Security interface. In all other cases, the text of the end user license agreement is provided in English or the first available language if the English text is unavailable.
- Click the
 button to open the menu and select Do not update this application if you want Kaspersky Small Office Security to stop notifying you about available updates for the selected application.
The selected application is moved to the list of exclusions. Kaspersky Small Office Security stops showing notifications about new updates released for this application.
- Click the button to open the menu and select Skip this update if you want Kaspersky Small Office Security to stop notifying you about the selected update.
The selected application update is moved to the list of exclusions. Kaspersky Small Office Security shows a notification about a new update released for this application.
- Click the button to open the menu and select Open the vendor website if you want to manually download and install the update for the selected application.
The default browser of the operating system opens the website of the software vendor. You can view the update on the website and download it manually.
- Click the Update button in the line containing the application that you want to update.
The window interface, App Updater, and viewing of the End User License Agreements may differ depending on the localization language of Kaspersky Small Office Security.
Removing an update or application from the exclusions list
When viewing the list of application updates, you can skip notifications about individual updates or skip notifications about all updates for specific applications. Kaspersky Small Office Security adds these updates and applications to the exclusions list.
To remove an update or application from the exclusions list:
- Open the main application window.
- Click in the lower part of the main window.
This opens the Settings window.
- Select the Performance settings section.
- Click the App Updater button.
This opens the App Updater settings window.
- Click the Exclusions link to open the Exclusions window.
The Exclusions list contains the applications and updates for which you have indicated that no updates are necessary, as well as individual updates of applications that you did not install.
- Select the update or application in the list and click the Delete button.
During the next search for updates, Kaspersky Small Office Security will notify you about the availability of updates for applications that you have removed from the exclusions list.
About Backup and Restore
Backup and Restore is needed to protect your data against loss when your computer malfunctions or gets stolen, or when it is deleted accidentally or corrupted by hackers.
To backup data, create and start a backup task. The task can be started automatically according to schedule or manually. The application also lets you view information about completed backup tasks.
It is recommended to save backup copies of data on removable drives or in Online storage.
Kaspersky Small Office Security cannot create a full copy of a drive while a Microsoft Windows operating system is active on the drive.
Kaspersky Small Office Security lets you use the following storage types for creating backup copies:
- Local drive;
- Removable drive (e.g., an external hard drive);
- Network drive;
- Online storage.
Creating tasks based on user's access rights
Backup tasks are created based on user's access rights to files on the local computer.
If you do not have local administrator rights on the computer, you can access only tasks created by yourself. If you have local administrator rights on the computer, you see all backup tasks, but you cannot modify tasks created by other users.
Backup tasks that were created earlier without taking user rights into account are available to all users of the computer. However, if such a task gets modified, it will be run based on the rights of the user that modified the task.
Restoring tasks based on user's access rights
If you do not have local administrator rights on the computer, you can restore data only from backup tasks created by yourself and only to folders you have rights to access. If you have local administrator rights on the computer, you can restore data from any backup task to any folder.
The total size of the copied files in a folder may exceed the size of that folder if it contains links to other folders (for example, when copying the Documents folder, the My Music, My Pictures and My Videos folders will also be copied if the Documents folder contains links to those folders).
About Backup and Restore in OneDrive
When backing up files to a OneDrive folder on your computer, Kaspersky Small Office Security acts differently depending on whether the cloud file is downloaded to the OneDrive folder:
- If the file is in the cloud and in the OneDrive folder on your computer, Kaspersky Small Office Security makes a backup copy of this file.
- If the file is not in the cloud, but it is present in the OneDrive folder on your computer, Kaspersky Small Office Security makes a backup copy of this file.
- If the file is displayed in the OneDrive folder but it is only stored in the cloud and not on your computer, Kaspersky Small Office Security makes a backup copy of this file.
How to create a backup task
To create a backup task:
- Open the main window of Kaspersky Small Office Security.
- Select the Performance section.
- In the Backup and Restore block, click the Select files button.
The Backup Task Creation Wizard starts.
The Wizard consists of a series of pages (steps), which you can navigate through by clicking the Back and Next buttons. To close the Wizard after it finishes, click the Done button. To stop the Wizard at any step, click the Cancel button.
Let us review the steps of the Wizard in more detail.
Step 1. Select files
At this step of the Wizard, select the type of files or specify folders that you wish to back up:
- Select one of the preset file types (files from the My Documents and Desktop folders, photos and images, movies and videos, music files) to perform quick configuration. If you confirm this option, the wizard takes you straight to Step 4 "Select backup storage".
Kaspersky Small Office Security does not create backup copies of files located in the "Desktop" and "My Documents" folders if these folders are located on a network drive.
- Select the Create backup copies of files from specified folders option to manually specify folders that you want to back up.
Step 2. Select folders for backup
If you have selected the Create backup copies of files from specified folders option at the previous step of the Wizard, click the Add folder button and select a folder in the Select folder for backup window that opens or drag the folder into the application window.
Select the Limit backup by file types check box if you want to specify the categories of files to back up in the folders selected.
Step 3. Select file types for backup
If you selected the Limit backup by file types check box at the previous step of the Wizard, at this step of the Wizard select check boxes opposite the types of files that you want to back up.
Step 4. Select backup storage
At this step, select the a backup storage:
- Online storage. Select this option if you want to store backup copies in the Dropbox online storage. The Online storage has to be activated before it can be used. When you back up data in Online storage, Kaspersky Small Office Security does not create backup copies of data of the types that are subject to restrictions by Dropbox usage rules.
- Local drive. If you wish to store backup copies on a local drive, select the relevant local drive in the list.
- Network drive. If you wish to store backup copies on a network drive, select the relevant network drive in the list.
- Removable drive. If you wish to store backup copies on a removable drive, select the relevant removable drive in the list.
To ensure data security, we recommend using the Online storage or creating backup storages on removable drives.
How to add a removable drive as storage
Select the Use advanced storage settings check box to configure file storage settings, such as the number of versions of backup copies of files stored and the duration of storage of backup copies.
Step 5. Creating a backup schedule
Do one of the following at this step of the Wizard:
- Specify the backup task schedule if you want the backup task to start automatically.
- In the Run backup drop-down list, select a time interval to run the task (for example, daily) and specify the task run time in the At field.
- In the Account section, specify the user name and password of your Windows account on this computer. The data of your Windows account is required to access files during backup. If you are logged in to the operating system under a domain account, specify the username and password of your domain account to create the backup task.
- Select the Run scheduled backup at computer startup if it was turned off at the specified time check box if you want to run backup as soon as possible after the computer is turned on. For example, backup is scheduled to be performed every weekend. If the computer was turned off at the weekend, backup is performed after the computer is turned on a weekday. If the check box is cleared, backup is performed according to schedule without retrying to run backup after a failed attempt.
- In the Run backup list, select the on demand option if you wish to start the task manually.
When working with backup tasks, please note the following:
- If you create a scheduled backup task, you need to specify the data of your account on this computer.
- If you create an on-demand backup task, you do not need to specify the data of your account on this computer.
- If you change an on-demand task to a scheduled task, you need to specify the data of your account on this computer.
Step 6. Setting a password to protect backup copies
Select the Enable password protection check box and fill out the Password for access to backup copies and Confirm password fields to protect access to backup copies with a password.
The password is required to protect the backup storage against unauthorized access.
The application will prompt you to enter a password in the following cases:
- When you first create a backup storage on a local or removable drive (like a flash drive). When creating subsequent backup tasks to a local drive or this removable drive, the application will no longer ask you to enter a password. The password that you previously entered will be used.
If you copy the local backup storage to a removable drive and connect this removable drive to another computer, the application will ask you to enter a password to copy or restore data from this storage.
- When you connect a removable drive to your computer. The application checks the removable drive and asks you to enter a password if it detects a backup storage on this removable drive.
Step 7. File versions storage settings
This step is available if the Use advanced storage settings check box was selected at Step 4 "Select backup storage".
Specify file storage settings:
- Select the Restrict the number of versions of backup copies check box, and in the Versions of backup copies to store field specify the number of versions of backup copies of one file to be stored.
- Select the Restrict storage period for versions of backup copies check box, and in the Keep old versions of backup copies for field specify the number of days that each file version of a backup copy should be stored.
Step 8. Entering the backup task name
Do the following at this step:
- Enter the backup task name.
- Select the Run backup when setup is complete check box to start the backup process automatically when the wizard finishes.
Step 9. Wizard completion
This window shows the process of configuring the backup storage. The configuration process may take some time.
When configuration completes, click Done.
A backup task is created. The task you have created appears in the Backup and Restore window.
How to start a backup task
To start a backup task:
- Open the main window of Kaspersky Small Office Security.
- Select the Performance section.
- In the Backup and Restore block, click the View backup copies button.
- In the Backup and Restore window that opens, select a backup task and click the Run button.
The backup task is started.
Restoring data from a backup copy
To restore data from a backup copy:
- Open the main application window.
- Select the Performance section.
- In the Backup and Restore block, click the View backup copies button.
This opens the Backup and Restore window.
- Click the Restore files button opposite the relevant backup task.
- Click the Manage storages button to open a window and click the Restore files button opposite the relevant backup storage.
- If a password was specified when the backup copy was created, enter this password in the Enter your password to access the storage window.
- In the Backup date / time drop-down list, select the date and time of creation of the backup copy.
- Do one of the following:
- If you want to restore all data, select the All data check box.
- If you want to restore only certain folders, select the check boxes next to the relevant folders.
- If you want to restore only certain files, select the check boxes next to the relevant files in the Name column.
- To restore only specific types of files, select these file types in the File type drop-down list.
- Click Restore selected files.
This opens the Restore files from backup copies window.
- Select one of the two options:
- Original folder. If this option is selected, the application restores data to the original folder.
- Specified folder. If this option is selected, the application restores data to the specified folder. Click the Browse button to select the folder to which you want to restore data.
- In the If file names conflict drop-down list, select the action to be performed by the application when the name of the file being restored matches the name of the file already present in the destination folder:
- ask – when file names match, the application prompts you to choose one of the following options: replace the file with the backup copy, save both files, or do not restore the file.
- replace file with backup copy – Kaspersky Small Office Security deletes the existing file and replaces it with the file restored from the backup copy.
- save both files – Kaspersky Small Office Security leaves the existing file unchanged and saves the file restored from the backup copy under a new name in the same folder.
- do not restore this file – Kaspersky Small Office Security leaves the existing file unchanged and does not restore the file of the same name from the backup copy.
- Click Restore.
The files selected for recovery will be restored from the backup copy and saved in the specified folder.
Restoring data from FTP storage
Kaspersky Small Office Security does not support Backup and Restore over FTP. To restore backup copies created in other Kaspersky applications from FTP storage, follow the instructions below.
To restore backup copies from FTP storage:
- Open the main application window.
- Select the Performance section.
- In the Backup and Restore block, click the View backup copies button.
This opens the Backup and Restore window.
- Click the Manage storages link to open the Storages window.
- Open the FTP storage folder in Windows Explorer.
- Copy the data (including the
storage.xmlfile) to a local drive (for example, С:\<folder name>). - In the Storages window next to the FTP storage, click the Delete storage button.
- In the deletion confirmation window, click Delete.
The storage is now deleted.
- In the Storages window, click the Connect existing storage button.
- In the Connect storage window, select the Local drive section and use the Browse button to specify the path to the folder containing the backup copies that you copied to the local drive from FTP storage.
- In the Storages window, next to the connected storage, click the Restore files button.
- Follow the standard restoration procedure.
Restoring data from a backup copy using Kaspersky Restore Utility
Kaspersky Restore Utility lets you manage backup storage data on a computer where a Kaspersky application is corrupted or has been removed. By default, after installation of the application the utility is located in the Kaspersky Restore Utility folder located in the application setup folder. To use the utility on a computer where a Kaspersky application is not installed or is corrupted, copy the utility to a removable drive.
To start Kaspersky Restore Utility, you need local administrator rights.
How to start the Restore Utility
How to open a storage using the Restore Utility
How to restore data from a backup copy
Page top
About Online storage
Kaspersky Small Office Security lets you save backup copies of your data in Online storage on a remote server via the Dropbox service.
To use Online storage:
- Make sure that the computer is connected to the Internet.
- Create an account on the website of the online data storage service provider.
- Activate Online storage.
You can use one and the same Dropbox account to back up data from different devices with Kaspersky Small Office Security installed to a single Online storage.
The Online storage size is determined by the provider of the online storage services, the Dropbox web service. See the Dropbox website for more details on the terms of use of the web service.
When copying files to Dropbox, Kaspersky Small Office Security does not differentiate between uppercase and lowercase letters in the name of a file and/or name of a path to the file. Therefore, when attempting to create backup copies of files whose names and/or paths differ only by their case, Kaspersky Small Office Security creates only one backup copy because a conflict arises in Dropbox.
Page top
How to activate Online storage
To activate Online storage:
- Open the main window of Kaspersky Small Office Security.
- Select the Performance section.
- In the Backup and Restore block, click the Select files button.
The Backup Task Creation Wizard starts.
- In the data type selection window, select the data category or manually specify the files that you want to back up.
- In the storage selection window, select the Online storage option and click the Activate button.
An Internet connection is required to create an Online storage.
A Dropbox account login dialog opens.
- In the window that opens, perform one of the following operations:
- Complete registration if you are not a registered Dropbox user.
- If you are a registered Dropbox user, log into your Dropbox account.
- To finish Online storage activation, confirm that Kaspersky Small Office Security is allowed to use your Dropbox account for backing up and restoring data. Kaspersky Small Office Security places backup copies of saved data in a separate folder that is created in the Dropbox storage folder for applications.
After Online storage activation has been completed, the storage selection window opens. It contains a selection of online storages to choose from. For the activated Online storage, the application shows the amount of used space and the amount of free space available for data storage.
When copying files to Dropbox, Kaspersky Small Office Security does not differentiate between uppercase and lowercase letters in the name of a file and/or name of a path to the file. Therefore, when attempting to create backup copies of files whose names and/or paths differ only by their case, Kaspersky Small Office Security creates only one backup copy because a conflict arises in Dropbox.
Current Activity
If you have noticed that your computer freezes or runs slower, you can open the Application Activity window, which shows a list of currently running apps and active processes, and terminate an app or apps that are consuming too much of your computer's resources.
To see the current activity and/or terminate an app:
- Open the main application window.
- Go to the Performance section.
- In the Current Activity block, click the View activity button.
This will open the Application Activity window on the Running tab.
- From the app list, select the one consuming the most of your processor resources (in the CPU column) and/or RAM (the Memory column), and click the Terminate process button.
The app will terminate.
Do not Disturb Mode
In the Do not Disturb Mode, Kaspersky Small Office Security does not show pop-up notifications about events on your PC that occur during a video call, when you are watching a movie, actively using installed applications or the keyboard. Do not Disturb Mode can also pause some automatically started tasks or delay running scheduled tasks to avoid excessive utilization of computer resources.
The Do not Disturb Mode is enabled and disabled automatically. You do not have to change the application settings.
After exiting Do not Disturb Mode, the application will use the taskbar notification area to display a message regarding any event that occurred while you were busy. If there were multiple events, click the View button to go to the Notification Center and view all events.
You can also view all events that occurred over the past three days in the Notification Center on the Status tab in the Notifications section.
As long as the Focused Work Mode or Do Not Disturb mode is enabled, you will also not see notifications from Kaspersky VPN Secure Connection and Kaspersky Password Manager applications installed on the same device.
You can find out more about displaying notifications in the How to configure application notifications section of Help.
How to reserve operating system resources
When Kaspersky Small Office Security runs together with some full-screen applications, the following issues may occur:
- Application performance becomes degraded due to lack of system resources
- Notification windows of Kaspersky Small Office Security distract the user
To avoid changing the settings of Kaspersky Small Office Security manually every time you switch to full-screen mode, you can use Focused Work Mode. If Focused Work Mode is being used and you are working with an application in full-screen mode, Kaspersky Small Office Security does not run scan and update tasks and does not display notifications.
To turn on Focused Work Mode:
- Open the main application window.
- Click in the lower part of the main window.
This opens the Settings window.
- Go to Performance settings → PC performance optimization.
- Select the Focused Work Mode check box.
As long as the Focused Work Mode or Do Not Disturb mode is enabled, you will also not see notifications from Kaspersky VPN Secure Connection and Kaspersky Password Manager applications installed on the same device.
Optimizing the load on the operating system
When you run a computer scan using Kaspersky Small Office Security, it can consume significant system resources. In order to optimize the load on the system, you can configure Kaspersky Small Office Security to run scan tasks (for system memory, the system partition, and startup objects) and to update databases when the computer is locked or the screen saver is activated. This additional setting allows you to enhance the security of your computer without sacrificing performance when you are using it.
If the computer is running on battery, Kaspersky Small Office Security will not execute tasks when the computer is idle in order to prolong battery life.
To optimize the load on the operating system:
- Open the main application window.
- Click in the lower part of the main window.
This opens the Settings window.
- Go to Performance settings → PC performance optimization.
- Select the Postpone computer scan tasks when the CPU and disk systems are at high load check box.
Privacy
Nowadays massive data breaches, marketers tracking your every step online — the list of digital annoyances goes on and on. Keeping your privacy protected becoming crucial. Learn how Kaspersky Small Office Security protects your privacy online, so you can manage and control your digital footprint.
Kaspersky VPN
Kaspersky VPN functionality is not available in some regions.
This section contains information on how to securely connect to Wi-Fi networks and establish a secure VPN connection.
About secure connection to Wi-Fi networks
Kaspersky VPN functionality is not available in some regions.
Public Wi-Fi networks may be under-protected, for example, if a Wi-Fi network uses a vulnerable encryption protocol or a weak password. When you make Internet purchases over insecure Wi-Fi networks, your passwords and other confidential data are transmitted in non-encrypted text. Hackers can intercept your confidential data such as your bank card number and obtain access to your money.
To ensure your security when using insecure Wi-Fi networks, you can enable VPN via a specially allocated server located in the region you specify. Traffic from the website first goes to the allocated server and only then is sent to your device over an encrypted secure connection.
To use the Kaspersky VPN component, you need to run Kaspersky VPN. Kaspersky VPN Secure Connection is installed together with Kaspersky Small Office Security.
The Kaspersky VPN component provides the following advantages:
- Safe use of payment systems and booking sites. Intruders will not be able to intercept the number of your bank card when you make online payments, book hotel rooms, or rent cars.
- Protection of your secret information. No one will be able to determine the IP address of your computer or your location.
- Protection of your privacy. No one will be able to intercept and read your private correspondence on social networks.
VPN connection can also be used for other types of network connections such as a local Internet connection or USB modem connection.
By default, Kaspersky VPN Secure Connection does not prompt you to enable VPN if the HTTPS protocol is used to connect to a website.
Changing your location when visiting websites of banks, payment systems, booking websites, social networks, chats, and email websites could result in the triggering of anti-fraud systems (systems intended for analyzing online financial transactions for signs of fraudulent operations).
The usage of VPN connection may be regulated by local legislation. You may use VPN connection only in accordance with its purpose and without violating local legislation.
Page top
How to enable VPN
Kaspersky VPN functionality is not available in some regions.
The VPN connection is established using Kaspersky VPN Secure Connection. You can start Kaspersky VPN Secure Connection from the Start menu (in the Microsoft Windows 7 operating system or earlier version), from the start screen (in the Microsoft Windows 8 operating system or later versions), or from the window of Kaspersky Small Office Security.
To start Kaspersky VPN Secure Connection from Kaspersky Small Office Security window:
- Open the main window of Kaspersky Small Office Security.
- Go to the Privacy section.
- In the Kaspersky VPN block, click the Use button.
This opens the main window of Kaspersky VPN Secure Connection.
More details about the operation of Kaspersky VPN Secure Connection are available in the help files of this application.
Page top
Private Browsing
This section provides information on how Kaspersky Small Office Security can protect you against tracking of your online activity.
About Private Browsing
While you browse the web, websites use tracking services to collect information about your online activity. Tracking services use the received information to analyze your activity and can use analysis results to show you relevant advertisements.
The Private Browsing component is designed to prevent the collection of information about your online activity.
In detection mode, the Private Browsing component detects and counts attempts to collect data and writes this information in a report. Detection mode is enabled by default, and data collection is allowed on all websites.
In blocking mode, the Private Browsing component detects and blocks attempts to collect data, and information about these attempts are written in a report. In this mode, data collection is blocked on all websites except:
- by websites added to exclusions
- by websites of Kaspersky and its partners
- by websites that may be rendered inoperable as a result of tracking services being blocked, according to information available to Kaspersky
The counter of blocked attempts to collect data displays the total number of blockings across the entire site depending on how many site pages are open in the browser. If one page is open in the browser, only blocked attempts to collect data on this page of the site are counted. If several pages of the same site are open in the browser, the blocked attempts to collect data on all pages of the site opened in the browser are counted.
You can manage the Private Browsing component via the Kaspersky Small Office Security interface or with the help of the Kaspersky Protection extension in your browser.
Private Browsing has the following limitations:
- The application does not block data collection by the tracking service of the "Social networks" category while you are on the website of the relevant social network.
- If the web page from which the data collection attempt originated could not be determined, Kaspersky Small Office Security does not block this data collection attempt and does not display information about it.
- If the web page from which the data collection attempt originated could be determined but could not be matched to any web page currently open in the browser, Kaspersky Small Office Security applies the action specified in the Private Browsing settings (blocks or allows data collection). The application displays information about the data collection attempt in reports but does not include this information in the Private Browsing statistics displayed in the browser.
This functionality is unavailable if Kaspersky Small Office Security is installed on a file server.
Page top
Blocking data collection
To block data collection:
- Open the main application window.
- Go to the Privacy section.
- Select the Private Browsing component, and click the icon.
This opens the Private Browsing settings window.
- If the component is disabled, enable it by setting the toggle in the upper part of the window to On.
- Select the Block data collection option.
Kaspersky Small Office Security will block data collection attempts on all websites except exclusions.
- If you want to block or allow data collection based on the categories of tracking services:
- Click the Categories and exclusions link to open the Categories and exclusions window.
- By default, data collection is blocked for all categories of tracking services and all social networks. Clear the check boxes opposite the categories of tracking services and social networks for which you want to allow data collection.
Allowing data collection on all websites
To allow data collection on all websites:
- Open the main application window.
- Go to the Privacy section.
- Select the Private Browsing component, and click the icon.
This opens the Private Browsing settings window.
- If the component is disabled, enable it by setting the toggle in the upper part of the window to On.
- Select the Only gather statistics option.
Kaspersky Small Office Security detects and counts attempts to track your online activity without blocking them. You can view the results of the component's operation in the report.
Allowing data collection as an exclusion
You can allow tracking of your activity on specific websites as an exclusion.
To allow data collection as an exclusion:
- Open the main application window.
- Go to the Privacy section.
- Select the Private Browsing component, and click the icon.
This opens the Private Browsing settings window.
- If the component is disabled, enable it by setting the toggle in the upper part of the window to On.
- Select the Block data collection option.
Kaspersky Small Office Security will block data collection attempts on all websites except exclusions.
- By default, there is an exclusion to allow data collection on the websites of Kaspersky and its partners. If you want to block data collection on these websites, clear the Allow data collection on the websites of Kaspersky and its partners check box.
- By default, there is an exclusion to allow data collection on websites that may be rendered inoperable as a result of data collection being blocked, according to information available to Kaspersky. If you want to block data collection on these websites, clear the Allow data collection on incompatible websites check box.
Kaspersky updates the list of incompatible websites as compatibility issues are resolved.
- If you want to specify your own exclusions:
- Click the Categories and exclusions link to open the Categories and exclusions window.
- Click the Exclusions link to open the Private Browsing exclusions window.
- Click the Add button.
- In the window that opens, enter the address of the website on which you want to allow activity tracking, and click the OK button.
The specified website is added to the list of exclusions.
You can also allow data collection on a chosen website while it is open in the browser.
Viewing a report on attempts to collect your data on the Internet
To view a report on attempts to collect your data on the Internet:
- Open the main application window.
- Go to the Privacy section.
- Select the Private Browsing component, and click the icon.
This opens the Private Browsing settings window.
If the component is disabled, enable it by setting the toggle in the upper part of the window to On.
The window displays a consolidated report with information about attempts to collect data on your online activity.
You can also view the report on data collection attempts in a browser or in the application performance report.
Managing the Private Browsing component in a browser
You can manage the Private Browsing component directly in the browser:
- Enable the component if it is disabled;
- View statistics on detected attempts to collect data;
- Go to the Private Browsing settings window;
- Block or allow data collection.
To manage the Private Browsing component in the browser,
Click the Kaspersky Protection button on the browser toolbar.
The menu that opens shows information about the operation of the component and the component controls.
Page top
Password Manager
Kaspersky Password Manager is designed to safely store and synchronize passwords across your devices. Kaspersky Password Manager has to be installed independently of Kaspersky Small Office Security.
After installation, you can start Kaspersky Password Manager from the Start menu (in Microsoft Windows 7 or Microsoft Windows 10), from the Start screen (in Microsoft Windows 8 or Microsoft Windows 8.1), or from the Kaspersky Small Office Security window.
If Kaspersky Small Office Security is installed on a file server, you cannot install and start Kaspersky Password Manager.
How to start Kaspersky Password Manager from the Kaspersky Small Office Security window
How to download and install Kaspersky Password Manager
See the Kaspersky Password Manager Help for instructions on using Kaspersky Password Manager.
Kaspersky Password Manager may be unavailable in certain regions. If you have previously installed Kaspersky Password Manager, you are advised to save your passwords before you migrate to Kaspersky Small Office Security.
Page top
Safe Money
This section provides instructions on how you can protect your financial transactions and purchases online with Kaspersky Small Office Security.
About protection of financial transactions and online purchases
To protect confidential data that you enter on websites of banks and payment systems (such as bank card numbers and passwords for online banking), as well as to prevent funds from being stolen when you make online payments, Kaspersky Small Office Security prompts you to open such websites in Protected Browser. If you select the option to open the website without Protected Browser, Kaspersky Small Office Security does not prompt you to open that website in Protected Browser for the next 50 minutes.
Protected Browser is a special browser operating mode designed to protect your data as you access bank or payment system websites. Protected Browser is started in an isolated environment to prevent other applications from injecting their code into the process of Protected Browser. Kaspersky Small Office Security creates special profiles for the Mozilla Firefox and Google Chrome browsers to prevent third-party add-ons from affecting the operation of Protected Browser. The application does not affect your data that the browsers may save in the profiles created for them.
When you first open the Protected Browser, you will be prompted to copy data, settings, and plug-ins from your main browser. After completing the data migration, Kaspersky Small Office Security will not keep your main browser and Protected Browser synchronized. This means, for example, that data deleted from your main browser will persist in Protected Browser. In this case, you must take steps to delete the same data from Protected Browser.
If you are using Chromium-based Microsoft Edge, Google Chrome, Mozilla Firefox, or Internet Explorer, Protected Browser is opened in a new window.
The application uses the Kaspersky Protection extension to provide a number of Protected Browser functions.
Browsers that do not meet the software requirements cannot operate in Protected Browser mode. Instead of such browsers, either Chromium-based Microsoft Edge or another browser configured in application settings starts in Protected Browser mode.
It is impossible to run Protected Browser under the following conditions:
- The Enable Self-Defense check box is cleared in the Self-Defense settings window, Security settings → Self-Defense section.
- JavaScript is disabled in the browser.
Running Protected Browser in Yandex Browser
Kaspersky Small Office Security supports securing your financial transactions in Yandex Browser with some limitations. To run Protected Browser, the application injects a special script into the web page (and traffic). The Kaspersky Protection extension is not available. The Private Browsing and Anti-Banner components operate but cannot be configured in Yandex Browser.
Protected Browser capabilities
In Protected Browser mode, the application provides protection against the following types of threats:
- Untrusted modules. The application runs a check for untrusted modules every time you visit a bank or payment system website.
- Rootkits. The application scans for rootkits at Protected Browser startup.
- Invalid certificates of bank or payment system websites. The application checks certificates when you visit a bank or payment system website. The check is performed against a database of compromised certificates.
Protected Browser status
When you open a website in Protected Browser, a frame appears on the borders of the browser window. The color of the frame indicates the protection status.
The frame of the browser window can display the following color indications:
- Green frame. Signifies that all checks have been performed successfully. You can continue using Protected Browser.
- Yellow frame. Signifies that checks have revealed security problems that need to be resolved.
The application can detect the following threats and security problems:
- Untrusted module. Computer scanning and disinfection is required.
- Rootkit. Computer scanning and disinfection is required.
- Invalid certificate of a bank or payment system website.
If you do not eliminate the threats detected, the security of the bank or payment system website connection session is not guaranteed. Events involving the launch and use of Protected Browser with reduced protection are recorded in the Windows event log.
About protection against screenshots
To protect your data when you browse protected websites, Kaspersky Small Office Security prevents spyware from taking unauthorized screenshots. Protection against screenshots is enabled by default. Protection against screenshots is running even if hardware virtualization is disabled.
About clipboard data protection
Kaspersky Small Office Security blocks unauthorized access by applications to the clipboard when you make online payments, thus preventing theft of data by criminals. Such blocking is active only if an untrusted application attempts to obtain unauthorized access to your clipboard. If you copy data manually from the window of an application to another application's window (for example, from Notepad to a text editor window), access to clipboard is allowed.
Clipboard protection is not running if hardware virtualization is disabled on your computer.
If Protected Browser is started under the Microsoft Windows 10 operating system, Kaspersky Small Office Security will block interaction of Universal Windows applications with the clipboard.
How to change Safe Money settings
To configure Safe Money:
- Open the main application window.
- Click in the lower part of the main window.
This opens the Settings window.
- Select the Privacy settings section.
- Click the Safe Money button.
The window displays the settings of the Safe Money component.
- Enable Safe Money by clicking the switch in the upper part of the window.
- In the On first access to websites of banks and payment systems section, select the action to be performed by the application when you first open a bank or payment system website in your browser:
- Select Run Protected Browser if you want the application to open the website in Protected Browser.
- Select Ask user if you want the application to ask you whether or not you want to open the website in Protected Browser when you visit the website.
- Select Do not run Protected Browser if you want the application not to open the website in Protected Browser.
- In the Additional section, open the To proceed to websites from the Safe Money window, use drop-down list and select the browser that the application will run in Protected Browser mode when you visit a bank or payment system website from the Safe Money window.
You can select one of the browsers installed on your computer or use the default browser of the operating system.
How to configure Safe Money for a specific website
To configure Safe Money for a specific website:
- Open the main application window.
- Go to the Privacy section.
- Select the Safe Money section, and click the View websites button.
This opens the Safe Money window.
- Click the Add website to Safe Money link to open fields for adding the website information.
- In the Website for Safe Money (URL) field, enter the web address of the website that you want to open in Protected Browser.
A website address must be preceded by the prefix for the HTTPS protocol (for example, https://example.com), which is used by default by Protected Browser.
- Select the action that you want Protected Browser to perform when you open the website:
- If you want the website to open in Protected Browser every time you visit it, select Run Protected Browser.
- If you want Kaspersky Small Office Security to prompt you for an action when the website is opened, select Ask user.
- If you want to disable Safe Money for the website, select Do not run Protected Browser.
- Click the Add description link to open the Description field and enter the name or description of this website.
- Click the Add button.
The website will be displayed in the list.
How to send feedback on Safe Money
You can send to Kaspersky your feedback on the operation of the Safe Money component or report a problem in this component.
If Kaspersky Small Office Security fails to send your feedback (for example, Internet connection is not available), this feedback is saved to your computer. Feedback is stored openly for 30 days.
You can send feedback on the operation of the Safe Money component up to 10 times per day.
You can also send feedback after the Safe Money component is disabled. After the component is disabled, you can send feedback once per month.
Page top
Webcam and Mic Control
This section contains information on how to prevent spying through your webcam and eavesdropping through your microphone.
About application access to the webcam and microphone
Intruders may attempt to spy on you using your webcam or eavesdrop on you by gaining access to your microphone. Kaspersky Small Office Security protects your webcam and microphone from unauthorized access if the Webcam and Mic Control component is enabled. In component settings, you can block all application access to webcam and microphone or request to be notified whenever an application tries to gain access to your webcam or microphone.
If the component is enabled, but access to your webcam and mic is not fully blocked, access is granted or denied based on the trust group that the relevant application is part of. Access is blocked for applications in the High Restricted or Untrusted groups.
In the Intrusion Prevention settings window, you can allow access to the webcam or mic for applications included in the High Restricted and Untrusted groups. If an application from the Low Restricted group is trying to gain access to the webcam or microphone, Kaspersky Small Office Security blocks the access and notifies you if you have configured notifications in component settings.
In the drop-down list of the notification, you can block application access to webcam or microphone, or go to access settings. The notification is not displayed if some applications are running in full-screen mode on your computer.
In the drop-down list of the notification, you can choose to hide notifications or proceed to configure notification display settings.
How Kaspersky Small Office Security manages the webcam
How to change settings of application access to the webcam or microphone
To change settings of application access to the webcam or microphone:
- Open the main application window.
- Click in the lower part of the main window.
This opens the Settings window.
- In the Privacy settings section, select the Webcam and Mic Control component.
- Under Webcam settings, select one of the following actions:
- Block all apps from accessing your webcam. Webcam access is blocked for all applications installed on your computer.
- Notify if an app is using the webcam. Applications that have access by default will be allowed access to the webcam. A notification will be displayed, informing the user that a specific application is using the webcam.
This setting is not available if the Block all apps from accessing your webcam action is selected.
- Under Mic settings, select one of the following actions:
- Block all apps from accessing your mic. Mic access is blocked for all applications installed on your computer.
- Notify if an app is using the mic. Applications that have access by default will be allowed access to the microphone. A notification will be displayed, informing the user that a specific application is using the microphone.
This setting is not available if the Block all apps from accessing your mic action is selected.
How to allow or block access to the webcam for an individual application
To allow or block access to the webcam for an application:
- Open the main application window.
- Go to the Security section.
- Select the Intrusion Prevention component.
- Click the Manage applications link to open the Manage applications window.
- In the list, select the application for which you want to allow access to sound recording devices. Double-click the application to open the Application rules window.
- In the Application rules window, go to the Rights tab.
- In the list of rights categories, select Operating system modification → Suspicious modifications in the operating system.
- Select Access webcam.
- In the Action column, select Allow or Deny.
- Click Save.
If you select Block all apps from accessing your webcam, application access to the webcam is blocked regardless of the trust group and manually configured permissions.
How to allow or block access to the mic for an individual application
To allow or block access to the mic for an application:
- Open the main application window.
- Go to the Security section.
- Select the Intrusion Prevention component.
- Click the Manage applications link to open the Manage applications window.
- In the list, select the application for which you want to allow access to the mic and double-click to open the Application rules window.
- In the Application rules window, go to the Rights tab.
- In the list of rights categories, select Operating system modification → Suspicious modifications in the operating system → Access sound recording devices.
- In the Action column, select Allow or Deny.
- To receive notifications about instances of applications being allowed or denied access to the audio stream, in the Action column, click the icon and select Log events.
- Click Save.
If you select Block access for all applications, application access to the mic is blocked regardless of the trust group and manually configured permissions.
Detection of stalkerware and other applications
Some legitimate applications can be used by criminals to steal your personal data and spy on you. Most of these applications are useful, and many people benefit from using them. These applications include IRC clients, autodialers, file downloaders, system activity monitors, password management utilities, FTP, HTTP, or Telnet servers.
However, if criminals get access to these apps on your computer or manage to covertly deploy them there, they will be able to use some of the functionality to steal your personal data or commit other illegal actions.
Below you will information about various types of software that criminals can use.
Type |
Name |
Description |
|---|---|---|
Client-IRC |
IRC clients |
People install these apps to communicate with each other in Internet Relay Chats (IRC). Criminals can use these apps to spread malware. |
Dialer |
Autodialers |
Allow covertly establishing phone connections over a modem. Criminals can use software of this type to make calls from the user's device, which can cause financial damage to the user. |
Downloader |
Downloaders |
Allow covertly downloading files from web pages. Criminals can use such software to download malware to your computer. |
Monitor |
Monitor apps |
Allow monitoring the activity of the computer on which they are installed (tracking which applications are running and how they are exchanging data with apps on other computers). Criminals can use these to spy on the user's device. |
PSWTool |
Password recovery tools |
Enable users to see and recover forgotten passwords. Criminals secretly deploy these apps on people's computers for the same purpose. |
RemoteAdmin |
Remote administration tools |
Widely used by system administrators to get access to remote computers’ interfaces to monitor and control them. Criminals covertly deploy these apps on people's computers for the same purpose, to spy on remote computers and control them. Legitimate remote administration tools are different from backdoors (remote control Trojans). Backdoors can infiltrate a system and install themselves there on their own, without the user's permission, whereas legitimate apps do not have this functionality. |
Server-FTP |
FTP servers |
Operate as FTP servers. Criminals can deploy them on your computer to open remote access to it using the FTP protocol. |
Server-Proxy |
Proxy servers |
Operate as proxy servers. Criminals deploy them on a computer to use it for sending out spam. |
Server-Telnet |
Telnet servers |
Operate as Telnet servers. Criminals deploy them on a computer to open remote access to it using the Telnet protocol. |
Server-Web |
Web servers |
Operate as web servers. Criminals can deploy them on your computer to open remote access to it using the HTTP protocol. |
RiskTool |
Local tools |
They give users additional capabilities for managing their computers (enabling them to hide files or active application windows, or to close active processes). This group includes miners that can be covertly installed and consume large amounts of computational resources. Criminals can use all actions described above to conceal malware installed on your device or make its detection harder. |
NetTool |
Network tools |
They give the users of computers on which they are installed additional capabilities for interacting with other computers on the network (restart remote computers, find open ports, launch applications installed on those computers). All actions listed above can be used for malicious purposes. |
Client-P2P |
P2P network clients |
Enable people to use P2P (Peer-to-Peer) networks. They can be used by criminals to spread malware. |
Client-SMTP |
SMTP clients |
Can covertly send emails. Criminals deploy them on a computer to use it for sending out spam. |
WebToolbar |
Web toolbars |
Add search engine toolbars to the interface of other apps. Often spread with the help of malware or adware. |
You can enable protection from stalkerware and other applications that can be used by criminals, and we will warn you if we discover such applications.
To enable protection from stalkerware and other applications:
- Open the main application window.
- Click in the lower part of the main window.
This opens the Settings window.
- Go to Security settings → Exclusions and actions on object detection.
- In the Stalkerware and other applications section, select check boxes:
- Detect stalkerware
For protection from applications that help criminals gain access to your location, messages, or websites and social networks you visit.
- Detect legitimate apps that intruders can use to damage your computer or personal data
For protection from applications that criminals can use to download malware to your computer or use your computational resources for their nefarious purposes. Kaspersky Small Office Security does not detect remote administration applications that are considered as trusted.
- Detect stalkerware
If these check boxes are cleared, you may receive notifications about some applications from the table above because they are included in special categories and are processed by default regardless of application settings, for example: RemoteAdmin, PSWTool, Monitor.
Anti-Banner
This section provides information on how Kaspersky Small Office Security can protect you against ad banners on the Internet.
About Anti-Banner
The Anti-Banner component is designed to provide protection against banners while you browse the web. Anti-Banner blocks banners shown on the websites that you visit and in the interface of some applications. Anti-Banner blocks banners from the list of known banners which is embedded in the Kaspersky Small Office Security databases. You can manage the blocking of banners via the Kaspersky Small Office Security interface or directly in the browser.
By default, banners are allowed on websites from the list of Kaspersky websites. This list is compiled by Kaspersky experts and includes Kaspersky websites and its partners' websites that host Kaspersky advertisements. You can view this list or disable the use of this list if you consider it necessary to block banners on the websites of Kaspersky and its partners.
The blocked banners counter displays the total number of blocked banners across the entire site depending on how many site pages are open in the browser. If one page is open in the browser, only blocks on this page of the site are counted. If several pages of the same site are open in the browser, the blocked banners on all pages of the site opened in the browser are counted.
Information about the operation of Anti-Banner is available in reports.
The following limitations apply to Anti-Banner:
The following limitations apply to Anti-Banner:
- Some sites detect that ads on their pages are blocked and do not show content until the user turns off the ad blocker. To view the content of such site, you need to add its address to exclusions.
- If the web page on which the banner is located could not be determined, Kaspersky Small Office Security does not block this banner and does not display information about it.
- If the web page on which the banner is located could be determined but could not be matched to any single web page opened in the web browser, Kaspersky Small Office Security blocks the banner or allows the banner to be displayed depending on the information that has been determined. The application displays information about the banner in reports but does not include this information in the Anti-Banner statistics displayed in the browser.
- The Anti-Banner statistics displayed in the browser can include banners blocked the previous time the web pages loaded, including banners blocked previously and loaded again.
- The Anti-Banner statistics displayed in the browser do not include banners that were blocked in dynamic content of a page after a website has been loaded.
- Due to the fact that some JavaScript features are not supported by Internet Explorer, Kaspersky Small Office Security cannot block certain banners in this browser.
This functionality is unavailable if Kaspersky Small Office Security is installed on a file server.
Page top
How to enable the Anti-Banner component
The Anti-Banner component is disabled by default. You can enable it via Kaspersky Small Office Security interface or with the help of the Kaspersky Protection extension in your browser.
How to enable Anti-Banner in Kaspersky Small Office Security interface
To enable Anti-Banner in Kaspersky Small Office Security interface:
- Open the main application window.
- Click in the lower part of the main window.
This opens the Settings window.
- Select the Privacy settings section.
- Select the Anti-Banner component.
This opens the Anti-Banner settings window.
- Enable the component by clicking the switch in the upper part of the window.
How to enable Anti-Banner in the browser window
To enable Anti-Banner in the browser window:
- Click the Kaspersky Protection button on the browser toolbar.
- In the drop-down menu in the Anti-Banner section, click the Enable button.
After enabling or disabling Anti-Banner, you must reload the web page in the browser for the changes to take effect.
Page top
Blocking banners
Anti-Banner blocks website banners from the list of known banners which is embedded in Kaspersky Small Office Security databases. If a banner is displayed on a web page even while Anti-Banner is running, this could mean that the banner is not in the list of known banners. You can manually block the display of this banner.
To block a banner, you must add it to the list of blocked banners. You can do this directly on the web page or in Kaspersky Small Office Security.
If a banner is on a website from the list of websites with allowed banners, you cannot block the display of this banner.
How to block a banner on a web page
To block a banner on a web page:
- Make sure that the Kaspersky Protection extension is installed and enabled in the browser.
- If Anti-Banner is disabled, enable it:
- Click the Kaspersky Protection button on the browser toolbar.
- In the drop-down menu in the Anti-Banner section, click the Enable button.
- Click the
- Move your mouse cursor over the banner that you want to block, and right-click.
- In the context menu that opens, select Add to Anti-Banner.
The Add blocked banner window opens.
- In the Add blocked banner window, click the Add button.
The banner URL is added to the list of blocked banners.
- Refresh the web page in the browser to stop the banner from showing.
The banner will not be displayed the next time you visit this web page.
How to block a banner in Kaspersky Small Office Security
To block a banner in Kaspersky Small Office Security:
- Open the main application window.
- Click in the lower part of the main window.
This opens the Settings window.
- Select the Privacy settings section.
- Select the Anti-Banner component.
This opens the Anti-Banner settings window.
- Enable the Anti-Banner component by clicking the switch in the upper part of the window.
- In the Anti-Banner settings window, click the Blocked banners link to open the Blocked banners window.
- In the Blocked banners window, click the Add button.
- In the window that opens, in the Web address mask (URL) field, enter the address or address mask of the banner.
- Specify Active as the status for this banner.
- Click the OK button.
Kaspersky Small Office Security will block the specified banner.
Allowing banners
You can allow an individual banner as well as all banners on a website that you specify.
How to allow an individual banner
To allow an individual banner:
- Open the main application window.
- Click in the lower part of the main window.
This opens the Settings window.
- Select the Privacy settings section.
- Select the Anti-Banner component.
This opens the Anti-Banner settings window.
- Enable the Anti-Banner component by clicking the switch in the upper part of the window.
- In the Anti-Banner settings window, click the Websites with allowed banners link to open the Websites with allowed banners window.
- In the Websites with allowed banners window, click the Add button.
- In the window that opens, in the Website field, enter the address or address mask of the banner.
- Select the Active status.
- Click the OK button.
The application will not block the specified banner.
If a banner was added to the list of allowed banners but the banner is inside an ad block whose properties cause it to be blocked by Anti-Banner on a website, the banner will be blocked along with the ad block.
How to allow all banners on a website
To allow all banners on a website:
- Open the main application window.
- Click in the lower part of the main window.
This opens the Settings window.
- Select the Privacy settings section.
- Select the Anti-Banner component.
This opens the Anti-Banner settings window.
- Enable the Anti-Banner component by clicking the switch in the upper part of the window.
- In the Anti-Banner settings window, click the Websites with allowed banners link to open the Websites with allowed banners window.
- In the Websites with allowed banners window, click the Add button.
- In the window that opens, in the Website field, enter the URL, for example,
example.com. - Select the Active status.
- Click the OK button.
The website will be added to the list of websites with allowed banners. Kaspersky Small Office Security does not block banners on websites from this list, even if a banner is added to the list of blocked banners.
How to configure Anti-Banner filters
To configure Anti-Banner filters:
- Open the main application window.
- Click in the lower part of the main window.
This opens the Settings window.
- Select the Privacy settings section.
- Select the Anti-Banner component.
This opens the Anti-Banner settings window.
- Enable the Anti-Banner component by clicking the switch in the upper part of the window.
- Click the List of filters link to open the List of filters window.
- In the List of filters window, configure the filters as necessary:
- Recommended. This group includes the general filter and language filter corresponding to your region. These filters are enabled by default.
- Thematic. This group includes two filters:
- Social media. Enable this filter if you want to block items such as the Like and Share buttons on websites of social networks.
- Annoyances. Enable this filter if you want to block pop-up messages, windows and other elements that do not belong to the particular website.
- Language-specific. In this group of filters, you can select a language. The application will block banners on websites in the specified language.
How to manage Anti-Banner in the browser
You can manage the Anti-Banner component directly in the browser by using the Kaspersky Protection extension.
The Kaspersky Protection extension lets you perform the following actions:
- Enable and disable the component
- View the statistics for blocked banners
- Go to the Anti-Banner settings window
- View information about whether or not banners are blocked on a website opened in the browser, and manage the display of banners on a website
How to manage the Anti-Banner component via the Kaspersky Protection extension
To manage the Anti-Banner component via the Kaspersky Protection extension:
Click the Kaspersky Protection button on the browser toolbar.
The menu that opens shows information about the operation of the component and the component controls.
Unwanted App Installation Blocker
Sometimes you are installing a program only to find out later that you have installed several more applications you have not requested along with the one you wanted. Sounds familiar? These unwanted applications are installed without your knowledge and may spam you with ads or even change your default browser.
Enable the Unwanted App Installation Blocker to forget about this issue once and for all. The Unwanted App Installation Blocker will automatically clear the checkboxes for any additional applications suggested for installation to save you the trouble of unchecking them manually.
You can also enable the Unwanted App Installation Blocker in the Application Manager settings window.
To do this, select the During installation of applications, automatically clear check boxes for installation of additional software. Warn about any attempts to install additional programs check box.
Page top
Adware Remover
Do you get a lot of annoying ads? Kaspersky Small Office Security can delete from your PC the apps that display ads in your browsers and on your desktop. In addition to adware, we will also remove any autodialer tools and suspicious packers that may contain viruses and other threats. Enable the Adware Remover to never see those annoying ads again.
To remove adware:
- Open the main application window.
- Go to the Privacy section.
- Turn on the Adware Remover functionality.
How to change Application Manager settings
To change Application Manager settings:
- Open the main application window.
- Select the Privacy section.
- In the Unwanted App Installation Blocker block, click
 .
.This takes you to the Application Manager settings window.
- In the Unwanted App Installation Blocker group of settings, select the During installation of applications, automatically clear check boxes for installation of additional software. Warn about any attempts to install additional programs check box to block installation of additional software during installation of new applications. If unwanted operations are prevented during installation of the new application, Kaspersky Small Office Security will notify you about this.
If the check box During installation of applications, automatically clear check boxes for installation of additional software. Warn about any attempts to install additional programs was cleared after you started installing a certain application, the Unwanted App Installation Blocker continues to run for the duration of the current installation. Check boxes opposite applications offered for additional installation are cleared, and the additional applications themselves are not installed. This functionality will be disabled during the next installation. Additional applications will be installed together with the main application.
- Select the Do not display installation steps that may contain advertisements and offers to install additional programs check box to block the display of installation steps with ads during installation of new software on the computer. If such installation steps are removed, Kaspersky Small Office Security will notify you about this.
About Secret Vault
Secret Vaults is designed to protect your confidential data against unauthorized access. A Secret Vault is a data storage on your computer that you can lock or unlock using the password that only you know. You have to enter the password to modify the files stored in a secret vault. If you have entered an invalid password 10 times in a row, access to the secret vault is blocked for one hour.
If you lose or forget the password, you will not be able to recover your data.
To create a secret vault, Kaspersky Small Office Security uses the AES XTS data encryption algorithm with an effective key length of 56 bits.
If the FAT32 file system is used on your computer, you can create secret vaults no more than 4 GB in size.
How to move files to a secret vault
To move files to a secret vault:
- Open the main window of Kaspersky Small Office Security.
- Go to the Privacy section.
- In the Secret Vault section, perform one of the following:
If you do not have a secret vault yet
If you already have a secret vault
When adding files with identical names, which differ only in character case, to the secret vault, one of the files can be unavailable when trying to open the secret vault. To avoid data loss, we recommend adding such files to different Secret Vaults or changing the file names to completely unique ones.
How to access files stored in a secret vault
To access files stored in a secret vault:
- Open the main window of Kaspersky Small Office Security.
- Go to the Privacy section.
- In the Secret Vault block, click the I already have a secret vault button.
This opens the Secret Vault window.
- Click Unlock next to your secret vault.
- Enter the password and click the Open in Windows Explorer button.
Files stored in the secret vault appear in the Explorer window. You can edit the files as needed or add new files and close the secret vault again.
Starting with Kaspersky Small Office Security 8, if you rename a Secret Vault and then try to open it, an error occurs. To avoid this, we recommend that you open the secret vault you want to rename, extract your data, and create a new secret vault with this data, giving it a different name.
To unlock Secret Vaults that were created using a previous version of the application, you must convert the Secret Vaults from the old format to the new format. The application prompts you to perform the conversion when you attempt to open a Secret Vault in Kaspersky Small Office Security.
Secret vault conversion to the new format can take a long time depending on the secret vault size.
If, when removing Kaspersky Small Office Security, in the Save the following data on this computer for reuse window, the Operational settings of the application check box is cleared and the Secret Vault check box is selected, the next time you install the current or future version of Kaspersky Small Office Security, you will need to add the secret vaults manually by clicking the I already have a secret vault link in the Secret Vault window.
If you have not installed the latest update for Kaspersky Small Office Security, when upgrading to a new version, the Secret Vaults that you created in the previous version of the application may become unavailable.
Page top
File Shredder
Added security of personal data is ensured by protecting deleted information against unauthorized recovery by hackers.
Kaspersky Small Office Security contains a permanent data deletion tool that makes data recovery using standard software tools impossible.
Kaspersky Small Office Security makes it possible to delete data without the possibility to recover it from the following data media:
- Local drives. Deletion is possible if you have the rights required for writing and deleting data.
- Removable drives or other devices that are recognized as removable drives (such as floppy disks, memory cards, USB disks, or cell phones). Data can be deleted from a memory card if its mechanical protection from rewriting is disabled.
You can delete the data that you can access under your personal account. Before deleting data, make sure that it is not used by running applications.
To permanently delete data:
- Open the main application window.
- Go to the Privacy section.
- In the File Shredder block, click the Select files button.
This opens the File Shredder window.
- Click the Browse button, and in the Select files to delete window that opens select the folder or file to be deleted permanently.
Deletion of system files and folders may cause operating system malfunctions.
- In the Data deletion method drop-down list, select the requisite data deletion algorithm.
To delete data from SSD and USB devices, it is recommended to apply Quick delete (recommended) or GOST R 50739-95, Russia. Other deletion methods might damage an SSD or a USB device.
- Quick delete (recommended). The deletion process consists of two cycles of data overwriting: writing zeros and pseudo-random numbers. The main advantage of this algorithm is its performance. Quick deletion prevents data recovery using standard recovery tools.
- GOST R 50739-95, Russia. The algorithm carries out one overwriting cycle using pseudo-random numbers and protects the data from recovery by common tools. This algorithm corresponds to protection class 2 (out of 6), according to the Russian State Technical Commission classification.
- Bruce Schneier Algorithm. The process consists of seven overwriting cycles. The method differs from the German VSITR in terms of its overwriting sequence. This enhanced method of data deletion is considered one of the most reliable.
- VSITR standard, Germany. Seven overwriting cycles are performed. The algorithm is considered reliable but requires considerable time for execution.
- NAVSO P-5239-26 (MFM) standard, USA, and NAVSO P-5239-26 (RLL) standard, USA. Three overwriting cycles are used. The standards differ from one another in terms of the sequence in which they overwrite information.
- DoD 5250.22-M standard, USA. The algorithm carries out three overwriting cycles. This standard is used by the U.S. Department of Defense.
- Click Delete.
- In the deletion confirmation window that opens, click Delete.
Files that are being used by a third-party application cannot be deleted.
Privacy Cleaner
User actions on a computer are recorded in the operating system. The following information is saved:
- Details of search queries entered by users and websites visited
- Information about started applications, as well as opened and saved files
- Microsoft Windows event log entries
- Other information about user activity
Intruders and unauthorized persons may be able to gain access to confidential data contained in information on past user actions.
The application includes the Privacy Cleaner Wizard, which cleans up traces of user activity in the operating system.
To run the Privacy Cleaner Wizard:
- Open the main application window.
- Go to the Privacy section.
- In the Privacy Cleaner block, click the Find activity button.
The Wizard consists of a series of pages (steps), which you can navigate through by clicking the Back and Next buttons. To close the Wizard after it finishes, click the Done button. To stop the Wizard at any stage, click the Cancel button.
Let us review the steps of the Wizard in more detail.
Starting the Wizard
- Select one of the two options for Wizard operation:
- Search for user activity traces. The Wizard will search for traces of your activities on the computer.
- Roll back changes. The Wizard will roll back the changes that were previously made by the Privacy Cleaner Wizard. This option is available if activity traces have been removed by the Wizard before.
- Click the Next button to start the Wizard.
Activity traces search
If you selected the Search for user activity traces option, the Wizard performs a search for activity traces on your computer. The search may take a while. When the search is complete, the Wizard proceeds automatically to the next step.
Selecting Privacy Cleaner actions
When the search is complete, the wizard informs you about the detected
and asks about the actions to take for elimination of these activity traces.
To view actions that have been included into a group, expand the list of the selected group.
To make the Wizard perform a certain action, select the corresponding check box next to the action. By default, the Wizard performs all recommended and strongly recommended actions. If you do not want to perform a certain action, clear the check box next to it.
It is strongly recommended that you not clear the check boxes selected by default, as doing so will leave your computer vulnerable to threats.
After you define the set of actions for the Wizard to perform, click the Next button.
Privacy Cleaner
The Wizard performs the actions selected during the previous step. The clean-up of activity traces may take some time. To clean up certain activity traces, it may be necessary to restart the computer; if so, the Wizard notifies you.
When the clean-up is complete, the Wizard proceeds automatically to the next step.
Wizard completion
Click the Done button to exit the Wizard.
Protecting personal data on the Internet
This section provides information about how to make your Internet browsing safe and protect your data against theft.
About protection of personal data on the Internet
Kaspersky Small Office Security helps you to protect your personal data against theft:
- Passwords, user names, and other registration data
- Account numbers and bank card numbers
Kaspersky Small Office Security includes components and tools that allow you to protect your personal data against theft by criminals who use methods such as
and interception of data entered on the keyboard.Protection against phishing is provided by Anti-Phishing, which is implemented in the Safe Browsing and Anti-Spam components. Enable these components to ensure comprehensive protection against phishing.
Protection against interception of data entered on the keyboard is provided by On-Screen Keyboard and Secure Keyboard Input.
The Privacy Cleaner Wizard clears the computer of all information about the user's activities.
Safe Money protects data when you use Internet banking services and shop on online stores.
Protection against personal data transfer via the Internet is provided by one of the Web Policy Management tools.
About On-Screen Keyboard
When using the Internet, you frequently need to enter your personal data or your user name and password. This happens, for example, during account registration on websites, online shopping, and Internet banking.
There is a risk that personal data can be intercepted by hardware keyboard interceptors or keyloggers, which are programs that record keystrokes. The On-Screen Keyboard tool prevents the interception of data entered via the keyboard.
This functionality is unavailable if Kaspersky Small Office Security is installed on a file server.
Many programs classified as spyware can take screenshots, which then are automatically transmitted to an intruder for further analysis to steal the user's personal data. On-Screen Keyboard protects entered personal data from attempts to intercept it by means of screenshots.
On-Screen Keyboard has the following features:
- You can click the On-Screen Keyboard buttons with the mouse.
- Unlike hardware keyboards, it is impossible to press several keys simultaneously on On-Screen Keyboard. This is why key combinations (such as ALT+F4) require that you click the first key (for example, ALT), then the second key (for example, F4), and then the first key again. The second click of the key acts in the same way as releasing the key on a hardware keyboard.
- The On-Screen Keyboard language can be switched by using the same shortcut that is specified by the operating system settings for the hardware keyboard. To do so, right-click the other key (for example, if the LEFT ALT+SHIFT shortcut is configured in the operating system settings for switching the keyboard language, left-click the LEFT ALT key and then right-click the SHIFT key).
- You can use touchpad to operate the On-Screen Keyboard.
The use of On-Screen Keyboard has the following limitations:
- On-Screen Keyboard prevents interception of personal data only when used with the Chromium-based Microsoft Edge, Mozilla Firefox, or Google Chrome browsers. When used with other browsers, On-Screen Keyboard does not protect entered personal data against interception.
- On-Screen Keyboard cannot protect your personal data if the website requiring the entry of such data is hacked, because in this case the information is obtained directly by the intruders from the website.
- On-Screen Keyboard does not prevent screenshots that are made by using the Print Screen key and other combinations of keys specified in the operating system settings.
- Kaspersky Small Office Security does not provide protection against unauthorized screenshots in Microsoft Windows 8 and 8.1 (64-bit only) if the On-Screen Keyboard window is open but the Protected Browser process is not started.
The preceding list describes the main restrictions in functionality for protection of data input. A full list of restrictions is given in an article on the Kaspersky Support website. This article lists restrictions on Secure Keyboard Input in Kaspersky Internet Security, these restrictions apply also to On-Screen Keyboard in Kaspersky Small Office Security.
Page top
How to open On-Screen Keyboard
You can open On-Screen Keyboard in the following ways:
- From the toolbar of Chromium-based Microsoft Edge, Mozilla Firefox, or Google Chrome
- By using the quick launch icon of On-Screen Keyboard in entry fields on websites
You can configure the display of the quick launch icon in entry fields on websites.
When On-Screen Keyboard is used, Kaspersky Small Office Security disables the autofill option for entry fields on websites.
- By pressing a combination of keyboard keys
Starting On-Screen Keyboard from the browser toolbar
To open On-Screen Keyboard from the toolbar of such browsers as Microsoft Edge based on Chromium, Mozilla Firefox, or Google Chrome:
- Click the Kaspersky Protection button on the browser toolbar.
- Select the On-Screen Keyboard item in the menu that opens.
Starting On-Screen Keyboard by using the hardware keyboard
Page top
How to configure the display of the On-Screen Keyboard icon
To configure display of the quick launch icon of On-Screen Keyboard in entry fields on websites:
- Open the main application window.
- Click in the lower part of the main window.
This opens the Settings window.
- Select the Privacy settings section.
- In the Privacy settings window, click the Secure Data Input button.
The window displays the settings for protecting data input.
- In the On-Screen Keyboard block, select the Open On-Screen Keyboard by typing CTRL+ALT+SHIFT+P check box.
- If you want the On-Screen Keyboard quick launch icon to be displayed in entry fields on all websites, select the Show quick launch icon in data entry fields check box.
- If you want the On-Screen Keyboard quick launch icon to be displayed only when websites of specific categories are opened, select the check boxes for the categories of websites on which the On-Screen Keyboard quick launch icon should be displayed in entry fields.
The On-Screen Keyboard quick launch icon is displayed when a website that belongs to any of the selected categories is accessed.
- If you want to enable or disable display of the On-Screen Keyboard quick launch icon on a specific website:
- In the On-Screen Keyboard block, click the Manage exclusions link to open the Exclusions for On-Screen Keyboard window.
- In the lower part of the window, click the Add button.
- A window opens for adding an exclusion for On-Screen Keyboard.
- In the Web address mask field, enter the web address of a website.
- In the Scope section, specify where you want the On-Screen Keyboard quick launch icon to be displayed (or not to be displayed): on the specified page or on all pages of the website.
- In the On-Screen Keyboard icon section, specify whether or not you want the On-Screen Keyboard quick launch icon to be displayed.
- Click the OK button.
The specified website appears in the list in the Exclusions for On-Screen Keyboard window.
When the specified website is accessed, the On-Screen Keyboard quick launch icon is displayed in the entry fields in accordance with the specified settings.
About protection of data entered on the computer keyboard
Protection of data input on the computer keyboard allows avoiding interception of data that is entered on websites via the keyboard. To enable protection of data input on the keyboard, the Kaspersky Protection extension must be activated in the browser. You can configure protection of data input from the computer keyboard on various websites. After Secure Keyboard Input is configured, a pop-up message stating that Secure Keyboard Input is enabled will be displayed next to the field in which the cursor is set. By default, Secure Keyboard Input is enabled for all website categories except Internet communication.
This functionality is unavailable if Kaspersky Small Office Security is installed on a file server.
Secure Data Input limitations
Secure Data Input in Kaspersky Small Office Security has the following limitations:
- Secure Keyboard Input does not work in browsers running in the application Sandboxie.
- Secure Keyboard Input cannot protect your personal data if a website that requires entering such data has been hacked, because in this case information is obtained by intruders directly from the website. Secure Keyboard Input only works in the following browsers: Microsoft Edge based on Chromium, Mozilla Firefox, Mozilla Firefox ESR, and Google Chrome when the Kaspersky Protection extension is installed and enabled.
- Protection only works for pages that satisfy the following conditions:
- The page is in a list of URL addresses or a category of pages that require Secure Keyboard Input.
- The page is open in a Protected Browser.
- The page is not on the URL exclusion list.
- The page contains a field for entering a password; at the same time, the Password entry fields on all websites checkbox should be selected in the application settings.
- To verify whether the checkbox is checked, go to the Privacy settings section → Secure Data Input settings → Secure Keyboard Input block.
- Protection only works for fields that satisfy the following conditions:
- The input field is a single line, and it corresponds to the HTML <input> tag.
- The input field is not hidden: The value of the type attribute is not equal to hidden, and in CSS styles the display field is not set to none.
- Input fields are not fields of the submit, radio, checkbox, button, or image types.
- The input field should not be read-only (readOnly).
- The input field should be ready for input (get focus).
- If the field has the maximum length (maxlength) attribute, the minimum number of characters that can be entered should be more than three.
- Protection does not work in the following cases:
- Data is input using the IME technology.
- The input field is not a password input field.
During the period after you install Kaspersky Small Office Security but before you restart the computer for the first time, the application will not intercept the first character entered by the user (in any application).
Page top
How to configure protection of data entered on the computer keyboard
To configure protection of data entered on the computer keyboard:
- Open the main application window.
- Click in the lower part of the main window.
This opens the Settings window.
- Go to the Privacy settings section.
- Click the Secure Data Input button.
This opens the Secure Data Input settings window.
- In the lower part of the window, in the Secure Keyboard Input section, select the Enable Secure Keyboard Input check box.
- Select the check boxes for categories of websites on which you want to protect data that is entered via the keyboard.
- If you want to enable or disable protection of data input from the keyboard on a specific website:
- Open the Exclusions for On-Screen Keyboard window by clicking the Manage exclusions link.
- In the window, click the Add button.
- A window opens for adding an exclusion to Secure Keyboard Input.
- In the window that opens, in the Web address mask field, enter a website address.
- Select one of the options for Secure Data Input on this website (Apply to the specified page or Apply to the entire website).
- Select the action to be performed by Secure Data Input on this website (Protect or Do not protect).
- Click the OK button.
The specified website appears in the list in the Exclusions for On-Screen Keyboard window. When this website is accessed, Secure Data Input will be active, functioning in accordance with the settings.
Checking a website for safety
Kaspersky Small Office Security allows checking the safety of a website before you click a link to open it. The URL Advisor component is used to scan websites (this component is unavailable on a file server).
The URL Advisor component checks links on a web page opened in Chromium-based Microsoft Edge, Google Chrome, or Mozilla Firefox. Kaspersky Small Office Security displays one of the following icons next to the checked link:
 – if the linked web page is safe according to Kaspersky;
 – if there is no information about the safety status of the linked web page;
 – if according to Kaspersky, hackers can cause harm to your computer or your data by using the web page that the link leads to;
 – if according to Kaspersky, the web page that the link leads to can be infected or hacked;
 – if the linked web page is dangerous according to Kaspersky.
To view a pop-up window with more details on the link, move the mouse pointer to the corresponding icon.
By default, Kaspersky Small Office Security checks links in search results only. You can enable URL checking on every website.
To configure URL checking on websites:
- Open the main application window.
- Click in the lower part of the main window.
This opens the Settings window.
- In the Essential protection section, select the Safe Browsing subsection.
The window displays the settings for Safe Browsing.
- By clicking the Advanced Settings link, open the advanced settings of Safe Browsing.
- In the URL Advisor block, select the Check URLs check box.
- If you want Kaspersky Small Office Security to scan the content of all websites, select On all websites except those specified.
- If necessary, specify web pages that you trust in the Exclusions window. Open this window by clicking the Manage exclusions link. Kaspersky Small Office Security will not scan the content of the specified web pages.
- If you want Kaspersky Small Office Security to check the content of specific web pages only:
- Select the On specified websites only option.
- Click the Configure checked websites link to open the Checked websites window.
- Click Add.
- Enter the address of the web page whose content you want to check.
- Select the checking status for the web page (if the status is Active, Kaspersky Small Office Security checks web page content).
- Click OK.
The specified web page appears in the list in the Checked websites window. Kaspersky Small Office Security checks URLs on this web page.
- To configure the advanced settings for URL Advisor, in the Advanced settings of Safe Browsing window, in the URL Advisor section, click the Configure URL Advisor link to open the URL Advisor window.
- If you want Kaspersky Small Office Security to notify you about the safety of links on all web pages, in the Checked URLs section, select All URLs.
- If you want Kaspersky Small Office Security to display information about whether a link belongs to a specific category of website content (for example, Profanity, obscenity):
- Select the Show information on the categories of website content check box.
- Select the check boxes next to categories of website content about which information should be displayed in comments.
Kaspersky Small Office Security checks links on the specified web pages and displays information about categories of the links in accordance with the settings.
How to change encrypted connections settings
Encrypted connections are established over the SSL and TLS protocols. By default, Kaspersky Small Office Security scans such connections upon request from protection components, such as Mail Anti-Virus, Anti-Spam, Safe Money, URL Advisor, Private Browsing, Safe Browsing, and Anti-Banner.
To change encrypted connections settings:
- Open the main application window.
- Click in the lower part of the main window.
This opens the Settings window.
- Go to the Security settings section.
- In the Advanced settings block, click the Network settings button.
- In the Network settings window, go to the Encrypted connections scan section.
- Select an action to perform when connecting to websites over an encrypted connection:
- Do not scan encrypted connections. Kaspersky Small Office Security does not scan encrypted connections.
- Scan encrypted connections upon request from protection components. Kaspersky Small Office Security only scans encrypted connections upon request from URL Advisor. This action is selected by default.
- Always scan encrypted connections. Kaspersky Small Office Security always scans encrypted connections.
Clicking the Show certificates link opens a window with a list of trusted certificates that are used by popular websites. Certificates are added to this list if you click Add to trusted certificates and continue in a Kaspersky Small Office Security warning when visiting a website. After you add a certificate to the list, the website is considered trusted. You can add or remove certificates in the Trusted root certificates window using the Add and Delete buttons.
If you have multiple user accounts on your computer, and one of the users accepts the new certificate, this certificate is also added to the trusted certificate list for all other users.
- Select an action to perform if there are errors when scanning encrypted connections:
- Ignore. If this action is selected, Kaspersky Small Office Security terminates the connection with the website on which the scan error occurred.
- Ask. If there is an error when scanning encrypted connection with a website, Kaspersky Small Office Security shows a notification where you can select an action:
- Ignore. Kaspersky Small Office Security terminates the connection with the website on which the scan error occurred.
- Add domain to exclusions. Kaspersky Small Office Security adds the website address to the list of trusted addresses. Kaspersky Small Office Security does not scan encrypted connections on websites from the list of trusted addresses. You can view such websites by clicking the Trusted addresses link.
This option is selected by default.
- Add domain to exclusions. Kaspersky Small Office Security adds the website to the list of trusted addresses. Kaspersky Small Office Security does not scan encrypted connections on websites from the list of trusted addresses. These websites are displayed in the Trusted addresses window, which can be opened by clicking the Trusted addresses link.
- Click the Trusted addresses link to open the Trusted addresses window and perform the following actions:
- Click the Add button to add the website to the list of exclusions for encrypted connections scan.
- Enter the domain name of the website in the Domain name field.
- Click Add.
Kaspersky Small Office Security will not scan encrypted connections with this website. Please note that adding a website to the list of trusted addresses may limit the functionality of scanning the website by protection components, such as Safe Money, URL Advisor, Private Browsing, Safe Browsing, and Anti-Banner.
Configuring notifications of vulnerabilities in Wi-Fi networks
When you are connected to a Wi-Fi network, your confidential data may be stolen if that network is protected poorly. Kaspersky Small Office Security checks Wi-Fi networks every time you connect to one. If the Wi-Fi network is not secure (for example, a vulnerable encryption protocol is used, or the name of the Wi-Fi network (SSID) is very popular), Kaspersky Small Office Security displays a notification informing you that you are about to connect to an insecure Wi-Fi network. Click the link in the notification window to learn how to safely use the Wi-Fi network.
To configure notifications of vulnerabilities in Wi-Fi networks:
- Open the main application window.
- Click in the lower part of the main window.
This opens the Settings window.
- Select the Security settings section.
- Select the Firewall component.
The window displays the settings of the Firewall component.
- Select the Notify of vulnerabilities in Wi-Fi networks if you want to receive notifications when you are connecting to vulnerable Wi-Fi networks. If you do not want to receive notifications, clear the check box. This check box can be accessed if Kaspersky VPN Secure Connection is not installed on the computer.
- Click the Select categories link and select Wi-Fi network vulnerability categories. When you attempt to connect to a Wi-Fi network with the relevant vulnerability, Kaspersky Small Office Security notifies you about it.
- If the Notify of vulnerabilities in Wi-Fi networks check box is selected, you can edit the advanced settings for display of notifications:
- Select the Block and warn about insecure transmission of passwords over the Internet check box to block all transmission of passwords in non-encrypted text format when you fill in the Password fields on the Internet.
- By clicking the link Enable, restore the default values of settings for display of notifications about transfers of passwords in non-encrypted form. If you have previously blocked display of notifications about password transfer in non-encrypted form, display of these notifications will resume.
When connecting to protected Wi-Fi networks, the application displays a notification, which asks you if you trust the new network. You can choose one of the following options:
- No, block external access to computer. All external connections of this network are blocked except connections initiated from your device. You can use the Internet and visit all websites. Other users on this network will not be able to connect to resources of your computer (for example, they will not gain access to the contents of your disks, including shared folders).
- Restrict, but allow shared access. You can use the Internet and visit all websites. Other users on this network will not be granted access to resources of your computer, but they will have access to resources designated as shared (for example, shared folders).
- Yes, allow all network activity. All connections on this network will be allowed. You can use the Internet and visit all websites. Other users on this network will be able to connect to your computer without limitations (for example, they will be able to gain access to the contents of your disks).
This functionality is unavailable if Kaspersky Small Office Security is installed on a file server.
How to uninstall incompatible applications
Kaspersky Small Office Security regularly checks if there are any
on your computer. Such applications are added to the list of incompatible applications. You can look through the list and decide what to do with the incompatible applications.It is recommended that you delete incompatible applications from your computer. Otherwise, Kaspersky Small Office Security will not be able to fully protect your computer.
The following are some of the reasons why a third-party application might not be compatible with Kaspersky Small Office Security:
- The application conflicts with File Anti-Virus.
- The application conflicts with Firewall.
- The application conflicts with Anti-Spam.
- The application interferes with protecting network traffic.
- The application conflicts with Secret Vault.
- The application conflicts with Kaspersky Password Manager.
How to uninstall incompatible applications
Page top
Using the application from the command prompt
You can work with Kaspersky Small Office Security from the command line.
Command prompt syntax:
avp.com <command> [settings]
To view help on the command prompt syntax, enter the following command:
avp.com [ /? | HELP ]
This command allows you to obtain a full list of commands that are available for managing Kaspersky Small Office Security from the command line.
To obtain help on the syntax of a specific command, you can enter one of the following commands:
avp.com <command> /?
avp.com HELP <command>
At the command prompt, you can refer to the application either from the application installation folder or by specifying the full path to avp.com.
You can enable or disable application event logging (creating trace files) from the command prompt if you have previously set a password to protect access to Kaspersky Small Office Security management in the application settings window.
If you have not set a password in the application settings window, you cannot create a password and enable event logging from the command prompt.
Certain commands can be executed only under the administrator account.
Page top
Contact Technical Support
This section describes the ways to get support and the terms on which it is available.
How to get technical support
If you do not find a solution to your problem in the application documentation or in one of the other sources of information about the application, we recommend that you contact the Technical Support. Visit the Kaspersky Support website to contact our experts who will answer your questions about installing and using the application.
Before contacting Technical Support, please read the support rules.
Page top
Collecting information for Technical Support
After you notify Technical Support specialists of a problem, they may ask you to create a report that contains information about your operating system and send it to Technical Support. Technical Support specialists may also ask you to create a trace file. The trace file allows tracing the process of performing application commands step by step and determining the stage of application operation at which an error occurs.
To provide better support on issues related to functioning of the application, Technical Support specialists may ask you to temporarily change application settings for debugging purposes while diagnostics are ongoing. To do so, you may need to perform the following actions:
- Collect extended diagnostic information
- Configure individual components of the application by changing special settings that are not accessible through the standard user interface
- Reconfigure storage and sending of collected diagnostic information
- Set up interception of network traffic and saving of network traffic to a file
Technical Support specialists will give you all information necessary for performing these actions (step-by-step instructions, settings to be changed, scripts, additional command line features, debugging modules, special utilities, etc.) and will inform you of what data will be collected for debugging purposes. After the extended diagnostic information is collected, it is saved on the user's computer. The collected data is not sent automatically to Kaspersky.
You are advised to perform the preceding actions only under the guidance of a Technical Support specialist after receiving instructions to do so. Changing application settings by yourself in ways not described in Help or not recommended by Technical Support specialists can cause slowdowns and crashes of the operating system, reduce the protection level of your computer, and damage the availability and integrity of the processed information.
About the contents and storage of service data files
Trace files and dump files are stored on the computer in non-encrypted form for a period of seven days after data logging is disabled. Trace files and dump files are deleted permanently after seven days.
Trace files are stored in the ProgramData\Kaspersky Lab folder.
The format of trace file names is as follows: KAV<version number_dateXX.XX_timeXX.XX_pidXXX.><trace file type>.log.
Trace files can contain confidential data. You can view the contents of a trace file by opening it in a text editor (such as Notepad).
Performance trace files can be viewed using the Windows Performance Analyzer utility. You can download this utility from the Microsoft website.
Page top
How to enable tracing
Make sure that you configure tracing only under the guidance of a Kaspersky Technical Support expert.
To enable application tracing and performance tracing:
- Open the main application window.
- Click
 in the lower part of the window.
This opens the Support window.
- Click the Support Tools link to open the Support Tools window.
- Enable and configure application traces and performance traces according to the instructions of a Kaspersky Technical Support expert.
- To save the changes, click the Save button.
How to make a screen recording if you face a problem with an application
If you encounter a problem with the application, you can make a screen recording and traces and send them to Technical Support for analysis.
When screen recording is on, pop-up notifications are not displayed.
To make screen recording and traces:
- Open the main application window.
- Click in the lower part of the window.
This opens the Support window.
- Click the Problem recording link to open the Problem recording window.
- Select an error category:
- Error with running the app. Select this option if the application suddenly stops working, does not respond, or reports a failure.
- Error while opening a website. Select this option if the application blocks access to the website or the website is not displayed correctly.
- Activation error. Select this option if you cannot activate a subscription in the application.
- Other. Select this option if there is no category for your problem.
- Select the Record the screen check box. When the check box Record the screen is not selected, clicking Start recording only creates a trace file (a service file with information about the application operation).
- Select the Record low level tracing (optional) checkbox if you were asked to do so by a Technical Support expert.
- Click Start recording.
The recording indicator is displayed in the upper part of the screen.
- Perform actions that demonstrate the problem you are having.
- Click Stop and save.
Recording is stopped and saved in an archive on Desktop. The archive can only be accessed with administrator privileges.
- Click Go to archive.
This opens an Explorer window at the location of the ZIP archive. The archive contains the screen recording and a trace file.
- Send the archive to the communication channel specified by the Technical Support expert.
- If you want to delete all system data, reports, and trace events, click Delete all service data and reports.
Collected data can only be accessed with administrator privileges. If you do not have access, contact your system administrator.
Page top
Limitations and warnings
Kaspersky Small Office Security has a number of limitations that are not critical to operation of the application.
Limitations on the operation of certain components and automatic processing of files
Infected files and malicious links are processed automatically according to rules created by Kaspersky specialists. You cannot modify these rules manually. Rules can be updated following an update of databases and application modules. The rules for Firewall, Webcam Protection, Application Manager, and Intrusion Prevention are also updated automatically.
If a device scan is started from Kaspersky Small Office Security Management Console, files will be processed automatically based on the rules specified in the application. Files detected on a device can be processed automatically by request from Kaspersky Small Office Security Management Console without your confirmation.
Specifics of processing files in interactive protection mode
If the infected file is part of an application from the Windows Store, Kaspersky application working in interactive protection mode displays a notification prompting you to delete the file. The Disinfect action is not available.
Limitations on connection to Kaspersky Security Network
During its operation, the application may query Kaspersky Security Network for information. If data from Kaspersky Security Network could not be retrieved, the application makes decisions based on local anti-virus databases.
Limitations of System Watcher functionality
Protection against cryptors (malware that encrypts user files) has the following limitations:
- The Temp system folder is used to support this functionality. If the system drive with the Temp folder has insufficient disk space to create temporary files, protection against cryptors is not provided. In this case, the application does not display a notification that files are not backed up (protection is not provided).
- Temporary files are deleted automatically when you close Kaspersky Small Office Security or disable the System Watcher component.
- In case of an emergency termination of Kaspersky Small Office Security, temporary files are not deleted automatically. To delete temporary files, clear the Temp folder manually. To do so, open the Run window and in the Open field type
%TEMP%. Click OK. - Protection against encryptors is provided only for files that are located on data drives that have been formatted with the NTFS file system.
- The number of files that can be restored cannot exceed 50 per one encryption process.
- The total volume of modifications to files cannot exceed 100 MB. Files with modifications that exceed this limit cannot be restored.
- File modifications initiated via network interface are not monitored.
- Files encrypted with EFS are not supported.
- You must restart the computer to enable protection against encryptors after Kaspersky Small Office Security is installed.
Encrypted connections scan limitations
Due to technical limitations of the implementation of scanning algorithms, scanning of encrypted connections does not support certain extensions of the TLS 1.0 protocol and later versions (particularly NPN and ALPN). Connections via these protocols may be limited. Browsers with SPDY protocol support use the HTTP over TLS protocol instead of SPDY even if the server to which the connection is established supports SPDY. This does not affect the level of connection security. If the server supports only the SPDY protocol and it is impossible to establish the connection via the HTTPS protocol, the application does not monitor the connection established.
The application does not process traffic transmitted via extensions of the HTTP/2 protocol.
Kaspersky Small Office Security prevents data exchange over the QUIC protocol. Browsers use a standard transport protocol (TLS or SSL) regardless of whether or not support for the QUIC protocol is enabled in the browser.
Kaspersky Small Office Security monitors only those protected connections which it is able to decrypt. The application does not monitor connections added to the list of exclusions (Websites link in the Network settings window).
The following components perform decryption and scanning of encrypted traffic by default:
- Safe Browsing
- Safe Money
- URL Advisor
- Web Policy Management
Kaspersky Small Office Security decrypts encrypted traffic while the user is using the Google Chrome browser if the Kaspersky Protection extension is disabled in this browser.
Kaspersky Small Office Security does not monitor traffic if the browser loads a web page or its elements from a local cache instead of from the Internet.
Limitations on scanning The Bat client encrypted connections
Since The Bat mail client uses its own certificate store, Kaspersky Small Office Security identifies the certificate used to establish an HTTPS connection between this client and the server as untrusted. To prevent this from happening, configure The Bat mail client to work with the local Windows Certificate Store.
Limitations on encrypted connections scan exclusions
When scanning encrypted connections with websites that have been added to exclusions, certain components such as Anti-Banner, URL Advisor and Private Browsing may continue to scan encrypted connections. The Safe Money, Web Policy Management, and Safe Browsing components do not scan websites that have been added to exclusions.
Backup and Restore limitations
The following limitations apply to Backup and Restore:
- Online storage of backup copies becomes unavailable when the hard drive or computer is replaced. Visit the Kaspersky Support website for information on how to restore the connection to Online storage after replacing your hardware.
- Editing of service files of the backup storage can result in loss of access to the backup storage and inability to restore your data.
- Since the application backs up through the system shadow copy service, the offline Outlook data file (.ost) is not included in the backup set because it is not designed to be backed up.
Limitations of Secret Vault functionality
When a secret vault is created in the FAT32 file system, the size of the secret vault file on the drive must not exceed 4 GB.
Specifics of kernel memory scanning for rootkits in Protected Browser mode
When an untrusted module is detected in Protected Browser mode, a new browser tab opens with a notification about malware detection. If this happens, you are recommended to exit the browser and run a Full Scan of the computer.
Specifics of clipboard data protection
Kaspersky Small Office Security allows an application to access clipboard in the following cases:
- An application with the active window attempts to place data in clipboard. The active window is the window that you are currently using.
- A trusted process of an application attempts to place data in clipboard.
- A trusted process of an application or a process with the active window attempts to receive data from clipboard.
- An application process that previously placed data in clipboard attempts to receive this data from clipboard.
Specifics of infected file processing by application components
By default, the application can delete infected files that cannot be disinfected. Removal by default can be performed during file processing by such components as Intrusion Prevention, Mail Anti-Virus, File Anti-Virus, during scan tasks, and also when System Watcher detects malicious activity of applications.
Limitations applicable to certain components in case of application installation together with Kaspersky Fraud Prevention for Endpoints
Operation of the following Kaspersky Small Office Security components is limited in Protected Browser if the application is installed together with Kaspersky Fraud Prevention for Endpoints:
- Safe Browsing, except Anti-Phishing
- Web Policy Management
- URL Advisor
- Anti-Banner
Specifics of the autorun process operation
The autorun process logs the results of its operation. Data is logged in text files named “kl-autorun-<date><time>.log”. To view data, open the Run window and in the Open field type %TEMP% and click OK.
All trace files are saved at the path to setup files that were downloaded during operation of the autorun process. Data is stored for the duration of operation of the autorun process and deleted permanently when this process is terminated. Data is not sent anywhere.
Kaspersky Small Office Security limitations under Microsoft Windows 10 RS4 with the Device Guard mode enabled:
Operation of the following functionality is partly limited:
- Clipboard protection
- Browser protection from keyboard and mouse input emulators (input spoofing)
- Protection from remote management applications
- Browser protection (management through API, protection from attacks that use dangerous messages to browser windows, protection from message queue management)
- Heuristic Analysis (emulation of the startup of malicious applications)
If UMCI mode is enabled in Windows, Kaspersky Small Office Security does not detect screen lockers.
About logging of events in the Windows event log that are related to the End User License Agreement and Kaspersky Security Network
Events involving accepting and declining the terms of the End User License Agreement, and also accepting and declining participation in Kaspersky Security Network, are recorded in the Windows event log.
Limitations on local address reputation checks in Kaspersky Security Network
Links to local resources are not scanned in Kaspersky Security Network.
Warning about applications that collect information
If an application that collects information and sends it to be processed is installed on your computer, Kaspersky Small Office Security may classify this application as malware. To avoid this, you can exclude the application from scanning by configuring Kaspersky Small Office Security as described in this document.
Warning about the creation of an application installation report
An installation report file is created when the application is installed to a computer. If application installation completed with an error, an installation report file is saved and you can send it to Kaspersky Technical Support. You can view the contents of the installation report file by clicking the link in the application window. If the application is successfully installed, the installation report file is immediately deleted from your computer.
Limitations to webcam control in the Microsoft Windows 10 Anniversary Update (RedStone 1) operating system
After installing the application in the Microsoft Windows 10 Anniversary Update (RedStone 1) operating system, control of webcam access is not guaranteed until the computer is restarted.
Limitation on online backup and restoring data from backup copies
You cannot simultaneously run a Kaspersky Small Office Security backup task and Kaspersky Restore Utility data recovery task on the same computer.
Firewall limitations
Firewall does not control local connections that are installed by controlled applications.
Limitations of the Intrusion Prevention component
If VeraCrypt is installed on your computer, Kaspersky Small Office Security may terminate when working with the Intrusion Prevention component. To resolve this issue, upgrade VeraCrypt to version 1.19 or later.
Limitations when the application is started for the first time after upgrading from Microsoft Windows 7 to Microsoft Windows 10
If you have upgraded Microsoft Windows 7 to Microsoft Windows 8 / 8.1 or Microsoft Windows 10 / RS1 / RS2 / RS3, Kaspersky Small Office Security operates with the following limitations when started for the first time:
- Only File Anti-Virus (real-time protection) is running. Other application components are not running.
- Self-Defense of files and the system registry is running. Self-Defense of processes is not running.
- The application interface is not available until you restart the computer. The application displays a notification stating that some application components are not running and that the computer must be restarted after completion of adaptation to the new operating system.
- Only the Exit option is available in the context menu of the application icon in the notification area.
- The application does not display notifications, and automatically chooses the recommended action.
Warning about error adapting application drivers when upgrading the operating system from Windows 7 to Windows 10
Upgrading Windows 7 to Windows 10 may result in an error adapting the drivers of Kaspersky Small Office Security. Drivers are adapted in the background, which means that you do not receive notifications about its progress.
If there is an error adapting the drivers, you will not be able to use the following features of the application:
- Firewall
- Threat detection while the operating system is loading
- Protection of application processes by using the Protected Process Light (PPL) technology of Microsoft Corporation
You can use the following methods to fix the error:
- Restart the computer and restart application adaptation from the notification in the Notification Center.
- Uninstall the application and re-install it.
Limitations on scanning traffic sent over HTTPS in the Mozilla Firefox browser
In Mozilla Firefox 58.x and later versions, the application does not scan traffic transmitted over the HTTPS protocol if browser settings modification is protected by a Primary password. When a Primary password is detected in the browser, the application shows a notification containing a link to an article in the Knowledge Base. The article contains instructions on resolving this problem.
If HTTPS traffic is not monitored, the operation of the following components is limited:
- Safe Browsing
- Anti-Phishing
- Web Policy Management
- Privacy Protection
- Anti-Banner
- Secure Data Input
- Safe Money
Limitations of the Kaspersky Protection extension in Google Chrome and Mozilla Firefox
The Kaspersky Protection extension does not operate in Google Chrome and Mozilla Firefox if there is Malwarebytes for Windows installed on your computer.
Special considerations when installing the application in Microsoft Windows 7 Service Pack 0 and Service Pack 1
When installing the application in an operating system that does not support certificates with an SHA256 digital signature, the application installs its own trusted certificate.
About automatic testing of functionality of Kaspersky applications
Kaspersky applications including Kaspersky Small Office Security, have a special API (application programming interface) for automatic testing of application functionality. This API is intended to be used only by Kaspersky developers.
Restrictions on data copying to the clipboard when multiple users connect to a terminal server at the same time.
If one of the users connected to the terminal server opens a website in Protected Browser, the function of copying data to the clipboard stops working for other users connected to this terminal server.
Secure Keyboard Input limitations when running multiple terminal sessions
Secure Keyboard Input is not available when multiple concurrent terminal sessions are running.
Page top
Other sources of information about the application
Kaspersky Small Office Security page in the Knowledge Base
Knowledge Base is a section on the Kaspersky Support website.
On Kaspersky Small Office Security page in the Knowledge Base, you can read articles that provide useful information, recommendations, and answers to frequently asked questions on how to purchase, install, and use the application.
Articles in the Knowledge Base may provide answers to questions that relate both to Kaspersky Small Office Security as well as to other Kaspersky applications. Articles in the Knowledge Base may also contain news from Kaspersky Support.
Support for Kaspersky applications in our Forum
You can receive support from users and Kaspersky experts in our Forum.
In the Forum, you can view existing topics, post your comments, and create new topics for discussion and getting help.
Page top
Network settings for interaction with external services
Kaspersky Small Office Security uses the following network settings for interacting with external services.
Network settings
Address |
Description |
|---|---|
Protocol: Port: |
Activating the application. |
Protocol: Port: |
Updating databases and application software modules. |
Protocol: Port: |
Requests sent by the application may contain addresses of domains and the public IP address of the user because the application establishes a TCP/UDP connection with the DNS server. This information is needed, for example, to validate the certificate of a web resource when using HTTPS. If Kaspersky Small Office Security is using a public DNS server, data processing is governed by the privacy policy of the relevant service. If you want to prevent Kaspersky Small Office Security from using a public DNS server, contact Technical Support for a private patch. |
Protocol: |
|
Protocol: Port: |
Updating databases and application software modules. |
Protocol: Port: |
Using Kaspersky Security Network. |
Protocol: Port: |
Using Kaspersky Security Network. |
Protocol: |
Follow links from the interface. |
Glossary
Activating the application
Switching the application to fully functional mode. Application activation is performed by the user during or after installation of the application. To activate the application, the user must have an activation code.
Activation code
A code that you receive when purchasing a license for Kaspersky Small Office Security. This code is required for activating the application.
The activation code is a unique sequence of twenty letters and numbers in the format xxxxx-xxxxx-xxxxx-xxxxx.
Anti-virus databases
Databases that contain information about computer security threats known to Kaspersky as of when the anti-virus databases are released. Entries in anti-virus databases allow detecting malicious code in scanned objects. Anti-virus databases are created by Kaspersky specialists and updated hourly.
Application modules
Files included in the Kaspersky installation package that are responsible for performing the main tasks of the corresponding application. A particular application module corresponds to each type of task performed by the application (protection, scan, updates of anti-virus databases and application modules).
Backup and Restore
Creates backup copies of data stored on the computer. Backup copies are created to prevent data loss as a result of theft, hardware malfunctions, or hacker attacks.
Blocking an object
Denying access to an object from third-party applications. A blocked object cannot be read, executed, modified, or deleted.
Compressed file
A compressed executable file that contains a decompression program and instructions for the operating system to execute it.
Database of malicious web addresses
A list of web addresses whose content may be considered to be dangerous. Created by Kaspersky experts, the list is regularly updated and is included in Kaspersky application package.
Digital signature
An encrypted block of data embedded in a document or application. A digital signature is used to identify the author of the document or application. To create a digital signature, the document or application author must have a digital certificate proving the author's identity.
A digital signature lets you verify the data source and data integrity and protect yourself against counterfeits.
Disk boot sector
A boot sector is a special area on a computer's hard drive, floppy disk, or other data storage device. It contains information on the disk's file system and a boot loader program, which is responsible for starting the operating system.
There exist a number of viruses that infect boot sectors, which are thus called boot viruses. Kaspersky application allows scanning boot sectors for viruses and disinfecting them if an infection is found.
Exploit
A software code that uses a vulnerability in the system or software. Exploits are often used to install malware on the computer without user's knowledge.
False positive
A situation when a Kaspersky application considers a non-infected object to be infected because the object's code is similar to that of a virus.
File mask
Representation of a file name using wildcards. The standard wildcards used in file masks are * and ?, where * represents any number of any characters and ? stands for any single character.
Heuristic analyzer
A technology for detecting threats about which information has not yet been added to Kaspersky databases. The heuristic analyzer detects objects whose behavior in the operating system may pose a security threat. Objects detected by the heuristic analyzer are considered to be probably infected. For example, an object may be considered probably infected if it contains sequences of commands that are typical of malicious objects (open file, write to file).
Hypervisor
An application supporting the parallel operation of several operating systems on one computer.
iChecker Technology
A technology that allows increasing the speed of anti-virus scanning by excluding objects that have remained unchanged since their last scan, provided that the scan parameters (the databases and the settings) have not been altered. The information for each file is stored in a special database. This technology is used in both real-time protection and on-demand scan modes.
For example, you have an archive file that was scanned by a Kaspersky application and assigned not infected status. Next time, the application will skip this archive unless the archive has been altered or the scan settings have been changed. If you have changed the archive content by adding a new object to it, modified the scan settings, or updated the application databases, the archive will be re-scanned.
Limitations of iChecker technology:
- This technology does not work with large files, since it is faster to scan a file than to check whether the file has been modified since it was last scanned.
- The technology supports a limited number of formats.
Incompatible application
An anti-virus application from a third-party developer or a Kaspersky application that does not support management through Kaspersky Small Office Security.
Infected object
An object a portion of whose code completely matches part of the code of known malware. Kaspersky does not recommend accessing such objects.
Kaspersky Security Network (KSN)
The cloud-based knowledge base of Kaspersky containing information about the reputation of applications and websites. Use of data from Kaspersky Security Network ensures faster responses by Kaspersky applications to threats, improves the performance of some protection components, and reduces the likelihood of false positives.
Kaspersky update servers
Kaspersky HTTP servers from which updates of databases and software modules are downloaded.
Keylogger
A program designed for hidden logging of information about keys pressed by the user. Keyloggers function as keystroke interceptors.
License term
A time period during which you have access to the application features.
Miners
Software designed to mine cryptocurrencies.
Phishing
A type of internet fraud aimed at obtaining unauthorized access to users' confidential data.
Probable spam
A message that cannot be unambiguously considered spam, but has several spam attributes (for example, certain types of mailings and advertising messages).
Probably infected object
An object whose code contains portions of modified code from a known threat, or an object whose behavior is similar to that of a threat.
Protected Browser
A dedicated operation mode of a standard browser designed for financial activities and online shopping. Using Protected Browser ensures the safety of confidential data that you enter on the websites of banks and payment systems such as bank card numbers or passwords used for online banking, and also prevents theft of payment assets when making online payments.
Protection components
Integral parts of Kaspersky Small Office Security intended for protection against specific types of threats (for example, Anti-Spam and Anti-Phishing). Each of the components is relatively independent of the other ones and can be disabled or configured individually.
Protocol
A clearly defined and standardized set of rules governing the interaction between a client and a server. Well-known protocols and the services associated with them include HTTP, FTP, and NNTP.
Quarantine
A dedicated storage in which the application places backup copies of files that have been modified or deleted during disinfection. Copies of files are stored in a special format that is not dangerous for the computer.
Rootkit
A program or a set of programs for hiding traces of an intruder or malware in the operating system.
On Windows-based operating systems, a rootkit usually refers to a program that penetrates the operating system and intercepts system functions (Windows APIs). Interception and modification of low-level API functions are the main methods that allow these programs to make their presence in the operating system quite stealthy. A rootkit can usually also mask the presence of any processes, folders, and files that are stored on a disk drive, in addition to registry keys, if they are described in the configuration of the rootkit. Many rootkits install their own drivers and services on the operating system (these also are "invisible").
Script
A small computer program or an independent part of a program (function) which, as a rule, has been developed to execute a specific task. It is most often used with programs that are embedded in hypertext. Scripts are run, for example, when you open some websites.
If real-time protection is enabled, the application tracks the execution of scripts, intercepts them, and scans them for viruses. Depending on the results of scanning, you may block or allow the execution of a script.
Secret Vault
A data vault is a special data storage in which files are stored in encrypted form. A password is needed to access such files. Secret vaults are meant to prevent unauthorized access to user data.
Security level
The security level is defined as a predefined collection of settings for an application component.
Spam
Unsolicited mass email mailings, most often including advertisements.
Startup objects
The set of programs needed to start and correctly operate the operating system and software installed on your computer. These objects are executed every time the operating system is started. There are viruses capable of infecting autorun objects specifically, which may lead, for example, to blocking of operating system startup.
Task
The functions of Kaspersky application are implemented in the form of tasks, such as: Full Scan task or Update task.
Task settings
Application settings that are specific for each task type.
The database of phishing links and fake cryptocurrency exchanges
List of web addresses which have been defined as phishing web addresses by Kaspersky specialists. The databases are regularly updated and are part of the Kaspersky application package.
Threat level
An index showing the probability that an application poses a threat to the operating system. The threat level is calculated using heuristic analysis based on two types of criteria:
- Static (such as information about the executable file of an application: size, creation date, etc.)
- Dynamic, which are used while simulating the application's operation in a virtual environment (analysis of the application's system calls)
Threat level allows detecting behavior typical of malware. The lower the threat level is, the more actions the application is allowed to perform in the operating system.
Traces
Running the application in debugging mode; after each command is executed, the application is stopped, and the result of this step is displayed.
Traffic scanning
Real-time scanning that uses information from the current (latest) version of the databases for objects transferred over all protocols (for example, HTTP, FTP, and other protocols).
Trust group
A group to which Kaspersky Small Office Security assigns an application or a process depending on the following criteria: presence of a digital signature, reputation on Kaspersky Security Network, trust level of the application source, and the potential danger of actions performed by the application or process. Based on the trust group to which an application belongs, Kaspersky Small Office Security can restrict the actions that the application may perform in the operating system.
In Kaspersky Small Office Security, the following trust groups are used: Trusted, Low Restricted, High Restricted, or Untrusted.
Trusted process
A software process whose file operations are not restricted by Kaspersky application in real-time protection mode. When suspicious activity is detected in a trusted process, Kaspersky Small Office Security removes the process from the list of trusted processes and blocks its actions.
Unknown virus
A new virus about which there is no information in the databases. Generally, unknown viruses are detected by the application in objects by using the heuristic analyzer. These objects are classified as probably infected.
Update
The procedure of replacing or adding new files (databases or application modules) retrieved from the Kaspersky update servers.
Update package
A file package designed for updating databases and application modules. Kaspersky application copies update packages from Kaspersky update servers and automatically installs and applies them.
Virus
A program that infects other programs, by adding its code to them in order to gain control when infected files are run. This simple definition allows identifying the main action performed by any virus: infection.
Vulnerability
A flaw in an operating system or an application that may be exploited by malware makers to penetrate the operating system or application, and corrupt its integrity. The presence of a large number of vulnerabilities in an operating system makes it unreliable, because viruses that penetrate the operating system may cause disruptions in the operating system itself and in installed applications.
Page top
Information about third-party code
Information about third-party code is contained in the file legal_notices.txt, in the application installation folder.
Page top
Trademark notices
Registered trademarks and service marks are the property of their respective owners.
Adobe, Acrobat, Reader are either registered trademarks or trademarks of Adobe in the United States and/or other countries.
Apple, Mac, macOS, MacBook, MacBook Air, Mac Pro, iMac, iPad, iPod, iPhone, QuickTime, Safari are trademarks of Apple Inc.
Arm is a registered trademark of Arm Limited (or its subsidiaries) in the US and/or elsewhere.
Cloudflare, the Cloudflare logo, and Cloudflare Workers are trademarks and/or registered trademarks of Cloudflare, Inc. in the United States and other jurisdictions.
Dropbox is a trademark of Dropbox, Inc.
Google, Google+, Google Chrome, Google Public DNS, Chromium, SPDY, YouTube, Android are trademarks of Google LLC.
Intel, Celeron, and Atom are trademarks of Intel Corporation in the U.S. and/or other countries.
Java and JavaScript are registered trademarks of Oracle and/or its affiliates.
Linux is the registered trademark of Linus Torvalds in the U.S. and other countries.
LogMeIn Pro and Remotely Anywhere are trademarks of LogMeIn, Inc.
Mail.ru is a Trademark of Mail.ru LLC.
ActiveX, Direct3D, Microsoft, Microsoft Edge, Windows, Windows Media, Windows XP, Windows Server, Internet Explorer, Outlook, PowerPoint, PowerShell, Bing are trademarks of the Microsoft group of companies.
Mozilla, Firefox and Thunderbird are trademarks of the Mozilla Foundation in the U.S. and other countries.
VMware is a registered trademark or trademark of VMware, Inc. in the United States and/or other jurisdictions.
Page top
Activating the application with a reserve activation code
To apply a reserve activation code, click the Next button.
If the license has not yet expired, you can apply an activation code that has been used previously to activate the application on another computer.
To cancel activation of the application, click the Cancel link.
Page top
Enter activation code window
Fields for entering an application activation code
Receive license from your account
Activation code corresponds to another application
This window opens if the activation code entered is intended for another application. You can start using this application now or after your license for Kaspersky Small Office Security expires.
Page top
Information about website categories
You can view descriptions of the website categories by following the link.
How to configure DNS over HTTPS protection
When you type a website name in the address bar, the browser sends your request to a DNS server. The DNS server determines the IP address of the website requested. Data is transferred from your computer to the DNS server using an ordinary unencrypted text protocol. Intruders can intercept information about the websites you visit and abuse it. To prevent this from happening, this information should be transferred over the secure HTTPS protocol. The server that receives and analyzes such requests is called a DNS over HTTPS (or DoH) server.
Kaspersky Small Office Security automatically receives data about which DoH server is used in the Mozilla Firefox browser. If you have added a DoH server manually in Kaspersky Small Office Security and you want DNS data to be transferred through this DoH server, you need to add this server to your Mozilla Firefox browser settings. For information on configuring the DoH server, see Mozilla Firefox Help.
To add a DoH server:
- Open the main application window.
- Click in the lower part of the main window.
This opens the Settings window.
- In the Additional section, select the Network subsection.
This opens the Network settings window.
- In the Traffic processing block, click the Manage DoH servers link to open the DoH servers window.
- Click the Add button.
- In the window that opens, enter the name or IP address of the DoH server and click Add.
The DoH is added to the list.
Information about the current license is found window
No, continue the wizard and enter a new activation code
Page top
Registration window
In this window, specify the registration data required to contact Technical Support.
Page top
Internet connection is not available
This window is displayed if you fail to activate the application due to problems with your Internet connection.
Page top
Select where to place restored files section
Activation error
Application activation failed. To view information about the issue in the Knowledge Base, click the Reasons and possible solutions link.
Reasons and possible solutions
Switching to other application
To run the Migration Wizard, click the Continue button. The Migration Wizard installs the application that corresponds to the entered activation code.
If your subscription for Kaspersky Small Office Security has not yet expired, you can use Kaspersky Small Office Security on another computer.
To cancel the migration to a different application, click the Cancel link.
Page top
Make sure that the activation code you enter is not the activation code for a subscription
Make sure that the activation code that you are specifying as a reserve code is not actually intended for subscription-based use of the application. Payment for subscription-based use of the application is collected when the subscription is obtained. If you have obtained a subscription for Kaspersky Small Office Security, do not use the application under the current license. Instead, activate the application with a subscription activation code.
Until the license expires, you can use an already used activation code to activate the application on another computer.
Page top
Applications whose mic access is blocked window
This window displays the applications for which you have blocked microphone access.
Permissions
A password protects the following application settings from being changed by a user or group. If a check box next to an action is selected, it means that the user or user group is allowed to perform the selected action.
Configure application settings |
Change application settings in the main window, the Settings window, Notification Center and notifications. Enable and disable application traces. |
Manage Backup and Restore |
Create, modify and remove Backup and Restore jobs. |
Sign in to Web Policy Management |
Sign in to Web Policy Management and edit settings |
Exit the application |
Exit the application. |
Remove / modify / restore the application |
Remove, modify and restore the application. |
Remove key |
Remove or modify an activation code and reserve activation code. |
View reports |
Go to the Reports window. |
Disable protection components |
Disable and enable protection components available in the Settings window. |
Troubleshooting / Roll back changes
This window displays the progress of fixing operating system corruption detected during analysis. It may take a while to fix damage.
If you selected Roll back changes at the first step, the Microsoft Windows Troubleshooting Wizard rolls back the actions selected at the previous step.
License details window
This window displays the following application license information:
- License key
- License status
- Number of hosts covered by the license
- Activation date
- License expiration date
- Number of days before expiration of the license
How to configure VPN for a selected website
Kaspersky VPN functionality is not available in some regions.
To configure VPN for a selected website:
- Open the main application window.
- In the main application window, click the
 button.
 - Select Settings → Websites.
- Click the Settings button.
This opens the Rules for connection to websites window.
- In the Exclusions for websites block, click the Settings button.
This opens the Exclusions for websites window.
- Click the Add button to add a website to the list of exclusions from the settings that are specified for website categories.
This opens the Add website window.
- Enter the website address in the Web address (URL) field.
- In the Action to take when the website is accessed section, specify which action the application must take when you visit this website:
- Enable VPN. The application enables VPN when you visit the specified website. For example, you can configure the application to enable VPN when you visit the website of your bank. This setting is applied even if the Ignore option is selected in the When browsing unsecured websites of banks section in the Rules for connection to websites window.
- In the Select drop-down list, select the location of the VPN server through which you want to establish a VPN connection when visiting this website. If the location of the VPN server selected for the website differs from the location selected for the website category to which the website belongs, connection to the website will be established through the location that is specified for this website and not for the website category.
- Select the Notify when enabled check box if you want to receive notifications about VPN being enabled when you visit this website.
- Ignore. The application does not enable VPN when you visit the specified website.
- Enable VPN. The application enables VPN when you visit the specified website. For example, you can configure the application to enable VPN when you visit the website of your bank. This setting is applied even if the Ignore option is selected in the When browsing unsecured websites of banks section in the Rules for connection to websites window.
- Click the Add button.
The application does not enable VPN if the HTTPS protocol is used to connect to a website.
Return to Kaspersky VPN Secure Connection Help.
Page top
How to configure VPN for website categories
Kaspersky VPN functionality is not available in some regions.
By default, Kaspersky VPN does not establish a secure connection when you open websites in a browser. You can configure enabling VPN for different website categories if Kaspersky Plus, Kaspersky Premium or Kaspersky Small Office Security is installed and activated on your computer. For example, you can specify that VPN must be enabled when you visit websites of payment systems or social networks.
To configure VPN for website categories:
- Open the main application window.
- In the main application window, click the button.
- Select Settings → Websites.
- Click the Settings button.
This opens the Rules for connection to websites window.
- Select website category:
- Banking websites. This category includes websites of banks.
- Payment systems. This category includes websites of payment systems.
- Internet shops with online payment. This category includes websites of online retailers with built-in payment systems.
- Social networks. This category includes websites of social networks.
- Select an action triggered by visiting this website category:
- Enable VPN. The application will activate VPN when visiting websites of this category.
- Ask. When visiting any website in this category, the application will ask you whether a VPN should be established for this website. In the browser window, choose the appropriate action and select the Remember my choice for this website check box. The application will perform the chosen action every time you visit this website. If the check box is not selected, the application remembers your choice for one hour.
- Ignore. The application will not establish a VPN when visiting websites of this category.
- If the Enable VPN option is selected, in the Select drop-down list, specify the location of the VPN server through which you want to establish a VPN connection for this website category.
- Select the Notify when enabled check box if you want to receive notifications about a secure connection being enabled when you visit this category of websites.
By default, Kaspersky VPN Secure Connection does not prompt you to enable VPN if the HTTPS protocol is used to connect to a website.
Return to Kaspersky VPN Secure Connection Help.
Page top
Intrusion Prevention
The Applications section displays information about the number of applications controlled by Kaspersky Small Office Security.
The Current Activity section displays information about the number of currently running applications and processes. Information about the CPU workload, RAM volume, free disk space, and network activity is provided in graphic format.
Intrusion Prevention Exclusions
Resources tab
This tab lets you select system resources or user resources and modify the rights of applications to access these resources.

End User License Agreement window
The window contains the text of the End User License Agreement. Use the scroll bar to view the End User License Agreement.
Page top
Licensing window
License information is displayed in the section located in the upper part of the window:
- License key
You can stop using the application under the current license by clicking the
 button.
 - Key status
- Number of hosts covered by the license
- Activation date
- License expiration date
- Number of days before expiration of the license
For subscriptions, additional information about the subscription status may also be displayed.
About your license/About your subscription
Depending on the presence of a license, subscription, and on the properties of your version of the application, the window may display various buttons for initiating actions related to your license or subscription. Default buttons are described below.
Activate application / Enter activation code
Reasons and possible solutions
Visit service provider website
Page top
Certificate Installation
This window displays the progress of automatic installation of the certificate. Task completion may take some time.
Kaspersky Small Office Security searches for web browsers installed on the user's computer and then automatically installs certificates to the Microsoft Windows certificate storage.
While installing the certificate, a Microsoft Windows security notification may appear on the screen, prompting you to confirm installation of the certificate.
Page top
Blocked computers section
To unblock a computer selected in the list, open its context menu.
Page top
Network activity section
The lower part of the window displays a network traffic chart that shows volumes of inbound and outbound traffic for a process selected in the list. The chart reflects traffic volume in real time. Traffic volume is displayed in kilobytes.
Page top
Special considerations when adding a rule for a network adapter
When you create an allow rule for a network adapter and/or a rule with a specified TTL, this rule may conflict with a deny rule for applications. For example, if an application is in the High Restricted group, it will be denied network access even if you created an allow packet rule for the network adapter (and for TTL).
To configure an allow rule to work for all applications that attempt to connect to the network via this network adapter, you must create the following rules in order of priority from the highest priority to the lowest priority (in the general list of packet rules, the priority is determined from top to bottom, going from the highest priority to the lowest priority).
- Allow rule for the selected network adapter.
- Deny rules for all other network adapters.
- Allow rule without specifying a network adapter.
To configure an allow rule to work for a network adapter using TTL, you must create the following rules in order of priority from the highest priority to the lowest priority:
- Allow rule for a specific TTL value.
- Deny rule for a TTL value equal to 255.
- Allow rule without specifying a TTL value.
Network traffic section
The lower part of the window displays a chart that shows the distribution of traffic of the selected application over time for the specified time interval.
Page top
Network connections termination
If the computer is shut down or protection is paused when the application is monitoring active network connections, notification about termination of those connections is displayed. This is necessary for properly quitting the application. Termination occurs automatically after 10 seconds or after you click the Yes button. Most terminated connections are recovered after a short time.
If the connection is terminated when you are downloading a file without a download manager, data transmission is interrupted. To download the file, you must start the download process again.
You can cancel termination of connections. To do this, in the notification dialog box, click the No button. The application continues to run.
Page top
About advanced options for VPN
Kaspersky VPN functionality is not available in some regions.
Additional features of VPN are available if Kaspersky Plus, Kaspersky Premium or Kaspersky Small Office Security is installed on your computer.
Additional features of VPN include:
- Settings for enabling VPN when visiting the following website categories:
- Banking websites;
- Payment systems;
- Online stores and electronic commerce websites;
- Social networks.
- Settings for automatically changing the location of the VPN server. If you specified different locations for websites of different categories in the VPN settings, you can specify whether or not to change the location of the VPN server when moving between websites of different categories.
- VPN settings for individual websites, for example, for websites that you visit often.
Return to Kaspersky VPN Secure Connection Help.
Page top
Detected objects
When this button is clicked, Kaspersky Small Office Security begins processing the detected object.
This button is available if an object has been detected.
Clicking the button opens a menu from which you can select an additional action:
- Add to exclusions creates an exclusion according to which the object should not be recognized as malicious.
- Ignore moves the notification to the Ignored notifications section.
- Open containing folder opens the folder that originally contained the file.
- Learn more opens a web page with a description of the detected object.
Kaspersky Small Office Security notification windows
Notifications that appear in the taskbar notification area inform you of application events that require your attention.
If a notification is displayed on the screen, you should select one of the options that are suggested in the notification. The optimal option is the one recommended as the default by Kaspersky experts.
Page top
Web Policy Management window
Switch / 
This switch enables / disables control of the user's actions:
– when control of the user's actions is enabled
– when control of the user's actions is disabled
Registration and authorization
Signing in with Facebook, Google and Apple is not available in some regions. For more details on restrictions in Russia, please see this article (available only in English and Russian).
When you sign in to an existing Kaspersky Small Office Security Management Console account, the window displays the following:
During Kaspersky Small Office Security Management Console account creation, the window displays the following:
I agree to provide Kaspersky with my email address to receive personalized marketing offers
More about Kaspersky Small Office Security Management Console account
Page top
Select secret vault location window
In this window, you can select the location of the secret vault that you are creating.
Trust group for unknown applications window
This window shows applications that could not be added to existing groups. You can select a trust group and click Save button. Applications that could not be added to other groups will be added to the group you specified.
By default, these applications are added to Low Restricted group.
Trust group for applications started before startup of Kaspersky Small Office Security window
In this window, you can select a trust group for unknown applications started before startup of Kaspersky Small Office Security.
Select trust group automatically
Page top
Remote Access Detection settings
Trusted remote administration applications (such as TeamViewer, LogMeIn Pro and Remotely Anywhere) can change the settings of Kaspersky Small Office Security.
Untrusted remote control applications will not be allowed to change the settings of Kaspersky Small Office Security.
Self-Defense settings
Settings |
Description |
|---|---|
Enable Self-Defense |
When this check box is selected, Kaspersky Small Office Security prevents alteration or deletion of application files on the hard drive, memory processes, and entries in the system registry. |
Allow managing Kaspersky Small Office Security settings via remote control applications |
If this check box is selected, trusted remote administration applications (such as TeamViewer, LogMeIn Pro and Remotely Anywhere) can change Kaspersky Small Office Security settings. Untrusted remote control applications will not be allowed to change Kaspersky Small Office Security settings, even when the check box is selected. |
Enable external management of system services |
If the check box is selected, Kaspersky Small Office Security allows management of application services from a remote computer. When an attempt is made to manage application services remotely, a notification is displayed in the Microsoft Windows taskbar, above the application icon (unless the notification service has been disabled by the user). |
Add / Edit registry key window
Activation completed window
This window opens if the application was successfully activated.
Blocked and allowed applications window
This window displays a list of applications that are allowed or not allowed to change the operating system settings. An empty list means that you have not yet allowed or blocked any applications from modifying operating system settings.
Page top
Privacy Protection window
In this window, you can enable or disable the following components:
Quarantine window
Kaspersky Small Office Security does not disinfect Windows Store apps. If scanning results indicate that such an app is dangerous, it is deleted from your computer. When a Windows Store app is deleted, Kaspersky Small Office Security does not create a backup copy of it. To restore such objects, you must use the recovery tools included with the operating system (for detailed information, see the documentation for the operating system that is installed on your computer) or update apps via the Windows Store.
Explicit language window
This window displays a list of explicit language. If any of these words are present in a message, Kaspersky Small Office Security flags the message as spam.


App Updater settings window
Enable search for application updates
Automatically download and install updates if you do not have to accept new license agreements
Search for application updates
Page top
Updates search mode / Schedule
The table describes the settings that control the schedule for the App Updater and Application Manager components.
Settings |
Description |
|---|---|
Updates search mode (App Updater) Run analysis (Application Manager) |
Automatically. Kaspersky Small Office Security runs the task once every 24 hours according to the internal settings. Minutely / Hourly / Daily / Weekly / Monthly / At a specified time. Kaspersky Small Office Security runs the task according to your defined schedule, which can be specified up to the exact minute. When one of these options is selected, the Postpone running after application startup for N minutes list is available. After application startup. After Kaspersky Small Office Security starts, it runs the task after waiting the amount of minutes indicated in the Start in N minutes field. After every update. Kaspersky Small Office Security runs the task after downloading and installing a new update package. |
Search for updates on the next day if computer is turned off (App Updater) Run object analysis on the next day if computer is turned off (Application Manager) |
If a scheduled search for application updates or object analysis was skipped because the computer was turned off, Kaspersky Small Office Security runs the task after the computer is turned on. This check box is displayed if one of the following run modes is selected: Daily / Weekly / Monthly / At a specified time. |
Search for application updates only when screensaver is active or computer is locked (App Updater) Run object analysis only when screensaver is active or computer is locked (Application Manager) |
Kaspersky Small Office Security runs the task when you are finished working with the computer. This means that the task will not use system resources while you work. This check box is displayed if the After every update run mode is selected. |
Update settings
Settings |
Description |
|---|---|
Databases update schedule |
Clicking this link opens the Databases update schedule window in which you can select one of the database update run modes: Automatically. Update task run mode, under which Kaspersky Small Office Security scans for the update package in the update source at a particular frequency. The scanning frequency can be increased during virus outbreaks and decreased when there are none. After detecting a fresh update package, Kaspersky Small Office Security downloads it and installs the updates on the computer. Manually. This task run mode allows you to run the update task manually. Minutely / Hourly / Daily / Weekly / Monthly / At a specified time / After application startup. Update task run mode in which Kaspersky Small Office Security runs the update task according to the schedule you have created. If you select this update task run mode, you can also run Kaspersky Small Office Security update task manually. |
Select update sources |
Clicking this link opens a window with the list of update sources. An update source is a public HTTP or FTP server or a shared folder (local or network) from where the application can download update databases and modules. By default, the list of update sources contains Kaspersky update servers. You can add other update sources to the list. If several update sources are selected from the list, Kaspersky Small Office Security will query them one after the other until it reaches the first available update source from which it is able to download the update package. |
Run database updates as |
Clicking the link opens a window in which you can choose to run the database update with a particular user’s rights. By default, Kaspersky Small Office Security update task is run in the name of the user with whose rights you are registered in the operating system. However, Kaspersky Small Office Security can be updated from an update source to which the user does not have access rights (for example, from a shared folder containing the update package) or for which there is no configured authentication on the proxy server. You can specify a user that possesses the required rights in the application settings and run Kaspersky Small Office Security update task in the name of this user. |
Applications whose webcam access is blocked window
This window displays the applications for which you have blocked webcam access.
Page top
Recommended setting window
Turn on protection against ads to install only desired software and block additional installations
Page top
Reports window
You can use the following capabilities for convenient management of reports:
- Filter by date;
- Filter by value in any cell;
- Search by event record text;
- Sort the list by each report column;
- Change the order and arrangement of columns that are displayed in the report.
The following event importance levels are used in reports:
![]() Informational messages. Informational events that generally do not contain important information.
Informational messages. Informational events that generally do not contain important information.
![]() Warnings. Events that you need to pay attention to, since they contain information about important situations that Kaspersky Small Office Security encounters when running.
Warnings. Events that you need to pay attention to, since they contain information about important situations that Kaspersky Small Office Security encounters when running.
![]() Critical events. Critically important events that indicate that Kaspersky Small Office Security has encountered problems affecting its ability to run or vulnerabilities affecting the protection level of the user’s computer.
Critical events. Critically important events that indicate that Kaspersky Small Office Security has encountered problems affecting its ability to run or vulnerabilities affecting the protection level of the user’s computer.
When you click the Save report button, you can save the report as either a TXT or CSV format file.
Page top
Running AVZ scripts
This window displays the process of execution of the AVZ script. Script execution may take some time.
Page top
Select a ZIP file or folder
Custom design themes are not available in some regions.
When choosing a theme, consider the following limitations:
- Kaspersky Small Office Security will not be able to use the selected theme in the following cases:
- The files within the archive have a name or path within the folder structure that is different than in the default theme.
- The archived files responsible for the texts in the application windows are corrupted.
- Themes are designed for a specific version of Kaspersky Small Office Security and are not applicable to other versions or other applications. When upgrading the application to a new version or installing another application over it, the theme is changed to the default theme.
If you encounter problems when selecting an alternative theme and you cannot install the default theme using the prescribed method (for example, you cannot clear the Use a custom design theme check box in the Interface settings window because the font merges with the background and the necessary management elements are indistinguishable), you are advised to reinstall Kaspersky Small Office Security.
Add / edit exclusion for computer keyboard window
In the Scope section, you can specify the area for which the exclusion rule for Secure Keyboard Input applies.
In the Secure Keyboard Input section, you can specify whether Kaspersky Small Office Security protects data input from the computer keyboard for the selected site or web page.
Add / edit exclusion for On-Screen Keyboard window
In the Scope section, you can specify what the On-Screen Keyboard icon display settings apply to: the entire website or the specified page.
In the On-Screen Keyboard icon section, you can specify whether or not the application should display the On-Screen Keyboard icon on pages matching the specified web address mask.
Do not show icon in browser window
Reports and Quarantine settings
In the Reports section, you can configure the settings for report creation and storage.
Limit the size of report file to
In the Quarantine section, you can modify Quarantine settings.
Limit the size of Quarantine to
Page top
Self-Defense settings
Allow managing Kaspersky Small Office Security settings via remote control applications
Proxy server settings
Automatically detect proxy server settings
Use specified proxy server settings
Use proxy server authentication
Webcam and Mic Control
Enable / disable Webcam and Mic Control
Under Webcam settings, you can edit the following settings:
Block all apps from accessing your webcam
Notify if an app is using the webcam
Under Mic settings, you can edit the following settings:
Block all apps from accessing your mic
Notify if an app is using the mic
Password protection window
The Change or remove password link is available if a password has been set earlier to protect access to Kaspersky Small Office Security functions.
In the Password scope section, you can specify which parts of application administration you want to protect with a password.
Configure application settings
Scan settings
The table describes the settings that control the following types of scans: Full Scan, Quick Scan, Selective Scan, and Instant File Scan.
Settings |
Description |
|---|---|
Security level |
Kaspersky Small Office Security uses various sets of settings for scanning. The sets of settings that are stored in the application are called security levels:
|
Action on threat detection |
Before attempting to disinfect or delete an infected file, the application creates a backup copy in case you subsequently need to restore the file or it becomes possible to disinfect it later. |
Edit scan scope (not available in the Context Menu Scan settings) |
Clicking the link opens a window with a list of objects that Kaspersky Small Office Security can scan. Depending on the type of scan (Full Scan, Quick Scan or Selective Scan), various objects will be included by default in the list. You can add objects to the list or delete the objects that you add. To remove an object from the scan, you do not have to delete the object from the list. All you need to do is clear the check box next to the object name. |
Scan schedule (not available in the Context Menu Scan settings) |
Manually. Run mode in which you can start scan manually at a time when it is convenient for you. By schedule. Scan run mode in which the application runs the scan task according to the schedule you have created. If you select this scan run mode, you can also run the scan task manually. |
Run scan as |
Clicking the link opens a window in which you can choose to run the scan with a particular user’s rights. By default the scan task is run in the name of the user with whose rights you are registered in the operating system. The protection scope may include network drives or other objects that require special rights to access. You can specify a user that possesses the required rights in the application settings and run the scan task on behalf of this user. |
File types |
Kaspersky Small Office Security treats files without extensions as executables. The application always scans them, regardless of the file types you have selected for scanning. All files. If this setting is enabled, Kaspersky Small Office Security scans all files without exception (all formats and extensions). Files scanned by format. If you select this setting, the application will scan only . Before searching for malicious code in a file, its internal header is analyzed to determine the file format (for example, TXT, DOC, EXE). The scan also looks for files with particular file extensions.Files scanned by extension. If you select this setting, the application will scan only potentially infected files. The file format is determined based on the extension of a file. |
Scan only new and modified files |
Scans only new files and those files that have been modified since the last time they were scanned. This will allow you to save time performing the scan. This scan mode applies both to simple and compound files. |
Skip file that is scanned for longer than N seconds |
Limits the duration for scanning a single object. After the specified amount of time has run out, the application will stop the file scan. This will allow you to save time performing the scan. |
Scan archives |
Scan ZIP, GZIP, BZIP, RAR, TAR, ARJ, CAB, LHA, JAR, ICE and other archives. The application scans archives not only by their extension, but by their format as well. When checking archives, the application performs a recursive unpacking. This allows to detect threats inside multi-level archives (archive within an archive). |
Scan distribution packages |
The check box enables/disables the scanning of third-party distribution packages. |
Scan files in Microsoft Office formats |
Scans Microsoft Office files (DOC, DOCX, XLS, PPT and other Microsoft extensions). Office format files also include OLE objects. Kaspersky Small Office Security scans office format files that are smaller than 1 MB, regardless of whether the check box is selected or not. |
Scan email format files |
This check box enables / disables the option for Kaspersky Small Office Security to scan files in email formats and mail databases. The application fully scans only Microsoft Outlook, Windows Mail/Microsoft Outlook Express and EML mail file formats, and only if the computer has the Microsoft Outlook x86 mail client. If this check box is selected, Kaspersky Small Office Security parses the email format file and analyzes each component (body, attachments) for viruses. If this check box is cleared, Kaspersky Small Office Security scans the email format file as a single object. |
Scan password-protected archives |
If the check box is selected, the application scans password-protected archives. Before files contained in the archive can be scanned, a request for password will be displayed on the screen. If the check box is not selected, the application skips scanning password-protected archives. |
Do not unpack large compound files Maximum file size |
If the check box is selected, the application does not scan compound files that are larger than the specified value. If this check box is cleared, the application scans compound files of all sizes. The application scans large files that are extracted from archives regardless of whether the check box is selected or not. |
Heuristic Analysis |
A technique for detecting threats that cannot be identified using the current version of Kaspersky application databases. It allows you to find files that may contain unknown malware or a new modification of a known malware program. When scanning files for malicious code, the heuristic analyzer executes instructions in the executable files. The number of instructions that are executed by the heuristic analyzer depends on the level that is specified for the heuristic analyzer. The heuristic analysis level sets the balance between the thoroughness of searches for new threats, the load on the operating system resources, and the time required for heuristic analysis. |
iSwift Technology |
This technology is a development of the iChecker technology for computers using the NTFS file system. There are limitations to iSwift Technology: it is bound to a specific file's location in the file system and works only with objects in the NTFS file system. When you upgrade Kaspersky Small Office Security to a new version, the iSwift technology is enabled for all scan types, even if it was previously disabled. |
iChecker Technology |
This technology allows increasing scan speed by excluding certain files from scanning. Files are excluded from the scan using a special algorithm that takes into account the release date of Kaspersky Small Office Security databases, the date when the file was scanned last, and any changes made to the scan settings. There are limitations to iChecker Technology: it does not work with large files and applies only to files with a structure that the application recognizes (for example, EXE, DLL, LNK, TTF, INF, SYS, COM, CHM, ZIP, and RAR). |
Removable drives scan settings
Settings |
Description |
|---|---|
Action when a removable drive is connected |
|
Maximum removable drive size |
If this check box is selected, Kaspersky Small Office Security will scan all external devices that do not exceed the specified maximum size. If this check box is cleared, Kaspersky Small Office Security scans external devices of all sizes. |
Show scan progress |
If this check box is selected, Kaspersky Small Office Security shows the progress of external device scans in a separate window and in the running scan window. |
Block the stopping of the scan task |
If this check box is selected, the Stop button is unavailable for external device scans in the running scan window. |
Background scan settings
If background scan is enabled, Kaspersky Small Office Security will perform a background scan. A Background scan is an automatic scan mode that does not display notifications. This scan requires fewer computer resources than other types of scans (for example, Full Scan). When in this mode, Kaspersky Small Office Security scans the system memory, system volumes, boot sectors and startup objects, and searches for rootkits.
If the computer is running on battery power, Kaspersky Small Office Security will not perform background scans when the computer is idle.
Page top
Application Vulnerability Scan settings
Settings |
Description |
|---|---|
Edit search scope |
Clicking the link opens the Application Vulnerability Scan scope window with a list of objects that are scanned for vulnerabilities in applications. You can add objects to the list or delete the objects that you add. To remove an object from the scan, you do not have to delete the object from the list. All you need to do is clear the check box next to the object name. |
Search schedule |
Manually. Run mode in which you can start the Application Vulnerability Scan manually at a convenient time. By schedule. Scan run mode in which the application runs the scan task according to the schedule you have created. If you select this scan run mode, you can also run the scan task manually. |
Blocked banners window
Allowed banners window

Kaspersky websites window
This window displays a list of Kaspersky websites and its partners' websites that host Kaspersky advertisements.
The list is compiled and updated by Kaspersky experts. The list is updated automatically when databases and application modules are updated.
Page top
Advanced settings of Anti-Spam
In the Classify a message as spam section, you can define the conditions for mail filtering that Anti-Spam uses to recognize spam.
If it contains phishing elements
If it contains URLs from the database of malicious URLs
If it is from a blocked sender
If it contains blocked phrases
In the Do not classify a message as spam section, you can define the signs that Anti-Spam uses to recognize non-spam mail.
If it is from an allowed sender
If it contains allowed phrases
In the Actions with messages section, you can specify the tags to add to the subject lines of messages that are assigned the Spam or Probable spam status by Anti-Spam.
Add Label [!! SPAM] to subject of messages classified as spam
Add Label [?? Probable SPAM] to subject of messages classified as probable spam
Page top
Blocked senders window
Blocked phrases window
Allowed phrases window
Safe Money settings
In the On first access to websites of banks and payment systems section, you can select an action that the application performs when you access bank or payment system websites for the first time.
In the Additional section, you can configure additional settings for Safe Money.
To proceed to websites from the Safe Money window, use Default browser
Notify about operating system vulnerabilities
Create shortcut for Safe Money
Safe Browsing settings
Settings |
Description |
|---|---|
Security level
|
The application uses various groups of settings to run Safe Browsing. The sets of settings that are stored in the application are called security levels:
|
Action on threat detection |
|
Scan methods Check the web address against the database of malicious web addresses
|
Scanning the links to determine whether they are included in the database of malicious links allows you to track websites that have been added to denylist. The database of malicious links is generated by Kaspersky specialists. It forms part of the software distribution kit, and it is updated together with Kaspersky Small Office Security databases. |
Check the web address against the database of web addresses containing adware |
An example could be software that redirects your search query in the Internet to an advertising website. This way, you get to an advertising website instead of the web resource that is most relevant to your search query. |
Check the web address against the database of web addresses containing legitimate applications that can be used by intruders to damage your computer or personal data |
An example of this category could be a remote administration tool which is legally used for troubleshooting by system administrators. A criminal can install such a tool on your computer without your knowledge to gain access to your computer and use it for criminal purposes. Kaspersky Small Office Security allows downloading such applications by clicking links on web pages. Single-use links are an exception. You cannot use them to download legitimate applications that hackers can use to cause harm to your computer or your data. |
Use Heuristic Analysis |
A technique for detecting threats that cannot be identified using the current version of Kaspersky application databases. It allows you to find files that may contain unknown malware or a new modification of a known malware program. When web traffic is scanned for viruses and other applications that present a threat, the heuristic analyzer performs instructions in the executable files. The number of instructions that are executed by the heuristic analyzer depends on the level that is specified for the heuristic analyzer. The heuristic analysis level sets the balance between the thoroughness of searches for new threats, the load on the operating system resources, and the time required for heuristic analysis. |
Anti-Phishing Check the web address against the database of phishing and fake crypto web addresses (in some subscription plans Check the web address against the database of phishing web addresses) |
The contents of the phishing link and fake cryptocurrency exchange database include the web addresses of currently known websites that are used for phishing attacks. Kaspersky supplements this database with addresses obtained from the international organization Anti-Phishing Working Group. The database of phishing links and fake cryptocurrency exchanges forms part of the software distribution kit, and it is updated together with Kaspersky Small Office Security databases. |
Use Heuristic Analysis |
A technique for detecting threats that cannot be identified using the current version of Kaspersky application databases. This enables detection of phishing even if the URL is not in the database of phishing web addresses. |
Check URLs |
The URL Advisor component checks links on a web page opened in Chromium-based Microsoft Edge, Google Chrome, or Mozilla Firefox. Kaspersky Small Office Security displays one of the following icons next to the checked link:
To view a pop-up window with more details on the link, move the mouse pointer to the corresponding icon. |
On all websites except those specified Manage exclusions |
When this option is selected, the application scans links on all websites except those that are indicated in the Exclusions window. The Exclusions window is opened by clicking the Manage exclusions link. |
On specified websites only Configure checked websites |
When this option is selected, Kaspersky Small Office Security scans links only on those websites that are indicated in the Checked websites window. The Checked websites window is opened by clicking the Configure checked websites link. |
Configure URL Advisor |
|
Website categories |
If the Show information on the categories of website content check box is selected, the application adds to the link comments to indicate whether the website belongs to one of the indicated categories (for example, Violence, intolerance or Adult content). You can remove check boxes next to the categories that do not require warnings. |
Do not scan web traffic from trusted URLs |
If the check box is selected, Safe Browsing does not scan the contents of web pages/websites whose addresses are included in the list of trusted web addresses. You can add both specific web pages/website addresses as well as web page/website address masks to the list of trusted web addresses. The list of trusted web addresses is available in the Trusted URLs window, which can be opened by clicking the link from the trusted URLs. |
Websites of Kaspersky and its partners window
This window shows a list of websites of Kaspersky and its partners.
The list is compiled and updated by Kaspersky experts. The list is updated automatically when databases and application modules are updated.
Page top
Network Attack Blocker settings
Network Attack Blocker (also called Intrusion Detection System) tracks incoming network traffic for activities characteristic of network attacks. When Kaspersky Small Office Security detects a network attack attempt on a user's computer, it blocks the network connection with the attacking computer. Descriptions of currently known types of network attacks and methods of neutralizing them are specified in Kaspersky Small Office Security databases. The list of network attacks that are detectable by the Network Attack Blocker is updated when the application databases and modules are updated.
Network Attack Blocker settings
Settings |
Description |
|---|---|
Treat port scanning and network flooding as attacks |
Network Flooding is an attack on organization's network resources (for example, web servers). This attack consists in sending a massive amount of traffic to exhaust the traffic capacity of a network. As a result, users can't access organization's network resources. Port scanning attack consists in scanning UDP- and TCP ports, as well as network services on the computer. This attack allows to determine computer’s vulnerability level before even more dangerous types of network attacks. Port scanning also allows hackers to determine computer's OS and choose OS-specific attacks for it. If the toggle is on, the Network Attack Blocker component blocks port scanning and network flooding. |
Block attacking computers for N min |
If the function is enabled, the Network Attack Blocker component adds the attacking computer to the blocked list. This means that the Network Attack Blocker will block the network connection with the attacking computer after the first network attack attempt during the specified period of time in order to automatically protect the user’s computer against any possible future network attacks from the same address. The attacking computer can be added to the block list for a minimum time of one minute. The maximum time is 999 minutes. |
Manage exclusions |
The list contains IP addresses from which the Network Attack Blocker does not block network attacks. You can add an IP address with port and protocol. The application does not report information about network attacks from IP addresses included in the exception list. |
Intrusion Prevention settings
Enable / disable Intrusion Prevention
Trust digitally signed applications
Load rules for applications from Kaspersky Security Network (KSN)
Trust group for applications that could not be added to existing groups
Trust group for applications started before startup of Kaspersky Small Office Security
Web beacons window
This window shows a list of web beacons.
The list is compiled and updated by Kaspersky experts. The list is updated automatically when databases and application modules are updated.
Page top
Incompatible websites window
This window shows a list of websites that may be rendered inoperable as a result of data collection being blocked, according to information available to Kaspersky.
The list is compiled and updated by Kaspersky experts. The list is updated automatically when databases and application modules are updated.
Page top
Private Browsing settings window
Enable / disable Private Browsing
Allow data collection on the websites of Kaspersky and its partners
Websites of Kaspersky and its partners
Allow data collection on incompatible websites
Page top
Ad agencies window
This window shows a list of ad agencies that track your online activity for advertising purposes.
The list is compiled and updated by Kaspersky experts. The list is updated automatically when databases and application modules are updated.
Page top
Web analytics services window
This window shows a list of web analytics services that use activity tracking to analyze your online activity.
The list is compiled and updated by Kaspersky experts. The list is updated automatically when databases and application modules are updated.
Page top
Mail Anti-Virus settings
Settings |
Description |
|---|---|
Security level |
Kaspersky Small Office Security uses various groups of settings to run Mail Anti-Virus. The sets of settings that are stored in the application are called security levels:
|
Action on threat detection |
|
Protection scope |
The Protection scope includes objects that the component checks when it is run: incoming and outgoing messages or incoming messages only. In order to protect your computers, you need only scan incoming messages. You can turn on scanning for outgoing messages to prevent infected files from being sent in archives. You can also turn on the scanning of outgoing messages if you want to prevent files in particular formats from being sent, such as audio and video files, for example. |
Scan POP3, SMTP, NNTP, and IMAP traffic |
This check box enables/disables the scanning by Mail Anti-Virus of mail traffic that is sent over the POP3, SMTP, NNTP and IMAP protocols. |
Connect Microsoft Outlook extension (not available on a file server) |
If the check box is selected, email messages transmitted via the POP3, SMTP, NNTP, and IMAP protocols will be scanned using the extension that is integrated into Microsoft Outlook. If email is scanned using the extension for Microsoft Outlook, it is recommended to use Cached Exchange Mode. You can find more details about the Cached Exchange Mode and recommendations for how to use it in the Microsoft Knowledge Base. |
Heuristic analysis |
A technique for detecting threats that cannot be identified using the current version of Kaspersky application databases. It allows you to find files that may contain unknown malware or a new modification of a known malware program. When scanning files for malicious code, the heuristic analyzer executes instructions in the executable files. The number of instructions that are executed by the heuristic analyzer depends on the level that is specified for the heuristic analyzer. The heuristic analysis level sets the balance between the thoroughness of searches for new threats, the load on the operating system resources, and the time required for heuristic analysis. |
Scan attached files of Microsoft Office formats |
Scans Microsoft Office files (DOC, DOCX, XLS, PPT and other Microsoft extensions). Office format files also include OLE objects. Kaspersky Small Office Security scans office format files that are smaller than 1 MB, regardless of whether the check box is selected or not. |
Scan attached archives |
Scan ZIP, GZIP, BZIP, RAR, TAR, ARJ, CAB, LHA, JAR, ICE and other archives. The application scans archives not only by their extension, but by their format as well. When checking archives, the application performs a recursive unpacking. This allows to detect threats inside multi-level archives (archive within an archive). |
Do not scan archives larger than |
If this check box is selected, Mail Anti-Virus excludes archives that are attached to mail messages from scanning if their size exceeds the value that you have specified. If the check box is cleared, Mail Anti-Virus scans archives of any size that are attached to mail messages. |
Limit the time for checking archives to |
If the check box is selected, then the amount of time that is needed to scan archives that are attached to mail messages will be limited to the specified period. |
Attachment filter |
The attachment filter does not work for outgoing mail messages. Disable filtering. If you select this option, Mail Anti-Virus will not filter files that are attached to mail messages. Rename attachments of selected types. If you select this option, Mail Anti-Virus will replace the last extension character found in the attached files of the specified types with the underscore character (for example, attachment.doc_). Thus, in order to open the file, the user must rename the file. Delete attachments of selected types. If you select this option, Mail Anti-Virus will delete files of the specified types that are attached to mail messages. You can specify the types of attached files that you must rename or delete from Email messages in the file mask list. |
Network properties (adapter) window
In the New connections section, you can select the action that Firewall performs when a new connection using this adapter is detected.
Automatically move new networks to the group
Page top
System Watcher settings
In the Exploit Prevention section, you can configure the actions that the application performs when executable files are run by vulnerable applications.
Monitor attempts to perform unauthorized operations
Action on detection of malicious or other activity
Action to perform if malicious or other activity can be rolled back
In the Protection against screen lockers section, you can configure the actions that are performed if screen locker activity is detected. Screen lockers are malicious programs that limit the user's operations on a computer, by locking the screen and the keyboard, or by blocking access to the taskbar and shortcuts. Screen lockers may attempt to extort ransom for recovery of access to the operating system. By using protection against screen lockers, you can close any screen locker by pressing a specified combination of keys.
Detect and close screen lockers
Use the following key combination to close a screen locker manually
File Anti-Virus settings
Settings |
Description |
|---|---|
Security level
|
Kaspersky Small Office Security uses various groups of settings to run File Anti-Virus. The sets of settings that are stored in the application are called security levels:
|
Action on threat detection |
Before attempting to disinfect or delete an infected file, the application creates a backup copy in case you subsequently need to restore the file or it becomes possible to disinfect it later. |
File types
|
All files. If this setting is enabled, the application scans all files without exception (all formats and extensions). Files scanned by format. If you select this setting, the application will scan only potentially infected files. Before searching for malicious code in a file, its internal header is analyzed to determine the file format (for example, TXT, DOC, EXE). The scan also looks for files with particular file extensions. Files scanned by extension. If you select this setting, the application will scan only potentially infected files. The file format is determined based on the extension of a file. |
Edit protection scope |
Clicking this link opens the File Anti-Virus protection scope window, which contains a list of objects that are scanned by File Anti-Virus. You can add objects to the list or delete the objects that you add. To remove an object from the scan, you do not have to delete the object from the list. All you need to do is clear the check box next to the object name. |
Signature Analysis |
The signature analysis method uses Kaspersky Small Office Security databases that contain descriptions of known threats and ways to neutralize them. Protection that uses this method provides the minimum acceptable security level. Based on the recommendations of Kaspersky experts, signature analysis is always enabled. |
Heuristic Analysis |
A technique for detecting threats that cannot be identified using the current version of Kaspersky application databases. It allows you to find files that may contain unknown malware or a new modification of a known malware program. When scanning files for malicious code, the heuristic analyzer executes instructions in the executable files. The number of instructions that are executed by the heuristic analyzer depends on the level that is specified for the heuristic analyzer. The heuristic analysis level sets the balance between the thoroughness of searches for new threats, the load on the operating system resources, and the time required for heuristic analysis. |
Scan only new and modified files |
Scans only new files and those files that have been modified since the last time they were scanned. This will allow you to save time performing the scan. This scan mode applies both to simple and compound files. |
Scan archives |
Scan ZIP, GZIP, BZIP, RAR, TAR, ARJ, CAB, LHA, JAR, ICE and other archives. The application scans archives not only by their extension, but by their format as well. When checking archives, the application performs a recursive unpacking. This allows to detect threats inside multi-level archives (archive within an archive). |
Scan distribution packages |
The check box enables/disables the scanning of third-party distribution packages. |
Scan files in Microsoft Office formats |
Scans Microsoft Office files (DOC, DOCX, XLS, PPT and other Microsoft extensions). Office format files also include OLE objects. Kaspersky Small Office Security scans office format files that are smaller than 1 MB, regardless of whether the check box is selected or not. |
Do not unpack large compound files Maximum file size |
If the check box is selected, the application does not scan compound files that are larger than the specified value. If this check box is cleared, the application scans compound files of all sizes. The application scans large files that are extracted from archives regardless of whether the check box is selected or not. |
Unpack compound files in the background Minimum file size |
If this check box is selected, the application provides access to compound files that are larger than the specified value before these files are scanned. In this case, Kaspersky Small Office Security unpacks and scans compound files in the background. The application provides access to compound files that are smaller than this value only after unpacking and scanning these files. If this check box is cleared, the application provides access to compound files only after unpacking and scanning files, regardless of their size. |
Scan mode
|
Smart mode. In this mode, File Anti-Virus scans an object based on an analysis of actions taken on the object. For example, when working with a Microsoft Office document, Kaspersky Small Office Security scans the file the first time it is opened and the last time it is closed. Intermediate operations that overwrite the file do not cause it to be scanned. On access and modification. In this mode, File Anti-Virus scans objects whenever there is an attempt to open or modify them. On access. In this mode, File Anti-Virus scans objects only upon an attempt to open them. On execution. In this mode, File Anti-Virus only scans objects upon an attempt to run them. |
Use iSwift technology
|
This technology is a development of the iChecker technology for computers using the NTFS file system. There are limitations to iSwift Technology: it is bound to a specific file's location in the file system and works only with objects in the NTFS file system. When you upgrade Kaspersky Small Office Security to a new version, the iSwift technology is enabled for all scan types, even if it was previously disabled. |
Use iChecker technology
|
This technology allows increasing scan speed by excluding certain files from scanning. Files are excluded from the scan using a special algorithm that takes into account the release date of Kaspersky Small Office Security databases, the date when the file was scanned last, and any changes made to the scan settings. There are limitations to iChecker Technology: it does not work with large files and applies only to files with a structure that the application recognizes (for example, EXE, DLL, LNK, TTF, INF, SYS, COM, CHM, ZIP, and RAR). |
Exclusions |
Objects excluded from scans. To specify exclusions, click the Manage exclusions link in the Exclusions window. |
Pause File Anti-Virus |
This temporarily and automatically pauses operation of File Anti-Virus at the specified time or when working with the specified applications. This is configured by clicking the Pause File Anti-Virus link. |
AMSI protection settings
Settings |
Description |
|---|---|
Scan archives |
Scan ZIP, GZIP, BZIP, RAR, TAR, ARJ, CAB, LHA, JAR, ICE and other archives. The application scans archives not only by their extension, but by their format as well. When checking archives, the application performs a recursive unpacking. This allows to detect threats inside multi-level archives (archive within an archive). |
Scan distribution packages |
The check box enables/disables the scanning of third-party distribution packages. |
Scan files in Microsoft Office formats |
Scans Microsoft Office files (DOC, DOCX, XLS, PPT and other Microsoft extensions). Office format files also include OLE objects. Kaspersky Small Office Security scans office format files that are smaller than 1 MB, regardless of whether the check box is selected or not. |
Do not unpack large compound files Maximum file size |
If the check box is selected, the application does not scan compound files that are larger than the specified value. If this check box is cleared, the application scans compound files of all sizes. The application scans large files that are extracted from archives regardless of whether the check box is selected or not. |
Report on personal data transfer
The upper part of the window displays the name of the user account whose actions are reported on in this window.
This switch allows enabling / disabling monitoring of the user's actions by Web Policy Management.
Depending on whether Web Policy Management is monitoring the user's actions, the button may have the following appearance:
– Web Policy Management monitors the user's actions.
– Web Policy Management does not monitor the user's actions.
Monitoring of a user's actions is performed in accordance with the Web Policy Management settings defined for that user.
In this window, you can view information on use of key words and attempts to transmit personal data by the selected user.
Page top

Web Policy Management. Exclusions
In this window, you can create a list of exclusions from the configured Web Policy Management settings. Access settings that affect websites added to the exclusion list are applied both when blocking websites by categories (the Block access to websites from selected categories button) and when blocking all websites (the Block access to all websites button).
For example, you can allow access to websites from the Internet communication category but add the www.example.com website to the list of exclusions to block access to that particular website. In this case, Web Policy Management allows access to all social networks except the example.com social network. You can also block all websites and add a webmail website access to which will be allowed to the list of exclusions. In this case, Web Policy Management allows the user to access the webmail website only.
Page top
Application usage restriction window
In this window, you can impose restrictions on the use time of a selected application.
In the Weekdays section, you can limit use time of the application on weekdays.
Allow access for no longer than <N> hours per day
In the Weekends section, you can limit the time for use of the application on weekends.
Allow access for no longer than <N> hours per day
In the Time breaks section, you can set up periodic blocking of access to the application during the day.
Take a break every <N> hours for <N> minutes
The Exact usage time section displays a table of application usage time. By using this table, you can set up an hour-by-hour schedule for use of the application throughout the week.
Page top
Application Usage Report
The upper part of the window displays the name of the user account whose actions are reported on in this window.
This switch allows enabling / disabling monitoring of the user's actions by Web Policy Management.
Depending on whether Web Policy Management is monitoring the user's actions, the button may have the following appearance:
– Web Policy Management monitors the user's actions.
– Web Policy Management does not monitor the user's actions.
Monitoring of a user's actions is performed in accordance with the Web Policy Management settings defined for that user.
In the Application Usage Report window, you can view information about startup of applications during a specified time interval for a selected account.
Contains a list of all applications that the user has started during the specified period. The list also describes the duration of use of each application.
Applications are grouped by categories (for example, "Games" or "IM clients").
Clicking the  button allows viewing the list of applications in a category.
Clicking the  button minimizes the list of applications in the category to one line.
Block games by categories
In this window, you can enable or disable blocking of games depending on their content. Classification of game content (the set of check boxes) corresponds to the PEGI or ESRB ratings. The type of game classification is selected automatically depending on your location. If necessary, you can select the type of game classification manually in the settings of the Web Policy Management component.
If the check box next to a category is selected, Web Policy Management blocks games included in the category.
If the check box next to a category is cleared, Web Policy Management allows starting games in the category.
Starting a game is allowed if all categories corresponding to the content of the game are allowed.
Page top
Web Policy Management. General Statistics
The upper part of the window displays the name of the user account whose actions are reported on in this window.
This switch allows enabling / disabling monitoring of the user's actions by Web Policy Management.
Depending on whether Web Policy Management is monitoring the user's actions, the button may have the following appearance:
– Web Policy Management monitors the user's actions.
– Web Policy Management does not monitor the user's actions.
Monitoring of a user's actions is performed in accordance with the Web Policy Management settings defined for that user.
In the Computer section, you can view the computer usage time of the selected user, view the report on computer usage, and configure Web Policy Management settings. Computer usage statistics are shown for the period specified in the report on computer usage time. By default, statistics for the current twenty-four hours are displayed.
In the Applications section, you can view details on applications that the selected user has used recently. Statistics on use of applications are shown for the time interval specified in the application usage report. By default, statistics for the current twenty-four hours are displayed.
The Internet section contains statistics on website visits and a report on the time that the user spent on those websites. You can also view the total number of blocked attempts to visit blocked websites.
The statistics on visited web resources are shown for the period specified in the report on Internet usage time. By default, statistics for the current twenty-four hours are displayed.
The Content Control section shows information on the number of blocked attempts to transmit personal data.
This statistics are shown for the period specified in the Content Control Report. By default, the statistics for one week are shown.
Page top
Internet Usage Report
The upper part of the window displays the name of the user account whose actions are reported on in this window.
This switch allows enabling / disabling monitoring of the user's actions by Web Policy Management.
Depending on whether Web Policy Management is monitoring the user's actions, the button may have the following appearance:
– Web Policy Management monitors the user's actions.
– Web Policy Management does not monitor the user's actions.
Monitoring of a user's actions is performed in accordance with the Web Policy Management settings defined for that user.
In the Internet Usage Report window, you can view information about websites visited by the selected user during the specified period.
Page top
Computer Usage Report
The upper part of the window displays the name of the user account whose actions are reported on in this window.
This switch allows enabling / disabling monitoring of the user's actions by Web Policy Management.
Depending on whether Web Policy Management is monitoring the user's actions, the button may have the following appearance:
– Web Policy Management monitors the user's actions.
– Web Policy Management does not monitor the user's actions.
Monitoring of a user's actions is performed in accordance with the Web Policy Management settings defined for that user.
In the Computer Usage Report window, you can view information about computer usage time for the specified period for the selected account.
Page top
Protecting your computer
Kaspersky Small Office Security provides comprehensive protection against viruses, network attacks, phishing, personal data breaches, and other kinds of cybersecurity threats. Various functions and protection components are available as part of Kaspersky Small Office Security to deliver comprehensive protection.
Each type of threat is handled by a dedicated protection component. You can enable and disable protection components, and configure their settings.
In addition to the real-time protection provided by the security components, we recommend that you regularly scan your computer for viruses and other malware. This is necessary in order to prevent any possible spreading of malicious programs that have not been discovered by protection components, for example, because a low security level was set or for other reasons.
To keep Kaspersky Small Office Security up to date, databases and application modules must be regularly updated.
File Anti-Virus
File Anti-Virus prevents infection of the computer's file system. The component starts upon startup of the operating system, continuously remains in the computer's RAM, and scans all files that are opened, saved, or launched on your computer and all connected drives. Kaspersky Small Office Security intercepts each attempt to access a file and scans the file for known viruses and other malware. Further access to the file is allowed only if the file is not infected or is successfully disinfected by the application. If a file cannot be disinfected for any reason, it is deleted. A copy of the file is moved to Quarantine when that happens. If an infected file is placed in the same location where the deleted file with the same name used to be, Quarantine saves only a copy of the last file. A copy of the previous file with the same name is not saved.
Network Attack Blocker
Network Attack Blocker loads at operating system startup and tracks incoming network traffic for activities characteristic of network attacks. When an attempt to attack your computer is detected, Kaspersky Small Office Security blocks all network activity from the attacking computer that is aimed at your computer.
Safe Browsing
Safe Browsing intercepts and blocks the execution of scripts on websites if they pose a threat. Safe Browsing also monitors all web traffic and blocks access to dangerous websites.
Mail Anti-Virus
Mail Anti-Virus scans incoming and outgoing email messages on your computer. An email message is available to the recipient only if it does not contain dangerous objects.
Firewall
Firewall ensures your security when you use local networks and the Internet. The component filters all network activities by using rules of two types: rules for applications and packet rules.
System Watcher
The System Watcher component rolls back the changes made to the operating system by malicious or other activity of applications.
The component protects against malware, including:
- Exploits
- Screen lockers
- Encryptors that encrypt data
- Cryptojacking
- Ransomware that encrypts data or blocks access to files or the system and extorts ransom for restoring the files or access to them
Disabling this component is not recommended.
Anti-Phishing
Kaspersky Small Office Security protects your from visiting phishing websites. A phishing website is a fraudulent website that looks like the website of a bank, payment system, cryptocurrency trading platform, or another legitimate website. It can be fairly hard to tell a phishing website from a legitimate one based on its look. Visiting a phishing website can result in theft of passwords, bank card information, and other sensitive personal data.
Page top
Privacy Cleaner / Rolling back changes
This window displays the progress of clearing traces of your activities in the operating system. The clean-up process may take some time. To remove some traces of activity, you may need to restart the computer.
If you have selected Roll back changes during the first step, the Privacy Cleaner Wizard rolls back the actions selected during the previous step.
Page top
Safe Money settings
In the On first access to websites of banks and payment systems section, you can select an action that Kaspersky Small Office Security performs when you access website of the specified types.
To proceed to websites from the Safe Money window, use:
Notify about operating system vulnerabilities
Database update window
Last update: <time of last update>
Downloaded: <total size of downloaded files>
PC performance optimization
Settings |
Description |
|---|---|
Launch Kaspersky Small Office Security at computer startup (recommended) |
When the check box is selected, Kaspersky Small Office Security is started after the operating system loads, protecting the computer during the entire session. When the check box is cleared, Kaspersky Small Office Security is not started after the operating system loads, until the user starts it manually. Computer protection is disabled and user data may be exposed to threats. |
Battery Saver |
If the check box is selected, energy conservation mode is enabled. Kaspersky Small Office Security postpones scheduled tasks. You can start scan and update tasks manually, if necessary. |
Do not Disturb Mode |
If this check box is selected, Kaspersky Small Office Security does not display notifications about events that occur during video calls, when watching videos, when working with applications, or using the keyboard. Do not Disturb Mode can also pause some automatically started tasks or delay running scheduled tasks to avoid excessive utilization of computer resources. |
Focused Work Mode |
If the check box is selected, the application does not run scan or update tasks and does not display notifications when you play games or run applications in full-screen mode. |
Postpone computer scan tasks when the CPU and disk systems are at high load |
When Kaspersky Small Office Security runs schedule tasks, this may result in increased workload on the CPU and disk subsystems, which affects the performance of other applications. When the check box is selected, Kaspersky Small Office Security suspends scheduled tasks when it detects an increased load and frees up operating system resources for user applications. |
Enable dump writing |
If the check box is selected, Kaspersky Small Office Security writes dumps when it crashes. If the check box is cleared, Kaspersky Small Office Security does not write dumps. The application also deletes existing dump files from the computer hard drive. |
Enable dump and trace files protection |
If the check box is selected, access to dump files is granted to the system administrator and local administrator as well as to the user who enabled dump writing. Only system and local administrators can access trace files. If the check box is cleared, any user can access dump files and trace files. |
Exclusions and actions on object detection
Settings |
Description |
|---|---|
Perform recommended actions automatically |
If the check box is cleared, main components of Kaspersky Small Office Security work in interactive mode. This means that Kaspersky Small Office Security asks you to decide which action to take on detected objects and threats if the Ask user option is selected in the settings of File Anti-Virus, Safe Browsing, Mail Anti-Virus, System Watcher, and Intrusion Prevention. If the check box is selected, Kaspersky Small Office Security automatically chooses the action based on rules defined by Kaspersky experts. |
Delete malicious tools, adware, auto-dialers and suspicious packers |
If the check box is selected, Kaspersky Small Office Security deletes malicious tools, adware, auto-dialers and suspicious packers in automatic protection mode. The function is available if the Perform recommended actions automatically check box is selected. |
Use Advanced Disinfection technology (requires considerable computer resources) |
If the check box is selected, a pop-up notification appears on the screen when malicious activity is detected in the operating system. In its notification, Kaspersky Small Office Security offers the user to perform Advanced Disinfection of the computer. After the user approves this procedure, Kaspersky Small Office Security neutralizes the threat. After completing the advanced disinfection procedure, Kaspersky Small Office Security restarts the computer. The advanced disinfection technology uses considerable computing resources, which may slow down other applications. While the application is detecting an active infection, some operating system functionality may not be available (e.g. launching modules of a process running in the background). Availability of the operating system is restored after Advanced Disinfection is complete and the computer is restarted.
|
Types of detected objects |
The application detects various types of objects, such as viruses and worms, Trojans, and adware. For details, please refer to the Kaspersky Encyclopedia. |
Detect stalkerware |
If this check box is selected, Kaspersky Small Office Security detects stalkerware applications that help criminals gain access to your location, messages, or websites and social networks you visit. |
Detect legitimate apps that intruders can use to damage your computer or personal data |
If the check box is selected, Kaspersky Small Office Security detects legitimate software that can be used by criminals to damage your computer or personal data. This software includes remote administration applications that system administrators can use to access the interface of a remote computer for monitoring or management purposes. Kaspersky Small Office Security does not detect remote administration applications that are considered as trusted. |
Multi-packed objects |
If this check box is selected, Kaspersky Small Office Security detects files that are packed multiple times, including by various packers. Multi-packing makes it more difficult to scan objects. |
Manage exclusions |
Clicking this link opens the Exclusions window containing a list of scan exclusions. A scan exclusion is a set of conditions that, when fulfilled, cause the application to not scan a particular object for viruses and other threats. You can add, edit, or delete exclusions from the list. In the window for adding or editing an exclusion, you can define specific conditions that, when fulfilled, will prevent objects from being scanned (the application will not scan them):
Instead of deleting an exclusion from the list, you can change the status of an en exclusion to Inactive (in the window for adding or editing an exclusion). When inactive, the exclusion will not be applied. |
Specify trusted applications |
Clicking this link opens a window with the list of trusted applications. Kaspersky Small Office Security does not monitor file activity and network activity of trusted applications (including malicious ones), and does not monitor these applications' queries to the system registry. You can add, edit, or delete trusted applications from the list. Even if an application is on the trusted list, Kaspersky Small Office Security continues to scan the executable file and process of this application for viruses and other threats. If you do not want to scan the executable file and process of a trusted application, add the application to the list of exclusions. When adding or editing a trusted application, in the Exclusions for application window you can specify rules that will be used by Kaspersky Small Office Security to monitor the activity of the trusted application. In the Exclusions for application window, the following rules are available:
If you change the status of an application to Inactive in the Exclusions for application window, Kaspersky Small Office Security does not treat the application as a trusted application. This way, you can temporarily exclude an application from the trusted list without actually deleting it from the list. |
Network settings
Settings |
Description |
|---|---|
Limit traffic on metered connections |
If this check box is selected, the application limits its own network traffic when the Internet connection is limited. Kaspersky Small Office Security identifies a high-speed mobile Internet connection as a limited connection and identifies a Wi-Fi connection as an unlimited connection. Cost-Aware Networking works on computers running Windows 8 or higher. |
Inject script into web traffic to interact with web pages |
If the check box is selected, Kaspersky Small Office Security injects a web page interaction script into web traffic. This script ensures the operation of such components as Safe Money, Private Browsing, Anti-Banner, and URL Advisor. |
Support DNS over HTTPS (DoH) |
If the check box is selected, the application correctly processes DNS data transmitted over HTTPS. We do not recommend clearing this check box. |
Manage DoH servers |
The link opens a window where you can manually add a DoH server through which DNS data will be transferred in a browser. Here you can read about DNS over HTTPS (DoH) and how to add a DoH server. |
Monitored ports |
Monitor all network ports. In this port monitoring mode, Mail Anti-Virus, Anti-Spam, and Safe Browsing monitor all open ports of your computer. Monitor selected network ports only. In this port monitoring mode, Mail Anti-Virus, Anti-Spam, and Safe Browsing monitor the selected ports of your computer. You can specify the monitored network ports in the Network ports window, which can be opened by clicking the Select link. You can also specify the particular applications where monitoring of all the network ports used by these applications should be enabled:
|
Network ports |
A list of ports that are normally used for transferring email and web traffic is included in Kaspersky Small Office Security distribution kit. By default, Kaspersky Small Office Security monitors traffic passing through all ports from this list. You can add ports to the list or delete them from the list. If the Active value is set in the port line in the Status column, Kaspersky Small Office Security monitors the traffic passing through this port. If the Inactive value is set in the port line in the Status column, Kaspersky Small Office Security excludes this port from scans, but does not remove it from the list of ports. You can change the status and other port settings in the window by clicking the Edit button. |
Encrypted connections scan |
You can select one of the following modes for scanning encrypted connections over SSL:
If you do not want the application to verify an SSL connection with a website, you can add the website to the list of exclusions by clicking the Trusted addresses link. |
When encrypted connections scan errors occur |
In the drop-down list, you can select the action that the application will perform if a secure connections scan error occurs on a website.
|
Domains with scan errors |
List of domains that could not be scanned due to errors when connecting to them. The addresses of the domains were checked against the database of malicious objects. |
Trusted addresses |
Click this link to open the Trusted addresses window, which contains a list of websites that you added as an exclusion for the Safe Browsing and URL Advisor components. |
Trusted applications |
List of applications whose activity is not monitored by Kaspersky Small Office Security during its operation. You can select the types of application activity that Kaspersky Small Office Security will not monitor (for example, do not scan network traffic). Kaspersky Small Office Security supports environment variables, and the |
Block SSL 2.0 connections (recommended) |
If the check box is selected, the application blocks network connections established over the SSL 2.0 protocol. If the check box is cleared, the application does not block network connections established over the SSL 2.0 protocol and does not monitor network traffic transmitted over these connections. |
Decrypt encrypted connections with websites that use EV certificates |
EV certificates (Extended Validation Certificates) confirm the authenticity of websites and enhance the security of the connection. Browsers use a lock icon in their address bar to indicate that a website has an EV certificate. Browsers may also fully or partially color the address bar in green. If the check box is selected, the application decrypts and monitors encrypted connections with websites that use an EV certificate. If the check box is cleared, the application does not have access to the contents of HTTPS traffic. For this reason, the application monitors HTTPS traffic only based on the website address, for example, If you are opening a website with an EV certificate for the first time, the encrypted connection will be decrypted regardless of whether or not the check box is selected. |
Proxy server settings |
Settings of the proxy server used for Internet access of users of client computers. Kaspersky Small Office Security uses these settings for certain protection components, including for updating databases and application modules. For automatic configuration of a proxy server, Kaspersky Small Office Security uses the WPAD protocol (Web Proxy Auto-Discovery Protocol). If the IP address of the proxy server cannot be determined by using this protocol, the application uses the proxy server address that is specified in the Microsoft Internet Explorer browser settings. |
Use the selected certificate store to scan encrypted connections in Mozilla applications |
If this check box is selected, the application scans encrypted traffic in the Mozilla Firefox browser and Thunderbird mail client. Access to some websites via the HTTPS protocol may be blocked. To scan traffic in Mozilla Firefox and Thunderbird, you must enable Encrypted Connections Scan. If Encrypted Connections Scan is disabled, the application does not scan encrypted traffic in Mozilla Firefox and Thunderbird. The application uses Kaspersky root certificate to decrypt and analyze encrypted traffic. You can select the certificate store that will contain the Kaspersky root certificate.
|
Managing application settings
Settings |
Description |
|---|---|
Import |
Extract application settings from a file in CFG format and apply them. |
Export |
Save the current application settings to a file in CFG format. |
Restore |
You can restore the application settings recommended by Kaspersky experts at any time. When the settings are restored, the Optimal security level is set for all protection components. |
Firewall
Settings |
Description |
|---|---|
Notify of vulnerabilities in Wi-Fi networks |
If this check box is selected, Kaspersky Small Office Security shows notifications when any vulnerabilities are detected on a Wi-Fi network. This check box can be accessed if Kaspersky VPN Secure Connection is not installed on the computer. If the Block and warn about insecure transmission of passwords over the Internet check box is selected, Kaspersky Small Office Security blocks the transmission of a password in non-encrypted text format when you fill in the Password field on the Internet. Clicking the Select categories link opens the Categories window in which you can specify the types of vulnerabilities of Wi-Fi networks. The application will alert you when you try to connect to a Wi-Fi network that has a specified vulnerability. |
Show devices that are connected to my networks |
If the check box is selected, Smart Home Monitor is enabled and functional. |
Allow connections on random ports for active FTP mode |
If the check box is selected, Firewall allows connections to your computer on random ports if switching to active FTP mode was detected on the host connection. |
Do not disable Firewall until the operating system shuts down completely |
If this check box is selected, Firewall does not stop working until the operating system shuts down completely. |
Block network connections if the user cannot be prompted for action |
If this check box is selected, Firewall does not stop when the interface of Kaspersky Small Office Security is not loaded. |
Application rules |
Clicking this link opens the Application network rules window. This window displays information related to control of the network activity of applications and application groups. The Intrusion Prevention component regulates the network activity of applications in accordance with network rules of applications and application groups. You can configure permissions for network activity of an application or application group via the menu of a cell in the Network column. The menu items are described in the Intrusion Prevention rules section. By selecting Details and rules in the context menu of a row, you can proceed to configure network rules for an application or application group. |
Packet rules |
Clicking this link opens the Packet rules window. By default, the window shows predefined network packet rules that are recommended by Kaspersky experts for optimum protection of the network traffic of computers running Microsoft Windows operating systems. Network packet rules serve to impose restrictions on network packets, regardless of the application. Such rules restrict inbound and outbound network traffic through specific ports of the selected data protocol. Network packet rules have higher priority than network rules for applications. When adding or editing a packet rule, you can define the following settings:
You can specify a range of remote or local ports (for example,
To quickly add a rule, you can select one of the predefined templates in the drop-down list in the lower part of the window. |
Available networks |
Clicking this link opens the Networks window containing a list of network connections that are detected on the computer by Firewall. In the list, you can change the type of network (Public, Trusted or Local) by using the menu in the Network type cell. You can edit network settings in the Network properties window, which can be opened by double-clicking the row of the network. The Public type is assigned to the Internet by default. You cannot change the network type or other settings for the Internet. In the Network properties window, you can edit the following network settings:
|
Application rules / Group rules
Settings |
Description |
|---|---|
File (only in the Application rules window) |
Reference information about an application and about the application's executable file. Kaspersky Small Office Security receives information about an application from the application's executable file and from Kaspersky Security Network. |
Files and system registry |
Rules for accessing system registry keys and files related to operation of the operating system or to your personal data. The individual access settings for read, write, create, and delete operations can be defined independently by using the menu in the cells of the corresponding table columns. The menu items are described in the Intrusion Prevention rules section. |
Rights |
Rights to access operating system resources and processes, and startup rights. You can set access rights by using the menu in the cells of the Action column. The menu items are described in the Intrusion Prevention rules section. |
Network rules |
Rules applied by Kaspersky Small Office Security to regulate the network activity of an application or application group. By default, the list displays the predefined application network rules that are recommended by Kaspersky experts. You cannot delete or edit predefined network rules (except changing the action in the Permission column; please refer to the description of available actions in the Intrusion Prevention rules section). When adding or editing a rule, you can define the following settings:
You can specify a range of remote or local ports (for example,
To quickly add a rule, you can select one of the predefined templates in the drop-down list in the lower part of the window. |
Exclusions (only in the Application rules window) |
You can select rules that will be used to exclude an application from scans:
|
History (only in the Application rules window) |
Reference information about actions taken on the application, such as starting the application or assigning a . |
Intrusion Prevention rules
A rule is a set of reactions by Intrusion Prevention in response to actions that an application performs on various categories of operating system resources and personal data.
Intrusion Prevention can react to actions of an application in the following ways:
- Inherit. Intrusion Prevention reacts to the activity of the application by applying the rule that is configured for the status that Intrusion Prevention has assigned to the application.
This response is applied by default. By default, Intrusion Prevention inherits access rights from the status that Intrusion Prevention has assigned to the application.
If you edited a rule for an application, the rule for the application will have a higher priority than the rule for the status that was assigned to the application.
- Allow. Intrusion Prevention allows the application to perform the action.
- Deny. Intrusion Prevention prevents the application from performing the action.
- Ask user. If the Perform recommended actions automatically check box is cleared under Settings → Security settings → Exclusions and actions on object detection, Intrusion Prevention asks the user to decide. If the check box is selected, the action is chosen automatically. You can follow the footnote in Kaspersky Small Office Security window to read about exactly which action will be selected.
- Log events. Intrusion Prevention logs information about the application activity and responses to it in a report. Information can be added to a report in addition to any other action taken by Intrusion Prevention.
Secure Data Input settings
Settings |
Description |
|---|---|
Use hardware virtualization if available |
If the check box is selected, hardware virtualization (hypervisor) is used for the operation of Protected Browser. The application uses hypervisor technology for additional protection against complex malware that could intercept your personal data by using the clipboard or phishing. This check box is displayed when the application is installed on a 64-bit version of Windows 8, Windows 8.1 and Windows 10. For more details about hardware virtualization and how it works, click the link. |
Protection using hardware virtualization
|
Secure Keyboard Input helps you prevent cybercriminals from intercepting the data that you enter from the keyboard when visiting websites (for more details, please refer to the About Secure Keyboard Input section). Select the check boxes for categories of websites on which you want to protect data that is entered via the keyboard. Click the Manage exclusions link to create lists of websites on which you want to enable or disable Secure Keyboard Input irrespective of the selected website categories. You can use masks when adding exclusions. |
On-Screen Keyboard |
Many programs classified as spyware can take screenshots, which then are automatically transmitted to an intruder for further analysis to steal the user's personal data. On-Screen Keyboard protects entered personal data from attempts to intercept it by means of screenshots. (For more details, please refer to About On-Screen Keyboard). You can choose how you will be able to open On-Screen Keyboard:
Select the check boxes for categories of websites on which you want to protect data that is entered via the On Screen Keyboard. Click the Manage exclusions link in the Exclusions for On-Screen Keyboard window to create lists of websites on which you want to enable or disable display of the On-Screen Keyboard quick launch icon irrespective of the selected website categories. You can use masks when adding exclusions. |
Show hints for creating strong passwords |
If the check box is selected, Kaspersky Small Office Security checks the strength of a password that you are entering in the browser for the first time, and notifies you about it. |
Protection against using the same passwords
|
When you enter a password on a website where password security is especially important (such as on a social network), Kaspersky Small Office Security prompts you to enable protection against the use of the same passwords. If the Warn about using the same passwords on websites check box is selected, protection against using the same passwords is enabled. You can select the categories of websites that should be protected from using the same passwords. These categories include banks and payment system websites, social networking websites, and mail service websites. You can click the Delete saved data link to delete all previously saved passwords. |
Windows account password strength check |
Kaspersky Small Office Security checks the password that is used for gaining remote access to a file server according to the following settings:
|
Change secret vault password window
Backup and Restore window
Restore files from my backup set
Buttons  /
/  /
/ 
The buttons can be used to manage the backup process:
– stop a backup task. This button is displayed if a backup task is running or paused at the moment.
– pause a backup task. This button is displayed if a backup task is running at the moment.
– start a backup task or resume a paused backup task. This button is available if a backup task has been completed or paused.
Clicking the button starts the process of creating backup copies of files. This button is displayed if a backup task is not running at the moment.
Clicking the button opens a menu from which you can select an additional action with the specified backup settings:
- Change settings – starts the backup settings editor wizard.
- Delete settings – deletes backup settings.
Create backup copies of other files
Restore files from a set of backup copies that is not in the list
Online storage section
To use Online storage, log on to the dropbox.com website. Clicking OK opens a web page with the dropbox.com website login form automatically.
Storages window
Clicking this button opens a window with a list of sets of backup copies stored in this storage. In this window you can select a set of backup copies from which to restore files.
Clicking the button opens a menu from which you can select an additional action:
- Change settings – starts the storage settings editor wizard.
- Delete storage – stops using the selected drive or online resources as a storage for backup copies of files and deletes all backup copies of files from the storage.
- Clean up storage – opens the Clean up storage window. In this window you can select backup copies of files to be removed from the storage in order to free up storage space.
Window with a list of sets of backup copies in storage
Support window
The window contains information required for contacting Kaspersky Technical Support: version number of Kaspersky Small Office Security, release date and time of the databases and application modules, operating system version, and key.
Answers to frequently asked questions
Application configuration tips
Page top
Clean up storage window
Backup copies created earlier than
Previous versions of backup copies
Select backup copy version to restore window
Kaspersky Restore Utility window
Button  /
/ 
The list includes backup copies of files that can be restored.
Depending on the / toggle switch position, the window shows a folder tree or all backup copies of files arranged alphabetically.
This list shows information about the name of the backup copy of a file, location of the source file, file type, file name extension, file size, and number of backup copies of this file. Clicking the link in the Version column opens the Select backup copy version to restore window. This window lets you select the version of a backup copy from which to restore the file.
If the check box opposite the name of a backup copy of the file is selected, the application restores this file.
If the check box opposite the name of a backup copy of the file is cleared, the application does not restore this file.
Right-clicking a list item opens a context menu with the following items:
- Open file – the file is opened with the application intended for managing files of this type.
- Restore the latest backup copy version – opens the Select where to place restored files window in which you can specify the destination folder for restoring the file from the latest version of its backup copy.
- Versions of backup copies of file – the Select backup copy version to restore window opens. This window lets you select the version of a backup copy from which to restore the file.
About phishing
Phishing is a type of Internet fraud involving the theft of personal data; phishing is propagated via email and other channels.
Emails can be fake notifications from banks, ISPs, online stores, electronic payment systems, or other entities. The emails attempt to trick the recipient into visiting the scammers' website under false pretenses, such as an invitation to update login information or to find out more about a product or service.
Unsuspecting recipients of a phishing email may follow the link to find themselves on a phishing website that looks exactly like the company's website it purports to be.
Internet users can get to a phishing site in other ways, for example, by clicking on a link in a search engine.
Scammers can generally pursue a range of different goals. One of these goals is to trick users into disclosing their confidential data, such as logins, passwords to accounts or crypto wallets and other registration data, bank account numbers and banking card details. Users would enter this information into a web form on the fraudulent website giving the scammers access to their money. Infecting computers with viruses and malware is another trap a user might step into after clicking on a phishing link.
Recognizing fraudulent emails and websites
Fraudulent (phishing) emails and websites may look unsuspicious at first glance. Inclusion of company logos that look like the authentic ones or actual contact phone numbers may lull users into a false sense of security. The email may also contain links to the company's actual website, except for the main phishing link that would take the user to the criminals’ website.
The following telltale signs of phishing may alert the user:
- Though phishing website domains may look like actual legitimate companies' web domains, on closer inspection the user may notice extra words in the domain name (for example, a company's official domain www.example.com could be changed to www.login-example.com), or dots and dashes replacing slashes (www.example.com/personal/login could be changed to www.example.com.personal.login or www.example.com-personal.login). Please note that the email body may contain the company's actual domain address, but when the user clicks on the link, the browser's address bar will show a different domain.
- The email is using an impersonal form of address, such as "Dear user," or "Hello".
- Graphics in the email or on he website look unprofessional, the text contains typos or bad grammar.
- The email recipient is being asked to immediately verify their confidential data by following a link, or sometimes to enter their data in a form in the email body. The email may explain such urgency with alleged account suspension or hacking, or a threat of losing one's data.
Phishing check
Kaspersky Small Office Security checks email and website contents for phishing links. Links are checked against a database of phishing web addresses and fake cryptocurrency exchanges, which is regularly updated.
For additional protection, Kaspersky uses heuristic analysis and sends queries to the Kaspersky Security Network (KSN) cloud services during the check. Kaspersky Security Network contains the most up-to-date information about recently emerged threats, including phishing websites which have not yet been added to Kaspersky databases. The data received by the KSN is analyzed by Virus Lab employees in real time.
If you have clicked through to a phishing website, you can report it to Kaspersky Security Network using the Kaspersky Protection extension.
Page top
About cryptojacking
Cryptojacking is a variety of cybercrime which involves using somebody else's devices (computers, tablets, smartphones, and servers) without their owners' knowledge to clandestinely produce (mine) cryptocurrencies, for example, Bitcoin.
How does cryptojacking work
The criminal hacks the device and installs special software that works in the background and does not arouse any suspicion in the user.
The malicious code can be installed in some of the following ways:
- The user follows a phishing link in an email message, which downloads the mining malware to the device.
- The user visits a website which loads what appears to be advertising banners, which run malicious code (JavaScript) when opened.
When the cryptojacking software is installed on the device, the mining begins, that is, generation of cryptocurrency. Mining consumes significant processing power, which negatively affects the functioning of the device.
The danger of cryptojacking
Even though cryptojacking does not directly harm the operating system and user data, it can still present a significant threat. For example, cryptojacking can damage the device or shorten its service life by making it overheat.
How to recognize cryptojacking
The following signs may indicate that cryptojacking is going on:
- Reduced performance of the device. You can suspect cryptojacking if the operating system performance is degraded, applications are running slower, the battery discharges too quickly, or the device shuts down seemingly without reason.
- Device overheating. Cryptojacking consumes a lot of resources, which may cause the device to overheat. Constant noise from cooling fans might indicate that the device is running cryptojacking software.
- Increased CPU load. If you visit a website that does not have any video or audio content, but you still see increased CPU load, it might be evidence of the website running a cryptojacking script. You can see your CPU load in Task Manager on the Performance tab.
How to defend against cryptojacking
Kaspersky Small Office Security includes tools that can help protect your device from cryptojacking. Websites that you visit are checked for embedded malicious code. If a cryptojacking attempt is encountered, the application displays a notification that lets you delete the malicious code.
Links are checked against a database of phishing web addresses and fake cryptocurrency exchanges, which is regularly updated. If you try following a malicious link, the application displays a warning.
Even if the cryptojacking code makes its way to your device, Kaspersky Small Office Security detects it as malicious and prevents it from running.
For additional protection, Kaspersky uses heuristic analysis and sends queries to the Kaspersky Security Network (KSN) cloud services during the check. Kaspersky Security Network has the most up-to-date information about emerging threats, including cryptojacking threats.
Page top
About crypto scams
Crypto scams are a variety of cybercrime that aim to steal cryptocurrency such as Bitcoin. During the first half of 2022, Kaspersky applications have detected almost 200 000 attempts to steal cryptocurrencies and crypto wallet information.
Types of crypto scams
Crypto scams can take the following forms:
- Fake websites and crypto wallets. Scammers create a fake site that mimics a known crypto exchange or a fake waller. Such a website can be hard to tell apart from the real thing because the domain name and layout of the website closely resemble the original. Users visit the fake website and enter their sensitive information, revealing it to the scammers.
- Crypto phishing. Scammers create phishing links that lead to fake websites, crypto exchanges, or investment platforms. These links are then emailed to victims or placed on other websites. Users click the links, losing their data or funds.
- Fake investments in a "new" cryptocurrency. Scammers create a sham proposal to invest into a new project, for example, a new cryptocurrency. Interested users send funds to the specified crypto wallet, but no cryptocurrency is in fact created, and the invested funds are never returned.
- Fake cryptocurrency investment opportunities. Scammers advertise lucrative cryptocurrency investment opportunities on social networks, promising to return the invested amount severalfold. Instead of the promised income, users lose the invested amounts.
- Scams involving the purchase of mining hardware. Users pay for cryptocurrency production (mining) hardware, but never receive the promised items.
- Fake cryptocurrency purchasing websites. Scammers create a website where you can ostensibly purchase cryptocurrency for fiat at a good exchange rate. You send the money but get nothing in return.
- Pump-and-dump schemes involving cryptocurrencies. Scammers launch a massive advertising campaign to prop up an individual cryptocurrency. They promise that the price of the cryptocurrency will continue to grow. Investors rush to purchase the cryptocurrency being advertised. Scammers then quickly sell off the cryptocurrency at the elevated price, which can cause its price to crash below the initial level within minutes.
How to defend against scams involving cryptocurrencies
Kaspersky Small Office Security includes tools that can help protect you from cryptocurrency scams. The application can detect if a website or crypto exchange is fake and will notify you.
Links on websites and in emails are checked against a database of phishing web addresses and fake cryptocurrency exchanges, which is regularly updated. If you try following a malicious link, the application displays a warning.
For additional protection, Kaspersky uses heuristic analysis and sends queries to the Kaspersky Security Network (KSN) cloud services during the check. Kaspersky Security Network has the most up-to-date information about emerging threats, including crypto scam threats.
Page top
Profile
Connecting a device to Kaspersky Small Office Security Management Console
Your Kaspersky Small Office Security Management Console account lets you view the status of all your devices where the application is installed, remotely manage the protection of these devices, manage licenses, and store activation codes in a secure location.
Learn more about the account and remote management of computer protection
License details
Here you can view the status of the license that your application uses, and the number of days remaining until the paid period expires.
To reveal other actions that you can perform with your license, click  . Depending on your license and its status, the list of available actions may be different.
Learn more about application licensing