How to disable or remove Windows Defender
Latest update: August 12, 2024
ID: 13341
How to disable Windows Defender in Windows 10
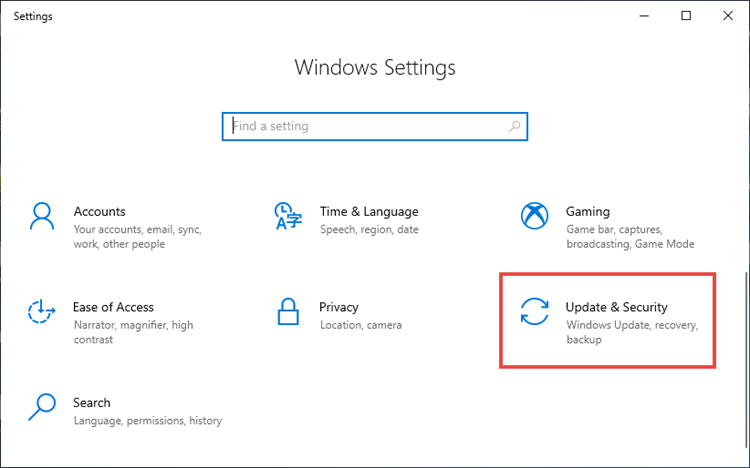
- In the lower left corner, click Start → Settings.

- Select Update & security.
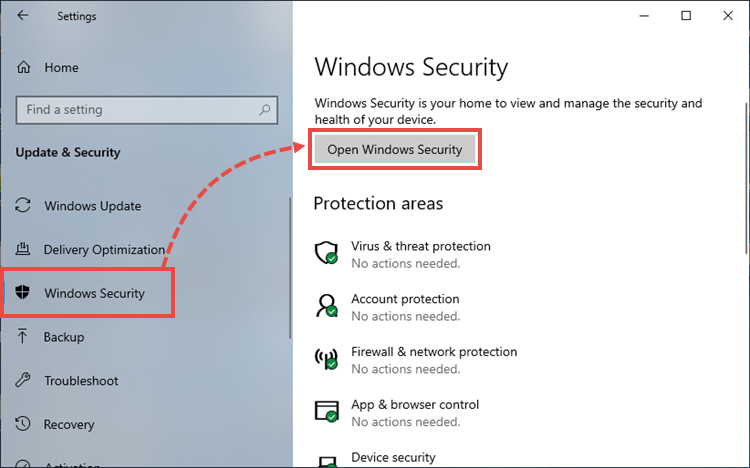
- Go to the Windows Security section and click Open Windows Security.
- Go to the Virus & threat protection section, expand the Windows Defender Antivirus options and disable Periodic scanning.
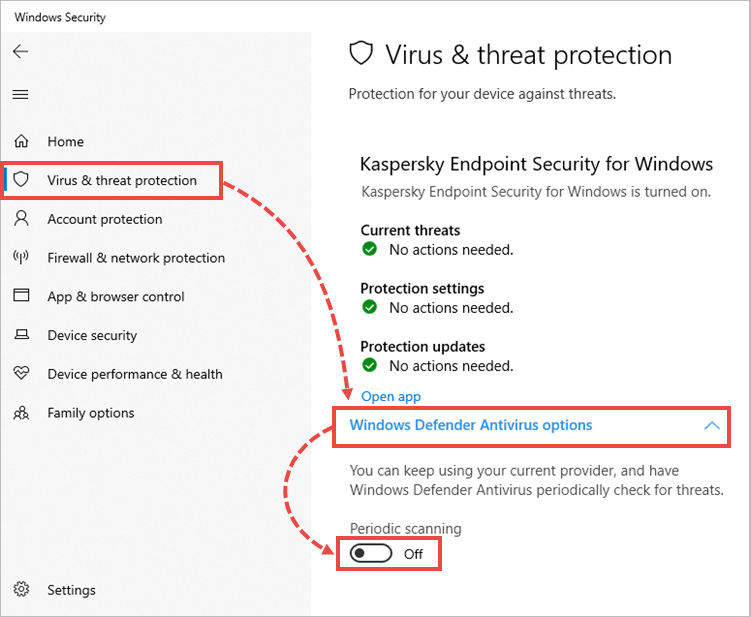
Windows Defender will be disabled on Windows 10.
How to disable Windows Defender scheduled scan in Windows 11
- Click the search icon in the Windows panel.
- Type "task scheduler" and click Task Scheduler in search results.
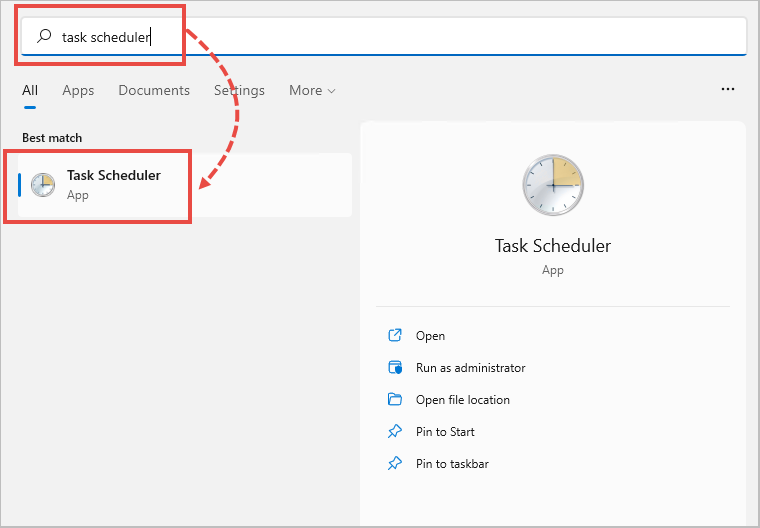
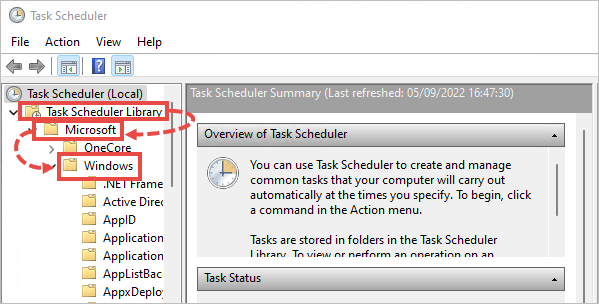
- Click Task Scheduler Library → Microsoft → Windows.
- Open the Windows Defender folder.
- Right-click Windows Defender Scheduled Scan and select Disable.
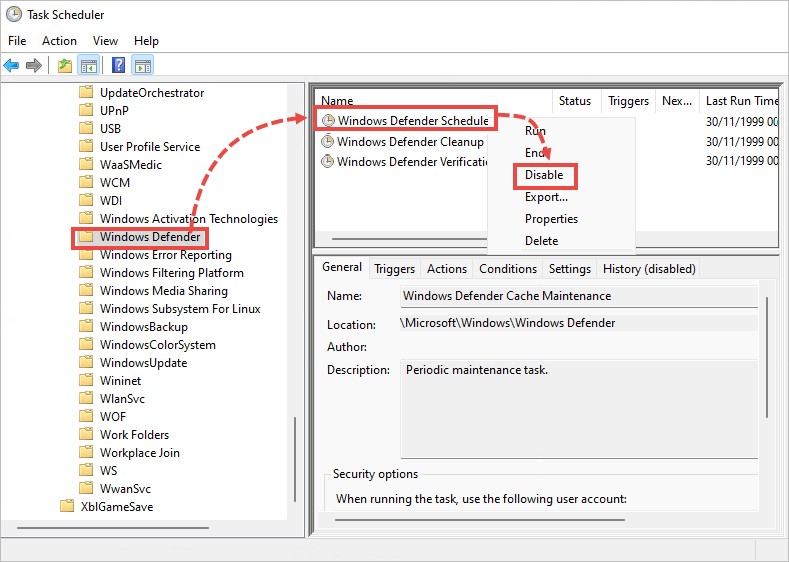
Windows Defender Scheduled Scan will be disabled.
How to remove Windows Defender
In Windows 10
You can delete the application using standard Windows tools. See the instructions on the Microsoft support website in the To uninstall Defender section.
If you cannot remove the application using the standard tools, use the Microsoft tool for solving installation and removal issues.
If the tool did not help, remove the application using the mseremoval.bat file:
- Unpack the mseremoval.zip archive.
- Right-click the mseremoval.bat file and select Run as administrator. Enter the login and password for the administrator account.
The command line window will appear. - When the necessary actions are completed, the command line window will close. After that, you can delete the mseremoval.bat file.
Windows Defender will be removed.
In Windows 11
You can disable Windows Defender in the real-time mode. For instructions, see Microsoft support site.