Diagnosing problems by disabling application components
Latest update: August 31, 2018
ID: 12287
1. Find the conflicting component
To isolate the problem, disable each protection component one by one until you find which one is causing the problem:
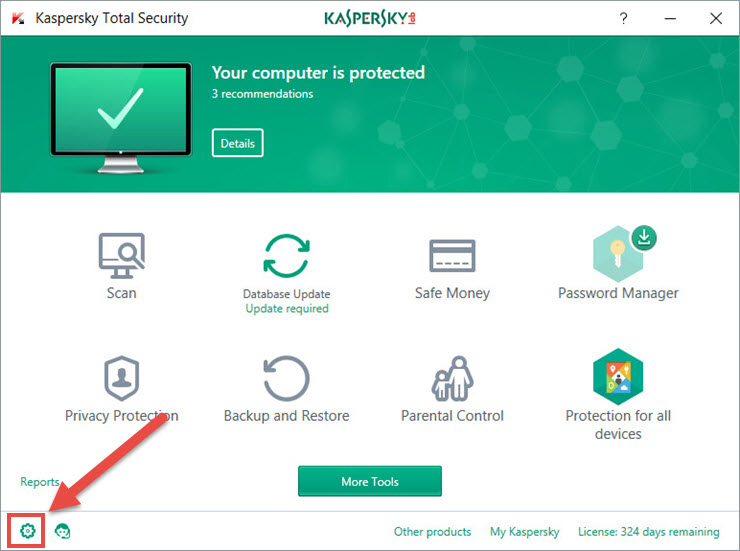
- Open your Kaspersky Lab product and click the gear icon
 .
.
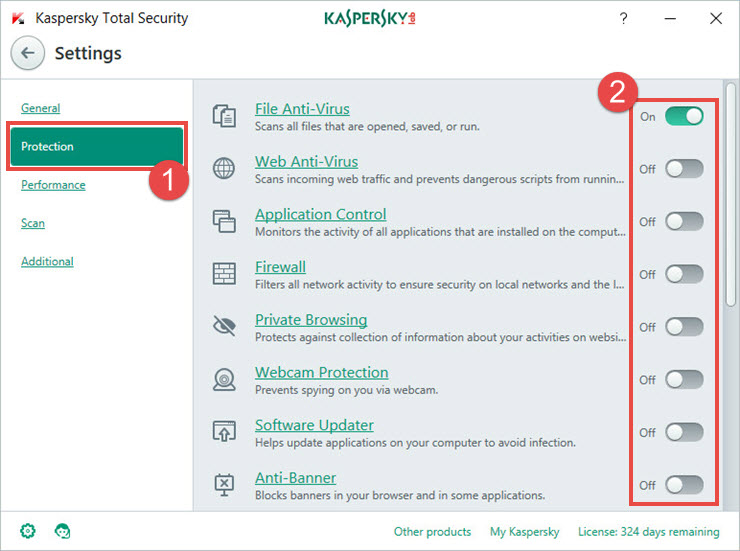
- Select Protection in the left menu.
- For each component on the right, except File Anti-Virus, click on the slider on the right to disable that component. If a component is already disabled, skip it.
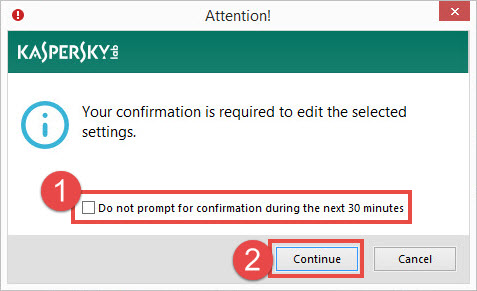
- When prompted to confirm, select the check box "Confirm my actions during the next 30 minutes" and click Accept.
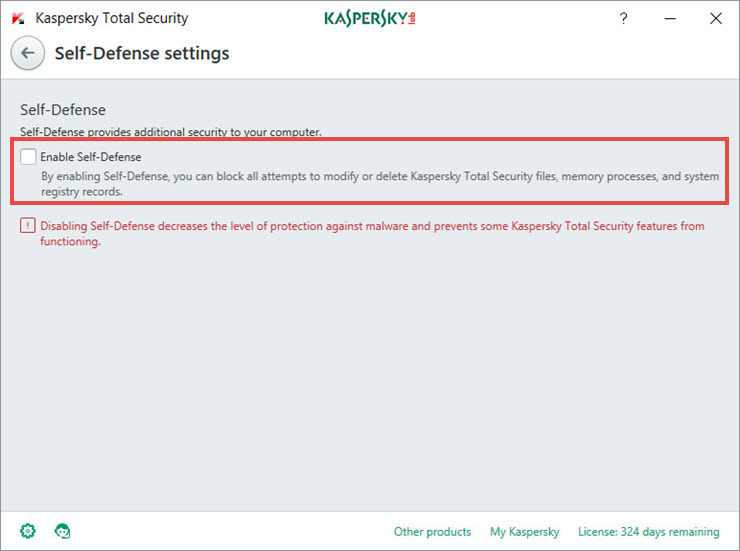
- Click Additional in the left menu and select Self-Defense in the right frame.
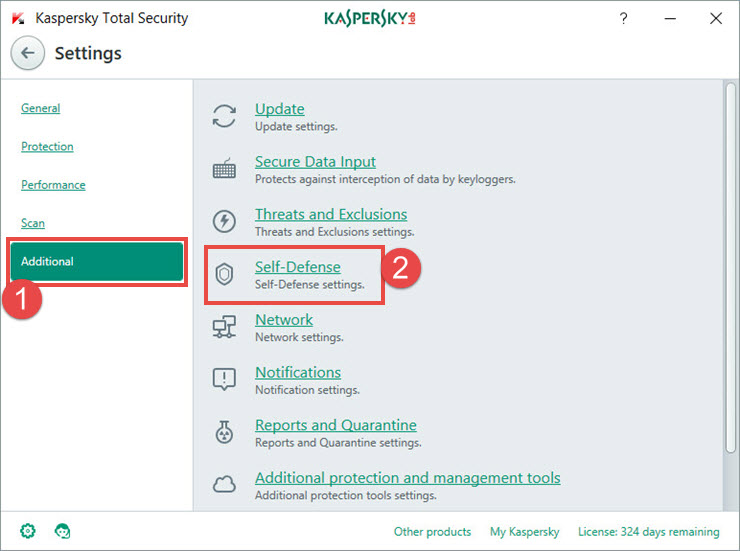
- Clear the check box Enable Self-Defense.
- Click the
 (Back arrow) in the upper-left corner twice to return to the main window.
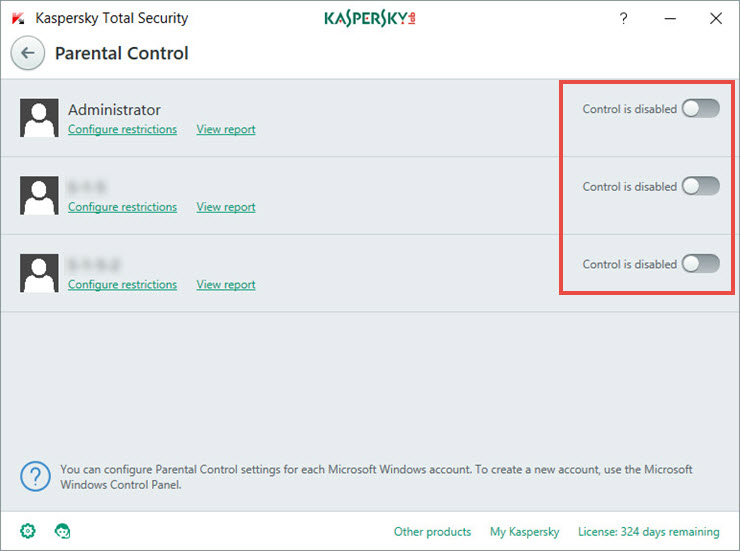
 - in the main window, click Parental Control.

- Disable Parental Control for each account.
- Reproduce the issue once again. If the issue persists, test with the File Anti-Virus component disabled as well. Keep enabling the components one by one until you find the one that causes the issue. Then, disable all components except that specific component and generate the report on its performance.
2. Generate a report to technical support
We do not recommend that you perform the actions described below unless they are required and guided by a Technical Support engineer. If enabled accidentally, trace collection may account for disk space shortage.
- In the main window of your Kaspersky Lab product, click the gear icon
 .
.

- For a guide on opening the application window, see this article.
- In the Support window, click Support Tools.

- In the Traces section, select the trace level:
- Errors
- Important
- Recommended
- All
Your Technical Support engineer will tell you which trace level to select. If you received no instructions on which level to choose, use Recommended.

-
In the Support Tools window, click Enable traces.

- Reproduce the issue with only the component that causes the issue enabled (see above).
- Click the stop (red square) button.

- Close the product window.
- Restart your computer.
As soon as you finish collecting traces, enable all the protection components that you have disabled earlier.
3. Find the report on your computer
Trace files are text files with the .log extension and unique names:
[Product name]_[Product version]_[Date of creation]_[Time of creation]_[Random characters]_[Tracing type]_[Encryption type].
E.g. KAV.18.0.0.445_06.21_10.46_1392.SRV.log
To find the created files:
- Enable Show hidden files and folders function.
- Press the Win+E combination on the keyboard.

- In the Address Bar of the Windows Explorer, please type:
- For Windows Vista/7/8/8.1/10 OS: %ALLUSERSPROFILE%\Kaspersky Lab\
- For Windows XP: %ALLUSERSPROFILE%\Application Data\Kaspersky Lab\
- Press Enter on the keyboard.
- Windows Explorer will open the Kaspersky Lab with the created files.

4. Send the report to Technical Support
- In the main window of your Kaspersky Lab application, click the headset icon .

- For a guide on opening the application window, see this article.
- In the Support window, click Support Tools.
- In the Support Tools window, click the link Send report to Technical Support.

- In the Send report window, select the reports you want to send.
- Enter the request number that was assigned to your request in My Kaspersky, and click Send report.

- Please wait until the report is packed and uploaded.
- If you cannot send the report at the moment (e.g. there is no Internet connection), save the report to your computer by clicking Save report. You can send the report to Kaspersky Lab later via My Kaspersky.

- In the Save As window, select the location. By default, the files are saved to the Documents folder.
- Enter the file name and click Save.
