Contents
- Kaspersky Secure Mail Gateway
- Kaspersky Secure Mail Gateway interface
- Application licensing
- About the End User License Agreement
- About the license
- About the license certificate
- About the key
- About the activation code
- About the key file
- About the subscription
- About data provision
- Viewing information about the license and added keys
- Updating of license and added keys information
- Adding a key file
- Adding an activation code
- Removing a key
- Modes of Kaspersky Secure Mail Gateway operation under license
- Notifications that the license expires soon
- Purchasing a license
- Mail server protection status
- Getting started with the application web interface
- Integrating Kaspersky Secure Mail Gateway into the corporate mail infrastructure
- Direct integration using a Quick Setup Wizard
- Integration through an edge gateway (SMTP verification of recipient email addresses is enabled) with the help of a wizard
- Step 1. Adding local domains (relay_domains)
- Step 2. Configuring email routing (transport_map)
- Step 3. Entering address of your Edge Gateway (relayhost)
- Step 4. Adding trusted networks and network hosts (mynetworks)
- Step 5. Completing the integration of Kaspersky Secure Mail Gateway through an edge gateway (SMTP verification of recipient email addresses is enabled)
- Integration through an edge gateway (SMTP verification of recipient email addresses is disabled) with the help of a wizard
- Step 1. Configuring email routing (transport_map)
- Step 2. Entering address of your Edge Gateway (relayhost)
- Step 3. Adding trusted networks and network hosts (mynetworks)
- Step 4. Completing the integration of Kaspersky Secure Mail Gateway through an edge gateway (SMTP verification of recipient email addresses is disabled)
- Kaspersky Secure Mail Gateway Monitoring
- Using message processing rules
- Domains and configuration of email routing
- Adding a record to the transport map and configuring email routing (transport_map)
- Adding a local domain (relay_domain)
- Deleting a record from the transport map
- Modifying email routing for a domain (transport_map)
- About using the TLS protocol in the operation of Kaspersky Secure Mail Gateway
- Configuring TLS security for incoming email messages
- Configuring TLS security for outgoing email messages
- About the DKIM signature for outgoing messages
- Enabling and disabling the DKIM signature for outgoing messages
- Preparing to add the DKIM signature to outgoing messages
- Adding the DKIM signature to messages from addresses from a specific domain
- DKIM signature for outgoing messages
- Using the TLS protocol in the operation of Kaspersky Secure Mail Gateway
- Backup
- Kaspersky Secure Mail Gateway message queue
- Enabling and disabling the transmission and reception of messages
- Viewing information about the message queue, KATA Quarantine, and Anti-Spam Quarantine
- Sorting messages in queue
- Filtering and searching messages by queue name
- Filtering and searching messages by message ID in queue
- Filtering and searching messages by message sender's address
- Filtering and searching messages by message recipient's address
- Filtering and searching messages by time of message arrival in queue
- Forced delivery and removal of messages from the queue
- Kaspersky Secure Mail Gateway operation reports
- Content of Kaspersky Secure Mail Gateway operation reports
- Viewing Kaspersky Secure Mail Gateway operation reports
- Deleting Kaspersky Secure Mail Gateway operation reports
- Enabling and disabling daily reports
- Configuring the daily report
- Enabling and disabling weekly reports
- Configuring the weekly report
- Enabling and disabling monthly reports
- Configuring the monthly report
- Generating a custom report
- General settings of Kaspersky Secure Mail Gateway
- Configuring the proxy server connection settings
- Configuring email addresses of the administrator
- Configuring HelpDesk account settings
- Changing the Administrator account password
- Configuring the settings for the event log and audit log
- Configuring application performance settings
- Configuring the appearance of scanned messages
- Configuring the template for messages when removing an attachment
- Exporting application settings
- Importing application settings
- Restarting the application
- Configuring integration with Kaspersky Security Center
- Configuring MTA settings
- Upgrading Kaspersky Secure Mail Gateway via the web interface
- Kaspersky Secure Mail Gateway database update
- Kaspersky Secure Mail Gateway Protection
- Participation in Kaspersky Security Network and using of Kaspersky Private Security Network
- Message authentication
- Connecting to a DNS to perform message authentication
- Enabling and disabling SPF message authentication
- Enabling and disabling DKIM message authentication
- Enabling and disabling DMARC message authentication
- Enabling and disabling message authentication for a rule
- Configuring detection of TempError and PermError during message authentication
- Configuring additional DMARC message authentication settings for a rule
- Configuring additional SPF message authentication settings for a rule
- Configuring additional DKIM message authentication settings for a rule
- Configuring tags added to message subjects after SPF message authentication
- Configuring tags added to message subjects after DKIM message authentication
- Configuring tags added to message subjects after DMARC message authentication
- Configuring actions on messages during DMARC, SPF and DKIM message authentication
- Preparing to configure SPF and DMARC message authentication for outgoing messages
- Anti-Virus protection
- About computer protection against certain legitimate applications
- About virus scan status
- Enabling and disabling Anti-Virus protection of messages
- Enabling and disabling Anti-Virus scanning for a rule
- Configuring Anti-Virus engine settings
- Setting default values for Anti-Virus engine settings
- Configuring actions on messages during Anti-Virus scanning
- Configuring tags added to message subjects after Anti-Virus scanning
- Configuring Anti-Virus scan restrictions and exclusions
- Anti-Spam protection
- About Anti-Spam message scan status labels
- Enabling and disabling Anti-Spam protection of messages
- Enabling and disabling Anti-Spam scanning of messages for a rule
- Configuring Anti-Spam engine settings
- Setting default values for Anti-Spam engine settings
- Configuring the custom DNSBL list for the Anti-Spam engine
- Configuring the custom SURBL list for the Anti-Spam engine
- Configuring Anti-Spam scan settings for a rule
- Configuring Anti-Spam scan actions on messages
- Configuring tags added to message subjects after spam scanning
- Anti-Spam Quarantine
- Anti-Phishing protection
- About Anti-Phishing message scan status labels
- Enabling and disabling Anti-Phishing protection of messages
- Enabling and disabling Anti-Phishing scanning of messages for a rule
- Configuring Anti-Phishing engine settings
- Setting default values for Anti-Phishing engine settings
- Configuring Anti-Phishing scan actions on messages
- Configuring tags added to message subjects after Anti-Phishing scanning
- Content filtering of messages
- About message content filtering status labels
- Enabling and disabling content filtering of messages
- Setting the maximum archive nesting level for content filtering
- Setting default values for Content Filtering settings
- Enabling and disabling content filtering of messages for a rule
- Configuring settings of message content filtering for a rule
- Configuring actions to take on messages during content filtering
- Configuring tags added to message subjects based on content filtering results
- KATA protection and integration of Kaspersky Secure Mail Gateway with Kaspersky Anti Targeted Attack Platform
- Entering integration settings for Kaspersky Secure Mail Gateway
- Confirming integration for Kaspersky Anti Targeted Attack Platform
- Checking the connection between Kaspersky Secure Mail Gateway and Kaspersky Anti Targeted Attack Platform
- Configuring the forwarding of Kaspersky Secure Mail Gateway messages to Kaspersky Anti Targeted Attack Platform for scanning
- Enabling and disabling KATA protection
- Configuring KATA protection settings
- Setting default values for KATA protection settings
- Enabling and disabling KATA protection for a rule
- Configuring actions on messages based on KATA scan results
- Configuring tags added to message subjects based on KATA scan results
- Black and white lists of addresses
- Connecting to an LDAP server
- About the connection to an LDAP server
- Connecting to and disconnecting from an LDAP server
- Adding a connection to an LDAP server
- Deleting a connection to an LDAP server
- Enabling and disabling a connection to an LDAP server
- Configuring the connection to an LDAP server
- Configuring the LDAP server connection filters
- Using the application via the SNMP protocol
- Kaspersky Secure Mail Gateway email notifications
- Kaspersky Secure Mail Gateway disclaimers and warnings
- About email disclaimers and insecure message warnings
- Creating a disclaimer or warning template
- Editing a disclaimer or warning template
- Deleting a disclaimer or warning template
- Enabling and disabling message disclaimers for a rule
- Adding a message scanning event disclaimer for a rule
- Adding an insecure message warning for a rule
- Kaspersky Secure Mail Gateway event log
- System information for Technical Support
- Kaspersky Secure Mail Gateway audit log
- Viewing the audit log and events in the audit log
- Sorting events in the audit log
- Filtering and searching events by date and time
- Filtering and searching events by event type
- Filtering and searching events by subject identifier
- Filtering and searching events by event result
- Filtering and searching events by event description
- Configuring the date and time in Kaspersky Secure Mail Gateway
- Contacting the Technical Support Service
- Glossary
- Advanced persistent threat (APT)
- Anti-Phishing
- Anti-Spam
- Anti-Virus
- Backup
- Content filtering
- Directory service
- DKIM authentication of mail senders
- DMARC authentication of mail senders
- DNSBL
- Email notification
- Heuristic analysis
- Kaspersky Anti Targeted Attack Platform
- Kaspersky Private Security Network
- Kaspersky Security Network (KSN)
- Key file
- LDAP
- Malicious links
- Phishing
- Reputation filtering
- SNMP agent
- SNMP trap
- Spam
- SPF authentication of mail senders
- SURBL
- Targeted attack
- Virtual machine
- Zero-day attack
- Zero-day vulnerability
- AO Kaspersky Lab
- Information about third-party code
- Trademark notices
Kaspersky Secure Mail Gateway
This section contains information about the Kaspersky Secure Mail Gateway.
About Kaspersky Secure Mail Gateway
Kaspersky Secure Mail Gateway lets you deploy a virtual mail gateway and integrate it into the existing corporate mail infrastructure. The following is preinstalled on the virtual mail gateway: Operating system, mail server, and Kaspersky Lab anti-virus application.
Kaspersky Secure Mail Gateway protects incoming and outgoing email against malware and spam, performs content filtering of messages, and, when integrated with Kaspersky Anti Targeted Attack Platform (hereinafter also referred to as "KATA"), protects email against intrusions into the corporate IT infrastructure.
Kaspersky Secure Mail Gateway:
- Scans incoming and outgoing email messages for , and malware, and, when integrated with KATA, scans messages for signs of and intrusions into the corporate IT infrastructure.
To promptly respond to new threats that have not yet been added to the anti-virus databases, protection components of Kaspersky Secure Mail Gateway can utilize information from
. - Integrates with (hereinafter also referred to as KPSN) for those organizations that cannot participate in Kaspersky Security Network (hereinafter also referred to as KSN).
After integration with KPSN, Kaspersky Secure Mail Gateway can use the KSN reputation databases without sending data outside of the organization.
If you want to purchase Kaspersky Private Security Network, you can contact Kaspersky Lab's partner specialists in your region.
- Integrates with for detection of threats such as , targeted attacks, and complex targeted attacks known as (hereinafter also referred to as "APT").
After integration with KATA, Kaspersky Secure Mail Gateway can send copies of messages to KATA for scanning. Based on the results of a KATA scan, Kaspersky Secure Mail Gateway can block individual messages.
To purchase the Kaspersky Anti-Virus Targeted Attack Platform program, you can contact Kaspersky Lab's sales team.
- Detects and blocks spam, probable spam and mass mailings (including marketing mail-outs), deletes messages, and places copies of messages in Backup.
- Detects, blocks, and disinfects infected email messages and infected attachments, deletes messages and attachments, and places copies of messages in Backup.
- Detects and blocks messages whose attachments contain macros (for example, Microsoft Office files with macros), deletes messages or attachments, and places copies of messages in Backup.
- Detects and blocks messages containing encrypted objects, deletes messages or attachments, and places copies of messages in Backup.
- Detects and blocks messages containing archives, recognizes the types of files within archives (for example, files in the ZIP, RAR, TGZ, 7z, and QZIP formats), and blocks individual files within archives.
- Detects and blocks phishing or links to malicious websites, deletes messages, and places copies of messages in Backup.
- Performs content filtering of messages based on the name, type and size of attachments (Kaspersky Secure Mail Gateway can determine the actual format and type of attachment regardless of its extension), deletes messages containing attachments in a specific format or with a specific name, or messages larger than the permissible size, and places copies of messages in Backup.
- Detects and blocks messages containing signs of targeted attacks and intrusions into the corporate IT infrastructure (when integrated with KATA), deletes messages, and places copies of messages in Backup.
- Saves backup copies of messages in Backup based on the results of their processing by the , and modules, and based on the results of and KATA scans of messages.
- Saves messages from Backup to file and forwards messages to recipients.
- Places messages into Anti-Spam Quarantine and KATA Quarantine, and manages the Anti-Spam Quarantine and KATA Quarantine in the web interface.
- Processes mail in accordance with the rules defined for groups of senders and recipients.
- Lets you use email filtering rules to specify users and user groups from Microsoft Active Directory and generic LDAP to enable message routing for specific email accounts and user groups.
- Notifies the sender, recipients, and administrator about the detection of messages containing objects that are infected, password-protected, or cannot be scanned.
- Sends notifications to users regarding the results from their messages being scanned by program modules. Notifications may contain a list of the latest messages in Backup. You can configure the schedule for sending notifications.
- Updates program databases from Kaspersky Lab update servers or custom resources (HTTP and FTP servers) according to schedule or on demand.
- Receives application operation statistics via the SNMP protocol, and enables or disables forwarding of SNMP traps.
- Lets you configure the settings and manage the application via a web interface.
- Sends and receives messages via a secure TLS/SSL link.
- Lets you verify the authenticity of senders using , , and technologies.
- Lets you sign outgoing email messages with DKIM signatures.
- Lets you add email disclaimers to outgoing and incoming messages.
- Adds dangerous attachment warnings to incoming messages.
- Retrieves user information from various domains and grants users access to a personal Backup.
- Lets you add, edit or delete information about domains (including local domains) and email addresses, configure Kaspersky Secure Mail Gateway settings for these domains and email addresses and configure email routing.
- Lets you configure TLS security modes for situations when Kaspersky Secure Mail Gateway receives messages from another server (acts in the Server role) or sends messages to another server (acts in the Client role), as well as configure TLS settings for individual domains.
- Lets you monitor the status of email traffic and usage of system resources and view lists of the latest detected threats in the web interface of the application.
- Lets you monitor the performance of the program via Kaspersky Security Center 10 SP2.
- Lets you view the application event Log and download it to the hard drive.
- Lets you upgrade the system via the web interface of Kaspersky Secure Mail Gateway.
- Lets you quickly configure the MTA using the Quick MTA Setup Wizard.
- Lets you add, change and delete TLS and DKIM encryption keys.
- Lets you generate and view reports on the email message processing rules.
- Lets you view the audit log in the program web interface.
- Lets you generate an archive containing information about Kaspersky Secure Mail Gateway operation for the purpose of sending it to Kaspersky Lab Technical Support.
Kaspersky Secure Mail Gateway is distributed in the format of OVA virtual machine templates (Open Virtual Appliance) or in a ZIP archive containing the virtual machine image intended for deployment on a Microsoft Hyper-V hypervisor.
Deployment of the image creates a virtual machine with a preinstalled CentOS 6.8 operating system, a mail server, and Kaspersky Security for Linux Mail Server application (hereinafter also referred to as "Kaspersky Security"). After deploying the virtual machine, you can configure it using the Initial Configuration Wizard.
Distribution kit
The application is available from online stores of Kaspersky Lab (for example, http://www.kaspersky.com, in the eStore section) and from partner companies.
The content of the distribution kit may differ depending on the region in which the application is distributed.
If Kaspersky Secure Mail Gateway is purchased through an online store, the application is copied from the store's website. Information that is required for activating the application will be sent to you by email after your payment has been received.
Page top
Modes of operation of Kaspersky Secure Mail Gateway
Kaspersky Secure Mail Gateway can run in normal mode, limited traffic mode, or certified mode.
In normal mode, Kaspersky Secure Mail Gateway is allowed to access the Internet and connect to the following servers outside the IT infrastructure of your organization:
In certified mode, Kaspersky Secure Mail Gateway is not allowed to access the Internet and connect to servers outside the IT infrastructure of your organization.
In limited traffic mode, the settings of Kaspersky Secure Mail Gateway components that require Internet access take the following values by default:
- KSN usage is disabled.
- SPF, DKIM, and DMARC message authentication is disabled. Connection to DNS servers is prohibited.
- The Enforced Anti-Spam Updates service is disabled in the settings of the Anti-Spam component.
- Kaspersky Secure Mail Gateway receives database updates from Kaspersky Security Center or a local source of Kaspersky Secure Mail Gateway database updates.
In certified mode, Kaspersky Secure Mail Gateway is not allowed to access the Internet and connect to servers outside the IT infrastructure of your organization. Besides, when Kaspersky Secure Mail Gateway operates in certified mode, the administrator is not allowed to view the event Log from the administrator's menu of Kaspersky Secure Mail Gateway Management Console.
You can select the certified mode of operation of Kaspersky Secure Mail Gateway when deploying the image of a Kaspersky Secure Mail Gateway virtual machine.
Kaspersky Secure Mail Gateway traffic limit
To switch Kaspersky Secure Mail Gateway to limited traffic mode:
- In the main window of the application web interface, open the management console tree and select the Settings section and Protection subsection.
- In the External Services section, click the Usage of KSN / KPSN link to open the Usage of KSN / KPSN window.
- Select Do not use KSN / KPSN.
- Click the Apply button.
The Usage of KSN / KPSN window closes.
- In the External Services section, click the Allow connection to DNS server link to open the External Services window.
- In the list on the right of the name of the Allow connection to DNS server setting, select No.
- Click the Apply button.
The External Services window closes.
- In the Anti-Spam section, click any of the Use KSN, Use enforced Anti-Spam Updates Service, Use reputation filtering or Maximum scanning time links to open the Anti-Spam settings window.
- In the External services settings group, in the Use enforced Anti-Spam Updates Service drop-down list, select No.
- Click the Apply button.
The Anti-Spam settings window closes.
- In the main window of the application web interface, open the management console tree and select the Settings section and Database Update subsection.
- In the Program Database Update Settings section, click the Update source link to open the Program database update settings window.
- In the Update source settings group, select Kaspersky Security Center.
- Clear the If inaccessible, use Kaspersky Lab servers check box.
- Click the OK button.
The Program database update settings window is closed.
Kaspersky Secure Mail Gateway starts running in limited traffic mode.
Kaspersky Secure Mail Gateway interface
Kaspersky Secure Mail Gateway is managed using a web interface.
The main window of the web interface contains the following items:
- Management console tree in the left part of the main window of the application web interface.
- Workspace in the right part of the main window of the application web interface.
Kaspersky Secure Mail Gateway management console tree
The management console tree displays the sections of Kaspersky Secure Mail Gateway and subsections of functional components of Kaspersky Secure Mail Gateway.
Kaspersky Secure Mail Gateway management console tree displays the following sections:
- Monitoring—Section containing Kaspersky Secure Mail Gateway monitoring data.
- Rules—Section containing message processing rules.
- Domains—Section in which you can add, edit or delete information about domains and email addresses, configure Kaspersky Secure Mail Gateway settings for these domains and email addresses.
- Encryption Keys—Section in which you can add, edit or delete DKIM and TLS encryption keys.
- Backup—Section containing information about message Backup and a filter for finding messages in Backup.
- Message Queue—Section containing information about the message queue of the MTA mail agent and a filter for finding messages in the queue.
- Reports—Section containing reports on the operation of the mail server.
- Settings—Section that lets you configure Kaspersky Secure Mail Gateway settings.
- Quick MTA Setup—Setup wizard that configures the main MTA settings. You can use it to quickly integrate Kaspersky Secure Mail Gateway into your corporate mail infrastructure at the first startup of the Kaspersky Secure Mail Gateway web interface as well as redefine the MTA settings during subsequent startups of the Kaspersky Secure Mail Gateway web interface.
After you complete all steps of the Quick MTA Setup, Kaspersky Secure Mail Gateway resets all values of MTA setting and replaces them with values that you specified in the Quick MTA Setup Wizard.
Workspace of the Kaspersky Secure Mail Gateway web interface window
The workspace contains information about the sections that you select in the management console and control elements for editing the application settings.
Settings in the workspace of the main window are grouped into settings groups for sections that let you manage Kaspersky Secure Mail Gateway settings.
Page top
About the End User License Agreement
The End User License Agreement (EULA) is a binding agreement between you and AO Kaspersky Lab, stipulating the terms on which you may use the program.
Read through the terms of the End User License Agreement carefully before you start using the application.
You can view the terms of the End User License Agreement in the following ways:
- During installation of Kaspersky Secure Mail Gateway.
- By reading the license.txt file. This file is included in the application's distribution kit.
By confirming that you agree with the End User License Agreement when installing the application, you signify your acceptance of the terms of the End User License Agreement. If you do not accept the terms of the End User License Agreement, you must abort application installation and must not use the application.
Page top
About the license
A license is a time-limited right to use the application, granted under the End User License Agreement.
A current license entitles you to the following kinds of services:
- Use of the application in accordance with the terms of the End User License Agreement
- Getting technical support
The scope of services and application usage term depend on the type of license under which the application is activated.
The following license types are provided:
- Trial—Free license intended for trying out the application.
A trial license is usually of limited duration. As soon as the license expires, all Kaspersky Secure Mail Gateway features are disabled. To continue using the application, you need to purchase a commercial license.
You can activate the application under a trial license only once.
- Commercial—Pay-for license that is provided when you buy the application.
When the commercial license expires, the application continues running with limited functionality (for example, Kaspersky Secure Mail Gateway database updates are not available). To continue using Kaspersky Secure Mail Gateway in fully functional mode, you must renew your commercial license.
We recommend renewing the license before its expiration to ensure maximum protection of your computer against security threats.
Page top
About the license certificate
A License Certificate is a document provided together with a key file or activation code.
The License Certificate contains the following license information:
- Order number
- Details of the license holder
- Information about the application that can be activated using the license
- Limitation on the number of licensing units (devices on which the application can be used under the license)
- License start date
- License expiration date or license validity period
- License type
About the key
A key is a sequence of bits with which you can activate and subsequently use the application in accordance with the terms of the End User License Agreement. A key is generated by Kaspersky Lab.
You can add a key to the application in one of the following ways: Apply a key file or enter an activation code.
After you add a key to the application, the key is displayed in the application interface as a unique alphanumeric sequence.
Kaspersky Lab can black-list a key over violations of the End User License Agreement. If the key has been black-listed, you have to add a different key to continue using the application.
There are two types of keys: active and additional.
An active key is the key that is currently used by the application. A trial or commercial license key can be added as the active key. The application cannot have more than one active key.
An additional key is a key that entitles the user to use the application, but is not currently in use. An additional key automatically becomes active when the license associated with the current active key expires. An additional key can be added only if the active key is available.
A key for a trial license can be added only as the active key. A key for a trial license cannot be added as an additional key.
An additional key can be added only if the active key is available.
Kaspersky Secure Mail Gateway uses keys of the following types:
- Fully-functional key. When this key is added, the application works in full-functionality mode, performing scans for spam, phishing, viruses and other types of malware.
- Key for Anti-Virus protection. When this key is added, the application scans messages for viruses and other threats but does not scan messages for spam. The status label assigned by the application to a message following a spam scan contains information about limited functionality.
- Key for Anti-Spam and Anti-Phishing protection. When this key is added, the application scans messages for spam and phishing but does not scan messages for viruses and other threats. The status label assigned by the application to a message following a scan for viruses and other threats contains information about limited functionality.
The type of additional key should match the type of the previously added active key. If the type of the additional key does not match the type of a previously added active key, the available application functionality changes in accordance with the type of the additional key when the additional key becomes active.
Anti-Spam and Anti-Virus databases are updated regardless of key type.
About the activation code
An activation code is a unique sequence of 20 characters in the Latin alphabet and numerals. You enter an activation code to add a key that activates Kaspersky Secure Mail Gateway. You receive an activation code at the email address that you provided after purchasing Kaspersky Secure Mail Gateway or after ordering the trial version of Kaspersky Secure Mail Gateway.
To activate the application with an activation code, Internet access is required for connecting to Kaspersky Lab activation servers.
If your activation code is lost after the application is activated, you can restore the activation code. You may need an activation code for registration in Kaspersky CompanyAccount, for example. To restore an activation code, you must contact Kaspersky Lab Technical Support.
Page top
About the key file
A key file is a file with the .key extension that you receive from Kaspersky Lab. Key files are designed to activate the application by adding a key.
You receive a key file at the email address that you provided when you bought Kaspersky Secure Mail Gateway or ordered the trial version of Kaspersky Security.
You do not need to connect to Kaspersky Lab activation servers in order to activate the program with a key file.
You can recover a key file if it is accidentally deleted. You may need a key file to register with Kaspersky CompanyAccount.
To recover a key file, do one of the following:
- Contact your license distributor
- Obtain a key file on the Kaspersky Lab website based on your existing activation code.
About the subscription
A subscription for Kaspersky Secure Mail Gateway is a purchase order for the application with specific parameters (subscription expiration date, number of devices protected).
A subscription can be limited (for example, lasting one year) or unlimited (without an expiration date). To continue using Kaspersky Secure Mail Gateway after a limited subscription expires, you need to renew it. An unlimited subscription is extended automatically if prepayment is made on time.
When a limited subscription expires, you may be provided a grace period for renewal. During this grace period, the application remains fully functional.
To use Kaspersky Secure Mail Gateway based on a subscription, you must apply an activation code. After the activation code is applied, the active key is installed. The active key defines the license for using the application by subscription. An additional key can be installed only by using an activation code and cannot be installed using a key file or by subscription.
Activation codes purchased by subscription cannot be used for activating earlier versions of Kaspersky Secure Mail Gateway.
Page top
About data provision
The application operates with the use of data whose transmission and processing requires the consent of the Kaspersky Secure Mail Gateway administrator.
You can view the list of data and the terms on which it is used as well as give consent to data processing in the following agreements between your organization and Kaspersky Lab:
- In the End User License Agreement (for example, when installing the application or upgrading the system in the Settings section, System Upgrade subsection of the main window of the application's web interface).
According to the terms of the End User License Agreement that you have accepted, you consent to the automatic transmission to Kaspersky Lab of the information enumerated in the License Agreement under Data Submission. This information is needed to improve the level of mail server security.
- In the KSN Statement.
If you agree to participate in Kaspersky Security Network, information collected during the application's operation on the computer is automatically forwarded to Kaspersky Lab. The KSN Statement specifies the list of data that is transmitted.
Kaspersky Lab protects any information received in this way as prescribed by law and applicable rules of Kaspersky Lab.
Kaspersky Lab uses any received information in anonymized form and as general statistics only. General statistics are automatically generated using original collected information and do not contain any personal data or other confidential information. The original information received is destroyed as new information is accumulated (once a year). General statistics are stored indefinitely.
User data may be present in the following Kaspersky Secure Mail Gateway components:
- Message queue (file names, email addresses of message senders and recipients, message texts).
- Backup (file names, email addresses of message senders and recipients, message texts).
- Application reports (file names, email addresses of message senders and recipients).
- Application event log (email addresses of message senders and recipients, names of attachment files, IP addresses of computers of message senders).
- Trace files (file names, paths to files, proxy server names, user account data, IP addresses of computers that connect to application database update sources, names and IP addresses of update sources, information about files downloaded and the download speed).
- Files storing settings of the connection to the LDAP server and proxy server (data of LDAP server and proxy server user accounts).
When it connects to DNS, SURBL, and DNSBL servers, Kaspersky Secure Mail Gateway uses the IP addresses and FQDN names of domains that contact these servers.
Managing the application via the management console of Kaspersky Secure Mail Gateway in Technical Support Mode with super-user account privileges lets you manage dump settings. A dump is generated during application crashes and may be needed to analyze the causes of the crash. The dump may include any data, including fragments of messages and files analyzed.
The corporate LAN administrator is responsible for access to this information.
By default, dump generation in Kaspersky Secure Mail Gateway is disabled.
Data of the email message queue currently being processed by Kaspersky Secure Mail Gateway as well as data of LDAP server and proxy server user accounts are stored in Kaspersky Secure Mail Gateway in unencrypted form.
Such data can be accessed from the Kaspersky Secure Mail Gateway Management Console in Technical Support Mode with super-user account privileges.
The administrator of Kaspersky Secure Mail Gateway must personally ensure the security of such data.
The administrator of Kaspersky Secure Mail Gateway is responsible for access to this information.
Data about events and processes of Kaspersky Secure Mail Gateway is logged and stored in the following Kaspersky Secure Mail Gateway logs:
- Event log
- Trace log
Viewing information about the license and added keys
To view information about the license and added keys,
in the main window of the application web interface, open the management console tree and select the Settings section and Licensing subsection.
The following key details appear in the Active Key section of the workspace:
- Alphanumeric sequence of the key
- Key status
- License type
- Number of users
- Application activation date
- Key expiration date
- Number of days until key expiration
Updating of license and added keys information
To update the license and the added keys information, follow these steps:
- In the main window of the application web interface, open the management console tree and select the Settings section and Licensing subsection.
- Press the Refresh button in the upper right corner of the window.
Information about the license and the added keys will be updated.
Adding a key file
To add a key file:
- In the main window of the application web interface, open the management console tree and select the Settings section and Licensing subsection.
- Click the Add a key file button.
The Add a key window opens.
- Click the Browse button.
The file selection window opens.
- Select the key file that you want to add.
- Click the OK button.
Once added, a key can have active or additional status. The first key to be added automatically becomes active. You can use the application as soon as you add an active key.
After adding an active key, you can add an additional key. The additional key automatically becomes active on expiration of the license. This ensures that protection is maintained in the period between expiration and renewal of the license.
You can now activate the program with an activation code. You are advised to activate the application using a key file.
Adding an activation code
To add an activation code:
- In the main window of the application web interface, open the management console tree and select the Settings section and Licensing subsection.
- Click the Add an activation code button.
The Activate with an activation code window opens.
- In the Activation code. field, enter the application activation code in the format XXXXX-XXXXX-XXXXX-XXXXX, where X can be letters of the Latin alphabet (A-Z, except O and I (uppercase i)) or numbers (0-9).
- Click the OK button.
The activation code will be sent to Kaspersky Lab activation servers for verification.
If the code you entered is invalid, the Activate with an activation code window will display a message informing you that an invalid code was entered. In this window, you can try to enter the activation code again.
If the code you entered is valid, you will see the terms of the End User License Agreement corresponding to the entered activation code. The Activate with an activation code window closes.
You can also activate the application with a key file. You are advised to activate the application using a key file.
Removing a key
To remove a key:
- In the main window of the application web interface, open the management console tree and select the Settings section and Licensing subsection.
- In the workspace of the window, select the check box next to the key that you want to delete.
- Click the Delete button.
The Deleting the key / activation code window opens.
- Click the Yes button.
The selected key is removed.
If you remove the active key and an additional key has been added for Kaspersky Secure Mail Gateway, the additional key automatically becomes active.
If you remove the active and additional keys, you cannot use the application functionality available under your license.
Modes of Kaspersky Secure Mail Gateway operation under license
Kaspersky Secure Mail Gateway can operate in various modes depending on the license.
Unlicensed
Kaspersky Secure Mail Gateway runs in this mode from the time when you install the application and start its web interface and until you add an active key.
Kaspersky Secure Mail Gateway does not scan email messages in Unlicensed mode.
Trial license
In this mode, Kaspersky Secure Mail Gateway scans email messages and updates databases.
When the trial license key expires, Kaspersky Secure Mail Gateway stops scanning email messages and updating databases.
In order for Kaspersky Secure Mail Gateway to resume operation, you have to install a commercial license key.
Commercial license
In this mode, Kaspersky Secure Mail Gateway scans email messages and updates databases.
When the commercial license key expires, Kaspersky Secure Mail Gateway continues scanning email messages but stops updating databases.
To resume database updates, add a new commercial license key or renew the existing commercial license key.
Kaspersky Secure Mail Gateway supports the following types of commercial license keys:
- Fully-functional key. When this key is added, the application works in full-functionality mode, performing scans for spam, phishing, viruses and other types of malware.
- Key for Anti-Virus protection. When this key is added, the application scans messages for viruses and other threats but does not scan messages for spam. The status label assigned by the application to a message following a spam scan contains information about limited functionality.
- Key for Anti-Spam and Anti-Phishing protection. When this key is added, the application scans messages for spam and phishing but does not scan messages for viruses and other threats. The status label assigned by the application to a message following a scan for viruses and other threats contains information about limited functionality.
Black list of keys
A key can be added to the black list of keys in a number of cases. If this has happened, Kaspersky Secure Mail Gateway stops scanning email messages but continues attempts to update databases in case the key is removed from the black list of keys.
As soon as the key has been removed from the black list of keys, Kaspersky Secure Mail Gateway resumes scanning of email messages in accordance with the valid license.
After scanning of email messages in Kaspersky Secure Mail Gateway is disabled, the following functionality remains available: the mail transfer agent (MTA), the connection to the LDAP server, the event log, and Kaspersky Secure Mail Gateway operation reports. You also have access to all Kaspersky Secure Mail Gateway settings (except the protection settings) via the web interface.
Notifications that the license expires soon
The application checks the license validity period after each update. When the number of days specified in the Send notification setting remains until license expiration, the application starts sending notifications to the email addresses of Kaspersky Secure Mail Gateway administrator.
By default, the application starts sending license expiration notifications 30 days before license expiration.
License expiration notifications are sent once a day.
The application stops sending license expiration notifications in the following cases:
- You have added a key whose validity period exceeds the validity period of the previous key and the value of the Send notification setting.
- License has expired. In this case, the application sends a notification that the license has expired.
To configure the start date for sending notifications, edit the header or text of the notification about an expiring license:
- In the main window of the application web interface, open the management console tree and select the Settings section and Notifications subsection.
- In the License Expires Soon section, click any link to open the Notification settings.
- In the Subject field, type the header of the expiring license notification.
- In the Message field, type the text of the expiring license notification.
- In the Send notification list, specify the number of days until license expiry that you want to start receiving the notification.
- Click the Save button.
The Notification settings window closes.
To enable or disable delivery of license expiration notifications:
- In the main window of the application web interface, open the management console tree and select the Settings section and Notifications subsection.
- In the License Expires Soon section, do one of the following:
- Flip on the toggle switch next to the name of the License Expires Soon group of settings if you want to enable delivery of license expiration notifications.
- Flip off the toggle switch next to the name of the License Expires Soon group of settings if you want to disable delivery of license expiration notifications.
If an additional key is installed in the application, the notification is not sent. After the expiry of the active key, the additional key automatically becomes active.
If the additional key validity period expires before the application is configured to start sending notifications, the first notification is sent at the time when the active key is replaced with the additional key.
Purchasing a license
Kaspersky Secure Mail Gateway is included in the following comprehensive solutions for security and system administration from Kaspersky Lab:
To select a comprehensive solution that is most suitable for your organization, consult with specialists of a Kaspersky Lab partner company. The contact details and addresses of partners are provided on the Kaspersky Lab website at https://www.kaspersky.co.uk/partners/distribution.
Mail server protection status
In the Monitoring section of the main window of the Kaspersky Secure Mail Gateway web interface, the following information on the status of mail server protection is displayed in the right part of the workspace:
- Operating status of the Anti-Spam module, up-to-date status of the Anti-Spam module databases, and the number of messages in Anti-Spam Quarantine.
- Operating status of the Anti-Virus module, and up-to-date status of Anti-Virus module databases.
- Status of the connection with the server hosting the KATA component, the number of messages in KATA Quarantine (if you are using Kaspersky Anti Targeted Attack Platform).
- Operating status of the Anti-Phishing module, and up-to-date status of the Anti-Phishing module databases.
- Status of the connection with Kaspersky Security Network or Kaspersky Private Security Network (if you are using Kaspersky Private Security Network).
- Information about the last update of application databases.
- Status of the connection to LDAP servers
- License validity period and a license expiration notification if the license is about to expire
- Information about the status of transmission and reception of messages by the MTA.
If you have activated the application, the Anti-Spam, Anti-Virus, and Anti-Phishing modules are enabled by default, and message transmission and receipt is enabled for the MTA mail agent.
Getting started with the application web interface
After installation and initial configuration of the application, you can begin working with the web interface of Kaspersky Secure Mail Gateway.
To begin working with the web interface of the application:
- Enter the following address into the address line of the browser:
https://<IP-address-of-deployed-appliance>/ksmg, using the IP address received during application installation.A web interface login page opens, prompting you to enter the user name and password of the web address administrator.
- In the User name field, type
Administrator. - In the Password field, enter the password that was set during application installation.
- Click the Log in button.
The main page of the Kaspersky Secure Mail Gateway web interface opens.
Integrating Kaspersky Secure Mail Gateway into the corporate mail infrastructure
Kaspersky Secure Mail Gateway is integrated into the existing corporate mail infrastructure and is not a standalone mail system. For example, Kaspersky Secure Mail Gateway does not deliver email messages to recipients and does not manage user accounts.
You can integrate Kaspersky Secure Mail Gateway into the corporate mail infrastructure in one of the following ways:
- Directly.
- Through an edge gateway on which SMTP verification of recipient email addresses is enabled.
Before configuring integration of Kaspersky Secure Mail Gateway via an edge gateway, specify whether or not SMTP verification of recipient email addresses is enabled on the edge gateway to which Kaspersky Secure Mail Gateway will be relaying messages from internal domains.
- Through an edge gateway on which SMTP verification of recipient email addresses is disabled.
You can configure the basic settings of Kaspersky Secure Mail Gateway integration into the corporate mail infrastructure using the Quick MTA Setup Wizard as well as integrate Kaspersky Secure Mail Gateway into the corporate mail infrastructure through the web interface of the application.
After you complete all steps of the Quick MTA Setup, Kaspersky Secure Mail Gateway resets all values of MTA setting and replaces them with values that you specified in the Quick MTA Setup Wizard.
Direct integration using a Quick Setup Wizard
Direct integration is the type of integration where Kaspersky Secure Mail Gateway receives email messages directly from the Internet and redirects them to internal mail servers, and also receives messages from internal mail servers and redirects them to the Internet.
To configure direct integration of Kaspersky Secure Mail Gateway into the corporate mail infrastructure:
- In the main window of the application web interface, open the management console tree and select the Quick MTA Setup section.
- In the Integrating Kaspersky Secure Mail Gateway into mail infrastructure section, select Integrate directly.
- Click the Start integration link to begin performing the steps of the wizard.
Step 1. Adding local domains (relay_domains)
At this step, add local domains of your organization for which Kaspersky Secure Mail Gateway will be receiving email messages from the outside. Kaspersky Secure Mail Gateway will receive messages only for the domains you specified. Messages intended for other domains are rejected.
If local domains are not specified, Kaspersky Secure Mail Gateway will not be receiving messages for your internal mail servers.
To add local domains of your organization:
- Click the Add a domain link to open the Adding a domain window.
- In the Enter domain name field, type the name of the domain for which Kaspersky Secure Mail Gateway will be receiving messages.
Type the domain names in FQDN format.
- Click the OK button.
- The Adding a domain window closes.
The domain names have to be entered one at a time. Repeat the process of adding domain names to the list for all domain names that you are adding.
Click the Save and go to Configuration of email routing link to proceed to the next step of the wizard.
Step 2. Configuring email routing (transport_map)
Configure email routing at this step.
By default, Kaspersky Secure Mail Gateway uses the settings of your DNS server for email routing. You can manually configure email routing. To do so, you must create a transport map. In the transport map, enter the names of the domains for which the email messages are intended and then enter the IP addresses or fully qualified domain names (FQDN) to which Kaspersky Secure Mail Gateway will be redirecting messages intended for these domains.
Example: If you want messages that are intended for the domain example.com to be redirected to the address 1.1.1.0:25, you must perform the following actions:
|
To configure email routing:
- Click the Add a record to the transport map link to open the Email routing window.
- In the Enter domain name field, type the name of the domain for which email messages are intended.
Type the domain names in FQDN format.
- In the Enter email destination address (IPv4, domain name or FQDN) field, enter the IP address or the domain name of the server to which you want to configure routing of email.
You can enter an IPv4 address (for example, 192.0.0.1 or 192.0.0.0/16), domain name or FQDN.
- In the Enter the port number to connect with the email destination address field, select the port number.
The default value is 25.
- Select one of the following options:
- Do not enable MX lookup.
- Enable MX lookup (for domain names or FQDNs).
- Click the OK button.
- The Email routing window closes.
Transport map records are added one at a time. Repeat the process of adding records to the transport map for all records that you are adding.
Click the Save and go to Adding trusted networks and network hosts link to proceed to the next step of the wizard.
Step 3. Adding trusted networks and network hosts (mynetworks)
At this step, create a list of trusted networks and network hosts that are allowed to send email messages via Kaspersky Secure Mail Gateway.
As a rule, these are internal networks and network hosts of your organization.
For example, you can specify the IP addresses of Microsoft Exchange servers used at your organization.
If trusted networks are not specified, Kaspersky Secure Mail Gateway will not be receiving messages from internal mail servers and redirect them outside the network of your organization.
To add a list of trusted networks and network hosts:
- Click the Add a trusted network or network host link to open the Adding a trusted network window.
- In the Enter email destination address (IPv4, domain name or FQDN) field, enter the network address or the subnet address.
You can enter an IPv4 address (for example, 192.0.0.1 or 192.0.0.0/16), domain name or FQDN. .
- Click the OK button.
- The Adding a trusted network window closes.
Addresses are added one at a time. Repeat the process of adding addresses to the list for all addresses that you are adding.
Click the Save and go to Completing the integration link to proceed to the next step of the wizard.
Step 4. Completing direct integration of Kaspersky Secure Mail Gateway
At this step, check the settings you have specified for integrating Kaspersky Secure Mail Gateway into the corporate mail infrastructure and confirm your choice.
When integration into the corporate mail infrastructure is completed, the following settings of Kaspersky Secure Mail Gateway are configured automatically:
- SPF authentication of message senders is enabled.
- SMTP verification of recipient email addresses is enabled.
After you complete all steps of the Quick MTA Setup, Kaspersky Secure Mail Gateway resets all values of MTA setting and replaces them with values that you specified in the Quick MTA Setup Wizard.
Integration through an edge gateway (SMTP verification of recipient email addresses is enabled) with the help of a wizard
Integration through an edge gateway on which SMTP verification of recipient email addresses is enabled is a type of integration where Kaspersky Secure Mail Gateway receives messages from an intermediate gateway and relays them to internal mail servers, and also receives messages from internal mail servers and relays them to the edge gateway. In this case, SMTP verification of recipient email addresses is enabled on the edge gateway.
SMTP verification of recipient email addresses is used by mail systems to prevent reception of messages for nonexistent addresses.
To configure integration of Kaspersky Secure Mail Gateway into the corporate mail infrastructure through an edge gateway on which SMTP verification of recipient email addresses is enabled:
- In the main window of the application web interface, open the management console tree and select the Quick MTA Setup section.
- In the Integrating Kaspersky Secure Mail Gateway into mail infrastructure section, select Integrate through Edge Gateway.
- Click the Start integration link to go to the SMTP Recipient Address Verification on the Edge Gateway section.
- Select SMTP Recipient Address Verification is enabled on the Edge Gateway.
- Click the Go to Adding local domains link to begin performing the steps of the wizard.
Step 1. Adding local domains (relay_domains)
At this step, add local domains of your organization for which Kaspersky Secure Mail Gateway will be receiving email messages from the outside. Kaspersky Secure Mail Gateway will receive messages only for the domains you specified. Messages intended for other domains are rejected.
If local domains are not specified, Kaspersky Secure Mail Gateway will not be receiving messages for your internal mail servers.
To add local domains of your organization:
- Click the Add a domain link to open the Adding a domain window.
- In the Enter domain name field, type the name of the domain for which Kaspersky Secure Mail Gateway will be receiving messages.
Type the domain names in FQDN format.
- Click the OK button.
- The Adding a domain window closes.
The domain names have to be entered one at a time. Repeat the process of adding domain names to the list for all domain names that you are adding.
Click the Save and go to Configuration of email routing link to proceed to the next step of the wizard.
Step 2. Configuring email routing (transport_map)
Configure email routing at this step.
By default, Kaspersky Secure Mail Gateway uses the settings of your DNS server for email routing. You can manually configure email routing. To do so, you must create a transport map. In the transport map, enter the names of the domains for which the email messages are intended and then enter the IP addresses or fully qualified domain names (FQDN) to which Kaspersky Secure Mail Gateway will be redirecting messages intended for these domains.
Example: If you want messages that are intended for the domain example.com to be redirected to the address 1.1.1.0:25, you must perform the following actions:
|
To configure email routing:
- Click the Add a record to the transport map link to open the Email routing window.
- In the Enter domain name field, type the name of the domain for which email messages are intended.
Type the domain names in FQDN format.
- In the Enter email destination address (IPv4, domain name or FQDN) field, enter the IP address or the domain name of the server to which you want to configure routing of email.
You can enter an IPv4 address (for example, 192.0.0.1 or 192.0.0.0/16), domain name or FQDN.
- In the Enter the port number to connect with the email destination address field, select the port number.
The default value is 25.
- Select one of the following options:
- Do not enable MX lookup.
- Enable MX lookup (for domain names or FQDNs).
- Click the OK button.
The Email routing window closes.
Transport map records are added one at a time. Repeat the process of adding records to the transport map for all records that you are adding.
Click the Save and go to Entering the Edge Gateway address link to proceed to the next step of the wizard.
Step 3. Entering address of your Edge Gateway (relayhost)
At this step, enter the address of your edge gateway. Kaspersky Secure Mail Gateway will be redirecting all messages to this address.
For example: 192.0.2.1 or domain.com.
If you have configured email routing for individual domains, Kaspersky Secure Mail Gateway will be redirecting email messages to the addresses specified for each domain.
To enter the address of an edge gateway:
- In the entry field, specify the IP address or the domain name of the edge gateway.
You can enter an IPv4 address (for example, 192.0.0.1 or 192.0.0.0/16), domain name or FQDN.
- Select one of the following options:
- Do not enable MX lookup.
- Enable MX lookup (for domain names or FQDNs).
Click the Save and go to Adding trusted networks and network hosts link to proceed to the next step of the wizard.
Step 4. Adding trusted networks and network hosts (mynetworks)
At this step, create a list of trusted networks and network hosts that are allowed to send email messages via Kaspersky Secure Mail Gateway.
As a rule, these are internal networks and network hosts of your organization.
For example, you can specify the IP addresses of Microsoft Exchange servers used at your organization.
If trusted networks are not specified, Kaspersky Secure Mail Gateway will not be receiving messages from internal mail servers and redirect them outside the network of your organization.
To add a list of trusted networks and network hosts:
- Click the Add a trusted network or network host link to open the Adding a trusted network window.
- In the Enter network address or network host address field, type the name of the domain for which email messages are intended.
Type the domain names in FQDN format.
- Click the OK button.
- The Adding a trusted network window closes.
Addresses are added one at a time. Repeat the process of adding addresses to the list for all addresses that you are adding.
Click the Save and go to Completing the integration link to proceed to the next step of the wizard.
Step 5. Completing the integration of Kaspersky Secure Mail Gateway through an edge gateway (SMTP verification of recipient email addresses is enabled)
At this step, check the settings you have specified for integrating Kaspersky Secure Mail Gateway into the corporate mail infrastructure and confirm your choice.
When integration into the corporate mail infrastructure is completed, the following settings of Kaspersky Secure Mail Gateway are configured automatically:
- SPF authentication of message senders is disabled.
Do not enable SPF authentication of message recipients because the message sender is the edge gateway from which Kaspersky Secure Mail Gateway receives messages.
- DMARC authentication of domains from which Kaspersky Secure Mail Gateway receives messages is disabled.
Do not enable DMARC authentication of domains because Kaspersky Secure Mail Gateway receives messages from an intermediate gateway.
- SMTP verification of recipient email addresses is enabled.
Do not disable SMTP verification of recipient email addresses because SMTP verification of recipient email addresses is enabled on the edge gateway.
After you complete all steps of the Quick MTA Setup, Kaspersky Secure Mail Gateway resets all values of MTA setting and replaces them with values that you specified in the Quick MTA Setup Wizard.
Integration through an edge gateway (SMTP verification of recipient email addresses is disabled) with the help of a wizard
Integration through an edge gateway on which SMTP verification of recipient email addresses is disabled is a type of integration where Kaspersky Secure Mail Gateway receives messages from an edge gateway and relays them to internal mail servers, and also receives messages from internal mail servers and relays them to the edge gateway. In this case, SMTP verification of recipient email addresses is disabled on the edge gateway.
SMTP verification of recipient email addresses is used by mail systems to prevent reception of messages for nonexistent addresses.
To configure integration of Kaspersky Secure Mail Gateway into the corporate mail infrastructure through an edge gateway on which SMTP verification of recipient email addresses is disabled:
- In the main window of the application web interface, open the management console tree and select the Quick MTA Setup section.
- In the Integrating Kaspersky Secure Mail Gateway into mail infrastructure section, select Integrate through Edge Gateway.
- Click the Start integration link to go to the SMTP Recipient Address Verification on the Edge Gateway section.
- Select SMTP Recipient Address Verification is disabled on the Edge Gateway.
- Click the Go to configuring email routing link to begin performing the steps of the wizard.
Step 1. Configuring email routing (transport_map)
Configure email routing at this step.
By default, Kaspersky Secure Mail Gateway uses the settings of your DNS server for email routing. You can manually configure email routing. To do so, you must create a transport map. In the transport map, enter the names of the domains for which the email messages are intended and then enter the IP addresses or fully qualified domain names (FQDN) to which Kaspersky Secure Mail Gateway will be redirecting messages intended for these domains.
Example: If you want messages that are intended for the domain example.com to be redirected to the address 1.1.1.0:25, you must perform the following actions:
|
To configure email routing:
- Click the Add a record to the transport map link to open the Email routing window.
- In the Enter domain name field, type the name of the domain for which email messages are intended.
Type the domain names in FQDN format.
- In the Enter email destination address (IPv4, domain name or FQDN) field, enter the IP address or the domain name of the server to which you want to configure routing of email.
You can enter an IPv4 address (for example, 192.0.0.1 or 192.0.0.0/16), domain name or FQDN.
- In the Enter the port number to connect with the email destination address field, select the port number.
The default value is 25.
- Select one of the following options:
- Do not enable MX lookup.
- Enable MX lookup (for domain names or FQDNs).
- Click the OK button.
The Email routing window closes.
Transport map records are added one at a time. Repeat the process of adding records to the transport map for all records that you are adding.
Click the Save and go to Entering the Edge Gateway address link to proceed to the next step of the wizard.
Step 2. Entering address of your Edge Gateway (relayhost)
At this step, enter the address of your edge gateway. Kaspersky Secure Mail Gateway will be redirecting all messages to this address.
For example: 192.0.2.1 or domain.com.
If you have configured email routing for individual domains, Kaspersky Secure Mail Gateway will be redirecting email messages to the addresses specified for each domain.
To enter the address of an edge gateway:
- In the entry field, specify the IP address or the domain name of the edge gateway.
You can enter an IPv4 address (for example, 192.0.0.1 or 192.0.0.0/16), domain name or FQDN.
- Select one of the following options:
- Do not enable MX lookup.
- Enable MX lookup (for domain names or FQDNs).
Click the Save and go to Adding trusted networks and network hosts link to proceed to the next step of the wizard.
Step 3. Adding trusted networks and network hosts (mynetworks)
At this step, create a list of trusted networks and network hosts that are allowed to send email messages via Kaspersky Secure Mail Gateway.
As a rule, these are internal networks and network hosts of your organization.
For example, you can specify the IP addresses of Microsoft Exchange servers used at your organization.
If trusted networks are not specified, Kaspersky Secure Mail Gateway will not be receiving messages from internal mail servers and redirect them outside the network of your organization.
To add a list of trusted networks and network hosts:
- Click the Add a trusted network or network host link to open the Adding a trusted network window.
- In the Enter network address or network host address field, type the name of the domain for which email messages are intended.
Type the domain names in FQDN format.
- Click the OK button.
The Adding a trusted network window closes.
Addresses are added one at a time. Repeat the process of adding addresses to the list for all addresses that you are adding.
Click the Save and go to Completing the integration link to proceed to the next step of the wizard.
Step 4. Completing the integration of Kaspersky Secure Mail Gateway through an edge gateway (SMTP verification of recipient email addresses is disabled)
At this step, check the settings you have specified for integrating Kaspersky Secure Mail Gateway into the corporate mail infrastructure and confirm your choice.
When integration into the corporate mail infrastructure is completed, the following settings of Kaspersky Secure Mail Gateway are configured automatically:
- SPF authentication of message senders is disabled.
Do not enable SPF authentication of message recipients because the message sender is the edge gateway from which Kaspersky Secure Mail Gateway receives messages.
- DMARC authentication of domains from which Kaspersky Secure Mail Gateway receives messages is disabled.
Do not enable DMARC authentication of domains because Kaspersky Secure Mail Gateway receives messages from an intermediate gateway.
- SMTP verification of recipient email addresses is disabled.
Do not enable SMTP verification of recipient email addresses because SMTP verification of recipient email addresses is disabled on the edge gateway.
After you complete all steps of the Quick MTA Setup, Kaspersky Secure Mail Gateway resets all values of MTA setting and replaces them with values that you specified in the Quick MTA Setup Wizard.
Kaspersky Secure Mail Gateway Monitoring
This section provides information on mail traffic monitoring, the latest threats detected, and system resources.
Mail traffic monitoring
To evaluate the current status of Kaspersky Secure Mail Gateway mail traffic:
- In the main window of the application web interface, open the management console tree and select the Monitoring section.
- In the workspace, select the Email Traffic tab.
- Select one of the periods for which you want to display information about mail traffic.
You can view information about mail traffic for the following periods: hour, day, week or 30 days.
- Select the option for displaying information in charts.
You can view the by quantity or by size charts of detected messages.
- Select the status labels of messages (for example, Clean, Infected, With spam or all messages) information about which you want to view.
The workspace displays mail traffic charts for the selected period.
Monitoring of the latest detected threats
To view the list of the latest detected threats:
- In the main window of the application web interface, open the management console tree and select the Monitoring section.
- In the workspace, select the Latest Threats Detected tab.
The Latest infected objects detected list is displayed – the last 5 objects detected.
Monitoring of system resources usage
To evaluate current usage of system resources:
- In the main window of the application web interface, open the management console tree and select the Monitoring section.
- In the workspace, select the System Resources tab.
- Select check boxes next to the types of data that you want to see in the system load chart (for example, you can select CPU, RAM, Swap or all options at once).
- Select check boxes next to the types of data that you want to see in the network interfaces load chart (for example, you can select Sending, Receiving or all options at once).
The workspace displays the System and Network Interfaces charts with the data you selected.
Monitoring the status of services and operation of the MTA mail agent
In the Monitoring section of the Kaspersky Secure Mail Gateway web interface, the following information on the status of mail server protection is displayed in the right part of the workspace:
- Operating status of the Anti-Spam module, up-to-date status of the Anti-Spam module databases, and the number of messages in Anti-Spam Quarantine.
- Operating status of the Anti-Virus module, and up-to-date status of Anti-Virus module databases.
- Status of the connection with the server hosting the KATA component, the number of messages in KATA Quarantine (if you are using Kaspersky Anti Targeted Attack Platform).
- Operating status of the Anti-Phishing module, and up-to-date status of the Anti-Phishing module databases.
- Status of the connection with Kaspersky Security Network or Kaspersky Private Security Network (if you are using Kaspersky Private Security Network).
- Information about the last update of application databases.
- Status of the connection to LDAP servers
- License validity period and a license expiration notification if the license is about to expire
- Information about the status of transmission and reception of messages by the MTA.
If you have activated the application, the Anti-Spam, Anti-Virus, and Anti-Phishing modules are enabled by default, and message transmission and receipt is enabled for the MTA mail agent.
Using message processing rules
A message processing rule (hereinafter also "the rule") is a specific multitude of pairs of addresses of senders and recipients whose email messages are processed by Kaspersky Secure Mail Gateway by applying the same values of settings. For a rule to be assigned to an email message, the addresses of the sender and recipient must be specified in the rule settings.
By default, the application contains the following preset message processing rules:
- WhiteList—Process messages from the white list.
- BlackList—Process messages from the black list.
- Default—Process messages according to settings predefined by Kaspersky Lab.
When processing an email message, Kaspersky Secure Mail Gateway checks each rule for the sender-recipient pair of addresses beginning with the highest-priority rule (1). If no match is found, Kaspersky Secure Mail Gateway checks the pair of addresses of the rule with the next highest priority (2). As soon as it finds the sender-recipient pair of addresses in any rule, the application applies the processing settings configured in that rule to the message.
If none of the rules contains the "sender - recipient" pair of addresses, the message is processed according to the preset settings of the Default rule.
For each rule, you can specify your own settings for processing email messages.
Creating message processing rules
To create a message processing rule:
- In the main window of the application web interface, open the management console tree and select the Rules section.
- Click the Create button in the upper part of the workspace.
A new message processing rule opens.
- Select the General rule settings section.
- In the Rule Name (required) field, enter the name of the new rule.
The rule must have a unique name in the list of Kaspersky Secure Mail Gateway rules.
- In the Rule Description field, enter the rule description.
- In the Rule Mode settings group, select one of the following message processing options:
- Use the settings of scan modules, if you want the application to process messages according to this rule using the settings of the Anti-Spam, Anti-Phishing, and Anti-Virus engines and content filtering settings configured for this rule.
The following settings groups are displayed in the lower part of the workspace (if they were hidden previously). You can use them to configure Kaspersky Secure Mail Gateway settings for a rule:
- Reject without scanning — if you want the application to reject the message without scanning when processing the message according to this rule.
- Delete without notifying the sender, if you want the application to delete messages without notifying the sender when processing messages according to this rule.
- Skip from scanning — if you want the application to deliver messages to recipients without scanning them when processing messages according to this rule.
The Email Disclaimer section is displayed in the lower part of the workspace, in which you can configure disclaimers for messages processed according to this rule.
- Use the settings of scan modules, if you want the application to process messages according to this rule using the settings of the Anti-Spam, Anti-Phishing, and Anti-Virus engines and content filtering settings configured for this rule.
- Click the Create button in the lower part of the workspace.
The rule is created and added to the list of rules in the Rules section.
In order for a rule to be used by Kaspersky Secure Mail Gateway, you have to configure the list of message senders and the list of message recipients for this rule.
You can also create a rule by copying an existing rule or editing its settings.
By default, the rule is assigned the highest priority of all previously created rules. You can change the rule priority level.
In order for the settings you have configured to be used during operation of Kaspersky Secure Mail Gateway, make sure that the rule for which you have configured settings is enabled. By default, the new rule is disabled and not used during operation of the application.
Creating a copy of a message processing rule
To create a copy of a message processing rule:
- In the main window of the application web interface, open the management console tree and select the Rules section.
- Select the check box in the line with the name of the rule that you want to copy.
- Click the Copy button in the upper part of the workspace.
- In the General rule settings section, in the Rule Name (required) field, change the rule name.
The rule must have a unique name in the list of Kaspersky Secure Mail Gateway rules.
- Click the Create button in the lower part of the workspace.
A copy of the rule is created and added to the list of rules in the Rules section.
You can edit the rule description, rule settings, and Kaspersky Secure Mail Gateway settings for this rule.
By default, the rule is assigned the highest priority of all previously created rules. You can change the rule priority level.
In order for the settings you have configured to be used during operation of Kaspersky Secure Mail Gateway, make sure that the rule for which you have configured settings is enabled. By default, the new rule is disabled and not used during operation of the application.
Configuring lists of message senders and recipients for a rule
In order for a rule to be used by Kaspersky Secure Mail Gateway, you have to configure the lists of message senders and recipients for this rule.
You can configure lists of message senders and recipients as follows:
- Create lists of message senders and recipients. You can add IP addresses of message senders and email addresses and LDAP accounts of message senders and recipients to lists.
- Copy addresses from lists of message senders and recipients to clipboard and paste addresses from clipboard into lists of message senders and recipients.
- Remove addresses from lists of message senders and recipients. You can remove individual addresses from lists, clear the lists of message senders and recipients, and also remove LDAP accounts from the List of senders' LDAP accounts and the List of recipients' LDAP accounts in the process of configuring lists of message senders and recipients.
Adding email addresses
To add email addresses to lists of message senders and recipients:
- In the main window of the application web interface, open the management console tree and select the Rules section.
- In the list of rules, click the name of the rule to open the rule for which you want to manage the list of message senders and recipients.
- Select the General rule settings section.
- Select the list to which you want to add email addresses:
- Senders — if you want to add email addresses to the list of message senders.
- Recipients — if you want to add email addresses to the list of message recipients.
- Under the list name, click the button with the icon corresponding to the type of the sender's or recipient's address, and select Email addresses in the context menu of the button.
- Type the email address in the field to the right of the Email addresses icon.
The email addresses are entered one at a time. Repeat the process of adding addresses to the list for all email addresses that you are adding.
You can use the symbols "*" and "?" to create an address mask, and regular expressions beginning with the prefix "reg:".
Regular expressions are not case-sensitive.
- Click the Add button on the right of the entry field.
Once added, the email address appears in the list you have selected with the Email addresses icon.
- To undo the last action, click the Undo last link under the list you have selected.
- After adding all email addresses to the list, click the Apply button in the lower part of the workspace.
Changes made to the lists of message senders or recipients are saved in the message processing rule that you are configuring.
In order for the settings you have configured to be used during operation of Kaspersky Secure Mail Gateway, make sure that the rule for which you have configured settings is enabled.
Adding IP addresses
You can add IP addresses only to the list of message senders. IP addresses cannot be added to the list of message recipients.
To add IP addresses to the list of message senders:
- In the main window of the application web interface, open the management console tree and select the Rules section.
- In the list of rules, click the name of the rule to open the rule for which you want to manage the list of message senders and recipients.
- Select the General rule settings section.
- In the Senders section, click the button with the icon for the sender address type, and select IP addresses in the context menu of the icon.
- In the field on the right of the IP addresses icon, enter the IP address of the message sender.
IP addresses should be entered one at a time. Repeat the process of adding addresses to the list for all IP addresses that you are adding.
You can enter an IPv4 address (for example: 192.0.0.1 or 192.0.0.0/16), an IPv6 address (for example: 2607:f0d0:1002:51::4), or subnet address in CIDR format (for example: fc00::/7).
- Click the Add button on the right of the entry field.
The IP address you have added appears in the list of message senders with the IP addresses icon.
- To undo the last action, click the Undo last link under the list of message senders.
- After adding all IP addresses to the list, click the Apply button in the lower part of the workspace.
Changes made to the lists of message senders or recipients are saved in the message processing rule that you are configuring.
In order for the settings you have configured to be used during operation of Kaspersky Secure Mail Gateway, make sure that the rule for which you have configured settings is enabled.
Adding LDAP accounts
To add LDAP accounts to lists of message senders and recipients:
- In the main window of the application web interface, open the management console tree and select the Rules section.
- In the list of rules, click the name of the rule to open the rule for which you want to manage the list of message senders and recipients.
- Select the General rule settings section.
- Select the list to which you want to add LDAP accounts:
- Senders, if you want to add LDAP accounts to the list of message senders.
- Recipients — if you want to add LDAP accounts to the list of message recipients.
- Under the list name, click the button with the icon corresponding to the type of the sender's or recipient's address, and select LDAP accounts in the context menu of the button.
- Click the Find button on the right of the entry field.
This opens a window depending on the list to which you are adding LDAP accounts:
- Edit list of senders for rule, if you want to add LDAP accounts to the list of message senders.
- Edit list of recipients for rule, if you want to add LDAP accounts to the list of message recipients.
- In the window that opens, in the Sender's LDAP account or Recipient's LDAP account field, enter a search string for searching accounts in the external directory service.
- Click the Find button on the right of the entry field.
The list of accounts that have been found is displayed in the field under the Find button.
- Select the LDAP accounts that you want to add to the list of message senders or recipients.
You can select several LDAP accounts.
- Click the Add to list button under the list.
The selected accounts are displayed in a list:
- List of senders' LDAP accounts, if you want to add LDAP accounts to the list of message senders.
- List of senders' LDAP accounts — if you want to add LDAP accounts to the list of message recipients.
- Click OK in the lower part of the window.
- Edit list of senders for rule, if you want to add LDAP accounts to the list of message senders.
- Edit list of recipients for rule, if you want to add LDAP accounts to the list of message recipients.
The window in which you added LDAP accounts closes.
The LDAP accounts that you have added appear in the list of addresses with the LDAP accounts icon.
- To undo the last action, click the Undo last link under the list of addresses.
- Click the Apply button in the lower part of the workspace.
Changes made to the lists of message senders or recipients are saved in the message processing rule that you are configuring.
In order for the settings you have configured to be used during operation of Kaspersky Secure Mail Gateway, make sure that the rule for which you have configured settings is enabled.
Removing LDAP accounts from the list of LDAP accounts
You can remove LDAP accounts from lists of senders and recipients in message processing rules and also from lists of LDAP accounts in the Edit list of senders for rule and Edit list of recipients for rule windows while configuring lists of message senders and recipients for a rule.
To remove LDAP accounts from lists of LDAP accounts:
- In the main window of the application web interface, open the management console tree and select the Rules section.
- In the list of rules, click the name of the rule to open the rule for which you want to manage the list of message senders and recipients.
- Select the General rule settings section.
- Select the list in which you want to manage LDAP accounts:
- Edit list of recipients for rule—To manage LDAP accounts of message senders.
- Recipients—To manage LDAP accounts of message recipients.
- Under the list name, click the button with the icon corresponding to the type of the sender's or recipient's address, and select LDAP accounts in the context menu of the button.
- Click the Find button on the right of the entry field.
This opens a window depending on the list in which you are managing LDAP accounts:
- Edit list of senders for rule—To manage LDAP accounts of message senders.
- Edit list of recipients for rule—To manage LDAP accounts of message recipients.
- In the lower part of the window, select the LDAP accounts that you want to remove from the list:
- List of senders' LDAP accounts, if you are removing LDAP accounts from the list of message senders.
- List of recipients' LDAP accounts, if you are removing LDAP accounts from the list of message recipients.
You can select several LDAP accounts.
- Click the Delete from List button under the list.
The selected accounts are removed from the selected list.
- Click OK in the lower part of the window.
- Edit list of senders for rule, if you are removing LDAP accounts from the list of message senders.
- Edit list of recipients for rule, if you are removing LDAP accounts from the list of message recipients.
The window in which you deleted LDAP accounts closes.
The deleted LDAP accounts are also removed from the list of addresses of message senders or recipients for the rule you selected.
- To undo the last action, click the Undo last link under the list of addresses.
- Click the Apply button in the lower part of the workspace.
Changes made to the list of message senders or recipients are saved in the message processing rule that you are configuring.
In order for the settings you have configured to be used during operation of Kaspersky Secure Mail Gateway, make sure that the rule for which you have configured settings is enabled.
Copying and pasting addresses
To copy an address from the list of senders or recipients in a message processing rule:
- In the main window of the application web interface, open the management console tree and select the Rules section.
- In the list of rules, click the name of the rule to open the rule for which you want to manage the list of message senders or recipients.
- Select the General rule settings section.
- Select the list from which you want to copy addresses to clipboard:
- Senders, if you want to copy addresses from the list of message senders.
- Recipients, if you want to copy addresses from the list of message recipients.
- Click the Export link under the selected list to open the Export entries to clipboard window.
- In the Select type list, select the type of addresses that you want to copy:
- Email addresses, if you want to copy email addresses.
- IP addresses, if you want to copy IP addresses (only from the list of message senders).
- LDAP accounts, if you want to copy LDAP accounts.
A list of addresses of the selected type appears in the field under the list of address types.
- Select the addresses you want to copy.
- Copy the addresses to clipboard.
- In the lower part of the Export entries to clipboard window, click the Cancel button.
The Export entries to clipboard window closes.
To paste addresses from clipboard to the list of message senders or recipients in a message processing rule:
- In the main window of the application web interface, open the management console tree and select the Rules section.
- In the list of rules, click the name of the rule to open the rule for which you want to manage the list of message senders and recipients.
- Select the General rule settings section.
- Select the list into which you want to paste addresses from clipboard:
- Senders — if you want to paste addresses from clipboard into the list of message senders.
- Recipients — if you want to paste addresses from clipboard into the list of message recipients.
- Click the Import link under the selected list to open the Import records from clipboard window.
- In the Select type list, select the type of addresses that you want to past from clipboard:
- Email addresses — if you want to paste email addresses.
- IP addresses — if you want to paste IP addresses (only from the list of message senders).
- LDAP accounts — if you want to paste LDAP accounts.
- Paste addresses from clipboard into the field under the list of address types.
- In the lower part of the Export entries to clipboard window, click the Import button.
The Import records from clipboard window closes.
The addresses you have added appear in the list of message senders or recipients with icons corresponding to the types of addresses.
- To undo the last action, click the Undo last link under the list of message senders or recipients.
- Click the Apply button in the lower part of the workspace.
Changes made to the lists of message senders or recipients are saved in the message processing rule that you are configuring.
In order for the settings you have configured to be used during operation of Kaspersky Secure Mail Gateway, make sure that the rule for which you have configured settings is enabled.
Deleting addresses
You can remove individual addresses from the lists of senders or recipients or clear the lists of senders and recipients in a message processing rule.
To remove addresses from the list of senders or recipients:
- In the main window of the application web interface, open the management console tree and select the Rules section.
- In the list of rules, click the name of the rule to open the rule for which you want to manage the list of message senders and recipients.
- Select the General rule settings section.
- Select the list from which you want to remove addresses:
- Senders — if you want to remove addresses from the list of message senders.
- Recipients — if you want to remove addresses from the list of message recipients.
- In the list, select the address that you want to remove.
- Click the removal icon on the right of the address that you want to remove.
The address is removed from the list of message senders or recipients.
- To undo the last action, click the Undo last link under the list of message senders or recipients.
- Click the Apply button in the lower part of the workspace.
Changes made to the lists of message senders or recipients are saved in the message processing rule that you are configuring.
To clear the list of senders or recipients:
- In the main window of the application web interface, open the management console tree and select the Rules section.
- In the list of rules, click the name of the rule to open the rule for which you want to manage the list of message senders and recipients.
- Select the General rule settings section.
- Select the list from which you want to remove all addresses:
- Senders — if you want to clear the list of message senders.
- Recipients — if you want to clear the list of message recipients.
- Click the link under the selected list to open the action confirmation window:
- Clear list of senders — if you want to clear the list of message senders.
- Clear the list of recipients — if you want to clear the list of message recipients.
- Click the Yes button.
The action confirmation window closes.
All addresses are removed from the list of message senders or recipients.
- To undo the last action, click the Undo last link under the list of message senders or recipients.
- Click the Apply button in the lower part of the workspace.
Changes made to the lists of message senders or recipients are saved in the message processing rule that you are configuring.
In order for the settings you have configured to be used during operation of Kaspersky Secure Mail Gateway, make sure that the rule for which you have configured settings is enabled.
Deleting message processing rules
To delete message processing rules:
- In the main window of the application web interface, open the management console tree and select the Rules section.
- Select the check box in the lines with the names of one or several rules that you want to delete.
- Click the Delete button in the upper part of the workspace.
The selected message processing rules are deleted.
Enabling and disabling a message processing rule
To enable or disable a message processing rule:
- In the main window of the application web interface, open the management console tree and select the Rules section.
- Do one of the following:
- Flip on the toggle switch in the line with the name of the rule that you want to enable.
- Flip off the toggle switch in the line with the name of the rule that you want to disable.
Changing the message processing rule priority
To change the message processing rule priority:
- In the main window of the application web interface, open the management console tree and select the Rules section.
- Select the check box in the line with the name of the rule whose priority you want to change.
- Click one of the following buttons in the upper part of the workspace:
- Move Up, if you want to raise the priority of the rule by one level.
The rule is moved one level up in the list of rules.
Click the Move Up button as many times as you want to raise the priority of the rule.
- Move Down, if you want to lower the priority of the rule by one level.
The rule is moved one level down in the list of rules.
Click the Move Down button as many times as you want to lower the priority of the rule.
- Move Up, if you want to raise the priority of the rule by one level.
Domains and configuration of email routing
This section contains information on how to add domains and email addresses to a transport map, configure email routing for those domains, remove domains from the list, configure TLS security modes for incoming and outgoing email messages, and add a DKIM signature to messages.
By default, Kaspersky Secure Mail Gateway uses the settings of your DNS server for email routing. You can manually configure email routing. To do so, you must create a transport map. In the transport map, enter the names of the domains for which the email messages are intended and then enter the IP addresses or fully qualified domain names (FQDN) to which Kaspersky Secure Mail Gateway will be redirecting messages intended for these domains.
Example: If you want messages that are intended for the domain example.com to be redirected to the address 1.1.1.0:25, you must perform the following actions:
|
This section also describes configuration of email routing for local domains (relay_domains).
Local domains (relay_domains) are domains of your organization for which Kaspersky Secure Mail Gateway will be receiving email messages from the outside. Kaspersky Secure Mail Gateway will receive messages only for the domains you specified. Messages intended for other domains are rejected.
If local domains are not specified, Kaspersky Secure Mail Gateway will not be receiving messages for your internal mail servers.
Adding a record to the transport map and configuring email routing (transport_map)
To add a record to the transport map and configure email routing:
- In the main window of the application web interface, open the management console tree and select the Domains section.
- Click the Add button.
The record creation window opens.
- In the Record type settings group, select one of the following record types:
- Domain, if you want to add a domain to the transport map.
- Subdomains of, if you want to add subdomains of a domain to the transport map.
- Email address, if you want to add an email address to the transport map.
- In the Domain/Email address field, enter the domain name and the name of subdomains in FQDN format, or the email address.
- Select the check box next to the name of the Local domain setting if you want to add a local domain.
- In the Email routing settings group, select the switch next to the name of the Configure email routing setting.
- In the Protocol settings group, select one of the email transmission protocols:
- SMTP, if you want to configure email transmission via the SMTP protocol.
- LMTP, if you want to configure email transmission via the LMTP protocol.
- In the Destination address and port number field, enter the IP address or the domain name of the server to which you want to configure routing of email.
You can enter an IPv4 address (for example, 192.0.0.1 or 192.0.0.0/16), a subnet mask in CIDR notation (for example: fc00::/7), a domain name or FQDN.
- In the MX lookup section, enable or disable MX record lookup. Select one of the following options:
- Disabled, if you want to disable MX record lookup.
- Enabled, if you want to enable MX record lookup.
- If you are adding a domain or subdomains, in the TLS Encryption mode for all outgoing mail of the mail server settings group select one of the following options:
- Use TLS Encryption mode, set for all outgoing mail from the server, if you want to use the TLS encryption mode set for all outgoing messages from the mail server for this domain.
- Override TLS Encryption mode for this domain, if you want to configure a different TLS encryption mode for this domain.
- If you have chosen to modify the TLS encryption mode for this domain, in the Override TLS Encryption mode for this domain list select the mode of TLS encryption of the connection that you want to set.
- If you want to configure the DKIM signature for messages from addresses of this domain, in the DKIM signature for messages from domain addresses settings group, do the following:
- Click the Add button.
The Creating DKIM signature for the domain window opens.
- In the Selector field, type the name that will help you find the DKIM signature.
- In the Key name list, select the DKIM key based on which the DKIM signature will be added to messages.
- Click the OK button.
The Creating DKIM signature for the domain window closes.
- Click the Add button.
- Click Add in the lower part of the window.
The added record is displayed in the transport map.
Adding a local domain (relay_domain)
To add a local domain of your organization:
- In the main window of the application web interface, open the management console tree and select the Domains section.
- Click the Add button.
The record creation window opens.
- In the Record type settings group, select Domain as the record type.
- In the Domain/Email address field, type the name of the domain for which Kaspersky Secure Mail Gateway will be receiving email messages from the outside.
Type the fully qualified domain name (FQDN).
- Select the check box next to the name of the Local domain setting.
Kaspersky Secure Mail Gateway will receive messages only for the domains you specified. Messages intended for other domains are rejected.
- In the Email routing settings group, select the switch next to the name of the Configure email routing setting.
- In the Protocol settings group, select one of the email transmission protocols:
- SMTP, if you want to configure email transmission via the SMTP protocol.
- LMTP, if you want to configure email transmission via the LMTP protocol.
- In the Destination address and port number field, enter the IP address or the domain name of the server to which you want to configure routing of email.
You can enter an IPv4 address (for example, 192.0.0.1 or 192.0.0.0/16), a subnet mask in CIDR notation (for example: fc00::/7), a domain name or FQDN.
- In the MX lookup section, enable or disable MX record lookup. Select one of the following options:
- Disabled, if you want to disable MX record lookup.
- Enabled, if you want to enable MX record lookup.
- In the TLS Encryption mode for all outgoing mail of the mail server settings group, select one of the following options:
- Use TLS Encryption mode, set for all outgoing mail from the server, if you want to use the TLS encryption mode set for all outgoing messages from the mail server for this domain.
- Override TLS Encryption mode for this domain, if you want to configure a different TLS encryption mode for this domain.
- If you have chosen to configure a different TLS encryption mode for this domain, in the Override TLS Encryption mode for this domain list select the mode of TLS encryption of the connection that you want to set.
- If you want to configure the DKIM signature for messages from addresses of this domain, in the DKIM signature for messages from domain addresses settings group, do the following:
- Click the Add button.
The Creating DKIM signature for the domain window opens.
- In the Selector field, type the name that will help you find the DKIM signature.
- In the Key name list, select the DKIM key based on which the DKIM signature will be added to messages.
- Click the OK button.
The Creating DKIM signature for the domain window closes.
- Click the Add button.
- Click Add in the lower part of the window.
The domain for which Kaspersky Secure Mail Gateway will be receiving messages appears in the list of domains.
Deleting a record from the transport map
To delete a record from the transport map:
- In the main window of the application web interface, open the management console tree and select the Domains section.
- In the list of domains, select the check box next to each record that you want to delete from the transport map.
- Click the Delete button.
The Delete action confirmation window opens.
- Click the Yes button.
The record will be removed from the transport map.
Modifying email routing for a domain (transport_map)
To modify email routing for a domain:
- In the main window of the application web interface, open the management console tree and select the Domains section.
- Within the transport map, click the link with the domain name to expand the email routing settings for this domain.
- In the Protocol settings group, select one of the email transmission protocols:
- SMTP, if you want to configure email transmission via the SMTP protocol.
- LMTP, if you want to configure email transmission via the LMTP protocol.
- In the Destination address and port number field, enter the IP address or the domain name of the server to which you want to configure routing of email.
You can enter an IPv4 address (for example, 192.0.0.1 or 192.0.0.0/16), a subnet mask in CIDR notation (for example: fc00::/7), a domain name or FQDN.
- In the MX lookup section, enable or disable MX record lookup. Select one of the following options:
- Disabled, if you want to disable MX record lookup.
- Enabled, if you want to enable MX record lookup.
- In the Destination address and port number field, type the IP address of the server to which you want to configure routing of email.
You can enter an IPv4 address (for example, 192.0.0.1 or 192.0.0.0/16), domain name or FQDN.
- Click OK in the lower part of the window.
Email routing will be modified for the domain.
About using the TLS protocol in the operation of Kaspersky Secure Mail Gateway
TLS (Transport Layer Security) protocol is a protocol for encrypting the connection between two servers, which ensures secure transmission of data between network hosts on the Internet.
TLS session is a sequence of the following events:
- The server from which email messages are sent (Client) establishes a connection to the server to which email messages are sent (Server).
- Servers start interacting via the SMTP protocol.
- The Client uses the
STARTTLScommand to offer the Server to use TLS during SMTP interaction. - If the Server is able to use TLS, it responds with the
Ready to start TLScommand and sends the Server certificate to the Client. - The Client receives the certificate and, if the necessary parameter values are specified within it, verifies the authenticity of the Server certificate.
- The Client and the Server enable the data encryption mode.
- The servers exchange data.
- The session ends.
You can configure TLS security mode for situations when Kaspersky Secure Mail Gateway receives messages from another server (acts in the Server role) and sends messages to another server (acts in the Client role), as well as configure TLS settings for individual domains and domain groups that use the same IP address.
Configuring TLS security for incoming email messages
To configure TLS security mode for situations when Kaspersky Secure Mail Gateway receives messages from another server (acts in the Server role):
- In the main window of the application web interface, open the management console tree and select the Domains section.
- Click any link to open the TLS settings window.
- In the Server TLS security level settings group, select one of the following modes of TLS encryption of the connection between Kaspersky Secure Mail Gateway and the server that sends email messages:
- No TLS Encryption if you do not want to use TLS encryption of the connection to the server that sends email messages.
In this case, Kaspersky Secure Mail Gateway receives all messages in unencrypted form.
- Accept TLS Encryption, if you want Kaspersky Secure Mail Gateway to prompt the server sending email messages to use TLS encryption of the connection.
In this case, Kaspersky Secure Mail Gateway uses the
STARTTLScommand to offer the server that sends email messages to use TLS encryption, but accepts messages regardless of the server's response. - Require TLS Encryption, if you want Kaspersky Secure Mail Gateway to require that the server sending email messages must use TLS encryption of the connection.
In this case, the server that is sending email messages (Client) uses the
STARTTLScommand to offer Kaspersky Secure Mail Gateway to use TLS encryption. Kaspersky Secure Mail Gateway responds with theReady to start TLScommand and sends the Server certificate to the Client and also requires the Client to verify the authenticity of the Server certificate. The encrypted TLS connection is established after the Client has verified the authenticity of the Server certificate.
- No TLS Encryption if you do not want to use TLS encryption of the connection to the server that sends email messages.
- In the Providing Server TLS certificate settings group, select the TLS certificate of the server to be sent by Kaspersky Secure Mail Gateway to the Client for authentication at the beginning of each TLS session.
You can create or import a TLS certificate in the Encryption Keys section, TLS subsection of the main window of the Kaspersky Secure Mail Gateway web interface.
- In the Requesting Client TLS certificate settings group, select one of the following options:
- Do not request if you want Kaspersky Secure Mail Gateway not to request the client's TLS certificate.
- Request if you want Kaspersky Secure Mail Gateway to request the client's TLS certificate but to still be able to redirect messages regardless of the certificate verification result.
- Require if you want Kaspersky Secure Mail Gateway to require the client's TLS certificate and not forward messages on detecting an invalid name or invalid TLS certificate of the client.
Set the Request or Require mode only if you are certain that the clients supported by your mail server can provide a verifiable TLS certificate.
- Click the OK button.
Configuring TLS security for outgoing email messages
To configure TLS security mode for situations when Kaspersky Secure Mail Gateway redirects messages from another server (acts in the Client role):
- In the main window of the application web interface, open the management console tree and select the Domains section.
- Click any link to open the TLS settings window.
- In the Client TLS security level settings group, select one of the following modes of TLS encryption of the connection between Kaspersky Secure Mail Gateway and the server that receives email messages:
- No TLS Encryption, if you do not want to use TLS encryption of the connection with the server that receives email messages.
In this case, Kaspersky Secure Mail Gateway redirects all messages in unencrypted form.
- Attempt TLS Encryption, if you want Kaspersky Secure Mail Gateway to attempt to establish a TLS session with the receiving mail server and, if the receiving server does not support TLS, redirect messages in unencrypted form.
- Require TLS Encryption and don't verify certificate, if you want Kaspersky Secure Mail Gateway to redirect messages only if the receiving mail server supports TLS, but regardless of the authenticity of its TLS certificate.
- Require TLS Encryption and verify certificate, if you want Kaspersky Secure Mail Gateway to redirect messages only if the receiving mail server supports TLS, its TLS certificate has been verified, and the certificate name matches the domain name of the server.
Kaspersky Secure Mail Gateway does not redirect messages when these conditions are not satisfied.
- No TLS Encryption, if you do not want to use TLS encryption of the connection with the server that receives email messages.
- Click the OK button.
About the DKIM signature for outgoing messages
A DKIM signature for outgoing messages is a digital signature added to messages sent from email addresses of a certain domain for purposes of identifying users by the name of the corporate domain.
DomainKeys Identified Mail (DKIM) technology combines several existing anti-phishing and anti-spam methods to improve the quality of classification and identification of legitimate email. Instead of a traditional IP address, DKIM technology adds a digital signature associated with the name of the corporate domain to the message for the purpose of identifying its sender.
Enabling and disabling the DKIM signature for outgoing messages
To enable or disable the DKIM signature for outgoing messages:
- In the main window of the application web interface, open the management console tree and select the Domains section.
- In the upper part of the workspace, click the DKIM signature link to open the DKIM settings window.
- Select one of the following options in the DKIM signature drop-down list:
- Enabled, if you want to add the DKIM signature to outgoing messages.
- Disabled, if you do not want to add the DKIM signature to outgoing messages.
- Click the OK button.
The DKIM settings window closes.
Preparing to add the DKIM signature to outgoing messages
You can configure the DKIM signature for messages in the web interface of Kaspersky Secure Mail Gateway.
The process of configuring the DKIM signature for messages consists of the following steps:
- Enabling the DKIM signature for outgoing messages.
- Creating or importing a DKIM key.
- Adding the DKIM signature to messages sent from email addresses in a specific domain.
In order for the remote mail server to be able to verify the DKIM signature added to outgoing messages, you need to obtain the DNS record of the public DKIM key via the web interface of Kaspersky Secure Mail Gateway and add it to the settings of your DNS server.
To obtain the DNS record of the public DKIM key, do the following in the web interface of Kaspersky Secure Mail Gateway:
- In the main window of the application web interface, open the management console tree and select the Domains section.
- If the workspace shows the value of the setting as Disabled, do the following:
- Click the DKIM signature link to open the DKIM settings window.
- In the DKIM signature drop-down list, select Enabled.
- Click the OK button.
The DKIM settings window closes.
- In the list of domains, open the record editing window by clicking the link containing the name of the domain for whose addresses you want to configure the DKIM signature to be added to outgoing messages.
- In the DKIM signature for messages from domain addresses settings group, click the Add button.
The Creating DKIM signature for the domain window opens.
- In the Selector field, type the name that will help you find the DKIM signature.
- In the Key name list, select the DKIM key based on which the DKIM signature will be added to messages.
- Click the OK button.
The Creating DKIM signature for the domain window closes.
In the DKIM signature for messages from domain addresses settings group, the DNS record field displays the DNS record of the public DKIM key for the specific domain.
To add a public DKIM key to the settings of your DNS server:
- Sign in to your DNS server under the administrator account.
- Locate the page with information on updating DNS records of the domain for whose addresses you want to configure the DKIM signature to be added to outgoing messages.
For example, this page can be named "DNS Management", "Name Server Management", or "Advanced Settings".
- Find records in TXT format for the domain for whose addresses you want to configure the DKIM signature to be added to outgoing messages.
- In the list of records in TXT format, add the DNS record of the public DKIM key for a certain domain with the following contents:
<selector>._domainkey.<name of the domain for which you want to add the public DKIM key>. IN TXT ( "v=<DKIM version>; k=rsa; s=email" "p=<DNS record of the public DKIM key>" )Example of a DNS record for an opened DKIM key:
mail._domainkey.example.com IN TXT ( "v=DKIM1; k=rsa; s=email; " "p=MIIBIjANBgkqhkiG9w0BAQEFAAOCAQ8AMIIBCgKCAQEAtyb09IeTJtIxTEohP/wa8eZOuiFJxL3pjk+1R81ajQyTb4J8Dj23RbjOKCZGFdyJfj7MUUL9MpvAo6OL9KrfaF8ehR7MbHhaix1qPDfSP5a97vl9/6KR2TKJfi+0dQ/pMLJMbnXfdWeoDoDBUK0++B8HHCnSpLTxsH/YDOtjKaHFxbU6DMEICTiVBWR+yeWopdWi9kPNT5SJ5H" )See Document RFC 5617 for details on configuring settings of the DNS record of a public DKIM key.
- Save changes.
The syntax of the sample DNS record is provided for purposes of adding it to the settings of a BIND DNS server. The syntax of the DNS record to be added to other DNS servers may differ slightly from the example provided.
Adding the DKIM signature to messages from addresses from a specific domain
Before adding the DKIM signature to messages from addresses belonging to a certain domain, you have to create or import a DKIM key.
To add the DKIM key to messages sent from email addresses belonging to a certain domain:
- In the main window of the application web interface, open the management console tree and select the Domains section.
- If the workspace shows the value of the setting as Disabled, do the following:
- Click the DKIM signature link to open the DKIM settings window.
- In the DKIM signature drop-down list, select Enabled.
- Click the OK button.
The DKIM settings window closes.
- In the list of domains, select the domain for which you want to add the DKIM signature to outgoing messages.
- In the DKIM signature for messages from domain addresses settings group, click the Add button.
- The Creating DKIM signature for the domain window opens.
- In the Selector field, type the name that will help you find the DKIM signature.
- In the Key name list, select the DKIM key based on which the DKIM signature will be added to messages.
- Click the OK button.
The Creating DKIM signature for the domain window closes.
After you have configured the DKIM signature for messages in the web interface of Kaspersky Secure Mail Gateway, to enable the remote mail server to be able to verify this DKIM signature you must add the public DKIM key to the settings of your DNS server.
DKIM signature for outgoing messages
This section provides instructions on adding a DKIM signature to outgoing messages.
Creating the DKIM key
To create a DKIM key:
- In the main window of the application web interface, open the management console tree and select the Encryption Keys section and DKIM subsection.
- Click the Create button in the upper part of the workspace.
The Key name field appears.
- In the Key name field, type the name of the DKIM key that will help you to find the key when adding the DKIM signature for messages.
- Click the OK button.
The DKIM key you have created appears in the list of DKIM keys in the workspace of the main window of the application web interface.
Importing the DKIM key from file
To import a DKIM key from file:
- In the main window of the application web interface, open the management console tree and select the Encryption Keys section and DKIM subsection.
- Click the Import from file button in the upper part of the workspace.
- In the Key name field, type the name that you want to assign to the DKIM key being imported.
- Click the Browse button on the right of the Choose DKIM key file field.
The file selection window opens in the browser that you use.
- Choose the file of the DKIM key that you want to import and click the Open button in your browser.
The file must contain an RSA key in PEM format and be 2048 or 4096 bits long.
The file selection window closes.
- Click the OK button.
The DKIM key appears in the list of DKIM keys in the workspace of the main window of the application web interface.
Deleting the DKIM key
To delete a DKIM key:
- In the main window of the application web interface, open the management console tree and select the Encryption Keys section and DKIM subsection.
- In the list of DKIM keys, select the check box next to the name of one or several keys that you want to delete.
- Click the Delete button in the upper part of the workspace.
The Delete selected items action confirmation window opens.
- Click the Yes button.
The Delete selected items window closes.
The DKIM key is deleted.
Using the TLS protocol in the operation of Kaspersky Secure Mail Gateway
This section contains information about using the TLS protocol in the operation Kaspersky Secure Mail Gateway and instructions on how to configure the protocol usage settings.
Creating a TLS certificate
To create a TLS certificate:
- In the main window of the application web interface, open the management console tree and select the Encryption Keys section and TLS subsection.
- Click the Create button in the upper part of the workspace.
- In the TLS certificate name, type the name of the TLS certificate to be sent to the SMTP client for authentication at the beginning of each TLS session.
The TLS certificate of the server is provided when Kaspersky Secure Mail Gateway acts in the role of a mail server (receives messages).
The TLS certificate name cannot be blank.
- In the State field, type the name of the state or region where your organization is located.
- In the Locality field, type the name of the city where your organization is located.
- In the Country code field, enter the two-letter code of the country in which your organization is located.
For example, you can type RU for Russia or US for the USA.
- In the Organization field, enter the name of your organization.
- In the Organization Unit field, type the name of the organizational unit for which you are creating the TLS certificate.
- In the Email address field, specify the email address of the Kaspersky Secure Mail Gateway administrator.
- Click the OK button.
The TLS certificate you have created appears in the list of TLS certificates in the workspace of the main window of the application web interface.
Deleting a TLS certificate
To delete a TLS certificate:
- In the main window of the application web interface, open the management console tree and select the Encryption Keys section and TLS subsection.
- In the list of TLS certificates, select the check box next to the name of one or several certificates that you want to delete.
- Click the Delete button in the upper part of the workspace.
The Delete selected items action confirmation window opens.
- Click the Yes button.
The Delete selected items window closes.
The TLS certificate is deleted.
Preparing a self-signed TLS certificate for import
A self-signed TLS certificate intended to be imported into Kaspersky Secure Mail Gateway must meet the following requirements:
- The certificate file must have a unique name in the list of certificates used in Kaspersky Secure Mail Gateway.
- The certificate file and the private key file must be in PEM format.
- The key length must be 1024 bits or longer.
By way of an example, below are instructions on how to prepare for import the self-signed TLS server certificate server_cert.pem, whose private key is contained in the key.pem file.
To prepare a self-signed TLS certificate for import into Kaspersky Secure Mail Gateway:
- In the private key file, remove the password (if any) for accessing the certificate. To do so, execute the command:
# openssl rsa -in <name of the private key file>.pem -out <name of the private key file with the password removed>.pemFor example, you can execute the following command:
# openssl rsa -in key.pem -out key-nopass.pem - Combine the private key and the server certificate in a single file. To do so, execute the command:
% cat <name of the private key file with the password removed>.pem <name of the server certificate>.pem <name of the server certificate after the files were combined>.pemFor example, you can execute the following command:
% cat key-nopass.pem server_cert.pem > cert.pem
The self-signed TLS certificate (for example, cert.pem) is ready for import into Kaspersky Secure Mail Gateway.
Preparing to import a TLS certificate signed by a certification authority
A TLS certificate signed by a certification authority (CA certificate) intended for import into Kaspersky Secure Mail Gateway must meet the following requirements:
- The certificate file must have a unique name in the list of certificates used in Kaspersky Secure Mail Gateway.
- The files of the server certificate, intermediate and root CA certificates, and the private key file must be in PEM format.
- The key length must be 1024 bits or longer.
- You must have the complete certificate chain – the path from the server certificate to the roof CA certificate.
On receiving the CA certificate, you may need to use the intermediate certificate in addition to the server certificate.
- Certificates must be specified in the certificate chain in the following order: first the server certificate, followed by intermediate CA certificates.
- Intermediate certificates must not be skipped in the certificate chain.
- The certificate chain must not include any certificates unrelated to current certification.
By way of an example, below are instructions on how to prepare for import a TLS server certificate signed by a certification authority, server_cert.pem, whose private key is contained in the key.pem file. The name of the intermediate server certificate is intermediate CA. The name of the root certificate is root CA.
To prepare a TLS certificate signed by a certification authority for import into Kaspersky Secure Mail Gateway:
- In the file of the TLS certificate, remove the password (if any) for accessing the certificate. To do so, execute the command:
# openssl rsa -in <name of the private key file>.pem -out <name of the private key file with the password removed>.pemFor example, you can execute the following command:
# openssl rsa -in key.pem -out key-nopass.pem - Do one of the following:
- If you are certain that the clients to which the server will provide this certificate have their own copies of the root and intermediate CA certificates, combine the private key, server certificate, intermediate and root CA certificates into a single file. To do so, execute the command:
% cat <name of the private key file with the password removed>.pem <name of the server certificate>.pem <name of the intermediate CA certificate>.pem <name of the root CA certificate>.pem <name of the TLS certificate after the files were combined>.pemFor example, you can execute the following command:
% cat key-nopass.pem server_cert.pem intermediate_CA.pem root_CA.pem > cert.pem - If you are not sure that the clients to which the server will provide this certificate have their own copies of the root and intermediate CA certificates, combine the private key and server certificate into a single file. To do so, execute the command:
% cat <name of the private key file with the password removed>.pem <name of the server certificate>.pem <name of the server certificate after the files were combined>.pemFor example, you can execute the following command:
% cat key-nopass.pem server_cert.pem > cert.pem
- If you are certain that the clients to which the server will provide this certificate have their own copies of the root and intermediate CA certificates, combine the private key, server certificate, intermediate and root CA certificates into a single file. To do so, execute the command:
The TLS certificate signed by the certification authority (for example, cert.pem) is ready for import into Kaspersky Secure Mail Gateway.
Importing the TLS certificate from file
Before importing TLS certificates via the web interface of Kaspersky Secure Mail Gateway, you have to prepare them for import.
You can prepare certificates of the following types for import:
- Self-signed TLS certificate.
- CA-signed TLS certificate (hereinafter also referred to as a "CA certificate").
Self-signed certificates are normally used to test and debug SSL and TLS encryption of connections. You are advised to use certificates signed by a certification authority (CA certificates) on public servers.
To import a TLS certificate from file:
- In the main window of the application web interface, open the management console tree and select the Encryption Keys section and TLS subsection.
- Click the Import from file button in the upper part of the workspace.
- In the TLS certificate name field, enter the name that you want to assign to the TLS certificate being imported.
- Click the Browse button to the right of the Choose TLS certificate file field.
The file selection window opens in the browser that you use.
- Choose the file of the TLS certificate that you want to import and click the Open button in your browser.
The certificate file (Preparing a self-signed TLS certificate for import, Preparing to import a CA-signed TLS certificate) must contain the TLS certificate and a private TLS key with the PEM extension. The private key must not be encrypted or password-protected.
The file selection window closes.
- Click the OK button.
The TLS certificate appears in the list of TLS certificates in the workspace of the main window of the application web interface.
Backup
Backup is designed to store copies of messages which Kaspersky Secure Mail Gateway saves during processing. Copies of messages are stored in Backup in unreadable format and therefore do not compromise your computer's security.
Kaspersky Secure Mail Gateway places copies of the following messages in Backup:
- Messages to which the Anti-Virus engine assigned one of the status labels and before actions are taken on them.
- Messages to which the Anti-Spam engine assigned one of the status labels and before actions are taken on them.
- Messages to which the Anti-Phishing engine assigned one of the status labels and before actions are taken on them.
- Messages to which one of the following status labels was assigned after content filtering and before actions are taken on them.
- Messages whose senders' addresses have been detected in a custom black list of addresses and before the actions was taken on them.
Copies of messages are placed in Backup together with attachments.
The default maximum Backup space is 7,32 GB. As soon as this threshold value is exceeded, the application starts to remove the oldest copies of messages from Backup. When the amount of occupied space is again below the threshold value, the application stops removing copies of messages from Backup.
Configuring Backup settings
To configure Backup settings:
- In the main window of the application web interface, open the management console tree and select the Backup section.
- Click any link to open the Backup settings window.
- In the Backup maximum size field, specify the maximum hard drive space that can be taken up by Backup.
A value of 100 MB or greater is recommended.
- In the Free space threshold to notify about field, specify the amount of Backup free space that, when left, causes the application to send a notification to the administrator of Kaspersky Secure Mail Gateway.
- Select one of the following options in the Allow delivery of infected messages list:
- Yes, if you want to allow delivery of infected messages from Backup to recipients.
- No, if you do not want to allow delivery of infected messages from Backup to recipients.
This setting applies to the HelpDesk account. A user under the Administrator account can deliver messages from Backup to recipients regardless of the value of the Allow delivery of infected messages setting.
- Select one of the following options in the Actions to take on messages if Backup is unavailable list:
- Process messages, if you want the application to continue processing messages regardless of whether or not Backup is available.
- Temporary fail, if you want the application to send a notification that Backup is temporarily unavailable.
- Reject messages, if you want the application to reject messages when Backup is unavailable.
- In the Notification subject for delivering message as an attachment field, enter the subject of the notification. For example, Message delivery from Backup.
- In the Notification body for delivering message as an attachment field, enter the text of the notification. For example, you can enter a warning stating that the message delivered from Backup may be unsafe or contain viruses.
- Click the OK button.
The Backup settings window closes.
Finding message copies in Backup
To find message copies in Backup:
- In the main window of the application web interface, open the management console tree and select the Backup section.
- In the workspace under the Deliver, View, Delete and Save buttons, click any link to open the Search filter window.
- In the From field, enter the text for searching email addresses of message senders.
You can enter an email address (for example: example-email@example.com), domain name (for example: example.com) or several symbols from the email address (for example: exa).
- In the To field, enter the text for searching email addresses of message recipients.
- In the Subject field, enter the text for searching for message headers.
- In the Message-ID field, enter the text for searching for the message ID on the mail server.
- In the Rule ID list, select the ID of the rule according to which messages were processed.
- In the ID list, select the message ID in Backup.
- In the Period list, select the period that has elapsed since the time when messages were processed and had their copies moved to Backup.
You can choose one of the following periods:
- Hour
- Day
- Week
- 2 weeks
- Month
- 3 months
- Year
- Custom
- If you choose the Custom period, do the following:
- In the starting from field, specify the search period start date and time.
- In the ending with field, specify the search period end date and time.
- In the Scan type group of settings, select check boxes next to the names of Kaspersky Secure Mail Gateway engines based on whose conclusions messages were moved to Backup.
You can select one or several scan engines:
- Anti-Spam
- Anti-Virus
- Content Filtering
- Anti-Phishing
- Custom black list of addresses
- Mail Sender Authentication
- KATA protection
- In the Message size (KB) group of settings, set a limit on message size in kilobytes.
You can set one of the following limits:
- Less than or equal to a certain message size in kilobytes
- Greater than or equal to a certain message size in kilobytes
- Click the OK button.
Copies of messages that match the search parameters are displayed in the list of message copies in the Backup section.
Viewing information about a message in Backup
To view information about a message in Backup:
- In the main window of the application web interface, open the management console tree and select the Backup section.
- In the list of message copies in Backup, in the lower part of the workspace do one of the following:
- In the line with the details of the message that you want to view, click any of the following links: From, To, or Subject.
- In the line with the details of the message that you want to view, select the check box and click the View button.
A message copy containing the following message information opens:
- ID
- Subject
- Message processing rule
- Rule ID
- From
- To
- Cc
- Bcc
- Scan Results with a list of scan modules: Anti-Spam, Anti-Virus, Content Filtering, Anti-Phishing, Mail Sender Authentication and KATA protection.
- Backup Reason
- Action
- Time placed in Backup
- Message ID on mail server
- Message size
- Time sent
- Time received
- Attachments
- Virus
- Anti-Virus databases release date
- Anti-Spam databases release date
- To return to the list of message copies in Backup, click the To messages list button in the upper part of the workspace.
Delivering messages from Backup to recipients
If you consider a message in Backup to be safe, you can deliver the message from Backup to the recipients.
You can deliver a message from Backup after previewing it or by selecting messages that you want to deliver in the list of message copies in Backup (one or several messages).
Delivering infected messages can pose a security threat to the computers of recipients.
Before delivering an infected message to the recipient, make sure that delivery of infected messages is allowed in Backup settings (for personal user accounts and the HelpDesk account).
To deliver a message from Backup to recipients:
- In the main window of the application web interface, open the management console tree and select the Backup section.
- In the list of message copies in Backup, in the lower part of the workspace select check boxes in the lines with the details of messages that you want to deliver.
- If you want to view information about a message, in the lower part of the workspace in the line containing the details of the message that you want to view, click the View button.
The message copy opens.
- Click the Deliver button in the upper part of the workspace.
The Deliver message window opens.
- Select the check box next to the name of the Deliver the message in an attachment setting if you want to deliver the message in an attachment.
- Select the check box next to the name of the To recipient email addresses specified in the message header setting if you want to deliver the message to email addresses of recipients to whom this message was intended.
- Select the check box next to the name of the To additional email addresses setting if you want to deliver the message to additional email addresses.
- If you have chosen to deliver the message to additional email addresses, in the field under the name of the To additional email addresses setting, enter the email addresses to which you want to deliver the message.
- Click the OK button.
The Deliver message window closes.
The message is placed in the delivery queue.
- To return to the list of message copies in Backup, click the To messages list button in the upper part of the workspace.
The list of message copies in Backup displays the message Message has been placed in queue for delivery.
- To hide the Message has been placed in queue for delivery message, click the Hide link in the right part of the line with the message.
Saving messages from Backup to file
If you consider a message in Backup to be safe, you can save it to file on the hard drive.
You can save a message from Backup after previewing it or by selecting the message that you want to save in the list of message copies in Backup.
Saving infected messages on the hard drive poses a security threat to your computer.
To save a message from Backup to a file:
- In the main window of the application web interface, open the management console tree and select the Backup section.
- In the list of message copies in Backup, in the lower part of the workspace select check boxes in the line with the details of the message that you want to save.
- If you want to view information about a message, in the lower part of the workspace in the line containing the details of the message that you want to view, click the View button.
The message copy opens.
- Click the Save button in the upper part of the workspace.
The message is saved on the hard drive of your computer in the folder specified as the destination folder for downloading files from the Internet in the settings of the browser that you use to manage Kaspersky Secure Mail Gateway.
For example, if you are using the Microsoft Windows operating system and the Downloads folder is specified as the destination folder for downloading files from the Internet, the message is saved in the Downloads folder on the hard drive of your computer.
- To return to the list of message copies in Backup, click the To messages list button in the upper part of the workspace.
Deleting a message copy from Backup
You can delete a message copy from Backup after previewing it or by selecting messages that you want to delete in the list of message copies in Backup (one or several messages).
To delete one or several messages from Backup:
- In the main window of the application web interface, open the management console tree and select the Backup section.
- In the list of message copies in Backup, in the lower part of the workspace select check boxes in the lines with the details of messages that you want to delete.
- If you want to view information about a message, in the lower part of the workspace in the line containing the details of the message that you want to view, click the View button.
The message copy opens.
- Click the Delete button in the upper part of the workspace.
- The Delete message(s) window opens.
- Click the Delete button in the Delete message(s) window.
A copy of the message is deleted from Backup.
- To return to the list of message copies in Backup, click the To messages list button in the upper part of the workspace.
The list of message copies in Backup displays the message Marked message has been deleted.
- To hide the Marked message has been deleted message, click the Hide link in the right part of the line with the message.
Kaspersky Secure Mail Gateway message queue
This section contains information on working with Kaspersky Secure Mail Gateway message queues, as well as information on how to sort and filter messages in queue, KATA Quarantine and Anti-Spam Quarantine, or search events by specific table columns based on the indicators you specify.
Enabling and disabling the transmission and reception of messages
To enable or disable transmission or reception of messages by the mail agent of Kaspersky Secure Mail Gateway:
- In the main window of the application web interface, open the management console tree and select the Message Queue section.
- In the upper part of the workspace:
- Flip on the toggle switch next to the name of the Sending messages setting if you want to allow the forwarding of messages by the Kaspersky Secure Mail Gateway mail transfer agent.
- Flip off the toggle switch next to the name of the Sending messages setting if you want to block the forwarding of messages by the Kaspersky Secure Mail Gateway mail transfer agent.
If the
Reject messages for unverified recipients (reject_unverified_recipient)parameter is set in advanced MTA settings, receipt of messages will also be disabled. - Flip on the toggle switch next to the name of the Receiving messages setting if you want to allow the receipt of messages by the Kaspersky Secure Mail Gateway mail transfer agent.
- Flip off the toggle switch next to the name of the Receiving messages setting if you want to block the receipt of messages by the Kaspersky Secure Mail Gateway mail transfer agent.
Attention! These settings control transmission and reception of messages by the mail agent of Kaspersky Secure Mail Gateway.
Viewing information about the message queue, KATA Quarantine, and Anti-Spam Quarantine
To view information about the message queue, KATA Quarantine, and Anti-Spam Quarantine:
In the main window of the application web interface, open the management console tree and select the Message Queue section.
The following information is displayed:
- KATA Quarantine, size. The KATA Quarantine size and the KATA Quarantine usage percentage compared to the maximum size defined in the KATA protection settings.
- KATA Quarantine, messages. The current number of messages in KATA Quarantine.
- KATA checked, messages. The number of messages scanned in KATA during the past hour.
- KATA timed out, messages. The number of messages whose KATA scan queue time expired during the past hour. The maximum queue time for a KATA scan is set in the KATA protection settings.
- Anti-Spam Quarantine, size. The Anti-Spam Quarantine size and Anti-Spam Quarantine usage percentage compared to the maximum size is defined in the Anti-Spam Quarantine settings.
- Anti-Spam Quarantine, messages. The current number of messages in Anti-Spam Quarantine.
- MTA queue, messages. The current number of messages in queue.
Sorting messages in queue
To sort messages in queue:
- In the main window of the application web interface, open the management console tree and select the Message Queue section.
This opens a table of messages in the message queue, KATA Quarantine, and Anti-Spam Quarantine.
- Click the
 button to the left of the name of the table column by which you want to sort messages. You can sort messages by one of the following indicators:
- ID of the message in queue—Message ID in queue.
- From—Message sender's address.
- To—Message recipient's address.
- Size – message size.
- Received—Time at which messages arrive in queue.
- Error—Message scan error.
To modify the sorting order for messages in queue,
click the  or
or  button to the left of the name of the table column whose message sorting order you want to modify.
Filtering and searching messages by queue name
To filter or search messages by queue name:
- In the main window of the application web interface, open the management console tree and select the Message Queue section.
- Click the Queue link to expand the list of queue names.
- Select the check boxes next to the names of the queues in which you want to search for messages. You can select one or several of the following queues:
- Deferred.
- Active.
- Inbound (Maildrop and Incoming queues).
- Hold.
- Anti-Spam Quarantine.
- KATA Quarantine.
- Click the Apply button.
A list of queued messages formed according to the filter criteria appears in the workspace of the Message Queue section in the main window of the Kaspersky Secure Mail Gateway web interface.
If the message search filter is not specified, the list shows all queued messages.
Filtering and searching messages by message ID in queue
To filter or search messages by message ID in queue:
- In the main window of the application web interface, open the management console tree and select the Message Queue section.
- Click the ID of the message in queue link to open the message filter configuration window.
- In the ID field, enter several characters or all characters of the message ID in queue.
- Click the Apply button.
A list of queued messages formed according to the filter criteria appears in the workspace of the Message Queue section in the main window of the Kaspersky Secure Mail Gateway web interface.
If the message search filter is not specified, the list shows all queued messages.
Filtering and searching messages by message sender's address
To filter or search messages by sender address:
- In the main window of the application web interface, open the management console tree and select the Message Queue section.
- Click the From link to open the message filter configuration window.
- In the From field, enter several characters or all characters of the message sender's address.
- Click the Apply button.
A list of queued messages formed according to the filter criteria appears in the workspace of the Message Queue section in the main window of the Kaspersky Secure Mail Gateway web interface.
If the message search filter is not specified, the list shows all queued messages.
Filtering and searching messages by message recipient's address
To filter or search messages by recipient address:
- In the main window of the application web interface, open the management console tree and select the Message Queue section.
- Click the To link to open the message filter configuration window.
- In the To field, enter several characters or all characters of the message recipient's address.
- Click the Apply button.
A list of queued messages formed according to the filter criteria appears in the workspace of the Message Queue section in the main window of the Kaspersky Secure Mail Gateway web interface.
If the message search filter is not specified, the list shows all queued messages.
Filtering and searching messages by time of message arrival in queue
To filter or search messages by time of message arrival in queue:
- In the main window of the application web interface, open the management console tree and select the Message Queue section.
- Click the Received link to expand the list of message search periods.
- Select one of the following periods:
- Last hour
- Last day
- Last week
- Custom
- If you chose a custom period for searching messages:
- In the calendar that opens, specify the start and end dates of the period during which messages arrived in queue.
- Click the Apply button.
The calendar closes.
A list of queued messages formed according to the filter criteria appears in the workspace of the Message Queue section in the main window of the Kaspersky Secure Mail Gateway web interface.
If the message search filter is not specified, the list shows all queued messages.
Forced delivery and removal of messages from the queue
To forcedly send or remove messages from the queue of the MTA:
- In the main window of the application web interface, open the management console tree and select the Message Queue section.
- View the list of queued messages in the workspace.
- To the left of the queue type name, select check boxes next to the messages that you want to process.
- Click one of the following buttons on the toolbar in the upper part of the workspace:
- Flush, if you want to forcedly send the selected messages.
- Flush all, if you want to forcedly send all messages.
Frequent attempts to deliver undelivered messages out of turn affect the speed with which the other messages are sent.
- Delete, if you want to delete the selected messages.
- Delete all, if you want to delete all messages.
The operation of removing all messages from the queue permanently removes all data from the queue, including messages that have been received but not processed yet.
In the event of forced delivery of messages from the KATA Quarantine queue, messages will invariably be scanned in Kaspersky Anti Targeted Attack Platform but Kaspersky Secure Mail Gateway will not wait for the result from scanning these messages. These messages will not be displayed in the scan queue.
Kaspersky Secure Mail Gateway operation reports
This section contains information on reports, and on how to create and view reports on mail server operation.
You can configure the following reports on the operation of the mail server:
- Daily.
- Weekly.
- Monthly.
- Custom.
Content of Kaspersky Secure Mail Gateway operation reports
You can receive information about Kaspersky Secure Mail Gateway performance during a certain period from Kaspersky Secure Mail Gateway operation reports.
Reports contain the following information about the operation of Kaspersky Secure Mail Gateway:
- Consolidated report on detects. Report on the results of operation of Kaspersky Secure Mail Gateway modules, which shows the quantity and volume of messages calculated based on the following indicators:
- Detected in KATA
- Detected by the Anti-Virus module
- Detected by the Anti-Phishing module
- Detected by the Anti-Spam module
- Sender authentication violations
- Processed by the Content Filtering module
- Clean
- Non-scanned
- Total messages
- Consolidated report on actions taken by Kaspersky Secure Mail Gateway on messages. Shows the quantity and volume of messages calculated based on the following indicators:
- Messages delivered, including:
- Clean
- Disinfected
- With deleted attachments
- Skipped
- Non-scanned
- Messages not delivered, including:
- Deleted
- Rejected
- Postponed
- Total messages
- Messages delivered, including:
- Report on detections by the Anti-Virus module. Shows the number of messages that were scanned and not scanned by the Anti-Virus module during a certain period and contains statistics on detection of messages of the following types:
- Clean
- Infected
- Encrypted
- Scan errors
- Messages that were not scanned due to one or several of the following reasons:
- They were excluded from scans according to the processing rules of global black lists or white lists.
- They were excluded from scans according to the processing rules of custom black lists or white lists.
- Virus scan has been disabled for all messages.
- Virus scan has been disabled for the rule that was applied when processing the message.
- Anti-virus databases are missing.
- License issues.
- Report on detections by the Anti-Spam module. Shows the number of messages that were scanned and not scanned by the Anti-Spam module during a certain period and contains statistics on detection of messages of the following types:
- Not spam
- Spam
- Probable spam
- Blacklisted message
- Mass mail
- Scan errors
It also displays the number of messages in Anti-Spam Quarantine and the number of messages that were not scanned.
- Report on detections by the Anti-Phishing module. Shows the number of messages that were scanned and not scanned by the Anti-Phishing module during a certain period and contains statistics on detection of messages of the following types:
- Not phishing
- Phishing
- Malicious URL
- Scan errors
In addition, the number of non-scanned messages is displayed.
- Report on the results of content filtering of messages. Shows the number of messages processed according to content filtering rules during a certain period calculated based on the following indicators:
- Messages without violations
- Messages exceeding the allowed size
- Messages with attachments having a forbidden name
- Messages with attachments of a forbidden type
In addition, the number of non-scanned messages is displayed.
- Report on the message processing rules applied.
- Report on the top ten sources of spam. Lists the addresses of sources and the number of times they triggered the Anti-Spam module.
- A report on the top ten email addresses to which the largest number of spam-containing messages were sent. Lists the email addresses of recipients of messages and the number of times they triggered the Anti-Spam module.
- Report on the top ten sources of malicious objects based on conclusions of the Anti-Virus module. Lists the addresses of sources and the number of times they triggered the Anti-Virus module.
- A report on the top ten email addresses to which the largest number of malicious objects were sent based on conclusions of the Anti-Virus component. Lists the addresses of recipients and the number of times they triggered the Anti-Virus module.
- Report on the top ten malicious objects based on conclusions of the Anti-Virus module. Lists the names of objects and the number of times they triggered the Anti-Virus module.
Viewing Kaspersky Secure Mail Gateway operation reports
To view Kaspersky Secure Mail Gateway operation reports:
- In the main window of the application web interface, go to the management console tree and select the Reports section and the subsection depending on the type of reports you want to view:
- All reports, if you want to view all reports.
- Daily, if you want to view daily reports.
- Weekly, if you want to view weekly reports.
- Monthly, if you want to view monthly reports.
- Custom, if you want to view custom reports.
A page with the list of reports of the type you have selected opens.
- Click the PDF link in the row with the details of the report that you want to view.
The report is downloaded to the hard drive of your computer in the folder that is specified as the destination folder for downloading files from the Internet in the settings of the browser that you use to manage Kaspersky Secure Mail Gateway.
For example, if you are using the Microsoft Windows operating system and the Downloads folder is specified as the destination folder for downloading files from the Internet, the message is saved in the Downloads folder on the hard drive of your computer.
Deleting Kaspersky Secure Mail Gateway operation reports
To delete one or several Kaspersky Secure Mail Gateway operation reports:
- In the main window of the application web interface, go to the management console tree and select the Reports section and the subsection depending on the type of reports you want to delete:
- All reports, if you want to remove all reports from the list.
- Daily, if you want to remove daily reports from the list.
- Weekly, if you want to remove weekly reports from the list.
- Monthly, if you want to remove monthly reports from the list.
- Custom, if you want to remove custom reports from the list.
A page with the list of reports of the type you have selected opens.
- Select check boxes in rows with the details of reports you want to delete.
- Click the Delete button in the upper part of the workspace.
The Delete reports action confirmation window opens.
- Click the Delete button.
The Delete reports window closes.
The selected reports are deleted.
Enabling and disabling daily reports
To enable or disable Kaspersky Secure Mail Gateway daily reports:
- In the main window of the application web interface, open the management console tree and select the Reports section and Daily subsection.
- In the Generating Daily report section, do one of the following:
- Flip on the toggle switch next to the name of the Generating Daily report section to enable Kaspersky Secure Mail Gateway daily reports.
- Flip off the toggle switch next to the name of the Generating Daily report section to disable Kaspersky Secure Mail Gateway daily reports.
Configuring the daily report
To configure the Kaspersky Secure Mail Gateway daily report:
- In the main window of the application web interface, open the management console tree and select the Reports section and Daily subsection.
- In the Generating Daily report section, click any link to open the Daily report settings window.
- In the Report generation time field, specify the time at which the daily report will be generated.
Specify a time in the range of 00:00 to 23:59.
- In the Report language list, select the language in which the daily report will be generated.
- In the Format dates in the report list, select the format of dates as you want them to appear in the daily report.
- If you want Kaspersky Secure Mail Gateway to send the daily report to email addresses, select the check box next to the name of the Enable report sending setting and do the following:
- Select the check box next to the name of the Send report to administrator setting if you want Kaspersky Secure Mail Gateway to send the daily report to the email addresses of the Kaspersky Secure Mail Gateway administrator.
- In the Send report to the following email addresses field, enter the email address to which you want the daily report to be delivered.
The email addresses are entered one at a time. Repeat the process of adding addresses to the list for all email addresses that you are adding.
You can use the symbols "*" and "?" to create an address mask, and regular expressions beginning with the prefix "reg:".
Regular expressions are not case-sensitive.
- Click the
 button on the right of the entry field.
The email address you have added appears in the list under the entry field.
- Click the OK button.
The Daily report settings window closes.
The Generating Daily report section displays the Kaspersky Secure Mail Gateway daily report settings you have configured.
The generated Kaspersky Secure Mail Gateway weekly reports will appear in the list under the Generating Daily report section.
Enabling and disabling weekly reports
To enable or disable Kaspersky Secure Mail Gateway weekly reports:
- In the main window of the application web interface, open the management console tree and select the Reports section and Weekly subsection.
- In the Generating Weekly report section, do one of the following:
- Flip on the toggle switch next to the name of the Generating Weekly report section to enable Kaspersky Secure Mail Gateway weekly reports.
- Flip off the toggle switch next to the name of the Generating Weekly report section to disable Kaspersky Secure Mail Gateway weekly reports.
Configuring the weekly report
To configure the Kaspersky Secure Mail Gateway weekly report:
- In the main window of the application web interface, open the management console tree and select the Reports section and Weekly subsection.
- In the Generating Weekly report section, click any link to open the Weekly report settings window.
- In the Report generation day of the week and time fields, select the day of the week and specify the time when the weekly report will be generated.
Specify a time in the range of 00:00 to 23:59.
- In the Report language list, select the language in which the weekly report will be generated.
- In the Format dates in the report list, select the format of dates as you want them to appear in the weekly report.
- If you want Kaspersky Secure Mail Gateway to send the weekly report to email addresses, select the check box next to the name of the Enable report sending setting and do the following:
- Select the check box next to the name of the Send report to administrator setting if you want Kaspersky Secure Mail Gateway to send the weekly report to the email addresses of the Kaspersky Secure Mail Gateway administrator.
- In the Send report to the following email addresses field, enter the email address to which you want the weekly report to be delivered.
The email addresses are entered one at a time. Repeat the process of adding addresses to the list for all email addresses that you are adding.
You can use the symbols "*" and "?" to create an address mask, and regular expressions beginning with the prefix "reg:".
Regular expressions are not case-sensitive.
- Click the button on the right of the entry field.
The email address you have added appears in the list under the entry field.
- Click the OK button.
The Weekly report settings window closes.
The Generating Weekly report section displays the Kaspersky Secure Mail Gateway weekly report settings you have configured.
The generated Kaspersky Secure Mail Gateway weekly reports will appear in the list under the Generating Weekly report section.
Enabling and disabling monthly reports
To enable or disable Kaspersky Secure Mail Gateway monthly reports:
- In the main window of the application web interface, open the management console tree and select the Reports section and Monthly subsection.
- In the Generating Monthly report section, do one of the following:
- Flip on the toggle switch next to the name of the Generating Monthly report section to enable Kaspersky Secure Mail Gateway monthly reports.
- Flip off the toggle switch next to the name of the Generating Monthly report section to disable Kaspersky Secure Mail Gateway monthly reports.
Configuring the monthly report
To configure the Kaspersky Secure Mail Gateway monthly report:
- In the main window of the application web interface, open the management console tree and select the Reports section and Monthly subsection.
- In the Generating Monthly report section, click any link to open the Monthly report settings window.
- In the Report generation day of the month and time fields, select the day of the month and specify the time when the monthly report will be generated.
Specify a time in the range of 00:00 to 23:59.
- In the Report language list, select the language in which the monthly report will be generated.
- In the Format dates in the report list, select the format of dates as you want them to appear in the monthly report.
- If you want Kaspersky Secure Mail Gateway to send the monthly report to email addresses, select the check box next to the name of the Enable report sending setting and do the following:
- Select the check box next to the name of the Send report to administrator setting if you want Kaspersky Secure Mail Gateway to send the monthly report to the email addresses of the Kaspersky Secure Mail Gateway administrator.
- In the Send report to the following email addresses field, enter the email address to which you want the monthly report to be delivered.
The email addresses are entered one at a time. Repeat the process of adding addresses to the list for all email addresses that you are adding.
You can use the symbols "*" and "?" to create an address mask, and regular expressions beginning with the prefix "reg:".
Regular expressions are not case-sensitive.
- Click the button on the right of the entry field.
The email address you have added appears in the list under the entry field.
- Click the OK button.
The Monthly report settings window closes.
The Generating Monthly report section displays the Kaspersky Secure Mail Gateway monthly report settings you have configured.
The generated Kaspersky Secure Mail Gateway weekly reports will appear in the list under the Generating Monthly report section.
Generating a custom report
To generate a custom report:
- In the main window of the application web interface, open the management console tree and select the Reports section and Custom subsection.
- Click the Create button in the upper part of the workspace.
The Custom report settings window opens.
- In the Reporting period list, select the period for which you want to generate a custom report, and do the following depending on the option you have selected:
- If you want to generate a report for a specific day, in the Day field enter the date for which you want to generate the report.
- If you want to generate a report for a specific month, in the Month field select the month for which you want to generate the report.
- If you want to generate a report for a specific year, in the Year field select the year for which you want to generate the report.
- If you want to generate a report for a specific date range, in the Date range field specify the start and end dates of the period for which you want to generate the report.
- In the Report language list, select the language in which the custom report will be generated.
- In the Format dates in the report list, select the format of dates as you want them to appear in the custom report.
- If you want Kaspersky Secure Mail Gateway to send the custom report to email addresses:
- Select the check box next to the name of the Send report to administrator setting if you want Kaspersky Secure Mail Gateway to send the custom report to the email addresses of the Kaspersky Secure Mail Gateway administrator.
- In the Send report to the following email addresses field, enter the email address to which you want the custom report to be delivered.
The email addresses are entered one at a time. Repeat the process of adding addresses to the list for all email addresses that you are adding.
You can use the symbols "*" and "?" to create an address mask, and regular expressions beginning with the prefix "reg:".
Regular expressions are not case-sensitive.
- Click the button on the right of the entry field.
The email address you have added appears in the list under the entry field.
- Click the OK button.
The Custom report settings window closes.
The generated Kaspersky Secure Mail Gateway operation reports appear in the list in the workspace of the main window of the application web interface.
General settings of Kaspersky Secure Mail Gateway
This section contains information on configuring the general settings of Kaspersky Secure Mail Gateway.
Configuring the proxy server connection settings
To configure the proxy server connection settings:
- In the main window of the application web interface, open the management console tree and select the Settings section and General Settings subsection.
- In the Use Proxy Server section, click any link to open the Connection settings window.
- In the Proxy server settings settings group, select one of the following options in the Use proxy server drop-down list:
- Yes, if you want to use a proxy server with Kaspersky Secure Mail Gateway.
- No, If you do not want to use a proxy server with Kaspersky Secure Mail Gateway.
- In the Address field, enter the proxy server address.
- In the Port field, enter the proxy server port.
- In the Authentication settings settings group, select one of the following options in the Authentication drop-down list:
- Not required, if you do not want to use authentication when connecting to the proxy server.
- Plain, if you want to use authentication when connecting to the proxy server.
- If the Authentication setting is set to Plain, enter the user name and password for connecting to the proxy server in the User name and Password fields.
- In the Proxy server connection settings settings group, in the Bypass proxy for local addresses drop-down list, select one of the following values:
- Yes , if you do not want to use a proxy server for internal email addresses of your organization.
- No — if you want to use a proxy server irrespective of whether or not email addresses belong to your organization.
- Click the OK button.
To enable or disable usage of a proxy server:
- In the main window of the application web interface, open the management console tree and select the Settings section and Database Update subsection.
- In the workspace, do one of the following:
- Flip on the toggle switch next to the name of the Use Proxy Server settings group if you want to use a proxy server with Kaspersky Secure Mail Gateway.
- Flip off the toggle switch next to the name of the Use Proxy Server settings group if you do not want to use a proxy server with Kaspersky Secure Mail Gateway.
You can enable use of a proxy server only after you configure the proxy server connection settings.
Configuring email addresses of the administrator
To configure email addresses of the administrator for sending notifications, reports, and other messages of Kaspersky Secure Mail Gateway:
- In the main window of the application web interface, open the management console tree and select the Settings section and General Settings subsection.
- In the Email Addresses section, click the Administrator's email addresses link to open the Administrator's email addresses window.
- In the Email addresses to which Kaspersky Secure Mail Gateway sends notifications, reports, and messages from the program email address field, enter the email address of the administrator.
The email addresses are entered one at a time. Repeat the process of adding addresses to the list for all email addresses that you are adding.
You can use the symbols "*" and "?" to create an address mask, and regular expressions beginning with the prefix "reg:".
Regular expressions are not case-sensitive.
- Click the Add button on the right of the entry field.
The list of administrator's email addresses is compiled in the field under the button for adding entries.
- Click the OK button.
- The Administrator's email addresses window closes.
Email addresses are displayed on the right of the Administrator's email addresses link in the workspace of the main window of the application web interface.
Configuring HelpDesk account settings
This section contains information about the HelpDesk account and how to configure it.
About the HelpDesk account
The HelpDesk account is designed for obtaining restricted access to application settings. Using the HelpDesk account, the Kaspersky Secure Mail Gateway administrator can grant another user the rights to perform certain operations, for example, to investigate incidents with messages in Backup.
To obtain access to Kaspersky Secure Mail Gateway under the HelpDesk account, you must perform the following actions:
- Activate HelpDesk Account.
- Specify the user name and password.
- Enter the assigned account credentials on the web interface authorization page.
After completion of the authentication procedure, if the appropriate rights are present, the HelpDesk user can access the following operations in Kaspersky Secure Mail Gateway:
- Viewing information about a message in Backup.
- Delivering messages from Backup to the recipient.
The value of this setting is assigned in Backup settings.
- Modifying custom black lists and white lists.
- Operations with reports:
- Viewing ready reports.
- Saving a ready report to the hard drive.
- Creating a one-time report with custom settings.
- Regularly creating daily, weekly, and monthly reports.
- Removing selected reports from the list of ready reports.
- Modifying the settings for generating reports for past periods according to schedule.
Activating and deactivating the HelpDesk account
To activate or deactivate the HelpDesk account:
- In the main window of the application web interface, open the management console tree and select the Settings section and General Settings subsection.
- In the Activate HelpDesk Account section, do one of the following:
- Flip on the toggle switch next to the name of the Activate HelpDesk Account settings group if you want to activate the HelpDesk account.
- Flip off the toggle switch next to the name of the Activate HelpDesk Account settings group if you want to deactivate the HelpDesk account.
Modifying the name and password of the HelpDesk account
To modify the HelpDesk account name or password:
- In the main window of the application web interface, open the management console tree and select the Settings section and General Settings subsection.
- In the Activate HelpDesk Account section, click any link to open the HelpDesk account settings window.
- In the HelpDesk account user name and password section:
- If you want to change the HelpDesk account name, enter a new name in the User name field.
- If you want to change the HelpDesk account password, specify a new password in the Password field and enter it again in the Confirm password field.
- Click the OK button.
The HelpDesk account settings window closes.
Granting the HelpDesk account access to custom black lists and white lists
To grant the HelpDesk account access to custom black lists and white lists:
- In the main window of the application web interface, open the management console tree and select the Settings section and General Settings subsection.
- In the Activate HelpDesk Account section, click any link to open the HelpDesk account settings window.
- In the HelpDesk account privileges section in the Allow access to custom lists drop-down list, select the Yes option.
- Click the OK button.
The HelpDesk account settings window closes.
Granting the HelpDesk account access to reports
To grant the HelpDesk account access to reports:
- In the main window of the application web interface, open the management console tree and select the Settings section and General Settings subsection.
- In the Activate HelpDesk Account section, click any link to open the HelpDesk account settings window.
- In the HelpDesk account privileges section in the Allow access to reports drop-down list, select the Yes option.
- Click the OK button.
The HelpDesk account settings window closes.
Changing the Administrator account password
To change the password of the Administrator account:
- In the lower left corner of the main window of the application web interface, click the Administrator link to open the Change password window.
- In the Old password field, enter the current password of the Administrator account.
- In the New password field, enter the new password for the Administrator account.
- In the Re-enter new password field, enter the new password for the Administrator account again.
- Click the Change Password button.
The Change password window closes.
Page top
Configuring the settings for the event log and audit log
You can select the category of the event log and specify the event log level.
By default, events are recorded in the log of the Mail category and have the Info event level.
To configure the settings of the event log and audit log:
- In the main window of the application web interface, open the management console tree and select the Settings section and General Settings subsection.
- In the Log Settings section, click any link to open the Log Settings window.
- In the Syslog facility list, select the event log category.
- Select the event log level in the Event level list.
- In the Maximum number of records in Audit Log list, select the maximum number of log records in the audit log.
The number of log records in the audit log has a default limit of 100000 records. When this limit is reached, log record rotation is applied to the audit log: Kaspersky Secure Mail Gateway overwrites the oldest log records with new data.
- Click the OK button.
Configuring application performance settings
To configure application performance settings:
- In the main window of the application web interface, open the management console tree and select the Settings section and General Settings subsection.
- In the Performance Settings settings group, click the Number of scanning threads link to open the Performance Settings window.
- In the Number of scanning threads list, select the number of message streams that Kaspersky Secure Mail Gateway can scan simultaneously.
- Click the OK button.
Configuring the appearance of scanned messages
To configure the appearance of scanned messages:
- In the main window of the application web interface, open the management console tree and select the Settings section and General Settings subsection.
- In the Message Settings settings group, click the Add message X-headers link to open the Message Settings window.
- In the Add message X-headers list, select one of the following options:
- Yes, if you want to add headers to scanned messages.
- No, if you do not want to add headers to scanned messages.
- Click the OK button.
Configuring the template for messages when removing an attachment
To configure the template for messages when removing an attachment:
- In the main window of the application web interface, open the management console tree and select the Settings section and General Settings subsection.
- In the Templates settings group, click the When removing an attachment link to open the Templates window.
- In the When removing an attachment, insert the following text in the message body field, enter the text that you want to add to messages from which Kaspersky Secure Mail Gateway deletes attachments.
- Click the OK button.
Exporting application settings
To export the application settings:
- In the main window of the application web interface, open the management console tree and select the Settings section and General Settings subsection.
- In the Export and Import of Program Settings settings group, click the Export settings link to open the Export program settings window.
- Click the OK button.
A file in KZ format is downloaded to the hard drive of your computer in the folder specified as the destination folder for downloading files from the Internet in the settings of the browser that you use to manage Kaspersky Secure Mail Gateway. The file contains all current application settings, including message processing rules with all recipients and senders.
Importing application settings
To import application settings:
- In the main window of the application web interface, open the management console tree and select the Settings section and General Settings subsection.
- In the Export and Import of Program Settings settings group, click the Import settings link to open the Import program settings window.
- Click the Browse button.
The file selection window opens.
- Select the KZ file containing the application settings that you want to load.
- Select one of the following options for importing application settings:
- All settings, if you want to import all application settings.
- Selected settings, if you want to select which application settings to import.
- If you are importing Selected settings, select the check boxes next to the application settings that you want to import.
- Click the Next button.
- If the application settings were imported successfully, click the Restart the program button.
The application will be restarted. After a few minutes, you must refresh the browser window and sign in again.
Restarting the application
To restart the application:
- In the main window of the application web interface, open the management console tree and select the Settings section and General Settings subsection.
- In the Export and Import of Program Settings settings group, click the Restart the program link to open the Program restart confirmation window.
- Click the OK button.
The application will be restarted. After a few minutes, you must refresh the browser window and sign in again.
Configuring integration with Kaspersky Security Center
After installation, Kaspersky Secure Mail Gateway sends information about itself to Kaspersky Security Center. Based on this information, Kaspersky Security Center combines all virtual machines of Kaspersky Secure Mail Gateway into a cluster. A name is assigned to the cluster. You can configure this setting for integration with Kaspersky Security Center.
To configure the setting for integration with Kaspersky Security Center:
- In the main window of the application web interface, open the management console tree and select the Settings section and General Settings subsection.
- In the Integration with Kaspersky Security Center settings group, click the Cluster ID link to open the Integration with Kaspersky Security Center window.
- In the Specify Kaspersky Security Center cluster ID field, enter the Kaspersky Security Center cluster ID. For example, enter Kaspersky Secure Mail Gateway.
Click the OK button.
Configuring MTA settings
Kaspersky Secure Mail Gateway is integrated into the existing corporate mail infrastructure and is not a standalone mail system. For example, Kaspersky Secure Mail Gateway does not deliver email messages to recipients and does not manage user accounts.
You can configure the basic MTA settings using the Quick MTA Setup Wizard or manually in the application web interface.
This section describes how you can configure the MTA settings manually.
Configuring basic MTA settings
To configure basic MTA settings:
- In the main window of the application web interface, open the management console tree and select the Settings section and MTA subsection.
- Open the Basic Settings section if it is not already open.
- Click any link in the Basic Settings section to open the Basic MTA settings window.
- If you want to change the domain name of Kaspersky Secure Mail Gateway (mydomain), enter the new domain name of the application server in the Domain name field.
- If you want to change the fully qualified domain name of Kaspersky Secure Mail Gateway (myhostname), enter the new fully qualified domain name of the application server in the Hostname field.
- In the Message size limit field, specify the maximum size of the email message received or forwarded through Kaspersky Secure Mail Gateway, including SMTP headers. Specify the maximum size in bytes.
Type 0 if restrictions are not required.
The default value is 20971520 bytes.
- Create a list of trusted networks and network hosts that are allowed to send email messages via Kaspersky Secure Mail Gateway (mynetworks). As a rule, these are internal networks and network hosts of your organization. For example, you can specify the IP addresses of Microsoft Exchange servers used at your organization.
If trusted networks are not specified, Kaspersky Secure Mail Gateway will not be receiving messages from internal mail servers and redirect them outside the network of your organization.
Perform the following actions for each address that you want to add:
- In the Trusted networks field, enter the network IP address or the subnet address.
Type IP addresses in IPv4 format or subnet addresses in CIDR format.
- Click the Add button.
The network IP address or subnet address that you added will be displayed in the list of trusted networks and network hosts.
Addresses should be entered one at a time. Repeat the actions for adding IP addresses or subnet addresses to the list for all trusted networks and network hosts that you are adding.
- In the Trusted networks field, enter the network IP address or the subnet address.
- In the Email destination address field, enter the address of your edge gateway (relayhost). Kaspersky Secure Mail Gateway will be redirecting all messages to this address.
You can enter an IPv4 address (for example, 192.0.0.1 or 192.0.0.0/16), domain name or FQDN.
If you have configured email routing for individual domains, Kaspersky Secure Mail Gateway will be redirecting email messages to the addresses specified for each domain.
- In the MX record lookup list, select one of the following values:
- Enabled, if you want to enable the search for MX records for domain names or FQDNs.
- Disabled, if you want to disable MX record lookup.
- Click the OK button.
The Basic MTA settings window closes.
Configuring advanced MTA settings
To configure advanced MTA settings:
- In the main window of the application web interface, open the management console tree and select the Settings section and MTA subsection.
- Open the Advanced Settings section.
- Click any link in the upper part of the list of settings to open the Advanced MTA settings window.
- In the SMTP greeting text field, type the text that will accompany code 220 in the SMTP greeting.
- In the Maximum connection attempts field, specify the maximum number of connection attempts by one remote SMTP client to the service of the SMTP server per minute.
Type 0 if restrictions are not required.
The default value is 0 (unlimited).
- In the Maximum simultaneous connection attempts field, specify the maximum number of simultaneous connection attempts by one remote SMTP client to the SMTP server.
Type 0 if restrictions are not required.
The default value is 50.
- In the Maximum mail delivery requests field, specify the maximum number of message delivery requests from one remote SMTP client to the SMTP server per minute, regardless of whether this mail server accepts these messages or not.
Type 0 if restrictions are not required.
The default value is 0 (unlimited).
- In the SMTP session timeout field, specify the maximum period of time during which a request has to be received from the remote SMTP client and a response sent by the SMTP server.
The default value is 30 seconds.
- In the Interval between destination address connection attempts, specify the interval between attempts by the MTA queue manager to connect to the message destination address if the destination address is unavailable.
The default value is 60 seconds.
- In the Minimum delivery interval for Deferred queue field, specify the minimum interval between attempts to deliver a message that has been deferred into the Deferred queue.
The default value is 300 seconds.
- In the [[LabelTitleSettingsMTAAdvancedDialog_maximalBackoffTime] field, specify the maximum interval between attempts to send a message that has been deferred into the Deferred queue.
The default value is 4000 seconds.
- In the Maximum queue lifetime for a message, set a limit on the time during which a message with a permanent error status will be stored in the queue. When this time elapses, the message is considered undelivered.
The default value is 3 days.
- In the Deferred queue processing interval field, specify the frequency at which the Deferred queue is scanned by the queue manager.
The default value is 1000 seconds.
- In the Maximum queue lifetime for a bounce message, set a limit on the time during which a bounce message with a permanent error status will be stored in the queue. When this time elapses, the message is considered undelivered.
The default value is 3 days.
- In the BCC address for all messages field, specify an optional email address for receiving blind carbon copies of all messages received by the MTA.
- In the Check addresses format for RFC 821 compliance list, configure (enable or disable) checking of email addresses in the
SMTP MAIL FROMandRCPT TOto verify that such addresses are in angle brackets and do not contain RFC 822 comments and phrases. This check prevents reception of messages from malicious applications.To configure the scanning of addresses, in the Check addresses format for RFC 821 compliance list, select one of the following values:
- Yes, if you want to enable checking.
- No if you want to disable checking.
The default value is Yes.
- Configure the Disable recipient verification SMTP VRFY setting, which enables or disables the
SMTP VRFYcommand. TheSMTP VRFYcommand prevents specific services from collecting email addresses.To enable or disable the
SMTP VRFYcommand, select one of the following values in the Disable recipient verification SMTP VRFY list:- Yes, if you want to enable the command.
- No, if you want to disable the command.
The default value is Yes.
- In the EHLO keywords not sent by SMTP server in response field, select check boxes next to those non-case-sensitive
EHLOcommands (for example:pipelining,starttls,auth), which your SMTP server will not announce in the response to theEHLOrequest from an external SMTP client.Default values are:
silent-discard,dsn,etrn. - Click the OK button.
The Advanced MTA settings window closes.
SMTP verification of recipient email addresses
This section contains information about SMTP authentication of message recipients and how to configure it.
About SMTP verification of recipient email addresses
SMTP verification of recipient email addresses – verification performed to check if email addresses of message recipients actually exist.
When Kaspersky Secure Mail Gateway receives messages for secure domains and redirects them to a back-end mail server, Kaspersky Secure Mail Gateway must be prevented from receiving messages for non-existent email addresses. This is required for two reasons:
- Receiving messages to be sent to nonexistent email addresses loads the processor because mail is processed unnecessarily.
- Attempts to deliver messages to non-existent email addresses can cause Kaspersky Secure Mail Gateway or the back-end server to create delivery failure notifications; because of such notifications, Kaspersky Secure Mail Gateway or your back-end mail server will be added to the black list.
Authentication of message recipients is not performed when Kaspersky Secure Mail Gateway receives messages from trusted network nodes.
Enabling and disabling SMTP verification of recipient email addresses
To enable or disable SMTP verification of recipient email addresses:
- In the main window of the application web interface, open the management console tree and select the Settings section and MTA subsection.
- Open the Advanced Settings section.
- Click the Reject messages for unknown recipient domains or Reject messages for unverified recipients link to open the Advanced MTA settings window.
In the Reject messages for unknown recipient domains list, select one of the following values:
- Yes if you want Kaspersky Secure Mail Gateway to reject the message delivery request if the
RCPT TOdomain name does not contain MX records of the DNS server and the DNS address or MX record is distorted (for example, a zero-length address of the MX host is specified). - No if you do not want Kaspersky Secure Mail Gateway to reject the message delivery request if the
RCPT TOdomain name does not contain MX records of the DNS server and the DNS address or MX record is distorted (for example, a zero-length address of the MX host is specified).
The default value is Yes.
- Yes if you want Kaspersky Secure Mail Gateway to reject the message delivery request if the
- To the right of the Reject messages for unverified recipients setting name, select one of the following options:
- None, if you do not want to reject messages to unverified addresses.
- Reject for unverified recipients, if you want to reject the message delivery request if the
RCPT TOis not available. - Reject for recipients not in valid list, if you want to reject the message delivery request if the
RCPT TOaddress is not in the list of valid domains for its domain class.
- Click the OK button.
The Advanced MTA settings window closes.
SMTP verification of recipient email addresses is not performed when Kaspersky Secure Mail Gateway receives messages from trusted network hosts.
Intense mail traffic can increase the load on the mail server due to transmission of failed message delivery notifications.
Upgrading Kaspersky Secure Mail Gateway via the web interface
This section describes how you can upgrade Kaspersky Secure Mail Gateway via the web interface.
About Kaspersky Secure Mail Gateway upgrade via the web interface
Kaspersky Lab may release upgrade packages for Kaspersky Secure Mail Gateway. For example, Kaspersky Lab can release critical fixes for vulnerabilities or bugs, scheduled upgrades that add new or improve existing features of Kaspersky Secure Mail Gateway, and packages with additional localizations for Kaspersky Secure Mail Gateway.
Following the release of Kaspersky Secure Mail Gateway upgrades, you can install them via the web interface of Kaspersky Secure Mail Gateway.
Prior to installing upgrades via the web interface of Kaspersky Secure Mail Gateway, you have to download the upgrade package or the localization package in TGZ format along with instructions on how to install this upgrade from the eStore website to your computer.
Kaspersky Secure Mail Gateway services may be suspended for the duration of upgrade installation. The upgrade process may take several minutes. After starting an upgrade of Kaspersky Secure Mail Gateway, do not interrupt the upgrade process or turn off the virtual machine. You may need to restart Kaspersky Secure Mail Gateway after upgrading.
Preparing to upgrade Kaspersky Secure Mail Gateway via the web interface
Before upgrading Kaspersky Secure Mail Gateway, you are strongly advised to make a copy of your Kaspersky Secure Mail Gateway virtual machine (a snapshot of the virtual machine in the hypervisor) to be able to return to the previous version of Kaspersky Secure Mail Gateway, if installation of the new version of Kaspersky Secure Mail Gateway fails.
Before taking a Kaspersky Secure Mail Gateway virtual machine snapshot, it is recommended to disable transmission or reception of messages by the mail agent of Kaspersky Secure Mail Gateway and power off the virtual machine.
To take a snapshot of a Kaspersky Secure Mail Gateway virtual machine:
- Start VMware vSphere Client.
- Select the virtual machine that you want to take a snapshot of.
- Open the menu by right-clicking.
- In the menu, select the Snapshot item and Take Snapshot sub-item (see figure below).
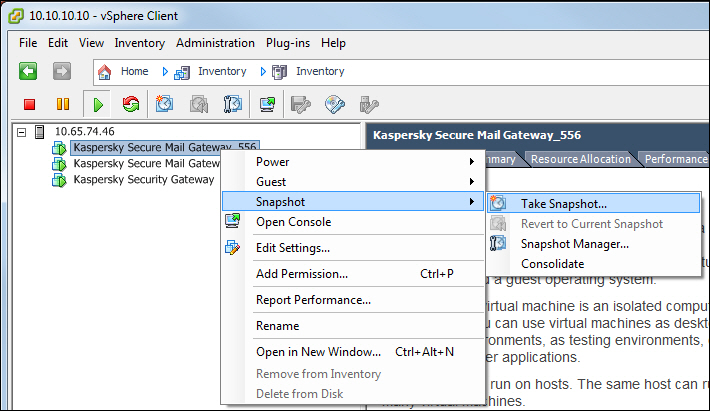
Snapshot of the virtual machine
The Take Virtual Machine Snapshot window opens (see figure below).

Input of virtual machine snapshot data
- In the Name field, enter the name of the virtual machine snapshot.
- In the Description field, enter a description of the virtual machine snapshot.
- Select the Snapshot the virtual machine's memory check box.
A snapshot of your virtual machine appears in the list of virtual machines in the left part of the main application window.
After you have taken a Kaspersky Secure Mail Gateway virtual machine snapshot, it is recommended to power on the virtual machine and start an update of Kaspersky Secure Mail Gateway.
See VMware vSphere Client manuals for details on managing virtual machines in VMware vSphere Client.
Performing Kaspersky Secure Mail Gateway upgrade via the web interface
To upgrade Kaspersky Secure Mail Gateway via the web interface:
- In the main window of the application web interface, open the management console tree and select the Settings section and System Upgrade subsection.
- Click the Start upgrade link to open the System Upgrade window.
Click the Browse button to the right of the Uploading Upgrade Package field.
The file selection window opens in the browser that you use.
- Choose the upgrade file that you want to upload and click the Open button in your browser.
The file selection window closes.
- Click the Next button.
- Follow the steps of the Upgrade Wizard.
The steps of the Upgrade Wizard may vary depending on the type of upgrade.
More detailed instructions on installing each upgrade are provided in the instruction manual that comes with this upgrade.
Kaspersky Secure Mail Gateway database update
This section contains information about updating Anti-Virus, Anti-Spam, and Anti-Phishing databases.
About database updates
Databases of the Anti-Virus, Anti-Spam, and Anti-Phishing modules (hereafter also referred to as "databases") are files containing records that can be used to detect malicious code in scanned objects. These records contain information about the control sections of malicious code and algorithms used for disinfecting objects that contain such threats.
Virus analysts at Kaspersky Lab detect hundreds of new threats daily, create records to identify them, and include them in database updates packages (or update packages). Update packages consist of one or several files containing records to identify threats that were detected since the previous update package was released. In order to minimize the risk of infecting the protected mail server, we recommend that you receive database update packages regularly.
As long as the license is in effect, you can receive database update packages from Kaspersky Lab's website automatically on schedule, or download and install them manually.
During installation, Kaspersky Secure Mail Gateway downloads the latest databases from one of Kaspersky Lab's update servers. If you have configured automatic database updates, Kaspersky Secure Mail Gateway runs updates according to schedule (with a frequency of once per 5 minutes).
Kaspersky Secure Mail Gateway periodically and automatically checks for new update packages on Kaspersky Lab's update servers. By default, if the Kaspersky Secure Mail Gateway anti-virus databases have not been updated within 24 hours or the Anti-Spam databases have not been updated within an hour since Kaspersky Lab released the latest updates, Kaspersky Secure Mail Gateway logs the event Databases are out of date into the event log. If the anti-virus databases have not been updated within a week, or the Anti-Spam databases have not been updated within 24 hours, Kaspersky Secure Mail Gateway logs the event Databases are obsolete. You can configure administrator notifications about these events.
About update sources
Update source is a resource containing updates for Kaspersky Secure Mail Gateway databases.
The main update source is Kaspersky Lab's update servers. These are special Internet sites which contain updates for databases and application modules for all Kaspersky Lab products. If you connect to the Internet via a proxy server, you have to configure the proxy server connection settings.
To reduce the amount of Internet traffic, you can configure Kaspersky Secure Mail Gateway to update databases from a custom update source. HTTP or FTP servers or local folders on your computer can serve as custom updates sources.
If Kaspersky Secure Mail Gateway is managed using Kaspersky Security Center, you can select Kaspersky Security Center as the update source.
Selecting the update source
To select the update source:
- In the main window of the application web interface, open the management console tree and select the Settings section and Database Update subsection.
- In the Program Database Update Settings section, click the Update source link to open the Program database update settings window.
- In the Update source settings group, select the source from which you want to receive update packages:
- Kaspersky Lab servers.
- Kaspersky Security Center.
- Custom update source.
- If you selected a custom update source, in the field under Kaspersky Security Center enter the web address of the update package on your FTP or HTTP server or the full path to the folder with the update package.
You can also select the If inaccessible, use Kaspersky Lab servers check box if you want to receive the update package from Kaspersky Lab's update servers whenever the custom update source is unavailable.
- Click the OK button.
Configuring the database update schedule and settings
To configure the database update schedule and settings:
- In the main window of the application web interface, open the management console tree and select the Settings section and Database Update subsection.
- In the Program Database Update Settings section, click the Schedule or Update source link to open the Program database update settings window.
- In the Schedule settings group, select one of the following options in the drop-down list:
- Manually.
- Once
- Weekly
- Monthly
- Run every
- In the Schedule settings group, specify the frequency of database updates in the fields on the right of the drop-down list. The following values can be specified depending on the schedule selected:
- If the database update start mode is set to Once, specify the date and time at which the database update is to start in the corresponding fields.
- If the database update start mode is set to Weekly, specify the day of the week and the time at which the database update is to start in the corresponding fields.
For example, if the values are set to Monday and 3:00 PM, the database update runs every Monday at 15:00.
- If the database update start mode is set to Monthly, in the corresponding fields specify the day of the month and the time at which the database update is to start.
For example, if the values are set to 20 and 3:00 PM, the database update runs on the 20th day of the month at 15:00.
- For the Run every update start mode, specify the frequency of the update start in minutes, hours, or days in the corresponding fields:
- To specify the frequency of updates in minutes, select the min value in the list in the right part of the window, specify the frequency in minutes, and in the Starting at field specify the time of the first database update.
For example, if the frequency value is set to 30, the min. frequency option has been selected, and the value of the Starting at field is set to 15:00, the database update starts every 30 minutes beginning at 3 p.m.
- To specify the frequency of updates in hours, select the hours value in the list in the right part of the window, specify the frequency in hours, and in the Starting at field specify the date and time of the first database update.
For example, if the frequency value is set to 3, the hr(s). frequency option has been selected, and the values the Starting at field are 25.05.2017 and 15:00, the database update starts every 3 hours beginning at 3 p.m. on the 25th May, 2017.
- To specify the frequency of updates in days, select the days value in the list in the right part of the window, specify the frequency in days, and in the Starting at field specify the time of the first database update.
For example, if the frequency value is set to 2, the days frequency option has been selected, and the value of the Starting at field is set to 15:00, the database update starts once every two days (every other day) at 3 p.m.
- To specify the frequency of updates in minutes, select the min value in the list in the right part of the window, specify the frequency in minutes, and in the Starting at field specify the time of the first database update.
- In the Update settings section, in the Randomization interval field specify the deviation from the scheduled time (in minutes) after which the database update is to run on computers so that these computers do not attempt to access the update source simultaneously when the database update starts. This feature is provided to solve the problem of simultaneous access to the update source by a large number of computers when the database update starts.
- In the Update settings section, in the Maximum duration field specify the maximum duration of the update process in minutes, after which the database update must be stopped.
- In the Update settings section, in the Run skipped tasks list select the procedure for starting the task of the update was not performed at the scheduled time for one of the following reasons:
- The computer was unavailable (turned off or disconnected from the Internet);
- The application was not running.
If the option to run missed tasks is enabled, an attempt is made to start the database update task the next time the application starts on the computer. In the Manually and Once update start mode, the database update task starts as soon as the computer goes online on the local area network.
If the option to run missed tasks is disabled, the database update tasks are started on computers according to schedule only, and Manually and Once database updates are started only on computers connected to the local area network.
- Click the OK button.
Setting default values for database update settings
To set default values for database update settings and the default database update schedule:
- In the main window of the application web interface, open the management console tree and select the Settings section and Database Update subsection.
- In the Program Database Update Settings section, click the Schedule link to open the Program database update settings window.
- In the lower part of the Program database update settings window, click the Set default values link.
- Click the OK button.
Updating databases manually
To start a database update manually:
- In the main window of the application web interface, open the management console tree and select the Settings section and Database Update subsection.
- In the workspace in the Program Database Update Settings section, click the Start update link to start a database update.
The Start update link is replaced by the Updating in progress message, and the database update progress is displayed.
Configuring proxy server connection settings for database updates
To configure proxy server connection settings for database updates:
- In the main window of the application web interface, open the management console tree and select the Settings section and Database Update subsection.
- In the Use Proxy Server section, click any link to open the Connection settings window.
- In the Proxy server settings settings group, select one of the following options in the Use proxy server drop-down list:
- Yes, if you want to use a proxy server with Kaspersky Secure Mail Gateway.
- No, If you do not want to use a proxy server with Kaspersky Secure Mail Gateway.
- In the Address field, enter the proxy server address.
- In the Port field, enter the proxy server port.
- In the Authentication settings settings group, select one of the following options in the Authentication drop-down list:
- Not required, if you do not want to use authentication when connecting to the proxy server.
- Plain, if you want to use authentication when connecting to the proxy server.
- If the Authentication setting is set to Plain, enter the user name and password for connecting to the proxy server in the User name and Password fields.
- In the Proxy server connection settings settings group, in the Bypass proxy for local addresses drop-down list, select one of the following values:
- Yes , if you do not want to use a proxy server for internal email addresses of your organization.
- No — if you want to use a proxy server irrespective of whether or not email addresses belong to your organization.
- Click the OK button.
To enable or disable usage of a proxy server:
- In the main window of the application web interface, open the management console tree and select the Settings section and Database Update subsection.
- In the workspace, do one of the following:
- Flip on the toggle switch next to the name of the Use Proxy Server settings group if you want to use a proxy server with Kaspersky Secure Mail Gateway.
- Flip off the toggle switch next to the name of the Use Proxy Server settings group if you do not want to use a proxy server with Kaspersky Secure Mail Gateway.
You can enable use of a proxy server only after you configure the proxy server connection settings.
Kaspersky Secure Mail Gateway Protection
This section contains information on configuring Kaspersky Secure Mail Gateway protection settings.
Participation in Kaspersky Security Network and using of Kaspersky Private Security Network
This section contains information on participation in
and use of .
About participation in Kaspersky Security Network and use of Kaspersky Private Security Network
To protect your computer more effectively, Kaspersky Secure Mail Gateway uses data that is recieved from users around the globe. Kaspersky Security Network is designed for gathering this data.
Kaspersky Security Network (KSN) is an infrastructure of cloud services providing access to Kaspersky Lab's online knowledge base with information about the reputation of files, web resources, and software. Data from Kaspersky Security Network ensures a faster response by Kaspersky Secure Mail Gateway to new objects that have not yet been added to the antivirus databases, improves the performance of some protection components, and reduces the risk of false alarms.
Thanks to users who participate in Kaspersky Security Network, Kaspersky Lab is able to receive in time the information about the types and sources of objects that have not yet been added to the antivirus databases, develop solutions for neutralizing them, and minimize the number of false alarms.
When you participate in Kaspersky Security Network, certain statistics obtain while Kaspersky Secure Mail Gateway is running are sent to Kaspersky Lab automatically. Files or their parts which may be exploited by intruders to harm the computer or data can be also sent to Kaspersky Lab to be examined additionally.
No personal data is collected, processed, or stored. The types of data that Kaspersky Secure Mail Gateway sends to Kaspersky Security Network are described in the KSN Statement.
Participation in Kaspersky Security Network is voluntary. The decision to participate in Kaspersky Security Network is taken during installation of Kaspersky Secure Mail Gateway, and can be changed at any time.
If you do not want to participate in KSN, you can use the Kaspersky Private Security Network (hereinafter also referred to as KPSN). KPSN is a solution that allows users to access the reputation databases of Kaspersky Security Network and other statistical data without sending data from their computers to Kaspersky Security Network.
If you want to purchase Kaspersky Private Security Network, you can contact Kaspersky Lab's partner specialists in your region.
Configuring participation in Kaspersky Security Network
To configure participation in Kaspersky Security Network:
- In the main window of the application web interface, open the management console tree and select the Settings section and Protection subsection.
- In the External Services section, click the Usage of KSN / KPSN link to open the Usage of KSN / KPSN window.
- In the list of actions, select Use KSN.
- Read the Kaspersky Security Network Statement and select one of the following options:
- Accept, if you want to participate in Kaspersky Security Network.
- Do not accept, if you want to participate in Kaspersky Security Network.
- Click the Apply button.
The Usage of KSN / KPSN window closes.
- In the External Services section, click the KSN timeout link to open the External Services window.
- In the KSN timeout field specify the maximum KSN timeout in seconds. You can specify a value in the range from 1 to 300 seconds.
The default value is 10 seconds.
- Click the Apply button.
Participation in Kaspersky Security Network will be configured.
Configuring use of Kaspersky Private Security Network
To configure use of Kaspersky Private Security Network:
- In the main window of the application web interface, open the management console tree and select the Settings section and Protection subsection.
- In the External Services section, click the Usage of KSN / KPSN link to open the Usage of KSN / KPSN window.
- In the list of actions, select Use KPSN.
- In the Upload KPSN configuration file line, click the Browse button.
The file selection window opens.
- Select the KPSN configuration file that you want to add.
The KPSN configuration file must be in ZIP archive format.
- Click the OK button.
The file selection window closes.
- In the External Services section, click the KSN timeout link to open the External Services window.
- In the KSN timeout field specify the maximum KSN timeout in seconds. You can specify a value in the range from 1 to 300 seconds.
The default value is 10 seconds.
- Click the Apply button.
Use of Kaspersky Private Security Network will be configured.
Message authentication
Message authentication is designed to provide additional protection for your corporate mail infrastructure against spam and phishing.
Kaspersky Secure Mail Gateway uses the following message authentication technologies:
- SPF (Sender Policy Framework) authentication.
- DKIM (DomainKeys Identified Mail) authentication.
- DMARC (Domain-based Message Authentication, Reporting and Conformance) authentication.
SPF message authentication – comparing IP addresses of message senders with the list of possible message sources, which has been created by the mail server administrator.
Kaspersky Secure Mail Gateway receives lists of possible message sources from the DNS server.
Enable SPF message authentication if Kaspersky Secure Mail Gateway receives messages directly from the Internet. Disable SPF message authentication if Kaspersky Secure Mail Gateway receives messages from an intermediate internal server.
DKIM message authentication – verification of the digital signature added to messages.
A digital signature associated with the name of the organization's domain is added to messages. Kaspersky Secure Mail Gateway verifies this digital signature.
DMARC message authentication – authentication performed to verify that the message was actually sent from the specified domain.
After the message has passed SPF and DKIM authentication, the application verifies that the domain containing the sender's address in the From field of the email message header matches the SPF and DKIM IDs and the SPF and DKIM statuses.
To enable SPF, DKIM, and DMARC message authentication, you have to allow Kaspersky Secure Mail Gateway to connect to the DNS server. If the connection to the DNS server is prohibited, SPF, DKIM, and DMARC message authentication is disabled.
If Kaspersky Secure Mail Gateway detects violations during SPF, DKIM, or DMARC message authentication, it is considered that SPF, DKIM, or DMARC message authentication has revealed violations of message senders' authenticity.
Connecting to a DNS to perform message authentication
To enable message authentication, you have to allow Kaspersky Secure Mail Gateway to connect to the DNS server. If the connection to the DNS server is prohibited, SPF, DKIM, and DMARC message authentication is disabled.
You can also specify the maximum DNS server response wait time. When this time elapses, the DNS server is considered unavailable, and the message is processed by Kaspersky Secure Mail Gateway without message authentication. The default value is 10 seconds.
To allow Kaspersky Secure Mail Gateway to connect to the DNS server:
- In the main window of the application web interface, open the management console tree and select the Settings section and Protection subsection.
- In the External Services section, click the Allow connection to DNS server link to open the External Services window.
- In the list on the right of the name of the Allow connection to DNS server setting, select Yes.
- Click the Apply button.
To specify the maximum DNS server response wait time:
- In the main window of the application web interface, open the management console tree and select the Settings section and Protection subsection.
- In the External Services section, click the Allow connection to DNS server link to open the External Services window.
- In the field to the right of the DNS server timeout setting, specify the maximum DNS server response wait time.
The default value is 10 seconds.
- Click the Apply button.
Enabling and disabling SPF message authentication
To enable or disable SPF message authentication:
- In the main window of the application web interface, open the management console tree and select the Settings section and Protection subsection.
- In the External Services section, click the Enable SPF Mail Sender Authentication link to open the External Services window.
- In the list to the right of the Enable SPF Mail Sender Authentication setting name, select one of the following options:
- Yes, if you want to enable SPF authentication.
- No, if you want to disable SPF authentication.
- Click the Apply button.
To enable SPF message authentication, you have to allow Kaspersky Secure Mail Gateway to connect to the DNS server. If the connection to the DNS server is prohibited, SPF message authentication is disabled.
Enabling and disabling DKIM message authentication
To enable or disable DKIM message authentication:
- In the main window of the application web interface, open the management console tree and select the Settings section and Protection subsection.
- In the External Services section, click the Enable DKIM Mail Sender Authentication link to open the External Services window.
- In the list to the right of the Enable DKIM Mail Sender Authentication setting name, select one of the following options:
- Yes, if you want to enable DKIM authentication.
- No, if you want to disable DKIM authentication.
- Click the Apply button.
To enable DKIM message authentication, you have to allow Kaspersky Secure Mail Gateway to connect to the DNS server. If the connection to the DNS server is prohibited, DKIM message authentication is disabled.
Enabling and disabling DMARC message authentication
To enable or disable DMARC message authentication:
- In the main window of the application web interface, open the management console tree and select the Settings section and Protection subsection.
- In the External Services section, click the Enable DMARC Mail Sender Authentication link to open the External Services window.
- In the list to the right of the Enable DMARC Mail Sender Authentication setting name, select one of the following options:
- Yes, if you want to enable DMARC authentication.
- No, if you want to disable DMARC authentication.
- Click the Apply button.
To enable DMARC message authentication, you have to allow Kaspersky Secure Mail Gateway to connect to the DNS server. If the connection to the DNS server is prohibited, DMARC message authentication is disabled.
Enabling and disabling message authentication for a rule
You can enable or disable message authentication for one or several rules.
Before enabling or disabling message authentication for a rule, make sure that at least one type of message authentication is enabled in the settings of Kaspersky Secure Mail Gateway (Enabling and disabling SPF message authentication, Enabling and disabling DKIM message authentication, Enabling and disabling DMARC message authentication).
To enable or disable message authentication for a rule:
- In the main window of the application web interface, open the management console tree and select the Rules section.
- In the list of rules, click the name of the rule to open the rule for which you want to enable or disable message authentication.
- Select the Mail Sender Authentication section.
- Do one of the following:
- Flip on the toggle switch next to the name of the Mail Sender Authentication settings group if you want to enable Mail Sender Authentication.
- Flip off the toggle switch next to the name of the Mail Sender Authentication settings group if you want to disable Mail Sender Authentication.
- Click the Apply button in the lower part of the workspace.
Configuring detection of TempError and PermError during message authentication
If you want the TempError temporary error to be considered a message authentication violation, you can specify this setting for one or several rules.
Before specifying whether the TempError temporary error should be considered a message authentication violation, make sure that at least one type of message authentication is enabled in the settings of Kaspersky Secure Mail Gateway (Enabling and disabling SPF message authentication, Enabling and disabling DKIM message authentication, Enabling and disabling DMARC message authentication).
To specify whether the TempError temporary error should be considered a message authentication violation:
- In the main window of the application web interface, open the management console tree and select the Rules section.
- In the list of rules, click the name of the rule to open the rule for which you want to specify whether the TempError temporary error should be considered a message authentication violation.
- Select the Mail Sender Authentication section.
- Do one of the following:
- Select the check box next to the name of the Consider temporary errors (TempError) as an authentication violation setting if you want Kaspersky Secure Mail Gateway to consider temporary errors (TempError) as a message authentication violation.
- Clear the check box next to the name of the Consider temporary errors (TempError) as an authentication violation setting if you do not want Kaspersky Secure Mail Gateway to consider temporary errors (TempError) as a message authentication violation.
- Do one of the following:
- Select the check box next to the name of the Consider permanent errors (PermError) as an authentication violation setting if you want Kaspersky Secure Mail Gateway to consider permanent errors (PermError) as a message authentication violation.
- Clear the check box next to the name of the Consider permanent errors (PermError) as an authentication violation setting if you do not want Kaspersky Secure Mail Gateway to consider permanent errors (PermError) as a message authentication violation.
- Click the Apply button in the lower part of the workspace.
Configuring additional DMARC message authentication settings for a rule
You can configure additional settings of DMARC message authentication for one or several rules.
Before configuring additional settings of DMARC message authentication for a rule, make sure that DMARC message authentication is enabled in the settings of Kaspersky Secure Mail Gateway.
To configure additional settings of DMARC message authentication for a rule:
- In the main window of the application web interface, open the management console tree and select the Rules section.
- In the list of rules, click the link with the name of the rule to open the rule for which you want to configure additional settings of DMARC message authentication.
- Select the Mail Sender Authentication section.
- Flip on the toggle switch next to the name of the Mail Sender Authentication settings group if it is off.
- In the DMARC Mail Sender Authentication section, do one of the following:
- Select the check box next to the name of the Consider DMARC authentication result as primary setting if you want Kaspersky Secure Mail Gateway to determine authentication violations based on the results of DMARC authentication.
- Clear the check box next to the name of the Consider DMARC authentication result as primary setting if you do not want Kaspersky Secure Mail Gateway to determine authentication violations based on the results of DMARC authentication.
If the check box is selected, an authentication violation is determined based on the results of DMARC authentication. If the check box is cleared, the results of SPF-, DKIM- and DMARC authentication are considered to be equivalent. A violation under any of these authentication methods is considered to be an authentication violation. If violations are found for several authentication methods simultaneously, the most strict of the defined actions to take on the message is applied during SPF, DKIM or DMARC authentication violations.
- Click the Apply button in the lower part of the workspace.
Configuring additional SPF message authentication settings for a rule
You can configure additional settings of SPF message authentication for one or several rules.
Before configuring additional settings of SPF message authentication for a rule, make sure that SPF message authentication is enabled in the settings of Kaspersky Secure Mail Gateway.
To configure additional settings of SPF message authentication for a rule:
- In the main window of the application web interface, open the management console tree and select the Rules section.
- In the list of rules, click the link with the name of the rule to open the rule for which you want to configure additional settings of SPF message authentication.
- Select the Mail Sender Authentication section.
- Flip on the toggle switch next to the name of the Mail Sender Authentication settings group if it is off.
- In the SPF Mail Sender Authentication settings group, perform one of the following actions:
- Select the check box next to the name of the Consider SPF softfail as a violation setting if you want Kaspersky Secure Mail Gateway to consider an SPF softfail error detected during SPF authentication as a message authentication violation.
- Clear the check box next to the name of the Consider SPF softfail as a violation setting if you do not want Kaspersky Secure Mail Gateway to consider an SPF softfail error detected during SPF authentication as a message authentication violation.
- Click the Apply button in the lower part of the workspace.
Configuring additional DKIM message authentication settings for a rule
You can configure additional settings of DKIM message authentication for one or several rules.
Before configuring additional settings of DKIM message authentication for a rule, make sure that DKIM message authentication is enabled in the settings of Kaspersky Secure Mail Gateway.
To configure additional settings of DKIM message authentication for a rule:
- In the main window of the application web interface, open the management console tree and select the Rules section.
- In the list of rules, click the link with the name of the rule to open the rule for which you want to configure additional settings of DKIM message authentication.
- Select the Mail Sender Authentication section.
- Flip on the toggle switch next to the name of the Mail Sender Authentication settings group if it is off.
- In the DKIM Mail Sender Authentication section, do one of the following:
- Select the check box next to the name of the Consider absence of DKIM signature as an authentication violation setting if you want Kaspersky Secure Mail Gateway to consider the absence of a DKIM signature of a message detected during DKIM authentication as a violation of the message sender's authenticity.
- Clear the check box next to the name of the Consider absence of DKIM signature as an authentication violation setting if you do not want Kaspersky Secure Mail Gateway to consider the absence of a DKIM signature of a message detected during DKIM authentication as a violation of the message sender's authenticity.
- Click the Apply button in the lower part of the workspace.
Configuring tags added to message subjects after SPF message authentication
To configure tags that Kaspersky Secure Mail Gateway adds to the message subject after SPF message authentication:
- In the main window of the application web interface, open the management console tree and select the Rules section.
- In the list of rules, click the name of the rule to open the rule for which you want to configure labels added to message subjects after SPF message authentication.
- Select the Mail Sender Authentication section.
- Flip on the toggle switch next to the name of the Mail Sender Authentication settings group if it is off.
- In the SPF Mail Sender Authenticationsettings group, click the link to the right of the Add the following text to the subject of an email message setting name to open the Tag for SPF authentication violation window.
- In the field under the name of the window, enter the text that you want to add at the beginning of the message subject when an SPF message authentication violation is detected.
- Click the OK button.
The Tag for SPF authentication violation window closes.
- Click the Apply button in the lower part of the workspace.
Configuring tags added to message subjects after DKIM message authentication
To configure labels that Kaspersky Secure Mail Gateway adds to the message subject after DKIM message authentication:
- In the main window of the application web interface, open the management console tree and select the Rules section.
- In the list of rules, click the name of the rule to open the rule for which you want to configure labels added to message subjects after DKIM message authentication.
- Select the Mail Sender Authentication section.
- Flip on the toggle switch next to the name of the Mail Sender Authentication settings group if it is off.
- In the DKIM Mail Sender Authentication settings group, click the link to the right of the Add the following text to the subject of an email message setting name to open the Tag for DKIM authentication violation window.
- In the field under the name of the window, enter the text that you want to add at the beginning of the message subject when a DKIM message authentication violation is detected.
- Click the OK button.
The Tag for DKIM authentication violation window closes.
- Click the Apply button in the lower part of the workspace.
Configuring tags added to message subjects after DMARC message authentication
To configure labels that Kaspersky Secure Mail Gateway adds to the message subject after DMARC message authentication:
- In the main window of the application web interface, open the management console tree and select the Rules section.
- In the list of rules, click the name of the rule to open the rule for which you want to configure labels added to message subjects after DMARC message authentication.
- Select the Mail Sender Authentication section.
- Flip on the toggle switch next to the name of the Mail Sender Authentication settings group if it is off.
- In the If DMARC violation detected settings group, click the link to the right of the Add the following text to the subject of an email message setting name to open the Tag for DMARC authentication violation window.
- In the field under the name of the window, enter the text that you want to add at the beginning of the message subject when a DMARC message authentication violation is detected.
- Click the OK button.
The Tag for DMARC authentication violation window closes.
- Click the Apply button in the lower part of the workspace.
Configuring actions on messages during DMARC, SPF and DKIM message authentication
You can configure the actions to take on messages DMARC, SPF и DKIM message authentication for one or several rules.
Before configuring actions to take on messages during DMARC, SPF and DKIM authentication, make sure that the corresponding Mail Sender Authentication is enabled in the settings of Kaspersky Secure Mail Gateway.
To configure actions to take on messages during DMARC, SPF and DKIM Mail Sender Authentication:
- In the main window of the application web interface, open the management console tree and select the Rules section.
- In the list of rules, click the link with the name of the rule to open the rule for which you want to configure actions on messages during DMARC message authentication.
- Select the Mail Sender Authentication section.
- Flip on the toggle switch next to the name of the Mail Sender Authentication settings group if it is off.
- In the DMARC Mail Sender Authentication section, in the If DMARC violation detected drop-down list, select one of the following actions to take on messages found to cause an authentication violation during DMARC authentication:
- Apply DMARC policy.
The DMARC policy is configured by the mail server administrator on the DNS server.
- Reject
- Delete message
- Skip
- Apply DMARC policy.
- Select the check box next to the name of the Place copy in Backup setting if you want the application to automatically save copies of messages in Backup before they are processed.
- In the SPF Mail Sender Authentication section, in the If SPF violation detected drop-down list, select one of the following actions to take on messages found to cause an authentication violation during SPF authentication:
- Reject
- Delete message
- Skip
- Select the check box next to the name of the Place copy in Backup setting if you want the application to automatically save copies of messages in Backup before they are processed.
- In the DKIM Mail Sender Authentication section, in the If DKIM violation detected drop-down list, select one of the following actions to take on messages found to cause an authentication violation during DKIM authentication:
- Reject
- Delete message
- Skip
- Select the check box next to the name of the Place copy in Backup setting if you want the application to automatically save copies of messages in Backup before they are processed.
- Click the Apply button in the lower part of the workspace.
Preparing to configure SPF and DMARC message authentication for outgoing messages
In order for the remote mail server to be able to perform message authentication when the message sender is Kaspersky Secure Mail Gateway (authentication of the sender of outgoing messages), you have to add the SPF and DMARC records to the settings of your DNS server.
To add SPF and DMARC records to the settings of your DNS server:
- Sign in to your DNS server under the administrator account.
- Locate the page with information on updating DNS records of the domain for whose addresses you want to configure authentication of senders of outgoing messages.
For example, this page can be named "DNS Management", "Name Server Management", or "Advanced Settings".
- Find records in TXT format for the domain for whose addresses you want to configure authentication of senders of outgoing messages.
- In the list of records in TXT format, add the SPF record for a certain domain with the following contents:
<name of the domain for whose addresses you want to configure SPF authentication of the sender of outgoing messages> IN TXT "v=<SPF version> +all>"For example, you can add the following string:
example.com IN TXT "v=spf1 +all"See Document RFC 4408 for details on configuring settings of the SPF record.
- In the list of records in TXT format, add the DMARC record for a certain domain with the following contents:
_dmarc.<name of the domain for whose addresses you want to configure DMARC authentication of the sender of outgoing messages>. IN TXT "v=<DMARC version>; p=<action that the remote mail server will perform on all email messages that do not satisfy the DMARC requirements>;"For example, you can add the following string:
_dmarc.example.com. IN TXT "v=DMARC1; p=quarantine;"See DMARC documentation for details on configuring settings of the DMARC record.
- Save changes.
The syntax of the sample SPF and DMARC records is provided for purposes of adding it to the settings of a BIND DNS server. The syntax of the SPF and DMARC records to be added to other DNS servers may differ slightly from the examples provided.
Anti-Virus protection
Kaspersky Secure Mail Gateway provides anti-virus protection of messages: It scans email messages for viruses and other threats and disinfects infected objects using the current (latest) version of Anti-Virus databases.
Messages are scanned for viruses and other threats by Anti-Virus engine. Anti-Virus engine scans the body of the message and all attached files in any format (attachments) using the Anti-Virus databases. The Anti-Virus engine detects and blocks email attachments that are intended for a limited number of recipients and are components of targeted attacks designed to exploit software vulnerabilities.
In addition to virus scanning of messages, you can enable detection of certain legitimate applications by the Anti-Virus component.
Based on the scan results, the Anti-Virus engine assigns the message one of the virus scan status labels and adds a tag with the status at the beginning of the message subject (Subject field).
Depending on the status assigned, the application performs actions in accordance with the message processing rule settings. You can select actions to be performed by the application on messages with a certain status and configure tags to be added to messages based on the Anti-Virus scanning result. Before processing a message, the application saves a copy of it in Backup.
You can specify the maximum size of attachments to be scanned and determine the objects to be skipped during Anti-Virus scanning. Attachments in certain formats and with certain names can be excluded from the scan.
The Anti-Virus engine is enabled by default. If required, you can disable Anti-Virus module or disable Anti-Virus scanning for any rule.
About computer protection against certain legitimate applications
Legitimate applications are applications that may be installed and used on computers of users and are intended for performing user tasks. However, when exploited by intruders, legitimate applications of certain types can harm the user's computer and the corporate LAN. If hackers gain access to these applications, or if they plant them on the user's computer, some of their features can be used to compromise the security of the user's computer or the corporate network.
These applications include IRC clients, auto-dialers, file downloaders, computer system activity monitors, password utilities, and Internet servers for FTP, HTTP, and Telnet.
Such applications are described in the table below.
Type |
Name |
Description |
|---|---|---|
Client-IRC |
Online chat clients |
Users install these applications to communicate with people in Internet Relay Chats. Intruders use them to spread malware. |
Dialer |
Auto-dialers |
They can establish phone connections over a modem in hidden mode. |
Downloader |
Downloader applications |
They can download files from web pages in hidden mode. |
Monitor |
Monitor applications |
They allow monitoring activity on the computer on which they are installed (seeing which applications are active and how they exchange data with applications that are installed on other computers). |
PSWTool |
Password restorers |
They allow viewing and restoring forgotten passwords. Intruders secretly plant them on computers for the same purpose. |
RemoteAdmin |
Remote administration programs |
They are widely used by system administrators. These programs allow obtaining access to the interface of a remote computer to monitor and manage it. Intruders secretly plant them on computers for the same purpose: to monitor and control computers. Legitimate remote administration applications differ from Backdoor-type Trojans for remote administration. Trojans have the ability to penetrate the operating system independently and install themselves; legitimate applications are unable to do so. |
Server-FTP |
FTP servers |
They function as FTP servers. Intruders plant them on computers to gain remote access to them via the FTP protocol. |
Server-Proxy |
Proxy servers |
They function as proxy servers. Intruders plant them on computers to send spam from them. |
Server-Telnet |
Telnet servers |
They function as Telnet servers. Intruders plant them on computer to gain remote access to them via the Telnet protocol. |
Server-Web |
Web servers |
They function as web servers. Intruders plant them on computers to gain remote access to them via the HTTP protocol. |
RiskTool |
Tools for managing a virtual machine |
They offer the user additional capabilities for managing the computer. The tools allow the user to hide files or windows of active applications and terminate active processes. |
NetTool |
Network tools |
They offer the user of the computer on which they are installed additional capabilities for interacting with other computers on the network. These tools allow restarting them, detecting open ports, and starting applications that are installed on the computers. |
Client-P2P |
P2P network clients |
They allow working on peer-to-peer networks. They can be used by intruders for spreading malware. |
Client-SMTP |
SMTP clients |
They send email messages without the user's knowledge. Intruders plant them on computers to send spam from them. |
WebToolbar |
Web toolbars |
They add toolbars to the interfaces of other applications to use search engines. |
FraudTool |
Pseudo-programs |
They pass themselves off as other programs. For example, there are pseudo-anti-virus programs which display messages about malware detection. However, in reality, they do not find or disinfect anything. |
About virus scan status
Based on the results of scanning for viruses, the Anti-Virus engine assigns one of the following virus scan statuses to messages:
- Clean (Clean message)—Object is not infected.
- Infected (Infected message)—Object is infected; either it cannot be disinfected, or disinfection has not been attempted.
- Disinfected (Disinfected message)—Object is disinfected.
- Encrypted (Encrypted message)—Object cannot be scanned because it is encrypted.
- Corrupted (Corrupted message)—Object is corrupted or an error occurred during scanning.
- Attachments with macros—Message contains a macro in the attachment.
Enabling and disabling Anti-Virus protection of messages
To enable or disable Anti-Virus protection of messages:
- In the main window of the application web interface, open the management console tree and select the Settings section and Protection subsection.
- In the Anti-Virus section, do one of the following:
- Flip on the toggle switch next to the name of the Anti-Virus settings group to enable anti-virus protection of messages.
- Flip off the toggle switch next to the name of the Anti-Virus settings group to disable anti-virus protection of messages.
Enabling and disabling Anti-Virus scanning for a rule
You can enable or disable virus scanning of messages for one or several rules. Anti-Virus scanning is enabled by default.
Before enabling or disabling Anti-Virus scanning of messages for a rule, make sure that Anti-Virus engine of Kaspersky Secure Mail Gateway is enabled.
To enable or disable virus scanning of messages for a rule:
- In the main window of the application web interface, open the management console tree and select the Rules section.
- In the list of rules, click the name of the rule to open the rule for which you want to enable or disable virus scanning of messages.
- Select the Anti-Virus section.
- Do one of the following:
- Flip on the toggle switch next to the name of the Anti-Virus settings group to enable virus scanning of messages for a rule.
- Flip off the toggle switch next to the name of the Anti-Virus settings group to disable virus scanning of messages for a rule.
- Click the Apply button in the lower part of the workspace.
Configuring Anti-Virus engine settings
To configure Anti-Virus engine settings:
- In the main window of the application web interface, open the management console tree and select the Settings section and Protection subsection.
- In the Anti-Virus section, click any link to open the Anti-Virus settings window.
- In the Protection and heuristic analysis settings group, select one of the following options in the drop-down list Use KSN:
- Yes, if you want to use KSN.
- No, if you do not want to use KSN.
- In the Protection and heuristic analysis settings group, select one of the following options in the drop-down list Use heuristic analysis:
- Yes, if you want to use Heuristic Analysis.
- No, if you do not want to use Heuristic Analysis.
- If you have enabled Heuristic Analyzer, in the Protection and heuristic analysis settings group in the Heuristic analysis level list select the level of heuristic analysis.
- In the Protection and heuristic analysis settings group, select one of the following options in the I consider some legitimate applications that can be exploited by hackers, to be dangerous for the corporate LAN drop-down list:
- Yes, if you believe that such applications can be exploited by criminals to harm the computer network of your organization.
- No, if you do not believe that such applications can be exploited by criminals to harm the computer network of your organization.
Such legitimate applications include, for example, commercial remote administration utilities, IRC clients, dialers, file downloaders, computer system activity monitors, and password management utilities. Messages in which such applications are detected will be processed according to the rules for infected objects.
- If, in the I consider some legitimate applications that can be exploited by hackers, to be dangerous for the corporate LAN list, you selected Yes, in the Protection and heuristic analysis settings group in the Enable detection of some legitimate applications drop-down list select one of the following options:
- Yes, if you want to enable detection of such applications by Kaspersky Secure Mail Gateway.
- No, if you want to disable detection of such applications by Kaspersky Secure Mail Gateway.
- In the Performance settings group, in the Maximum scanning time field specify the maximum virus scan time in seconds.
If the virus scan of a message does not finish within the time limit you specified, Kaspersky Secure Mail Gateway:
- Stops scanning the message (Skip action).
- Assigns Clean (Clean message) status to the message.
- Adds the
av-status="Clean"label to the message subject. - Delivers the message to the recipient.
- Adds the following entry to the /var/log/maillog event log:
<scan time and date> <Kaspersky Secure Mail Gateway hostname>: not clean: message-id=<message ID>: relay-ip=<IP address of the computer of the message recipient>: action="Skipped": rules=<rule ID>: size=<message size>: mail-from=<email address of the message sender>: rcpt-to=<email address of the message sender>: av-status="Clean", ap-status="Error", as-status="Error", ma-status="NotScanned, disabled by settings", cf-status="NotScanned, disabled by settings">
- In the Performance settings group, in the Maximum scanning level field specify the maximum scanning level for messages scanned by the Anti-Virus engine.
- Click the Apply button.
Setting default values for Anti-Virus engine settings
To set default values for Anti-Virus engine settings:
- In the main window of the application web interface, open the management console tree and select the Settings section and Protection subsection.
- In the Anti-Virus section, click any link to open the Anti-Virus settings window.
- In the lower part of the Anti-Virus settings window, click the Set default values link.
- Click the Apply button.
Configuring actions on messages during Anti-Virus scanning
To configure the actions to be performed by Kaspersky Secure Mail Gateway on messages during virus scanning:
- In the main window of the application web interface, open the management console tree and select the Rules section.
- In the list of rules, click the link with the name of the rule to open the rule for which you want to configure actions on messages during virus scanning.
- Select the Anti-Virus section.
- Flip on the toggle switch next to the name of the Anti-Virus settings group if it is off.
- In the If an infected file is detected drop-down list, select one of the following actions to perform on infected messages that pose a threat to the local area network of your organization:
- Disinfect.
- Delete attachment.
- Delete message
- Reject
- Skip
The Disinfect action is selected by default.
- If the action of the If an infected file is detected setting is set to Disinfect, in the right part of the workspace in the If disinfection fails drop-down list select one of the following actions to take on infected messages that cannot be disinfected:
- Delete attachment.
- Delete message
- Reject
The Delete attachment action is selected by default.
- If you selected one of the actions Disinfect, Delete attachment or Delete message, you can configure copies of messages to be automatically saved in Backup before those messages are processed. To do so, select the check box next to the Place copy in Backup setting name.
By default, before performing the Disinfect, Delete attachment and Delete message actions, the application places a copy of messages in Backup.
- In the If scan errors detected drop-down list, select one of the following actions to take on messages that returned errors during scanning:
- Delete attachment.
- Delete message
- Reject
- Skip
The Skip action is selected by default.
- If you selected one of the actions Delete attachment or Delete message] you can configure copies of messages to be automatically saved in Backup before those messages are processed. To do so, select the check box next to the Place copy in Backup setting name.
By default, before performing the Delete attachment and Delete message the application places a copy of messages in Backup.
- In the If encrypted object is detected drop-down list, select one of the following actions to take on messages containing encrypted objects:
- Delete attachment.
- Delete message
- Reject
- Skip
The Skip action is selected by default.
- If you selected one of the actions Delete attachment or Delete message] you can configure copies of messages to be automatically saved in Backup before those messages are processed. To do so, select the check box next to the Place copy in Backup setting name.
By default, before performing the Delete attachment and Delete message the application places a copy of messages in Backup.
- Select the Process attachments with macros check box if you want the application to process attachments with macros.
- In the If a macro is detected drop-down list, select one of the following actions to take on messages containing macros in an attachment:
- Delete attachment.
- Delete message
- Reject
- Skip
The Delete attachment action is selected by default.
- If you selected one of the actions Delete attachment or Delete message] you can configure copies of messages to be automatically saved in Backup before those messages are processed. To do so, select the check box next to the Place copy in Backup setting name.
By default, before performing the Delete attachment and Delete message actions, the application places a copy of messages in Backup.
- Click the Apply button in the lower part of the workspace.
In order for the settings you have configured to be used during operation of Kaspersky Secure Mail Gateway, make sure that Anti-Virus scanning of messages is enabled for the rule and the rule for which you have configured settings is enabled.
Configuring tags added to message subjects after Anti-Virus scanning
To configure tags that Kaspersky Secure Mail Gateway adds to the message subject after virus scanning:
- In the main window of the application web interface, open the management console tree and select the Rules section.
- In the list of rules, click the name of the rule to open the rule for which you want to configure tags added to message subjects after virus scanning.
- Select the Anti-Virus section.
- Flip on the toggle switch next to the name of the Anti-Virus settings group if it is off.
- Add a tag to the Subject field of infected messages. To do so, perform the following:
- In the If an infected file is detected settings group, click the link to the right of the Add the following text to the subject of an infected email message setting name to open the Tag for messages that contain malicious objects window.
- In the field under the name of the window, enter the text that you want to add at the beginning of the subject of infected messages. For example, you can add the Infected tag.
- Click the OK button.
The Tag for messages that contain malicious objects window closes.
- Add a tag to the Subject field of disinfected messages. To do so, perform the following:
- In the If an infected file is detected settings group, click the link to the right of the Add the following text to the subject of a disinfected email message setting name to open the Tag for messages that contain disinfected objects window.
- In the field under the name of the window, enter the text that you want to add at the beginning of the subject of disinfected messages. For example, you can add the Cured tag.
- Click the OK button.
The Tag for messages that contain disinfected objects window closes.
- Add a tag to the Subject field of messages with objects found to contain errors during scanning. To do so, perform the following:
- In the If scan errors detectedsettings group, click the link to the right of the Add the following text to subject of email message setting name to open the Tag for messages with objects that cause scan errors window.
- In the field under the name of the window, enter the text that you want to add at the beginning of the subject of messages that returned scan errors. For example, you can add the Corrupted tag.
- Click the OK button.
The Tag for messages with objects that cause scan errors window closes.
- Add a tag to the Subject field of messages that contain encrypted objects. To do so, perform the following:
- In the If encrypted object is detected settings group, click the link to the right of the Add the following text to subject of email message setting name to open the Tag for messages that contain encrypted objects window.
- In the field under the name of the window, enter the text that you want to add at the beginning of the subject of messages containing encrypted objects. For example, you can add the Encrypted tag.
- Click the OK button.
The Tag for messages that contain encrypted objects window closes.
- Add a label to the Subject field of messages that contain macros in an attachment. To do so, perform the following:
- In the If a macro is detected settings group, click the link to the right of the Add the following text to subject of email message setting name to open the Tag for messages with a macro in the attachment window.
- In the field under the name of the window, enter the text that you want to add at the beginning of the subject of messages containing macros in an attachment. For example, you can add the Attachments with Macros tag.
- Click the OK button.
The Tag for messages with a macro in the attachment window closes.
- Click the Apply button in the lower part of the workspace.
In order for the settings you have configured to be used during operation of Kaspersky Secure Mail Gateway, make sure that Anti-Virus scanning of messages is enabled for the rule and the rule for which you have configured settings is enabled.
Configuring Anti-Virus scan restrictions and exclusions
To configure restrictions and exclusions during virus scanning for a rule:
- In the main window of the application web interface, open the management console tree and select the Rules section.
- In the list of rules, click the link with the name of the rule to open the rule for which you want to configure restrictions and exclusions from virus scanning of messages.
- Select the Anti-Virus section.
- Flip on the toggle switch next to the name of the Anti-Virus settings group if it is off.
- If you want to exclude archives from virus scanning, in the Exclusions from scanning settings group select the Do not scan archives check box.
- To exclude message attachments of a certain size from virus scanning, do the following in the Exclusions from scanning settings group:
- Click the link to the right of the Do not scan objects larger than setting name to open the Attachment size scan limit window.
- In the field under the window name, enter the maximum size of objects to be scanned in the range from 0 KB to 1048576 KB (1 GB).
If the value is set to 0 KB, no restrictions apply to the size of objects.
- Click the OK button.
The Attachment size scan limit window closes.
- To exclude message attachments with certain names from virus scanning, do the following in the Exclusions from scanning settings group:
- Click the link to the right of the Do not scan attachments by name masks setting name to open the Banned names window.
- In the field under the window name, enter the masks of names of attachments that you want to exclude from virus scanning.
Masks can contain any symbols. Separate masks with the ";" symbol.
- Click the OK button.
The Banned names window closes.
- If you want to exclude message attachments of a certain format from virus scans, do the following in the Exclusions from scanning settings group:
- Click the link to the right of the Do not scan attachments by file types setting name to open the Banned attachment types window.
- Select check boxes next to the formats of attachments that you want to exclude from virus scanning.
- Click the Close button.
The Banned attachment types window closes.
- Click the Apply button in the lower part of the workspace.
In order for the settings you have configured to be used during operation of Kaspersky Secure Mail Gateway, make sure that Anti-Virus scanning of messages is enabled for the rule and the rule for which you have configured settings is enabled.
Anti-Spam protection
Kaspersky Secure Mail Gateway filters messages passing through the mail server to remove unsolicited mail (spam).
Messages are scanned for spam by the Anti-Spam engine. Anti-Spam engine scans each message for signs of spam. To do so, the Anti-Spam module first scans message attributes such as the addresses of the sender and recipient, message size, and headers (including the From and To headers). Second, Anti-Spam engine analyzes the message content (including the Subject header) and attached files. Anti-Spam engine is enabled by default. If required, you can disable the Anti-Spam engine or disable Anti-Spam scanning for any rule. You can also limit the size of messages to be scanned for spam.
Depending on the sensitivity level, the application assigns messages in which spam or probable spam has been detected the specific statuses in accordance with the spam rating calculated by Anti-Spam. Spam rating is a whole number from 0 to 100 that reflects the number of times Anti-Spam engine was actuated in processing the message. The application also takes into account the responses from the DNSBL, SURBL and UDS servers, SPF technology, and results of reputation filtering to assign the spam rating to messages.
Reputation filtering is a cloud service that uses a technology that determines the reputation of messages. Information about new kinds of spam appears in the cloud service sooner than in Anti-Spam module databases, making it possible to improve the speed and accuracy of spam detection.
Depending on the status assigned, the application performs actions in accordance with the message processing rule settings. You can select actions to be performed by the application on messages with a certain status and configure tags to be added to messages based on the Anti-Spam scanning result. The default action performed on messages is Skip.
Anti-Spam functionality can be configured by editing the settings file for the Anti-Spam engine. In the settings file, you can change, for example, statuses of Anti-Spam scanning of messages or the level of detail of email message information recorded in the Kaspersky Secure Mail Gateway event log.
The settings file of the Anti-Spam engine can be accessed from the Kaspersky Secure Mail Gateway Management Console in Technical Support Mode with super-user account privileges.
About Anti-Spam message scan status labels
Based on the results of scanning for spam, the Anti-Spam engine assigns one of the following spam scan statuses to messages:
- Clean (Not Spam)—Message contains no spam.
- Spam—Application unambiguously recognizes the message as spam.
- Probable Spam—Message may contain spam.
- Blacklisted—Sender's email address is on the global or custom black list of addresses, or the host IP address or DNS name are on the DNSBL black list.
- Massmail—Message belongs to a mass mailing campaign.
- Scan Error—Message scanning returned an error.
Enabling and disabling Anti-Spam protection of messages
To enable or disable Anti-Spam protection of messages:
- In the main window of the application web interface, open the management console tree and select the Settings section and Protection subsection.
- In the Anti-Spam section, do one of the following:
- Flip on the toggle switch next to the name of the Anti-Spam settings group to enable Anti-Spam protection of messages.
- Flip off the toggle switch next to the name of the Anti-Spam settings group to disable Anti-Spam protection of messages.
Enabling and disabling Anti-Spam scanning of messages for a rule
You can enable or disable spam scanning of messages for one or several rules. Spam scanning of messages is enabled by default.
Before enabling or disabling Anti-Spam scanning of messages for a rule, make sure that Anti-Spam engine of Kaspersky Secure Mail Gateway is enabled.
To enable or disable spam scanning of messages for a rule:
- In the main window of the application web interface, open the management console tree and select the Rules section.
- In the list of rules, click the name of the rule to open the rule for which you want to enable or disable spam scanning of messages.
- Select the Anti-Spam section.
- Do one of the following:
- Flip on the toggle switch next to the name of the Anti-Spam settings group to enable spam scanning of messages for a rule.
- Flip off the toggle switch next to the name of the Anti-Spam settings group to disable Anti-Spam scanning of messages for a rule.
- Click the Apply button in the lower part of the workspace.
Configuring Anti-Spam engine settings
To configure the Anti-Spam engine settings:
- In the main window of the application web interface, open the management console tree and select the Settings section and Protection subsection.
- In the Anti-Spam section, click any of the Use KSN, Use enforced Anti-Spam Updates Service, Use reputation filtering or Maximum scanning time links to open the Anti-Spam settings window.
- In the External services settings group, select one of the following options in the drop-down list Use KSN:
- Yes, if you want to use KSN.
- No, if you do not want to use KSN.
- In the External services settings group, select one of the following options in the drop-down list Use enforced Anti-Spam Updates Service:
- Yes, if you want to use enforced Anti-Spam Updates Service.
- No, if you do not want to use enforced Anti-Spam Updates Service.
- In the External services settings group, select one of the following options in the drop-down list Use reputation filtering:
- Yes, if you want to use reputation filtering.
- No, if you do not want to use reputation filtering.
- In the Performance settings group, in the Maximum scanning time field specify the maximum Anti-Spam scan time in seconds.
If Anti-Spam scanning of a message does not finish within the time limit you specified, Kaspersky Secure Mail Gateway:
- Stops scanning the message (Skip action).
- Assigns Error (Scan error) status to the message.
- Adds the
as-status="Error"label to the message subject. - Delivers the message to the recipient.
- Adds the following entry to the /var/log/maillog event log:
<scan time and date> <Kaspersky Secure Mail Gateway hostname>: not clean: message-id=<message ID>: relay-ip=<IP address of the computer of the message recipient>: action="Skipped": rules=<rule ID>: size=<message size>: mail-from=<email address of the message sender>: rcpt-to=<email address of the message sender>: av-status="Clean", ap-status="Error", as-status="Error", ma-status="NotScanned, disabled by settings", cf-status="NotScanned, disabled by settings">
- Click the Apply button.
Setting default values for Anti-Spam engine settings
To set default values for Anti-Spam engine settings:
- In the main window of the application web interface, open the management console tree and select the Settings section and Protection subsection.
- In the Anti-Spam section, click any of the Use KSN, Use enforced Anti-Spam Updates Service, Use reputation filtering or Maximum scanning time links to open the Anti-Spam settings window.
- In the lower part of the Anti-Spam settings window, click the Set default values link.
- Click the Apply button.
Configuring the custom DNSBL list for the Anti-Spam engine
You can create a custom list of DNSBL servers to improve the accuracy of spam detection. DNSBL servers stores lists of IP addresses that were previously detected as sources of spam and to which the Anti-Spam module assigns a spam rating and one of the Anti-Spam message scan status labels.
To create the custom DNSBL list of the Anti-Spam engine:
- In the main window of the application web interface, open the management console tree and select the Settings section and Protection subsection.
- In the Anti-Spam section, click the Custom DNSBL list link to open the Custom DNSBL list window.
- In the field under the window name, type DNS names or IP addresses into the DNSBL list.
You can use only these symbols: a–z, A–Z, 0–9, "-" and ".", and the "-" symbol must not come last. For example, you can add the sender's DNS name dns-bl.example.com or the sender's IP address 10.0.0.1 to the list.
Separate the addresses with the ";" symbol.
- Click the Apply button.
To view the custom DNSBL list of the Anti-Spam engine:
- In the main window of the application web interface, open the management console tree and select the Settings section and Protection subsection.
- In the Anti-Spam section, click the Custom DNSBL list link to open the Custom DNSBL list window.
- Click the Apply or Cancel button after you finish managing the list.
The Custom DNSBL list window closes.
To remove an entry from the custom DNSBL list of the Anti-Spam engine:
- In the main window of the application web interface, open the management console tree and select the Settings section and Protection subsection.
- In the Anti-Spam section, click the Custom DNSBL list link to open the Custom DNSBL list window.
- In the field under the window name, select one or several accounts that you want to delete.
- Press the Delete key.
- Click the Apply button.
Configuring the custom SURBL list for the Anti-Spam engine
You can create a custom list of SURBL servers to improve the accuracy of spam detection. SURBL servers store lists of web addresses that were previously detected in the subject or body of messages recognized as spam and to which the Anti-Spam module assigns a spam rating and one of the Anti-Spam message scan status labels.
To create the custom SURBL list of the Anti-Spam engine:
- In the main window of the application web interface, open the management console tree and select the Settings section and Protection subsection.
- In the Anti-Spam section, click the Custom SURBL list link to open the Custom SURBL list window.
- In the field under the window name, type DNS names or IP addresses into the SURBL list.
You can use only these symbols: a–z, A–Z, 0–9, "-" and ".", and the "-" symbol must not come last. For example, you can add the DNS name dns-bl.example.com or the IP address 10.0.0.1 to the list.
Separate the addresses with the ";" symbol.
- Click the Apply button.
To view the custom SURBL list of the Anti-Spam engine:
- In the main window of the application web interface, open the management console tree and select the Settings section and Protection subsection.
- In the Anti-Spam section, click the Custom SURBL list link to open the Custom SURBL list window.
- Click the Apply or Cancel button after you finish managing the list.
The Custom SURBL list window closes.
To remove an entry from the custom SURBL list of the Anti-Spam engine:
- In the main window of the application web interface, open the management console tree and select the Settings section and Protection subsection.
- In the Anti-Spam section, click the Custom SURBL list link to open the Custom SURBL list window.
- In the field under the window name, select one or several accounts that you want to delete.
- Press the Delete key.
- Click the Apply button.
Configuring Anti-Spam scan settings for a rule
You can configure the settings of the Anti-Spam engine for one or several rules.
To configure the settings of the Anti-Spam engine for a rule:
- In the main window of the application web interface, open the management console tree and select the Rules section.
- In the list of rules, click the link with the name of the rule to open the rule for which you want to configure the Anti-Spam engine settings.
- Select the Anti-Spam section.
- Flip on the toggle switch next to the name of the Anti-Spam settings group if it is off.
- In the General settings section, select check boxes next to the names of the general settings that you want to enable:
- Use graphical image processing technologies, if you want to use GSG technology that identifies images containing text in order to determine whether such text is spam. The text is recognized regardless of whether it has been modified, rotated in the image, hidden behind "noise" or otherwise modified to conceal the purpose of the image.
- Scan RTF attachments, if you want the Anti-Spam engine to scan all message attachments in RTF format.
- In the Scan using external services settings group, select check boxes next to the names of settings that control usage of external services you want to enable:
- Use custom DNSBL list, if you want the Anti-Spam module to check senders' addresses on the DNSBL servers specified in the custom DNSBL list.
You can view the custom DNSBL list by clicking the custom link in the name of the Use custom DNSBL list setting.
- Use custom SURBL list, if you want the Anti-Spam module to check web addresses from the subject and body of messages on the SURBL servers specified in the custom SURBL list.
You can view the custom SURBL list by clicking the custom link in the name of the Use custom SURBL list setting.
- Use custom DNSBL list, if you want the Anti-Spam module to check senders' addresses on the DNSBL servers specified in the custom DNSBL list.
- In the Raise spam rating if settings group, select check boxes next to the names of languages and fonts that, when used in the message, increase the spam rating of the message:
- Message written in Chinese, if you want the Anti-Spam engine to increase the spam rating of messages written in Chinese.
- Message written in Japanese, if you want the Anti-Spam engine to increase the spam rating of messages written in Japanese.
- Message written in Korean, if you want the Anti-Spam engine to increase the spam rating of messages written in Korean.
- Message written in Thai, if you want the Anti-Spam engine to increase the spam rating of messages written in Thai.
- Message uses Cyrillic script, if you want the Anti-Spam engine to increase the spam rating of messages written using the Cyrillic script.
- Click the Apply button in the lower part of the workspace.
In order for the settings you have configured to be used during operation of Kaspersky Secure Mail Gateway, make sure that Anti-Spam scanning of messages is enabled for the rule and the rule for which you have configured settings is enabled.
Configuring Anti-Spam scan actions on messages
To configure the actions to be performed by Kaspersky Secure Mail Gateway on messages during spam scanning:
- In the main window of the application web interface, open the management console tree and select the Rules section.
- In the list of rules, click the link with the name of the rule to open the rule for which you want to configure actions on messages during spam scanning.
- Select the Anti-Spam section.
- Flip on the toggle switch next to the name of the Anti-Spam settings group if it is off.
- In the If spam is detected drop-down list, select one of the following actions to take on messages containing spam:
- Delete message
- Reject
- Skip
- If you want to configure the application to automatically save copies of messages in Backup before they are processed, select the check box next to the name of the Place copy in Backup setting.
By default, the application places a copy of messages in Backup before performing the Delete message action.
- In the If probable spam is detected drop-down list, select one of the following actions to take on messages containing probable spam:
- Delete message
- Reject
- Skip
- If you want to configure the application to automatically save copies of messages in Backup before they are processed, select the check box next to the name of the Place copy in Backup setting.
By default, the application places a copy of messages in Backup before performing the Delete message action.
- In the If mail sender's address is blacklisted by DNSBL drop-down list, select one of the following actions to take on messages whose sender has been detected in the DNSBL list and that has been assigned Blacklisted status:
- Delete message
- Reject
- Skip
- If you want to configure the application to automatically save copies of messages in Backup before they are processed, select the check box next to the name of the Place copy in Backup setting.
By default, the application places a copy of messages in Backup before performing the Delete message action.
- In the If mass mailing is detected drop-down list, select one of the following actions to take on messages found to contain mass mailing:
- Delete message
- Reject
- Skip
- If you want to configure the application to automatically save copies of messages in Backup before they are processed, select the check box next to the name of the Place copy in Backup setting.
By default, the application places a copy of messages in Backup before performing the Delete message action.
- Click the Apply button in the lower part of the workspace.
The Skip action is selected by default for all messages.
In order for the settings you have configured to be used during operation of Kaspersky Secure Mail Gateway, make sure that Anti-Spam scanning of messages is enabled for the rule and the rule for which you have configured settings is enabled.
Configuring tags added to message subjects after spam scanning
To configure tags that Kaspersky Secure Mail Gateway to the message subject after Anti-Spam scanning:
- In the main window of the application web interface, open the management console tree and select the Rules section.
- In the list of rules, click the name of the rule to open the rule for which you want to configure tags added to message subjects after Anti-Spam scanning.
- Select the Anti-Spam section.
- Flip on the toggle switch next to the name of the Anti-Spam settings group if it is off.
- Add a tag to the Subject field of messages that contain spam. To do so, perform the following:
- In the If spam is detected settings group, click the link to the right of the Add the following text to the subject of an email message setting name to open the Tag for spam messages window.
- In the field under the name of the window, enter the text that you want to add at the beginning of the subject of messages containing spam. For example, you can add the Spam tag.
- Click the OK button.
The Tag for spam messages window closes.
- Add a tag to the Subject field of messages that contain probable spam. To do so, perform the following:
- In the If probable spam is detected settings group, click the link to the right of the Add the following text to the subject of an email message setting name to open the Tag for probable spam messages window.
- In the field under the name of the window, enter the text that you want to add at the beginning of the subject of probable spam messages. For example, you can add the Probable spam tag.
- Click the OK button.
The Tag for probable spam messages window closes.
- Add a tag to the Subject field for messages whose sender has been detected in the DNSBL list and assigned Blacklisted status. To do so, perform the following:
- In the If mail sender's address is blacklisted by DNSBL settings group, click the link to the right of the Add the following text to the subject of an email message setting name to open the Tag for messages blacklisted by DNSBL window.
- In the field under the name of the window, enter the text that you want to add at the beginning of the subject of messages from blacklisted senders. For example, you can add the Blacklisted tag.
- Click the OK button.
The Tag for messages blacklisted by DNSBL window closes.
- Add a tag to the Subject field of messages that contain mass mailing. To do so, perform the following:
- In the If mass mailing is detected settings group, click the link to the right of the Add the following text to the subject of an email message setting name to open the Tag for mass mailing window.
- In the field under the name of the window, enter the text that you want to add at the beginning of the subject of messages found to contain mass mailing. For example, you can add the MASSMAIL tag.
- Click the OK button.
The Tag for mass mailing window closes.
- Click the Apply button in the lower part of the workspace.
In order for the settings you have configured to be used during operation of Kaspersky Secure Mail Gateway, make sure that Anti-Spam scanning of messages is enabled for the rule and the rule for which you have configured settings is enabled.
Anti-Spam Quarantine
Email messages whose scan results from the Anti-Spam module are not yet final are temporarily placed in Anti-Spam Quarantine. You can configure Anti-Spam Quarantine settings.
Enabling and disabling the use of Anti-Spam Quarantine
To enable or disable the use of Anti-Spam Quarantine:
- In the main window of the application web interface, open the management console tree and select the Settings section and Protection subsection.
- In the Anti-Spam Quarantine section, do one of the following:
- Flip on the toggle switch next to the name of the Anti-Spam Quarantine settings group to enable the use of SNMP.
- Flip off the toggle switch next to the name of the Anti-Spam Quarantine settings group to disable the use of SNMP.
Configuring Anti-Spam Quarantine settings.
Email messages whose scan results from the Anti-Spam module are not yet final are temporarily placed in Anti-Spam Quarantine. You can configure Anti-Spam Quarantine settings.
To configure Anti-Spam Quarantine settings:
- In the main window of the application web interface, open the management console tree and select the Settings section and Protection subsection.
- In the Anti-Spam Quarantine section, open the Anti-Spam Quarantine settings window by clicking any of the following links: Maximim Quarantine duration, Maximum Anti-Spam Quarantine size or Maximum number of messages in Anti-Spam Quarantine.
- In the Maximum Quarantine duration field, specify the maximum time to store a message in Anti-Spam Quarantine before the message will be delivered to the recipient.
- In the Maximum Anti-Spam Quarantine size field, specify the maximum Anti-Spam Quarantine size. When this size of the quarantined messages is exceeded, messages will not be placed in Quarantine.
- In the Maximum number of messages in Anti-Spam Quarantine field, specify the maximum number of messages in Anti-Spam Quarantine. When this number is exceeded, messages will not be placed in Quarantine.
- Click the Apply button.
Setting default values for Anti-Spam Quarantine
To set default values for Anti-Spam engine settings:
- In the main window of the application web interface, open the management console tree and select the Settings section and Protection subsection.
- In the Anti-Spam Quarantine section, open the Anti-Spam Quarantine settings window by clicking any of the following links: Maximim Quarantine duration, Maximum Anti-Spam Quarantine size or Maximum number of messages in Anti-Spam Quarantine.
- In the lower part of the Anti-Spam Quarantine settings window, click the Set default values link.
- Click the Apply button.
Anti-Phishing protection
Kaspersky Secure Mail Gateway filters out phishing threats and links to websites with malware from messages passing through the mail server. Phishing applies to messages with phishing web addresses, containing images or text that could trick users into disclosing confidential data to fraudsters.
The Anti-Phishing engine scans messages for phishing threats and links to websites with malware. The Anti-Phishing engine analyzes the message content (including the Subject header) and attached files.
Based on the Anti-Phishing scan results, the application assigns the message one of the Anti-Phishing scan statuses and adds a status tag at the beginning of the message subject (Subject field). You can configure the message status tag in the rule settings.
Depending on the status assigned, the application performs actions in accordance with the message processing rule settings. You can specify actions to be performed by the application on messages with a certain status. The default action taken by the application on messages is Skip, with messages delivered to users unchanged.
The Anti-Phishing engine is enabled by default. If required, you can disable the Anti-Phishing engine or disable Anti-Phishing scanning of messages for any rule.
About Anti-Phishing message scan status labels
Based on the Anti-Phishing scan results, the Anti-Phishing engine assigns one of the following status labels to the message:
- Clean (Not Phishing)—Message does not contain phishing web addresses, images or text that could trick users into disclosing confidential data to fraudsters, or links to websites with malware.
- Phishing—Application has found the message to contain images or text that could trick users into disclosing confidential data to fraudsters.
- Malicious link – the application has found the message to contain links to websites with malware.
- Scan Error – message scanning returned an error.
Enabling and disabling Anti-Phishing protection of messages
To enable or disable Anti-Phishing protection of messages:
- In the main window of the application web interface, open the management console tree and select the Settings section and Protection subsection.
- In the Anti-Phishing section, do one of the following:
- Flip on the toggle switch next to the name of the Anti-Phishing settings group to enable Anti-Phishing protection of messages.
- Flip off the toggle switch next to the name of the Anti-Phishing settings group to disable Anti-Phishing protection of messages.
Enabling and disabling Anti-Phishing scanning of messages for a rule
You can enable or disable Anti-Phishing scanning of messages for one or several rules. Anti-Phishing scanning of messages is enabled by default.
Before enabling or disabling Anti-Phishing scanning of messages for a rule, make sure that Anti-Phishing engine of Kaspersky Secure Mail Gateway is enabled.
To enable or disable Anti-Phishing scanning of messages for a rule:
- In the main window of the application web interface, open the management console tree and select the Rules section.
- In the list of rules, click the name of the rule to open the rule for which you want to enable or disable Anti-Phishing scanning of messages.
- Select the Anti-Phishing section.
- Do one of the following:
- Flip on the toggle switch next to the name of the Anti-Phishing settings group to enable Anti-Phishing scanning of messages for a rule.
- Flip off the toggle switch next to the name of the Anti-Phishing settings group to disable Anti-Phishing scanning of messages for a rule.
- Click the Apply button in the lower part of the workspace.
Configuring Anti-Phishing engine settings
To configure the Anti-Phishing engine settings:
- In the main window of the application web interface, open the management console tree and select the Settings section and Protection subsection.
- In the Anti-Phishing section, click any link to open the Anti-Phishing settings window.
- Select one of the following options in the Use KSN drop-down list:
- Yes, if you want to use KSN.
- No, if you do not want to use KSN.
- Select one of the following options in the Use heuristic Anti-Phishing drop-down list:
- Yes, if you want to use Heuristic Anti-Phishing.
- No, if you do not want to use Heuristic Anti-Phishing.
- In the Maximum scanning time field, specify the maximum duration of Anti-Phishing scanning of a message in seconds.
If Anti-Phishing scanning of a message does not finish within the time limit you specified, Kaspersky Secure Mail Gateway:
- Stops scanning the message (Skip action).
- Assigns Error (Scan error) status to the message.
- Adds the
ap-status="Error"label to the message subject. - Delivers the message to the recipient.
- Adds the following entry to the /var/log/maillog event log:
<scan time and date> <Kaspersky Secure Mail Gateway hostname>: not clean: message-id=<message ID>: relay-ip=<IP address of the computer of the message recipient>: action="Skipped": rules=<rule ID>: size=<message size>: mail-from=<email address of the message sender>: rcpt-to=<email address of the message sender>: av-status="Clean", ap-status="Error", as-status="Error", ma-status="NotScanned, disabled by settings", cf-status="NotScanned, disabled by settings">
- Click the Apply button.
Setting default values for Anti-Phishing engine settings
To set default values for Anti-Phishing engine settings:
- In the main window of the application web interface, open the management console tree and select the Settings section and Protection subsection.
- In the Anti-Phishing section, click any link to open the Anti-Phishing settings window.
- In the lower part of the Anti-Phishing settings window, click the Set default values link.
- Click the Apply button.
Configuring Anti-Phishing scan actions on messages
To configure the actions to be performed by Kaspersky Secure Mail Gateway on messages during Anti-Phishing scanning:
- In the main window of the application web interface, open the management console tree and select the Rules section.
- In the list of rules, click the link with the name of the rule to open the rule for which you want to configure actions on messages during Anti-Phishing scanning.
- Select the Anti-Phishing section.
- Flip on the toggle switch next to the name of the Anti-Phishing settings group if it is off.
- In the If phishing threats or malicious websites are detected drop-down list, select one of the following actions to be performed on messages with phishing threats and messages containing links to web resources with malware:
- Delete message
- Reject
- Skip
The Skip action is selected by default.
- Click the Apply button in the lower part of the workspace.
In order for the settings you have configured to be used during operation of Kaspersky Secure Mail Gateway, make sure that Anti-Phishing scanning of messages is enabled for the rule and the rule for which you have configured settings is enabled.
Configuring tags added to message subjects after Anti-Phishing scanning
To configure tags that Kaspersky Secure Mail Gateway adds to the message subject after Anti-Phishing scanning:
- In the main window of the application web interface, open the management console tree and select the Rules section.
- In the list of rules, click the name of the rule to open the rule for which you want to configure tags added to message subjects after Anti-Phishing scanning.
- Select the Anti-Phishing section.
- Flip on the toggle switch next to the name of the Anti-Phishing settings group if it is off.
- Add a tag to the Subject field of messages that contain phishing threats. To do so, perform the following:
- In the If phishing threats or malicious websites are detected settings group, click the link to the right of the Add the following text to the subject of a phishing message setting name to open the Tag for messages with phishing threats window.
- In the field under the name of the window, enter the text that you want to add at the beginning of the subject of messages containing phishing threats. For example, you can add the Phishing tag.
- Click the OK button.
The Tag for messages with phishing threats window closes.
- Add a tag to the Subject field of messages containing links to web resources with malware. To do so, perform the following:
- In the If phishing threats or malicious websites are detected settings group, click the link to the right of the Add the following text to the subject of a message containing the URL of a malicious website setting name to open the Tag for messages found to contain URLs of malicious websites window.
- In the field under the name of the window, enter the text that you want to add at the beginning of the subject of messages containing links to web resources with malware. For example, you can add the Malicious Link tag.
- Click the OK button.
The Tag for messages found to contain URLs of malicious websites window closes.
- Click the Apply button in the lower part of the workspace.
In order for the settings you have configured to be used during operation of Kaspersky Secure Mail Gateway, make sure that Anti-Phishing scanning of messages is enabled for the rule and the rule for which you have configured settings is enabled.
Content filtering of messages
Kaspersky Secure Mail Gateway can perform content filtering of messages that pass through the mail server. You can restrict transmission of messages with specific parameters by the mail server.
Content filtering of messages is performed according to one of the following parameters:
- Message size
- Masks of attachment names
- Attachment formats
As a result of content filtering, Scan Logic assigns messages one of the following statuses:
Depending on the status assigned, the application performs actions in accordance with the message processing rule settings. You can specify actions to be performed by the application on messages with a certain status. The default action performed on messages is Reject.
About message content filtering status labels
As a result of content filtering, the Scan Logic message scanning control module assigns one of the following content filtering statuses to messages:
- Clean—Message has not been found to contain any violations of the restrictions specified in content filtering settings.
- Banned Attachment Name—Message contains an attachment with a banned name.
- Banned Attachment Type—Message contains an attachment having a banned file format.
- Message Size Exceeded—Message exceeds the maximum allowed size.
Enabling and disabling content filtering of messages
To enable or disable content filtering of messages:
- In the main window of the application web interface, open the management console tree and select the Settings section and Protection subsection.
- In the Content Filtering section, do one of the following:
- Flip on the toggle switch next to the name of the Content Filtering section to enable content filtering of messages.
- Flip off the toggle switch next to the name of the Content Filtering section to disable content filtering of messages.
Setting the maximum archive nesting level for content filtering
To set the maximum archive nesting level for content filtering:
- In the main window of the application web interface, open the management console tree and select the Settings section and Protection subsection.
- In the Content Filtering section, click the Maximum level for scanning link to open the Content Filtering settings window.
- In the Maximum scanning level field, specify the maximum archive nesting level for content filtering.
- Click the Apply button.
Setting default values for Content Filtering settings
To set default values for Content Filtering settings:
- In the main window of the application web interface, open the management console tree and select the Settings section and Protection subsection.
- In the Content Filtering section, click the Maximum level for scanning link to open the Content Filtering settings window.
- In the lower part of the Anti-Phishing settings window, click the Set default values link.
- Click the Apply button.
Enabling and disabling content filtering of messages for a rule
You can enable or disable content filtering of messages for one or several rules. By default, content filtering of messages is disabled.
Before enabling or disabling content filtering of messages for a rule, make sure that content filtering in Kaspersky Secure Mail Gateway is enabled.
To enable or disable content filtering of messages for a rule:
- In the main window of the application web interface, open the management console tree and select the Rules section.
- In the list of rules, click the name of the rule to open the rule for which you want to enable or disable content filtering of messages.
- Select the Content Filtering section.
- Do one of the following:
- Flip on the toggle switch next to the name of the Content Filtering settings group to enable content filtering of messages for a rule.
- Flip off the toggle switch next to the name of the Content Filtering settings group to disable content filtering of messages for a rule.
- Click the Apply button in the lower part of the workspace.
Configuring settings of message content filtering for a rule
To configure message content filtering settings for a rule:
- In the main window of the application web interface, open the management console tree and select the Rules section.
- In the rules list, click the name of the rule to open the rule for which you want to configure the message content filtering settings.
- Select the Content Filtering section.
- Flip on the toggle switch next to the name of the Content Filtering settings group if it is off.
- To restrict transmission of messages containing attachments of a certain size:
- In the If the allowed message size is exceeded settings group, click the link to the right of the Message size limit setting name to open the Attachment size scan limit window.
- In the field under the window name, enter the maximum size of objects in the range from 0 KB to 1048576 KB (1 GB).
If the value is set to 0 KB, no restrictions apply to the size of objects.
- Click the OK button.
The Attachment size scan limit window closes.
- To restrict transmission of messages containing attachments of a certain format:
- In the If attachment type is banned settings group, click the link to the right of the Banned formats of attachments setting name to open the Banned attachment types window.
- Select check boxes next to the formats of attachments the transmission of which you want to restrict.
You can restrict transmission of messages with the following attachments:
- Executable files (e.g., EXE; DLL; OCX)
- Document files (e.g., DOC; XLS; PDF; PPT)
- Multimedia files (e.g., AVI; WMV; MP3)
- Graphic files (e.g., JPG; BMP; WMF)
- Archives (e.g., ZIP; RAR; TGZ)
- Databases (e.g., ACCDB; ACCDC; MDB)
- Other files (e.g., TXT; CHM; HTM)
- Click the Close button.
The Banned attachment types window closes.
- To restrict transmission of messages containing attachments with specific names:
- In the If attachment name is banned settings group, click the link to the right of the Banned names of attachments setting name to open the Banned names window.
- In the field under the window name, enter the masks of names of attachments the transmission of which you want to restrict.
Masks can contain any symbols. Separate masks with the ";" symbol.
For example, you can enter the
*.exename mask to restrict transmission of messages that include attachments with the exe extension. - Click the OK button.
The Banned names window closes.
- Click the Apply button in the lower part of the workspace.
In order for the settings you have configured to be used during operation of Kaspersky Secure Mail Gateway, make sure that content filtering of messages is enabled for the rule and the rule for which you have configured settings is enabled.
Configuring actions to take on messages during content filtering
To configure the actions to be performed by Kaspersky Secure Mail Gateway on messages during content filtering:
- In the main window of the application web interface, open the management console tree and select the Rules section.
- In the list of rules, click the link with the name of the rule to open the rule for which you want to configure actions on messages during content filtering.
- Select the Content Filtering section.
- Flip on the toggle switch next to the name of the Content Filtering settings group if it is off.
- In the If the allowed message size is exceeded drop-down list, select one of the following actions to be performed on messages containing attachments whose size exceeds the limit:
- Delete message
- Reject
- Skip
- If you want to configure the application to automatically save copies of messages in Backup before they are processed, select the check box next to the name of the Place copy in Backup setting.
By default, the application places a copy of messages in Backup before performing the Delete message action.
- In the If attachment type is banned drop-down list, select one of the following actions to take on messages containing attachments in a forbidden format:
- Delete message
- Delete attachment.
- Reject
- Skip
- If you want to configure the application to automatically save copies of messages in Backup before they are processed, select the check box next to the name of the Place copy in Backup setting.
By default, before performing the Delete attachment and Delete message the application places a copy of messages in Backup.
- In the If attachment name is banned drop-down list, select one of the following actions to be taken on messages containing attachments with forbidden names:
- Delete message
- Delete attachment.
- Reject
- Skip
- If you want to configure the application to automatically save copies of messages in Backup before they are processed, select the check box next to the name of the Place copy in Backup setting.
By default, before performing the Delete attachment and Delete message the application places a copy of messages in Backup.
- If you want to enable content filtering for files within archives in message attachments, select the check box next to the name of the Check file formats and names in archive setting.
- Click the Apply button in the lower part of the workspace.
The Reject action is selected by default for all messages.
In order for the settings you have configured to be used during operation of Kaspersky Secure Mail Gateway, make sure that content filtering of messages is enabled for the rule and the rule for which you have configured settings is enabled.
Configuring tags added to message subjects based on content filtering results
To configure tags that Kaspersky Secure Mail Gateway adds to the message subject based on content filtering results:
- In the main window of the application web interface, open the management console tree and select the Rules section.
- In the list of rules, click the rule name to open the rule for which you want to configure tags added to message subjects based on content filtering results.
- Select the Content Filtering section.
- Flip on the toggle switch next to the name of the Content Filtering settings group if it is off.
- Add a tag to the Subject field of messages that exceed the maximum allowed size limit. To do so, perform the following:
- In the If the allowed message size is exceeded section, click the link to the right of the Add the following text to the subject of an email message setting name to open the Tag for messages of the size exceeding maximum window.
- In the field under the name of the window, enter the text that you want to add at the beginning of the subject of messages that exceed the maximum allowed size limit.
- Click the OK button.
The Tag for messages of the size exceeding maximum window closes.
- Add a tag to the Subject field of messages containing attachments of forbidden file formats. To do so, perform the following:
- In the If attachment type is banned section, click the link to the right of the Add the following text to the subject of an email message setting name to open the Tag for messages containg attachments of banned file types window.
- In the field under the name of the window, enter the text that you want to add at the beginning of the subject of messages containing attachments of banned file formats.
- Click the OK button.
The Tag for messages containg attachments of banned file types window closes.
- Add a tag to the Subject field of messages containing attachments with forbidden file names. To do so, perform the following:
- In the If attachment name is banned section, click the link to the right of the Add the following text to the subject of an email message setting name to open the Tag for messages containing attachments with banned file names window.
- In the field under the name of the window, enter the text that you want to add at the beginning of the subject of messages containing attachments with forbidden file names.
- Click the OK button.
The Tag for messages containing attachments with banned file names window closes.
- Click the Apply button in the lower part of the workspace.
In order for the settings you have configured to be used during operation of Kaspersky Secure Mail Gateway, make sure that content filtering of messages is enabled for the rule and the rule for which you have configured settings is enabled.
KATA protection and integration of Kaspersky Secure Mail Gateway with Kaspersky Anti Targeted Attack Platform
You can configure the integration of Kaspersky Secure Mail Gateway with Kaspersky Anti Targeted Attack Platform.
Kaspersky Anti Targeted Attack Platform (KATA) (hereinafter also referred to as "the program") is a solution designed for the protection of a corporate IT infrastructure and timely detection of threats such as zero-day attacks, targeted attacks, and complex targeted attacks known as advanced persistent threats (hereinafter also referred to as "APT").
After its integration, Kaspersky Secure Mail Gateway will be able to send email messages to Kaspersky Anti Targeted Attack Platform for scanning and receive the scan results. KATA scans messages for signs of targeted attacks and intrusions into the corporate IT infrastructure.
Based on the results of a KATA scan, Kaspersky Secure Mail Gateway can block individual messages.
Entering integration settings for Kaspersky Secure Mail Gateway
To enter the Kaspersky Secure Mail Gateway settings for its integration with Kaspersky Anti Targeted Attack Platform:
- In the main window of the web interface of Kaspersky Secure Mail Gateway, open the management console tree and select the Settings section and the Protection subsection.
- Select the KATA Protection section.
- Select the switch next to the name of the KATA Protection settings group.
- In the KATA Protection section, click any link to open the KATA Protection window.
- In the KATA Central Node IPv4-address field, enter the IP address of the Kaspersky Anti Targeted Attack Platform server with the Central Node component.
- In the KATA Central Node port field, enter the port used to connect to the Kaspersky Anti Targeted Attack Platform server with the Central Node component.
- In the KATA response timeout field, enter the maximum time to wait for the result of message scanning by Kaspersky Anti Targeted Attack Platform.
- In the KATA Quarantine maximum size field, enter the maximum size of the quarantined messages for Kaspersky Anti Targeted Attack Platform. When this size of the quarantined messages is exceeded, messages will not be placed in Quarantine.
- In the Maximum number of messages in KATA Quarantine field, enter the maximum number of quarantined messages for Kaspersky Anti Targeted Attack Platform. When this number is exceeded, messages will not be placed in Quarantine.
- If you want to set the default values for the KATA Central Node port, KATA response timeout, KATA Quarantine maximum size and Maximum number of messages in KATA Quarantine settings, click the Set default values link in the lower part of the KATA Protection window.
- Click the Apply button.
The KATA Protection window closes.
Kaspersky Secure Mail Gateway attempts to establish a connection with the Kaspersky Anti Targeted Attack Platform server that has the Central Node component.
Proceed to confirmation of Kaspersky Anti Targeted Attack Platform integration with Kaspersky Secure Mail Gateway.
Page top
Confirming integration for Kaspersky Anti Targeted Attack Platform
To confirm integration of Kaspersky Anti Targeted Attack Platform integration with Kaspersky Secure Mail Gateway:
- Log in to the management console of the Kaspersky Anti Targeted Attack Platform server with the Central Node component via the SSH protocol or through a terminal.
- In response to the system prompt, enter the administrator account name of the Kaspersky Anti Targeted Attack Platform server with the Central Node component and the administrator password.
The program administrator menu is displayed.
- In the application administrator menu, select Program settings.
- Press ENTER.
The Select action window is displayed.
- Select Configure KSMG Sensor connections.
- Press ENTER.
The Configure KSMG Sensor connections window is displayed.
- Select the line containing the IP address of the Kaspersky Secure Mail Gateway server. The line containing the unconfirmed connection is marked with an asterisk.
- Press ENTER.
This opens a window containing the fingerprints of public keys for the connection between Kaspersky Secure Mail Gateway and Kaspersky Anti Targeted Attack Platform.
- Make sure that the Kaspersky Secure Mail Gateway key matches the key fingerprint in the web interface of Kaspersky Secure Mail Gateway.
- Select Accept KSMG Sensor.
- Press ENTER.
You are returned to the Configure KSMG Sensor connections window. The line containing the IP address of the Kaspersky Secure Mail Gateway server will not be marked with an asterisk.
Integration of Kaspersky Secure Mail Gateway with Kaspersky Anti Targeted Attack Platform will be confirmed by Kaspersky Anti Targeted Attack Platform.
Page top
Checking the connection between Kaspersky Secure Mail Gateway and Kaspersky Anti Targeted Attack Platform
To check the connection between Kaspersky Secure Mail Gateway and Kaspersky Anti Targeted Attack Platform:
- In the main window of the web interface of Kaspersky Secure Mail Gateway, open the management console tree and select the Settings section and the Protection subsection.
- Select the KATA Protection section.
- Select the switch next to the name of the KATA Protection settings group.
- In the KATA Protection section, click the KATA connection state link to open the KATA connection state window.
The IP address of the Kaspersky Anti Targeted Attack Platform server with the Central Node component will be displayed next to the name of the KATA Central Node IPv4-address setting.
The status of the connection between Kaspersky Secure Mail Gateway and Kaspersky Anti Targeted Attack Platform is displayed next to the name of the Connection state setting.
The Kaspersky Secure Mail Gateway key fingerprint is displayed next to the name of the KSMG public key fingerprint setting.
The Kaspersky Anti Targeted Attack Platform key fingerprint is displayed next to the name of the KATA public key fingerprint setting.
If the KATA connection state window displays the key fingerprints of both servers and shows the Connected status for the connection between Kaspersky Secure Mail Gateway and Kaspersky Anti Targeted Attack Platform, this means that integration of Kaspersky Secure Mail Gateway with Kaspersky Anti Targeted Attack Platform has been correctly configured and a connection has been established between the servers.
Page top
Configuring the forwarding of Kaspersky Secure Mail Gateway messages to Kaspersky Anti Targeted Attack Platform for scanning
To configure the forwarding of email messages by Kaspersky Secure Mail Gateway to Kaspersky Anti Targeted Attack Platform for scanning:
- In the main window of the application web interface, open the management console tree and select the Rules section.
- In the list of rules, click the link containing the name of the rule for which you want to configure the forwarding of email messages by Kaspersky Secure Mail Gateway to Kaspersky Anti Targeted Attack Platform for scanning.
- Select the KATA protection section.
- Flip on the toggle switch next to the name of the KATA protection settings group if it is off.
- In the If KATA detected an event drop-down list, select one of the following actions to take on messages in which KATA detected events:
- Delete message
- Reject
- Skip
- Add a tag to the Subject field of messages in which KATA detected events. To do so, perform the following:
- In the KATA protection settings group, click the link to the right of the Add the following text to the subject of an email message setting name to open the Tag for messages with a KATA detect window.
- In the field under the name of the window, enter the text that you want to add at the beginning of the subject of messages in which KATA detected events. For example, you can add the KATA detect tag.
- Click the OK button.
The Tag for messages with a KATA detect window closes.
- Select the check box next to the name of the Place copy in Backup setting if you want the application to automatically save copies of messages in Backup before they are processed.
- Click the Apply button in the lower part of the workspace.
For the selected rule, you have configured the forwarding of email messages by Kaspersky Secure Mail Gateway to Kaspersky Anti Targeted Attack Platform for scanning.
Page top
Enabling and disabling KATA protection
To enable or disable KATA protection:
- In the main window of the web interface of Kaspersky Secure Mail Gateway, open the management console tree and select the Settings section and the Protection subsection.
- In the KATA Protection section, do one of the following:
- Flip off the toggle switch next to the name of the KATA Protection settings group to ensable Anti-Phishing protection of messages.
- Flip off the toggle switch next to the name of the KATA Protection settings group to disable Anti-Phishing protection of messages.
Configuring KATA protection settings
To configure KATA protection settings and Kaspersky Secure Mail Gateway settings for its integration with Kaspersky Anti Targeted Attack Platform:
- In the main window of the web interface of Kaspersky Secure Mail Gateway, open the management console tree and select the Settings section and the Protection subsection.
- Select the KATA Protection section.
- Select the switch next to the name of the KATA Protection settings group.
- In the KATA Protection section, click any link to open the KATA Protection window.
- In the KATA response timeout field, enter the maximum time to wait for the result of message scanning by Kaspersky Anti Targeted Attack Platform.
- In the KATA Quarantine maximum size field, enter the maximum size of the quarantined messages for Kaspersky Anti Targeted Attack Platform. When this size of the quarantined messages is exceeded, copies of messages will not be placed in Quarantine.
- In the Maximum number of messages in KATA Quarantine field, enter the maximum number of quarantined messages for Kaspersky Anti Targeted Attack Platform. When this number is exceeded, copies of messages will not be placed in Quarantine.
- Click the Apply button.
Setting default values for KATA protection settings
To set default values for Anti-Spam engine settings:
- In the main window of the application web interface, open the management console tree and select the Settings section and Protection subsection.
- In the KATA Protection section, click any link to open the KATA Protection window.
- In the lower part of the KATA Protection window, click the Set default values link.
- Click the Apply button.
Enabling and disabling KATA protection for a rule
You can enable or disable KATA protection for one or several rules. KATA protection is enabled by default.
Before enabling or disabling KATA protection for a rule, make sure that KATA protection is enabled in application settings.
To enable or disable KATA protection for a rule:
- In the main window of the application web interface, open the management console tree and select the Rules section.
- In the list of rules, click the name of the rule to open the rule for which you want to enable or disable KATA protection.
- Select the KATA protection section.
- Do one of the following:
- Flip on the toggle switch next to the name of the KATA protection settings group to enable the KATA protection for a rule.
- Flip off the toggle switch next to the name of the Content Filtering settings group to disable the KATA protection for a rule.
- Click the Apply button in the lower part of the workspace.
Configuring actions on messages based on KATA scan results
To configure the actions to be performed by Kaspersky Secure Mail Gateway on messages based on KATA scan results:
- In the main window of the application web interface, open the management console tree and select the Rules section.
- In the list of rules, click the link with the rule name to open the rule for which you want to configure actions on messages based on KATA scan results.
- Select the KATA protection section.
- Flip on the toggle switch next to the name of the KATA protection settings group if it is off.
- In the If KATA detected an event drop-down list, select one of the following actions to take on messages in which KATA detected events:
- Delete message
- Reject
- Skip
The Delete message action is selected by default.
- Click the Apply button in the lower part of the workspace.
In order for the settings you have configured to be used during operation of Kaspersky Secure Mail Gateway, make sure that KATA protection is enabled for the rule and that the rule for which you have configured settings is enabled.
Configuring tags added to message subjects based on KATA scan results
To configure tags added by Kaspersky Secure Mail Gateway to message subjects based on KATA scan results:
- In the main window of the application web interface, open the management console tree and select the Rules section.
- In the list of rules, click the rule name to open the rule for which you want to configure tags added to message subjects based on KATA scan results.
- Select the KATA protection section.
- Flip on the toggle switch next to the name of the KATA protection settings group if it is off.
- Add a tag to the Subject field of messages in which KATA detected an event. To do so, perform the following:
- In the KATA protection settings group, click the link to the right of the Add the following text to the subject of an email message setting name to open the Tag for messages with a KATA detect window.
- In the field under the name of the window, enter the text that you want to add at the beginning of the subject of messages in which KATA detected an event. For example, you can add the KATA detect tag.
- Click the OK button.
The Tag for messages with a KATA detect window closes.
- Click the Apply button in the lower part of the workspace.
In order for the settings you have configured to be used during operation of Kaspersky Secure Mail Gateway, make sure that KATA protection is enabled for the rule and that the rule for which you have configured settings is enabled.
Black and white lists of addresses
This section contains information about black and white lists of email addresses that you can create and edit in Kaspersky Secure Mail Gateway.
About black and white lists of addresses
Black and white lists of addresses can be used to fine-tune the mail system's response to messages that are not spam officially (such as news feeds). Black lists of addresses can also be used to configure the application to block messages containing threats and spam before Kaspersky Security databases have been updated.
There are two types of black and white lists of addresses:
- Custom. They contain addresses of message senders for the given recipient. A custom white list of addresses allows messages to pass through without spam scanning. The messages are still scanned for phishing, viruses, and other threats, and content filtering is also performed.
- Global. Contain the addresses of message senders and recipients. You can configure such lits in the preset WhiteList and BlackList message processing rules. You can also create rules and specify the addresses of senders and recipients whose messages should be rejected without scanning or delivered without scanning. A global white list of addresses allows messages to pass through without scanning for spam, viruses, and phishing threats.
Messages whose sender and recipients have their addresses on a global black or white list of addresses are processed as follows:
- If the addresses of the sender and recipients of a message are on a global black list of addresses, the application rejects the message. The message does not reach the mail server of Kaspersky Secure Mail Gateway.
- If the addresses of the sender and recipients of a message are on a global white list of addresses, the application refers the message for further scanning, bypassing scanning by the Anti-Spam, Anti-Virus, and Anti-Phishing components.
- If the addresses of the sender and recipients of a message are both on the global white list and the global black list of addresses, the application processes the message according to a rule with a higher priority.
A message is processed according to the rule of a custom white list or personal black list of addresses if the rules of the global black list and global white list of addresses do not apply to it.
A message whose sender has his address on a custom black or white list of addresses is processed as follows:
- If the message sender's address is on a custom black list of addresses and one of the addresses of the message recipients belongs to the owner of the custom black list of addresses, the message is not delivered to the recipient who owns the custom black list. Depending on the action configured for messages from senders on a custom black list, the message is either deleted or quarantined.
- If the sender's address is on a custom white list of addresses, the message is delivered to the recipient depending on the results of scanning for viruses, phishing threats, and content filtering.
- If the sender's address is both on a custom white list and black list of addresses, the message is processed according to the rules of the personal white list of addresses.
Configuring the custom black list of addresses
To configure the custom black list of email addresses:
- In the main window of the application web interface, open the management console tree and select the Settings section and Protection subsection.
- In the Custom Black List Settings section, click any link to open the Black list settings window.
- In the If the sender's address is blacklisted list select one of the following actions on messages::
- Delete message, if you do not want to delete messages from a sender whose address is in the custom black list.
- Reject, if you want to reject messages from a sender whose address is in the custom black list.
- In the Move the message to Backup list, select one of the following values:
- Yes, if you want to move messages from a sender whose address is in the custom black list to Backup.
- No, if you do not want to move messages from a sender whose address is in the custom black list to Backup.
- Click the Apply button.
Viewing custom black and white lists of addresses
To be able to access custom black and white lists of addresses from the web interface of Kaspersky Secure Mail Gateway, you have to add a connection to an LDAP server.
To be able to manage custom black and white lists of addresses from the web interface of Kaspersky Secure Mail Gateway, you have to connect to an LDAP server.
To view custom black and white lists of email addresses:
- In the main window of the application web interface, open the management console tree and select the Settings section and LDAP subsection.
- In the Custom Black and White lists of addresses settings group, click the Access to black and white lists link to open the Custom black and white lists of addresses window.
- In the Search by user name or group name in the LDAP directory service field, enter a search string for searching custom black lists and white lists of addresses by user name or group name in the LDAP directory service.
- Click the Find button on the right of the entry field.
A list of LDAP accounts matching the search string you specified appears under the entry field.
- Click the LDAP account of the user whose custom black and white lists of addresses you want to view.
- When finished working with the user's custom lists, click the Close button.
The Custom black and white lists of addresses window closes.
Adding addresses to custom black and white lists of addresses
To be able to access custom black and white lists of addresses from the web interface of Kaspersky Secure Mail Gateway, you have to add a connection to an LDAP server.
To be able to manage custom black and white lists of addresses from the web interface of Kaspersky Secure Mail Gateway, you have to connect to an LDAP server.
To add addresses to custom black and white lists of email addresses:
- In the main window of the application web interface, open the management console tree and select the Settings section and LDAP subsection.
- In the Custom Black and White lists of addresses settings group, click the Access to black and white lists link to open the Custom black and white lists of addresses window.
- In the Search by user name or group name in the LDAP directory service field, enter a search string for searching custom black lists and white lists of addresses by user name or group name in the LDAP directory service.
- Click the Find button on the right of the entry field.
A list of LDAP accounts matching the search string you specified appears under the entry field.
- Click the LDAP account of the user to whose custom black and white lists of addresses you want to add addresses.
The custom black and white lists of addresses appear in the lower part of the window.
- In the address entry field of the list of addresses to which you want to add email addresses, type the email address that you want to add.
The email addresses are entered one at a time. Repeat the process of adding addresses to the list for all email addresses that you are adding.
You can use the symbols "*" and "?" to create an address mask, and regular expressions beginning with the prefix "reg:".
Regular expressions are not case-sensitive.
- Click the button on the right of the entry field.
The email address that has been added appears in the list you have selected.
- After you finish managing the user's custom lists, click the Apply button.
The Custom black and white lists of addresses window closes.
Removing addresses from custom black and white lists of addresses
To be able to access custom black lists and white lists of addresses from the web interface of Kaspersky Secure Mail Gateway, you must add an LDAP server connection and connect to it.
To remove addresses from custom black and white lists of email addresses:
- In the main window of the application web interface, open the management console tree and select the Settings section and LDAP subsection.
- In the Custom Black and White lists of addresses settings group, click the Access to black and white lists link to open the Custom black and white lists of addresses window.
- In the Search by user name or group name in the LDAP directory service field, enter a search string for searching custom black lists and white lists of addresses by user name or group name in the LDAP directory service.
- Click the Find button on the right of the entry field.
A list of LDAP accounts matching the search string you specified appears under the entry field.
- Click the LDAP account of the user from whose custom black and white lists of addresses you want to remove addresses.
The custom black and white lists of addresses appear in the lower part of the window.
- In the list of addresses from which you want to remove the address, select the email address that you want to remove.
The email addresses are deleted one at a time. Repeat the process of removing addresses from the list for all email addresses that you are deleting.
- Click the Delete button to the right of the list of addresses.
The email address is removed from the list of you have selected.
- After you finish managing the user's custom lists, click the Apply button.
The Custom black and white lists of addresses window closes.
Connecting to an LDAP server
This section describes how you can connect Kaspersky Secure Mail Gateway to an LDAP server and configure the LDAP server connection settings and filters.
About the connection to an LDAP server
Kaspersky Secure Mail Gateway can connect to servers of external directory services used by your organization via the LDAP protocol.
A directory service is a software system that can store information about network resources (such as users) in one place and provides centralized management capabilities.
LDAP stands for Lightweight Directory Access Protocol for accessing directory services.
A connection to an external directory service via the LDAP protocol enables the Kaspersky Secure Mail Gateway administrator to perform the following tasks:
- Add senders or recipients from an external directory service to message processing rules.
- Create, edit, and view custom black and white lists of addresses of users on the LAN of the organization.
- View Backup copies of messages of users on the LAN of the organization.
Connecting to and disconnecting from an LDAP server
To connect to an LDAP server or disconnect from an LDAP server:
- In the main window of the application web interface, open the management console tree and select the Settings section and LDAP subsection.
- Click the LDAP server connection link to open the LDAP server connection window.
- Select one of the following LDAP server connection options:
- Not in use, if you do not want to use an LDAP server with Kaspersky Secure Mail Gateway.
- Active Directory or generic LDAP, if you want to connect to an LDAP server of Microsoft Active Directory or any other LDAP-compatible directory service (such as Red Hat Directory Server).
- If you want to limit the server response timeout, select the check box next to the name of the Set a time limit for server timeout setting.
- If you have selected the check box next to the name of the Set a time limit for server timeout setting, in the Server timeout in seconds field specify the maximum time in seconds during which a response from the LDAP server must be received.
The default value is 20 seconds.
- Click the Apply button.
The LDAP server connection window closes.
Adding a connection to an LDAP server
You can add a connection to one or several LDAP servers.
To add a connection to an LDAP server:
- In the main window of the application web interface, open the management console tree and select the Settings section and LDAP subsection.
- If the workspace shows the value of the LDAP server connection setting as Not in use, perform the following actions:
- Click the LDAP server connection link to open the LDAP server connection window.
- In the LDAP server connection list, select Active Directory or generic LDAP.
- If you want to limit the server response timeout, select the check box next to the name of the Set a time limit for server timeout setting.
- If you have selected the check box next to the name of the Set a time limit for server timeout setting, in the Server timeout in seconds field specify the maximum time in seconds during which a response from the LDAP server must be received.
The default value is 20 seconds.
- Click the Apply button.
The LDAP server connection window closes.
- Click the Add button in the workspace.
The LDAP server connection wizard window opens.
- On the Connection settings tab, in the LDAP server settings section, select one of the following external directory services in the LDAP server list:
- Generic LDAP, if you want to add a connection to a server of an LDAP-compatible directory service (such as Red Hat Directory Server).
- Active Directory, if you want to add a connection to a Microsoft Active Directory server.
- In the LDAP server settings section, in the Server address field type the IP address in IPv4 format or the FQDN name of the LDAP server to which you want to connect.
- In the LDAP server settings section, in the Connection port number list specify the port for connecting to the LDAP server.
The LDAP server usually receives inbound connections at port 389 via the TCP or UDP protocol. Port 636 is normally used to connect to an LDAP server via the SSL protocol.
- In the LDAP server settings section, in the Connection type list select one of the data encryption options when connecting to the LDAP server:
- SSL, if you want to use SSL.
- TLS, if you want to use TLS.
- No encryption, if you do not want to use data encryption technologies when connecting to the LDAP server.
After the Microsoft update is released (see ADV190023 LDAP Channel Binding and LDAP Signing for details), SSL or TLS encryption will be required when connecting to Active Directory. If you continue to use the No encryption option, the application may experience the following operational issues: no connection to Active Directory; no access to copies of messages in personal storage; errors in the message processing rules.
- In the Authentication settings section, in the LDAP server user account name field type the name of the user of the LDAP server who has privileges to read directory records (BindDN). Enter the user name in one of the following formats:
cn=<user name>, ou=<department name>(if required), dc=<domain name>, dc=<parent domain name>, if you want to add a connection to a server of an LDAP-compatible directory service (such as Red Hat Directory Server).For example, you can enter the following user name:
cn=LdapServerUser, dc=example, dc=com,whereLdapServerUseris the name of the LDAP server user;exampleis the domain name of the directory to which the user's account belongs;comis the name of the parent domain in which the directory is located.cn=<user name>, ou=<unit name>(if required), dc=<domain name>, dc=<parent domain name>or<user name>@<domain name>.<parent domain name>if you want to add a connection to a Microsoft Active Directory server.For example, you can enter the following user name:
LdapServerUser@example.com,whereLdapServerUseris the name of the LDAP server user;example.comis the domain name of the directory to which the user's account belongs.
- In the Authentication settings section, in the LDAP server user account password field type the LDAP server access password of the user specified in the LDAP server user account name field.
- In the Search settings section, in the Search base field type the DN (Distinguished Name) of the directory object beginning with which Kaspersky Secure Mail Gateway will start searching directory records.
Enter the search base in the following format:
ou=<department name>(if required), dc=<domain name>,dc=<parent domain name>.For example, you can enter the following search base:
ou=people, dc=example, dc=com,wherepeopleis the directory level from which Kaspersky Secure Mail Gateway starts searching for records (the search is run at thepeoplelevel and lower levels. Objects located above this level are excluded from the search scope);exampleis the domain name of the directory in which Kaspersky Secure Mail Gateway searches for records;comis the name of the parent domain in which the directory is located. - Click the Check button.
Kaspersky Secure Mail Gateway checks the connection to the LDAP server using the connection and authentication settings you have specified.
- Click the Next button.
The Filters tab opens.
- In the Set up LDAP filters group of settings, in the User authentication field specify the user authentication filter (for example, to let the user access the user's messages in Backup).
- To set the standard values of the user authentication filter, click the Set default values link under the User authentication field.
- In the Set up LDAP filters settings group, in the User and group search field, specify the search filter for users or a group of users.
- To set the standard values of the user and group search filter, click the Set default values link under the User and group search field.
- In the Set up LDAP filters settings group, in the Search for the DN of users and groups using email address field, specify the filter for searching for the DN of users and groups to which they belong based on their email address.
- To set standard values for the filter for searching for the DN of users and groups to which they belong based on their email address, click the Set default values link under the Search for the DN of users and groups using email address.
- In the Set up LDAP filters group of settings, in the Search for groups by users' DN field configure the filter for searching for groups to which the user belongs based on the user's DN. This filter is used when the user group could not be determined using the filter specified in the Search for the DN of users and groups using email address field.
- To set the standard values of the filter for searching for groups to which the user belongs based on the user's DN, click the Set default values link under the Search for groups by users' DN field.
- Select the Use recursive search check box to enable a search for LDAP accounts in subgroups.
- Click the Finish button.
The LDAP server connection wizard window closes.
The connection to an external directory service that you have added appears in the workspace of the LDAP section of the main window of the application interface.
Deleting a connection to an LDAP server
You can delete a connection to one or several LDAP servers.
To delete a connection to an LDAP server:
- In the main window of the application web interface, open the management console tree and select the Settings section and LDAP subsection.
- In the lower part of the workspace, select the check box next to the address of the LDAP server that you want to remove.
- Click the Delete button.
The Delete action confirmation window opens.
- Click the Yes button.
The Delete window closes.
The connection to the LDAP server is deleted.
Enabling and disabling a connection to an LDAP server
You can enable or disable the connection to one or several LDAP servers.
To enable or disable usage of the connection to an LDAP server:
- In the main window of the application web interface, open the management console tree and select the Settings section and LDAP subsection.
- In the lower part of the workspace, do one of the following:
- Flip on the toggle switch next to the address of the LDAP server the connection to which you want to enable.
- Flip off the toggle switch next to the address of the LDAP server the connection to which you want to disable.
Configuring the connection to an LDAP server
To configure the LDAP server connection settings:
- In the main window of the application web interface, open the management console tree and select the Settings section and LDAP subsection.
- In the lower part of the workspace, select the LDAP server the connection to which you want to configure.
- In the LDAP Server Connection Settings settings group of the selected server, click any link to open the LDAP Server Connection Settings window.
- In the LDAP server settings settings group, in the LDAP server list, select one of the following external directory services:
- generic LDAP, if you want to add a connection to a server of an LDAP-compatible directory service (such as Red Hat Directory Server).
- Active Directory, if you want to add a connection to a Microsoft Active Directory server.
- In the LDAP server settings section, in the Server address field type the IP address in IPv4 format or the FQDN name of the LDAP server to which you want to connect.
- In the LDAP server settings section, in the Connection port number list specify the port for connecting to the LDAP server.
The LDAP server usually receives inbound connections at port 389 via the TCP or UDP protocol. Port 636 is normally used to connect to an LDAP server via the SSL protocol.
- In the LDAP server settings section, in the Connection type list select one of the data encryption options when connecting to the LDAP server:
- SSL, if you want to use SSL.
- TLS, if you want to use TLS.
- No encryption, if you do not want to use data encryption technologies when connecting to the LDAP server.
After the Microsoft update is released (see ADV190023 LDAP Channel Binding and LDAP Signing for details), SSL or TLS encryption will be required when connecting to Active Directory. If you continue to use the No encryption option, the application may experience the following operational issues: no connection to Active Directory; no access to copies of messages in personal storage; errors in the message processing rules.
- In the Authentication settings section, in the LDAP server user account name field type the name of the user of the LDAP server who has privileges to read directory records (BindDN). Enter the user name in one of the following formats:
cn=<user name>, ou=<department name>(if required), dc=<domain name>, dc=<parent domain name>, if you want to add a connection to a server of an LDAP-compatible directory service (such as Red Hat Directory Server).For example, you can enter the following user name:
cn=LdapServerUser, dc=example, dc=com,LdapServerUseris the name of the LDAP server user;exampleis the domain name of the directory to which the user's account belongs;comis the name of the parent domain in which the directory is located.cn=<user name>, ou=<unit name>(if required), dc=<domain name>, dc=<parent domain name>or<user name>@<domain name>.<parent domain name>if you want to add a connection to a Microsoft Active Directory server.For example, you can enter the following user name:
LdapServerUser@example.com,whereLdapServerUseris the name of the LDAP server user;example.comis the domain name of the directory to which the user's account belongs.
- In the Authentication settings section, in the LDAP server user account password field type the LDAP server access password of the user specified in the LDAP server user account name field.
- In the Search settings section, in the Search base field type the DN (Distinguished Name) of the directory object beginning with which Kaspersky Secure Mail Gateway will start searching directory records.
Enter the search base in the following format:
ou=<department name>(if required), dc=<domain name>,dc=<parent domain name>.For example, you can enter the following search base:
ou=people, dc=example, dc=com,wherepeopleis the directory level from which Kaspersky Secure Mail Gateway starts searching for records (the search is run at thepeoplelevel and lower levels. Objects located above this level are excluded from the search scope);exampleis the domain name of the directory in which Kaspersky Secure Mail Gateway searches for records;comis the name of the parent domain in which the directory is located. - Click the Check button.
Kaspersky Secure Mail Gateway checks the connection to the LDAP server using the connection and authentication settings you have specified.
- Click the Apply button.
The LDAP Server Connection Settings window closes.
Configuring the LDAP server connection filters
To configure the LDAP server connection filters:
- In the main window of the application web interface, open the management console tree and select the Settings section and LDAP subsection.
- In the lower part of the workspace, select the LDAP server the filters of the connection to which you want to configure.
- In the LDAP Filter Settings settings group of the selected server, click any link to open the LDAP Filter Settings window.
- In the Set up LDAP filters group of settings, in the User authentication field specify the user authentication filter (for example, to let the user access the user's messages in Backup).
- To set the standard values of the user authentication filter, click the Set default values link under the User authentication field.
- In the Set up LDAP filters settings group, in the User and group search field, specify the search filter for users or a group of users.
- To set the standard values of the user and group search filter, click the Set default values link under the User and group search field.
- In the Set up LDAP filters settings group, in the Search for the DN of users and groups using email address field, specify the filter for searching for the DN of users and groups to which they belong based on their email address.
- To set standard values for the filter for searching for the DN of users and groups to which they belong based on their email address, click the Set default values link under the Search for the DN of users and groups using email address.
- In the Set up LDAP filters group of settings, in the Search for groups by users' DN field configure the filter for searching for groups to which the user belongs based on the user's DN. This filter is used when the user group could not be determined using the filter specified in the Search for the DN of users and groups using email address field.
- To set the standard values of the filter for searching for groups to which the user belongs based on the user's DN, click the Set default values link under the Search for groups by users' DN field.
- Select the Use recursive search check box to enable a search for LDAP accounts in subgroups.
- Click the OK button.
The LDAP Filter Settings window closes.
Using the application via the SNMP protocol
This section provides instructions on using the application via the SNMP protocol and configuring traps for events that occur during operation of Kaspersky Secure Mail Gateway.
About receiving runtime information via the SNMP protocol
SNMP (Simple Network Management Protocol)—Protocol for managing network devices.
The SNMP protocol is used in Kaspersky Secure Mail Gateway as follows:
- SNMP agent—Network management software module of Kaspersky Secure Mail Gateway, which monitors the operation of Kaspersky Secure Mail Gateway.
- Kaspersky Secure Mail Gateway can send this information in the form of SNMP traps—application event notifications.
You can use the SNMP protocol to access the following information about Kaspersky Secure Mail Gateway:
- General information
- Runtime statistics of Kaspersky Secure Mail Gateway since the time of its installation
- Information about Kaspersky Secure Mail Gateway runtime events.
For example, Kaspersky Secure Mail Gateway sends SNMP traps in the following cases:
- The license is renewed.
The SNMP trap contains the license number, license type, available functionality, and the license expiration date.
- License grace period.
The SNMP trap contains the license number and the number of days until the grace period ends.
An SNMP trap is sent when the grace period begins and subsequently once every 24 hours, and when Kaspersky Secure Mail Gateway is restarted.
Read-only access is granted.
Enabling and disabling the use of the SNMP protocol in Kaspersky Secure Mail Gateway
To enable or disable the use of SNMP with Kaspersky Secure Mail Gateway:
- In the main window of the application web interface, open the management console tree and select the Settings section and SNMP subsection.
- Do one of the following:
- Flip on the toggle switch next to the name of the Use SNMP settings group to enable the use of SNMP.
- Flip off the toggle switch next to the name of the Use SNMP settings group to disable the use of SNMP.
Configuring the connection to the SNMP server
To configure the connection to the SNMP server:
- In the main window of the application web interface, open the management console tree and select the Settings section and SNMP subsection.
- Click the SNMP server connection address and port or SNMP server timeout link to open the SNMP server connection settings window.
- In the SNMP server connection address and port field, enter the SNMP server connection address and port.
For example, you can type tcp:localhost:705.
- In the SNMP server timeout field, specify the maximum amount of seconds to wait for a response from the SNMP server. You can specify a value in the range from 1 to 255 seconds.
The default value is 15 seconds.
- Click the OK button.
Enabling and disabling the transmission of SNMP traps
To enable or disable delivery of SNMP traps with information about Kaspersky Secure Mail Gateway runtime events:
- In the main window of the application web interface, open the management console tree and select the Settings section and SNMP subsection.
- Flip on the toggle switch next to the name of the Use SNMP settings group if it is off.
- In the Use SNMP section, do one of the following:
- Flip on the toggle switch next to the name of the Send SNMP Traps group of settings to enable delivery of SNMP traps.
- Flip off the toggle switch next to the name of the Send SNMP Traps group of settings to disable delivery of SNMP traps.
Kaspersky Secure Mail Gateway email notifications
This section contains information about Kaspersky Secure Mail Gateway email notifications and how to configure them.
About email notifications
An email notification (hereinafter also "notification") is an email message describing an application event or a message scan event, which Kaspersky Secure Mail Gateway sends to the specified email addresses.
You can configure delivery of notifications to the following email addresses:
- Mail server administrator's address
- Message sender's address
- Message recipient's address
- Additional email addresses
Kaspersky Secure Mail Gateway event notifications contain information about application settings, errors occurring during operation of the application, and information to the effect that a sent message has not been delivered to a recipient if delivery failed.
You can configure delivery of the Message Delivery Failed email notification to the sender of the message that has not been delivered.
You can configure delivery of email notifications to the mail server administrator about the following Kaspersky Secure Mail Gateway events:
- Anti-Spam databases are out of date
- Anti-Virus databases are out of date
- Anti-Phishing databases are out of date
- Error Placing Messages in Backup
- Error Purging Backup
- Backup is Almost Full
- Personal Backup notification
- License Expires Soon
- License Expired
- The key is Blocked
- Grace period
- The license is renewed
- LDAP Server Connection Error
Message scan event notifications contain information about the message that has been processed and objects removed from it. The application also includes the text of the original email message in notifications for recipients.
You can configure delivery of email notifications to the administrator, sender, or recipient of messages or to other recipients about the following message scan events:
- Malicious objects detected
- Encrypted objects detected
- Scan errors detected
- Content Filtering issues detected
- Phishing messages detected
- A macro detected in the attachment
Editing notification templates
To edit an email notification template:
- In the main window of the application web interface, open the management console tree and select the Settings section and Notifications subsection.
- Select the section containing the type of notification whose template you want to edit.
For example, you can select the Anti-Spam databases are out of date section.
- In the selected section, click either the Message subject or Message link to open the Notification settings window.
For example, if you want to edit the template of notifications about outdated Anti-Spam databases, click one of these two links: Message subject about out of date databases or Message about out of date databases.
The Notification settings window opens.
- In the Subject field, enter the subject of the notification whose template you want to edit.
- In the Message field, enter the text of the notification whose template you want to edit.
- Click the Save button.
The Notification settings window closes.
Configuring delivery of personal Backup notifications
To configure delivery of personal Backup notifications:
- In the main window of the application web interface, open the management console tree and select the Settings section and Notifications subsection.
- Select the Personal Backup notification section.
- Click the Message subject, Message, Schedule or Do not send to emails link to open the Notification settings window.
- In the Subject field, enter the subject of the notification about personal Backup. For example, you can enter the subject "Weekly Backup".
- In the Message field, enter the text of the notification about personal Backup. For example, you can use the default text for the personal Backup notification.
- In the Send notification on fields, specify the day of the week and the time to send Personal Backup notifications.
- If you want to exclude specific addresses from receiving personal Backup notifications, perform the following actions for each address that you want to exclude:
- In the Don't send to emails field, enter the email address.
The email addresses are entered one at a time. Repeat the process of adding addresses to the list for all email addresses that you are adding.
You can use the symbols "*" and "?" to create an address mask, and regular expressions beginning with the prefix "reg:".
Regular expressions are not case-sensitive.
- Click the Add button on the right of the entry field.
- In the Don't send to emails field, enter the email address.
- Click the Save button.
Configuring message scanning event notifications for a rule
You can configure delivery of email notifications about message scanning events for one or several rules.
You can configure delivery of email notifications to the administrator, sender, or recipient of messages or to other recipients about the following message scan events:
- Malicious objects detected
- Encrypted objects detected
- Scan errors detected
- Content Filtering issues detected
- Phishing messages detected
- A macro detected in the attachment
To configure delivery of message scanning event notifications:
- In the main window of the application web interface, open the management console tree and select the Rules section.
- In the list of rules, click the link with the name of the rule to open the rule for which you want to configure delivery of notifications.
- Select the Notifications section.
- Select a message scanning event for which you want to configure delivery of notifications.
For example, you can select the Malicious objects detected event.
- In the group of settings with the name of the selected event (for example, Malicious objects detected), select the check boxes next to the names of settings:
- Notify administrator, if you want to enable delivery of notifications about the selected event to the Kaspersky Secure Mail Gateway administrator's address.
- Notify sender, if you want to enable delivery of notifications about the selected event to addresses of message senders.
- Notify recipient, if you want to enable delivery of notifications about the selected event to addresses of message recipients.
- Additional addresses, if you want to enable delivery of notifications about the selected event to additional email addresses.
- If you have enabled delivery of notifications to addresses of message recipients, configure the settings of delivery of notifications to message recipients. To do so, perform the following:
- Click the link to the right of the Notify recipient setting name to open the User notification settings window.
- Select one of the following options:
- Notify only, if you want to configure delivery of a notification to recipients without the source message.
- Notify with source message in attachment, if you want to configure delivery of a notification to recipients with the source message in an attachment.
- Click the OK button.
The User notification settings window closes.
- If you have enabled delivery of notifications to additional email addresses, specify the additional email addresses of notification recipients. To do so, perform the following:
- Click the link to the right of the Additional addresses setting name to open the Addresses for notifications window.
- In the Addresses for notifications field, enter the email address of the recipient of notifications.
The email addresses are entered one at a time. Repeat the process of adding addresses to the list for all email addresses that you are adding.
You can use the symbols "*" and "?" to create an address mask, and regular expressions beginning with the prefix "reg:".
Regular expressions are not case-sensitive.
- Click the button for adding entries to the right of the entry field.
The list of additional email addresses of notification recipients is compiled in the field under the button for adding entries.
- Click the OK button.
The Addresses for notifications window closes.
- Click the Apply button in the lower part of the workspace.
Enabling and disabling delivery of application event notifications
To enable or disable delivery of Kaspersky Secure Mail Gateway event notifications:
- In the main window of the application web interface, open the management console tree and select the Settings section and Notifications subsection.
- In the section containing the type of notification whose delivery you want to enable or disable, perform one of the following actions:
- Flip on the toggle switch next to the name of the selected section (for example: Anti-Spam databases are out of date), if you want to enable delivery of notifications about this event.
- Flip off the toggle switch next to the name of the selected section (for example: Anti-Spam databases are out of date), if you want to disable delivery of notifications about this event.
Kaspersky Secure Mail Gateway disclaimers and warnings
This section contains information about Kaspersky Secure Mail Gateway disclaimers and warnings and instructions on how to configure them.
About email disclaimers and insecure message warnings
An email disclaimer (hereinafter also “disclaimer”) is text that Kaspersky Secure Mail Gateway can add at the beginning or end of an email message.
You can configure disclaimer templates, specify the display format for disclaimers in messages, enable or disable disclaimers for one or several message processing rules.
An insecure message warning (hereinafter also "warning") is text that Kaspersky Secure Mail Gateway can add at the beginning or end of email messages that have been assigned one of the following scan status labels by Kaspersky Secure Mail Gateway modules:
- Encrypted
- Phishing
- Infected
- Error
You can configure warning templates, specify the display format for warnings in messages, enable or disable warnings for one or several message processing rules.
Creating a disclaimer or warning template
To create a disclaimer or warning template:
- In the main window of the application web interface, open the management console tree and select the Settings section and Disclaimers subsection.
- Click the Create button in the upper part of the workspace.
A new disclaimer or warning template opens.
- In the Template name field, type the name of the template.
Based on this name, you can select a template for configuring the settings of message processing rules.
- In the Position drop-down list, select the position of the disclaimer or warning. You can configure the disclaimer or warning to be displayed before or after the message.
- Select one of the following tabs above the Message text field:
- Plain, if you want the message to be displayed in plain text format.
- HTML, if you want the message to be displayed in HTML format.
By default, Kaspersky Secure Mail Gateway applies the text format depending on the format of email messages.
In an email message in HTML format, Kaspersky Secure Mail Gateway adds a disclaimer or warning in HTML format.
In an email message in Plain format, Kaspersky Secure Mail Gateway adds a disclaimer or warning in Plain format.
- Enter the text of the disclaimer or warning in the Message text field.
- If you entered the text of the disclaimer or warning in HTML format, under the Message text field click the Preview link to see a preview of your message.
- Select the Use text only check box if you want the message to contain text only.
When a disclaimer or warning in Use text only format is added to an email message in HTML format, the message may be displayed incorrectly.
- Click the Create button in the lower part of the workspace.
The disclaimer or warning template you have created appears in the list of disclaimer and warning templates in the workspace of the main window of the application web interface.
Editing a disclaimer or warning template
To edit a disclaimer or warning template:
- In the main window of the application web interface, open the management console tree and select the Settings section and Disclaimers subsection.
- In the list of disclaimer and warning templates in the workspace, select the disclaimer or warning template that you want to edit.
- Edit the template name in the Template name field.
Based on this name, you can select a template for configuring the settings of message processing rules.
- In the Position drop-down list, change the position of the disclaimer or warning. You can configure the disclaimer or warning to be displayed before or after the message.
- Select one of the following tabs above the Message text field:
- Plain, if you want the message to be displayed in plain text format.
- HTML, if you want the message to be displayed in HTML format.
- In the Message text field, edit the text of the disclaimer or warning.
- If you entered the text of the disclaimer or warning in HTML format, under the Message text field click the Preview link to see a preview of your message.
- Select the Use text only check box if you want the message to contain text only.
- Click the Apply button in the lower part of the workspace.
Deleting a disclaimer or warning template
To delete a disclaimer or warning template:
- In the main window of the application web interface, open the management console tree and select the Settings section and Disclaimers subsection.
- Select the check box in the lines with the names of one or several disclaimer or warning templates that you want to delete.
- Click the Delete button in the upper part of the workspace.
The selected disclaimer or warning templates are deleted.
Enabling and disabling message disclaimers for a rule
You can enable or disable message disclaimers for one or several rules. By default, message disclaimers are disabled.
To enable or disable message disclaimers for a rule:
- In the main window of the application web interface, open the management console tree and select the Rules section.
- In the list of rules, click the name of the rule to open the rule for which you want to enable or disable message disclaimers.
- Select the Email Disclaimer section.
- Do one of the following:
- Flip on the toggle switch next to the name of the Email Disclaimer settings group to enable message disclaimers for a rule.
- Flip off the toggle switch next to the name of the Email Disclaimer settings group to disable message disclaimers for a rule.
- Click the Apply button in the lower part of the workspace.
Adding a message scanning event disclaimer for a rule
To add a message scanning event disclaimer for a rule:
- In the main window of the application web interface, open the management console tree and select the Rules section.
- In the list of rules, click the link with the name of the rule to open the rule for which you want to add a message scanning event disclaimer.
- Select the Email Disclaimer section.
- Flip on the toggle switch next to the name of the Email Disclaimer settings group if it is off.
- In the Add the following disclaimer settings group, click the link to the right of the Disclaimer template setting name.
- The Disclaimer template window opens.
- In the Disclaimer template list, select the template of a disclaimer that you want to add to a message scanning event for a rule.
- Click the OK button.
The Disclaimer template window closes.
The disclaimer you have added appears in the Email Disclaimer section in the workspace of the main window of the application web interface.
- Click the Apply button in the lower part of the workspace.
In order for the settings you have configured to be used during operation of Kaspersky Secure Mail Gateway, make sure that the option that lets you add disclaimers to messages is enabled for the rule and the rule for which you have configured the settings is enabled.
Adding an insecure message warning for a rule
To add an insecure message warning for a rule:
- In the main window of the application web interface, open the management console tree and select the Rules section.
- In the list of rules, click the link with the name of the rule to open the rule for which you want to add an insecure message warning.
- Select the Insecure Message Warning section.
- Select check boxes next to one or several types of messages to which you want to add a warning:
- Enable for encrypted messages, if you want to add a warning to messages that have been assigned Encrypted status after scanning by Kaspersky Secure Mail Gateway modules.
- Enable for phishing messages, if you want to add a warning to messages that have been assigned Phishing status after scanning by Kaspersky Secure Mail Gateway modules.
- Enable for infected messages, if you want to add a warning to messages that have been assigned Infected status after scanning by Kaspersky Secure Mail Gateway modules.
- Enable for messages with scan errors, if you want to add a warning to messages that have been assigned Error (Scan Error) status after scanning by Kaspersky Secure Mail Gateway modules.
- In the Add the following warning settings group, click the link to the right of the Warning template setting name.
- The Warning template window opens.
- In the Warning template list, select the template of an insecure message warning that you want to add for a rule.
- Click the OK button.
The Warning template window closes.
The disclaimer you have added appears in the Insecure Message Warning section in the workspace of the main window of the application web interface.
- Click the Apply button in the lower part of the workspace.
In order for the settings you have configured to be used during operation of Kaspersky Secure Mail Gateway, make sure that the rule for which you have configured settings is enabled.
Kaspersky Secure Mail Gateway event log
This section contains information about the Kaspersky Secure Mail Gateway event log.
About the event log
Various events occur during the operation of Kaspersky Secure Mail Gateway. They reflect changes in the status of the application. To allow the application administrator to analyze errors in application settings and enable Kaspersky Lab representatives to provide effective technical support, Kaspersky Secure Mail Gateway logs information about such events in the event log.
Event log data is stored for the entire duration of Kaspersky Secure Mail Gateway usage and is deleted permanently when the application is uninstalled. Event log files are automatically rotated when the files reach the file size limit.
Kaspersky Secure Mail Gateway keeps the event log within the operating system log (syslog) in the Mail category. You can change the category of the event log.
Kaspersky Secure Mail Gateway categorizes events in terms of the following levels:
- Error—Events involving application errors.
- Info—Informational events.
Events of the Info level can contain email addresses of message senders and recipients, attachment names, IP addresses of computers from which messages were sent, and detailed information about message scan results.
By default, Kaspersky Secure Mail Gateway logs only events with the Info importance level in the event log (see table below). You can configure all application events to be recorded in the log.
Events in the event log
Event |
Description |
Event level |
|---|---|---|
RuleSettingsChangedEvent |
Message processing rule settings have been changed. |
Info |
TaskSettingsChangedEvent |
Task settings have been changed. |
Info |
MessageProcessedEvent |
Message has been processed. |
Info |
MessageNotProcessedEvent |
Message has not been processed. |
Info |
MessageQuarantinedEvent |
Messages has been placed in Backup. |
Info |
ProductStartEvent |
Application has been started. |
Info |
ScheduledReportError |
Error creating scheduled report. |
Error |
ScheduledReportGenerated |
Scheduled report has been generated. |
Info |
BackupLimitReachedEvent |
Backup limit size has been reached. |
Info |
BackupRestoreAvThreatEvent |
Message from Backup has been saved to file or sent to recipients. |
Info |
BackupAddErrorEvent |
Error adding message to Backup. |
Error |
BackupRotateErrorEvent |
Error automatically freeing up space in Backup. |
Error |
AvUpdateErrorEvent |
Error updating Anti-Virus databases. |
Error |
AvBasesLoadError |
Error loading Anti-Virus databases. |
Error |
AspUpdateErrorEvent |
Error updating Anti-Spam databases. |
Error |
AspBasesLoadError |
Error loading Anti-Spam databases. |
Error |
ApUpdateErrorEvent |
Error updating Anti-Phishing databases. |
Error |
ApBasesLoadError |
Error loading Anti-Phishing databases. |
Error |
AvBasesAttachedEvent |
Anti-Virus databases have been updated successfully. |
Info |
ApBasesAttachedEvent |
Anti-Phishing databases have been updated successfully. |
Info |
AspBasesAttachedEvent |
Anti-Spam databases have been updated successfully. |
Info |
NothingToUpdateEvent |
No database update required. |
Info |
AvBasesOutdatedEvent |
Anti-Virus databases are out of date. |
Info |
AspBasesOutdatedEvent |
Anti-Spam databases are out of date. |
Info |
ApBasesOutdatedEvent |
Anti-Phishing databases are out of date. |
Info |
AvBasesObsoleteEvent |
Anti-Virus databases are obsolete. |
Info |
AspBasesObsoleteEvent |
Anti-Spam databases are obsolete. |
Info |
ApBasesObsoleteEvent |
Anti-Phishing databases are obsolete. |
Info |
AvBasesAppliedEvent |
Anti-Virus databases have been loaded successfully. |
Info |
AspBasesAppliedEvent |
Anti-Spam databases have been loaded successfully. |
Info |
ApBasesAppliedEvent |
Anti-Phishing databases have been loaded successfully. |
Info |
LicenseBlacklistedEvent |
Key is blacklisted. |
Error |
LicenseExpiredEvent |
License has expired. |
Error |
LicenseExpiresSoonEvent |
License expires soon. |
Info |
LicenseErrorEvent |
Key related error. |
Error |
LicenseInstalledEvent |
Key has been added successfully. |
Info |
LicenseRevokedEvent |
Key has been removed successfully. |
Info |
TaskCrashEvent |
Process returned an error. |
Error |
TaskRestartEvent |
Process has been restarted. |
Info |
QueueFlushMessageSuccessEvent |
Forced delivery of a single message from the queue is successful. |
Info |
QueueFlushMessageFailureEvent |
Forced delivery of a single message from the queue returned an error. |
Error |
QueueFlushAllSuccessEvent |
Forced delivery of all messages from the queue is successful. |
Info |
QueueFlushAllFailureEvent |
Forced delivery of all messages from the queue returned an error. |
Error |
QueueDeleteMessageSuccessEvent |
Removal of a single message from the queue is successful. |
Info |
QueueDeleteMessageFailureEvent |
Removal of a single message from the queue returned an error. |
Error |
QueueDeleteAllSuccessEvent |
Removal of all messages from the queue is successful. |
Info |
QueueDeleteAllFailureEvent |
Removal of all messages from the queue returned an error. |
Error |
MailProcessingChangeSuccessEvent |
Change of the message send or receive status: completed successfully. |
Info |
MailProcessingChangeFailureEvent |
Change of the message send or receive status: error. |
Error |
TLSServerCertificateWasChanged |
Modifying a TLS certificate. |
Info |
Viewing the event log
To view the Kaspersky Secure Mail Gateway event log:
- In the main window of the application web interface, open the management console tree and select the Settings section and Log subsection.
- In the Log category list, select the category of the event log that you want to view.
- In the Last list, select the number of entries you want to view.
- Click the View button.
Downloading the event log to hard drive
To download the Kaspersky Secure Mail Gateway event log to the hard drive:
- In the main window of the application web interface, open the management console tree and select the Settings section and Log subsection.
- In the Log category list, select the category of the event log that you want to download.
- To the right of the Log category list, click the Download link to open the event log download window.
The event log is downloaded to the hard drive of your computer in the folder that is specified as the destination folder for downloading files from the Internet in the settings of the browser that you use to manage Kaspersky Secure Mail Gateway.
System information for Technical Support
You can generate an archive containing system information (information about Kaspersky Secure Mail Gateway operation) for the purpose of sending it to Kaspersky Lab Technical Support. The archive may contain data on your organization that you consider to be confidential. The Kaspersky Secure Mail Gateway administrator must get the contents of the forwarded archive approved with the security department of your organization.
Prior to sending the archive, delete from it all data that you consider to be confidential.
Creating a system information archive
To create a system information archive:
- In the main window of the application web interface, open the management console tree and select the Settings section and Log subsection.
- In the lower right corner of the window, click the System information link.
The System information for technical support window opens.
- Click the Create button.
The Create archive with system information window opens.
In a few seconds, the archive containing information about Kaspersky Secure Mail Gateway operation appears in the list of archives in the System information for technical support window .
Downloading a system information archive to the hard drive
To download a system information archive to the hard drive:
- In the main window of the application web interface, open the management console tree and select the Settings section and Log subsection.
- In the lower right corner of the window, click the System information link.
The System information for technical support window opens. It displays a list of archives containing system information. If there are no system information archives in the list, you can create an archive.
- Click the link containing the archive name to start downloading the archive to the hard drive.
The archive in TGZ format is downloaded to the hard drive of your computer in the folder specified as the destination folder for downloading files from the Internet in the settings of the browser that you use to manage Kaspersky Secure Mail Gateway.
Deleting a system information archive
To delete one or several system information archives:
- In the main window of the application web interface, open the management console tree and select the Settings section and Log subsection.
- In the lower right corner of the window, click the System information link.
The System information for technical support window opens. It displays a list of archives containing system information.
- Select the check boxes to the left of the name of each archive that you want to delete.
- Click the Delete button.
- If you want to completely clear the list of system information archives, click the Delete all button.
The system information archives will be deleted.
Kaspersky Secure Mail Gateway audit log
Kaspersky Secure Mail Gateway registers email scan-related events in the audit log.
This section contains information on working with the Kaspersky Secure Mail Gateway audit log, as well as information on how to sort and filter events in the audit log or search events by specific table columns based on the indicators you specify.
Viewing the audit log and events in the audit log
To view the Kaspersky Secure Mail Gateway audit log:
- In the main window of the application web interface, open the management console tree and select the Settings section and Log subsection.
- In the lower right corner of the window, click the Audit Log link.
This opens the Audit Log window containing the table of events in the Kaspersky Secure Mail Gateway audit log.
The table displays the first 500 events of the audit log. To view a large number of events, utilize filtering and searching events in the audit log.
To view an event in the Kaspersky Secure Mail Gateway audit log:
- In the main window of the application web interface, open the management console tree and select the Settings section and Log subsection.
- In the lower right corner of the window, click the Audit Log link.
This opens the Audit Log window containing the table of events in the Kaspersky Secure Mail Gateway audit log.
- Click the link with information about the event that you want to view to open a window containing information about this event.
- If you want to return to the table of events, click the To Audit Log button.
Sorting events in the audit log
To sort events in the audit log:
- In the main window of the application web interface, open the management console tree and select the Settings section and Log subsection.
- In the lower right corner of the window, click the Audit Log link.
This opens the Audit Log window containing the table of events in the Kaspersky Secure Mail Gateway audit log.
- Click the button to the left of the name of the table column by which you want to sort events. You can sort events by one of the following indicators:
- Event time—Date and time when the event occurred.
- Event type—Type of Kaspersky Secure Mail Gateway event. For example, Message scan.
- Subject ID—Subject identifier. For example, the domain name of the Kaspersky Secure Mail Gateway server.
- Result—Result of the Kaspersky Secure Mail Gateway event. For example, Success or Fail.
- Description—Description of the event and its result. For example, the result of a message scan by application modules or a message stating that application database update failed.
To modify the sorting order for messages in queue,
click the or button to the left of the name of the table column whose event sorting order you want to modify.
Filtering and searching events by date and time
To filter or search events by date and time:
- In the main window of the application web interface, open the management console tree and select the Settings section and Log subsection.
- In the lower right corner of the window, click the Audit Log link.
This opens the Audit Log window containing the table of events in the Kaspersky Secure Mail Gateway audit log.
- Click the Event time link to expand the list of event search periods.
- Select one of the following periods:
- Last hour
- Last day
- Last week
- Custom
- If you chose a custom period for searching events:
- In the calendar that opens, specify the start and end dates of the period for displaying events in the audit log.
- Click the Apply button.
The calendar closes.
The workspace of the Audit Log window displays the audit log event table generated based on the filter conditions.
If no message search filter is defined, the table displays the first 500 events of the audit log.
Filtering and searching events by event type
To filter or search events by event type:
- In the main window of the application web interface, open the management console tree and select the Settings section and Log subsection.
- In the lower right corner of the window, click the Audit Log link.
This opens the Audit Log window containing the table of events in the Kaspersky Secure Mail Gateway audit log.
- Click the Event type link to open the event filter configuration window.
- In the Event type field, enter several characters or all characters of the event type. For example, you can enter Message scan.
- Click the Apply button.
The workspace of the Audit Log window displays the audit log event table generated based on the filter conditions.
If no message search filter is defined, the table displays the first 500 events of the audit log.
Filtering and searching events by subject identifier
To filter or search events by subject identifier:
- In the main window of the application web interface, open the management console tree and select the Settings section and Log subsection.
- In the lower right corner of the window, click the Audit Log link.
This opens the Audit Log window containing the table of events in the Kaspersky Secure Mail Gateway audit log.
- Click the Subject ID link to open the event filter configuration window.
- In the Subject ID field, enter several characters or all characters of the subject identifier. For example, you can enter the domain name of the Kaspersky Secure Mail Gateway server.
- Click the Apply button.
The workspace of the Audit Log window displays the audit log event table generated based on the filter conditions.
If no message search filter is defined, the table displays the first 500 events of the audit log.
Filtering and searching events by event result
To filter or search events by event result:
- In the main window of the application web interface, open the management console tree and select the Settings section and Log subsection.
- In the lower right corner of the window, click the Audit Log link.
This opens the Audit Log window containing the table of events in the Kaspersky Secure Mail Gateway audit log.
- Click the Result link to expand the list of event results.
- Select one of the following event results:
- Success
- Fail
- Click the Apply button.
The workspace of the Audit Log window displays the audit log event table generated based on the filter conditions.
If no message search filter is defined, the table displays the first 500 events of the audit log.
Filtering and searching events by event description
To filter or search events by event description:
- In the main window of the application web interface, open the management console tree and select the Settings section and Log subsection.
- In the lower right corner of the window, click the Audit Log link.
This opens the Audit Log window containing the table of events in the Kaspersky Secure Mail Gateway audit log.
- Click the Description link to open the event filter configuration window.
- In the Description field, enter several characters of the event description.
- Click the Apply button.
The workspace of the Audit Log window displays the audit log event table generated based on the filter conditions.
If no message search filter is defined, the table displays the first 500 events of the audit log.
Configuring the date and time in Kaspersky Secure Mail Gateway
To set the date and time in Kaspersky Secure Mail Gateway:
- In the main window of the application web interface, open the management console tree and select the Settings section and Date and Time subsection.
- In the Date and time settings section, click the editing icon.
- Select one of the following options:
- If you want to synchronize the time of the application with the host, select the Synchronize with VMware host option.
- If you want to synchronize time with an NTP server, select the Synchronize with NTP server option and specify the NTP server address in the NTP server address: field.
If you select this option, you are advised to disable time synchronization between the virtual machine and the host using hypervisor tools.
- If you want to set the date and time manually, select the Set the date and time manually option and enter the necessary date and time values in the entry fields.
- Click the OK button.
To set the time zone:
- In the main window of the application web interface, open the management console tree and select the Settings section and Date and Time subsection.
- In the Time zone settings section, click the editing icon.
- In the Country drop-down list, select the necessary country.
- In the Time zone drop-down list, select the necessary time zone.
- Click the OK button.
Contacting the Technical Support Service
This section describes the ways to get technical support and the terms on which it is available.
How to obtain Technical Support
If you cannot find a solution to your problem in the program documentation or in one of the other sources of information about Kaspersky Secure Mail Gateway, we recommend that you contact Technical Support. Technical Support staff will answer your questions about installing and using Kaspersky Secure Mail Gateway.
Kaspersky provides support of Kaspersky Secure Mail Gateway throughout its life cycle (see program life cycle page). Before contacting Technical Support, please read the support rules.
You can contact Technical Support in one of the following ways:
- By visiting the Technical Support website.
- By sending a request to Technical Support through the Kaspersky CompanyAccount portal.
Technical Support via Kaspersky CompanyAccount
Kaspersky CompanyAccount is a portal for companies that use Kaspersky Lab applications. The portal Kaspersky CompanyAccount is designed to facilitate interaction between users and Kaspersky Lab specialists via online requests. The portal Kaspersky CompanyAccount lets you monitor the progress of electronic request processing by Kaspersky Lab specialists and store a history of electronic requests.
You can register all of your organization's employees under a single account on Kaspersky CompanyAccount. A single account lets you centrally manage electronic requests from registered employees to Kaspersky Lab, and also manage the privileges of these employees via Kaspersky CompanyAccount.
The portal Kaspersky CompanyAccount is available in the following languages:
- English
- Spanish
- Italian
- German
- Polish
- Portuguese
- Russian
- French
- Japanese
To learn more about Kaspersky CompanyAccount, visit the Technical Support website.
Page topGlossary
Advanced persistent threat (APT)
A sophisticated targeted attack against the corporate IT infrastructure that simultaneously uses different methods to infiltrate the network, hide on the network, and gain unobstructed access to confidential data.
Anti-Phishing
A component of Kaspersky Secure Mail Gateway designed to detect messages categorized as phishing.
Anti-Spam
A component of Kaspersky Secure Mail Gateway designed to detect messages categorized as spam.
Anti-Virus
A Kaspersky Secure Mail Gateway component designed to detect viruses in email messages and email attachments.
Backup
Special storage for saving backup copies of objects. Backup copies are created before disinfection or deletion of infected objects.
Content filtering
Filtering email messages based on message size, attachment file name mask, and attachment format. Based on the results of content filtering, you can restrict the forwarding of messages by the mail server.
Directory service
A software system that can store information about network resources (such as users) in one place and provides centralized management capabilities.
DKIM authentication of mail senders
Verification of the digital signature added to messages.
DMARC authentication of mail senders
Authentication performed to verify that the message was actually sent from the specified domain.
DNSBL
DNS blacklist or DNS blocklist. Custom list of DNSBL servers used to improve the accuracy of spam detection. DNSBL servers stores lists of IP addresses that were previously detected as sources of spam and to which the Anti-Spam module assigns a spam rating and one of the Anti-Spam message scan status labels.
Email notification
An email message describing an application event or a message scan event, which Kaspersky Secure Mail Gateway sends to the specified email addresses.
Heuristic analysis
The technology designed to detect threats that cannot be detected using the current version of Kaspersky Lab application databases. It detects files that may be infected with an unknown virus or a new variety of a known virus.
Files in which malicious code is detected during heuristic analysis are marked as infected.
Kaspersky Anti Targeted Attack Platform
Solution designed for the protection of a corporate IT infrastructure and timely detection of threats such as zero-day attacks, targeted attacks, and complex targeted attacks known as advanced persistent threats (hereinafter also referred to as "APT").
Kaspersky Private Security Network
A solution that allows users of Kaspersky Lab anti-virus applications to access Kaspersky Security Network databases without sending data from their computers to Kaspersky Security Network servers.
Kaspersky Security Network (KSN)
An infrastructure of cloud services that provides access to the online Knowledge Base of Kaspersky Lab which contains information about the reputation of files, web resources, and software. The use of data from Kaspersky Security Network ensures faster responses by Kaspersky Lab applications to threats, improves the performance of some protection components, and reduces the likelihood of false alarms.
Key file
A xxxxxxx.key file that allows using a Kaspersky Lab application on the terms of a trial or commercial license. The application generates the key file based on the activation code. The application can be used only with a key file.
LDAP
Lightweight Directory Access Protocol for accessing directory services.
Malicious links
Web addresses leading to malicious resources, i.e. web resources designed to spread malware.
Phishing
A type of Internet fraud aimed at obtaining unauthorized access to users' confidential data.
Reputation filtering
A cloud service that uses technologies for determining the reputation of messages. Information about new kinds of spam appears in the cloud service sooner than in Anti-Spam module databases, making it possible to improve the speed and accuracy of spam detection.
SNMP agent
A network management software module of Kaspersky Secure Mail Gateway, which monitors the operation of Kaspersky Secure Mail Gateway.
SNMP trap
An application event notification sent by the SNMP agent.
Spam
Unsolicited mass email messages mailings, most often including advertisements
SPF authentication of mail senders
Comparison of IP addresses of message senders with the list of possible message sources, which has been created by the mail server administrator.
SURBL
Spam URI Realtime Blocklists. Custom list of SURBL servers used to improve the accuracy of spam detection. SURBL servers store lists of web addresses that were previously detected in the subject or body of messages recognized as spam and to which the Anti-Spam module assigns a spam rating and one of the Anti-Spam message scan status labels.
Targeted attack
Attack that targets a specific person or organization. Unlike mass attacks by computer viruses designed to infect as many computers as possible, targeted attacks can be aimed at infecting the network of a specific organization or even a specific server within the corporate IT infrastructure. A dedicated Trojan program may be written to stage each targeted attack.
Virtual machine
A fully isolated software system that executes machine-independent or machine code of the processor and can imitate the operating system of an application or device (such as a computer).
Zero-day attack
An attack targeting the corporate IT infrastructure by exploiting zero-day vulnerabilities in software. These are software vulnerabilities that hackers find and exploit before the software vendor has a chance to release a patch.
Zero-day vulnerability
A software vulnerability that hackers find and exploit before the software vendor has a chance to release a patch with fixed program code.
Page top
AO Kaspersky Lab
Kaspersky Lab is a world-renowned vendor of systems protecting computers against various threats, including viruses and other malware, unsolicited email (spam), network and hacking attacks.
In 2008, Kaspersky Lab was rated among the world’s top four leading vendors of information security software solutions for end users (IDC Worldwide Endpoint Security Revenue by Vendor). Kaspersky Lab is the preferred vendor of computer protection systems for home users in Russia (“IDC Endpoint Tracker 2014”).
Kaspersky Lab was founded in Russia in 1997. It has since grown into an international group of companies with 38 offices in 33 countries. The company employs more than 3000 qualified specialists.
Products. Kaspersky Lab’s products provide protection for all systems—from home computers to large corporate networks.
The personal product range includes security applications for desktop, laptop, and tablet computers, smartphones and other mobile devices.
The company offers protection and control solutions and technologies for workstations and mobile devices, virtual machines, file and web servers, mail gateways, and firewalls. The company's portfolio also features specialized products providing protection against DDoS attacks, protection for industrial control systems, and prevention of financial fraud. Used in conjunction with Kaspersky Lab’s centralized management system, these solutions ensure effective automated protection for companies and organizations of any size against computer threats. Kaspersky Lab's products are certified by the major test laboratories, are compatible with the software of many suppliers of computer applications, and are optimized to run on many hardware platforms.
Kaspersky Lab’s virus analysts work around the clock. Every day they uncover hundreds of thousands of new computer threats, create tools to detect and disinfect them, and include signatures for these threats in databases used by Kaspersky Lab applications.
Technologies. Many technologies that are now part and parcel of modern anti-virus tools were originally developed by Kaspersky Lab. It is no coincidence that many other software developers use the Kaspersky Anti-Virus kernel in their products, including: Alcatel-Lucent, Alt-N, Asus, BAE Systems, Blue Coat, Check Point, Cisco Meraki, Clearswift, D-Link, Facebook, General Dynamics, H3C, Juniper Networks, Lenovo, Microsoft, NETGEAR, Openwave Messaging, Parallels, Qualcomm, Samsung, Stormshield, Toshiba, Trustwave, Vertu, and ZyXEL. Many of the company’s innovative technologies are patented.
Achievements. Over the years, Kaspersky Lab has won hundreds of awards for its services in combating computer threats. Following tests and research conducted by the reputed Austrian test laboratory AV-Comparatives in 2014, Kaspersky Lab ranked among the top two vendors by the number of Advanced+ certificates earned and was eventually awarded the Top Rated certificate. But Kaspersky Lab's main achievement is the loyalty of its users worldwide. The company’s products and technologies protect more than 400 million users, and its corporate clients number more than 270,000.
Kaspersky Lab website: |
|
Virus encyclopedia: |
|
Virus Lab: |
https://virusdesk.kaspersky.com/ (for scanning suspicious files and websites) |
Kaspersky Lab’s web forum: |
Page top
Information about third-party code
Information about third-party code is contained in the file legal_notices.txt, in the application installation folder.
Page top
Trademark notices
Registered trademarks and service marks are the property of their respective owners.
Apache and Apache feather logo are trademarks of Apache Software Foundation.
Linux is a trademark of Linus Torvalds registered in the USA and elsewhere.
Active Directory, Hyper-V, Microsoft, and Windows are trademarks of Microsoft Corporation registered in the United States of America and elsewhere.
Mozilla and Firefox are Trademarks of the Mozilla Foundation.
CentOS is a trademark of Red Hat, Inc.
Red Hat is a trademark of Red Hat Inc. registered in the United States of America and elsewhere.
Debian is a registered trademark of Software in the Public Interest, Inc.
VMware, VMware ESXi and VMware vSphere are trademarks of VMware, Inc or trademarks of VMware, Inc. registered in the United States or other jurisdictions.
Page top