Adding the self-signed certificate as trusted to a browser (Windows)
June 28, 2024
ID 186925
The procedures in this section show you how to add the self-signed certificates generated during Kaspersky Scan Engine installation to the trusted storage. This will remove the security warnings generated by browsers.
The information in this section is applicable to the situation when the user gains access to Kaspersky Scan Engine GUI from the same computer on which Kaspersky Scan Engine GUI runs. If the Settings > ServerSettings > ConnectionString element of the Kaspersky Scan Engine configuration file refers to an external interface, the Kaspersky Scan Engine GUI website will not be considered trusted, because the self-signed certificate can be used only with https://127.0.0.1 and https://localhost addresses.
To avoid potential security risks, it is recommended to use a trusted certificate signed by a certificate authority (CA).
Causing a self-signed certificate to be trusted by a browser (Kaspersky Scan Engine GUI is opened in Internet Explorer)
Gaining the browser's trust requires that you perform, in sequence, the following three procedures:
Save the certificate to a local file
To save the certificate to a local file:
- Open the
https://127.0.0.1orhttps://localhostaddress in Internet Explorer.The browser informs you of a problem with the security certificate of the website.
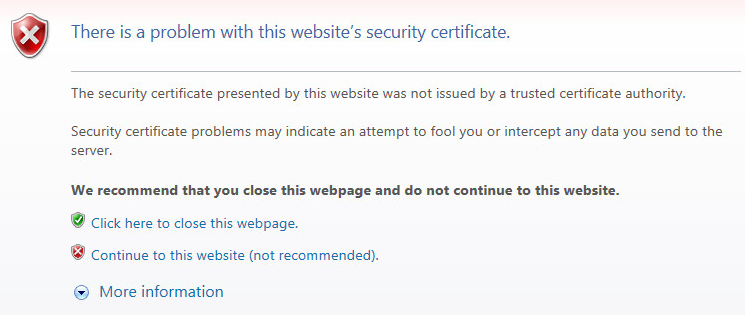
Certificate error message
- Select the Continue to this website (not recommended) link.
The Certificate Error message appears in the address bar.
- Click Certificate Error.
The Untrusted Certificate window opens.
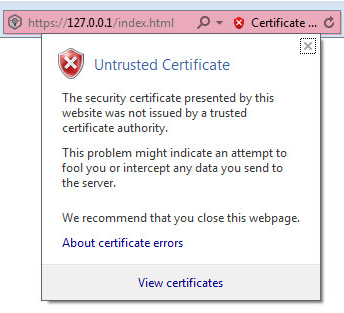
Untrusted Certificate window
- Select the View certificates link.
The Certificate window opens with information about the Kaspersky Scan Engine certificate.
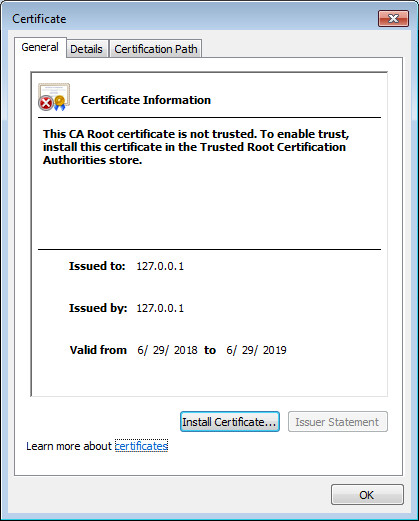
Certificate window
- Select the Details tab and click Copy to File to create a local copy of the certificate.
The Certificate Export Wizard starts.
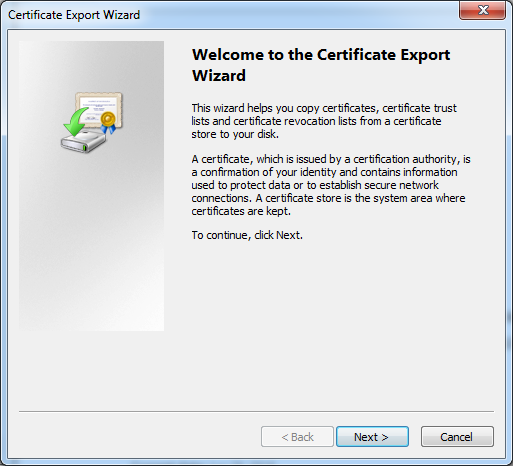
Certificate Export Wizard
- Follow the Wizard instructions.
Use the default Wizard settings during the certificate export.
Start the certificate import process
To start the certificate import process through Microsoft Management Console (MMC):
- From the Search box, navigate to the Run box and enter mmc.
You can now run MMC as Administrator.

Running the MMC
- In the MMC-based console that opens, select File > Add/Remove Snap-in.
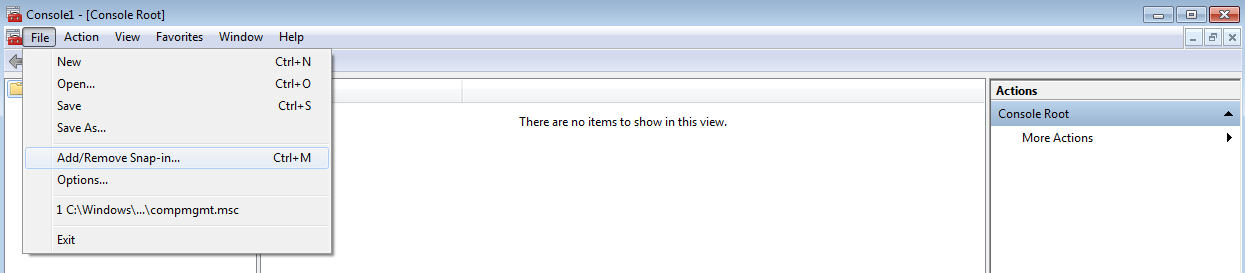
Selecting Add/Remove Snap-in
The Add or Remove Snap-ins window opens.
- In the Available snap-ins list, select Certificates and click Add.
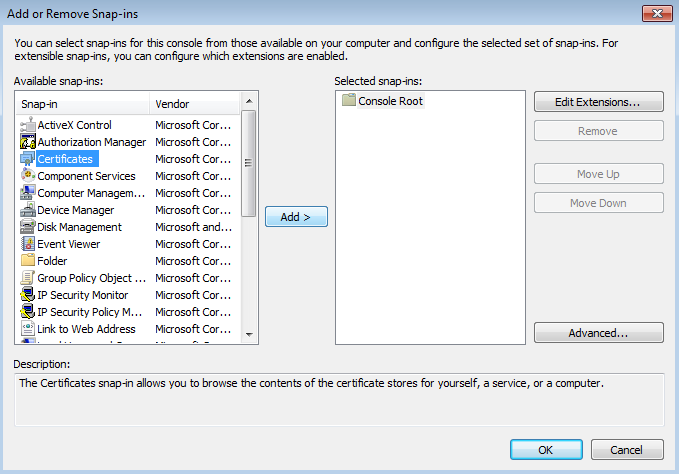
Adding the Certificates snap-in
The Certificates snap-in window opens.
- Select Computer account and click Next.
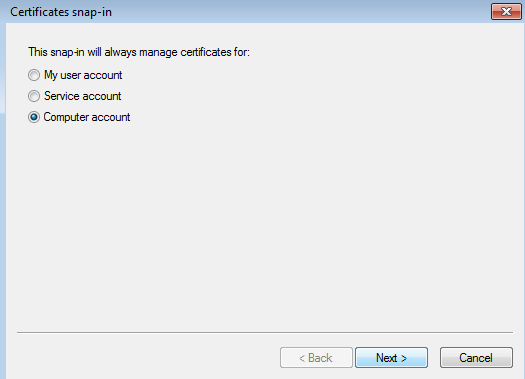
Selecting Computer account
In the Select Computer window that opens, click Finish.
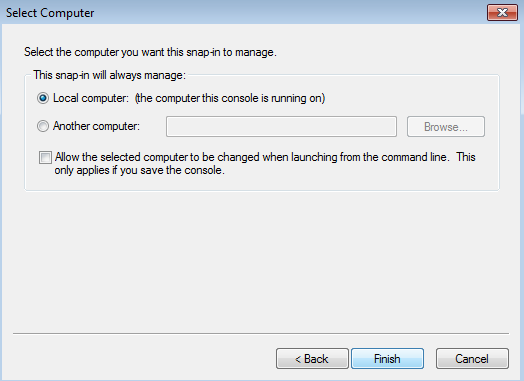
Selecting Local computer
- In the tree pane, select Certificates (Local Computer) > Trusted Root Certification Authorities, right-click Certificates, and select All Tasks > Import.
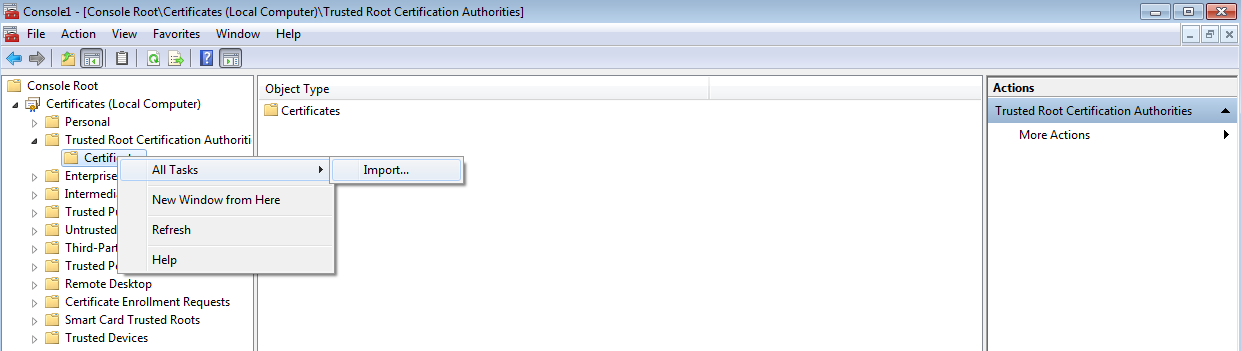
Selecting Import
The Certificate Import Wizard starts.
Import the saved certificate
To add the saved certificate to the Trusted Root Certification Authorities store:
- On the Welcome page of the Wizard, click Next.
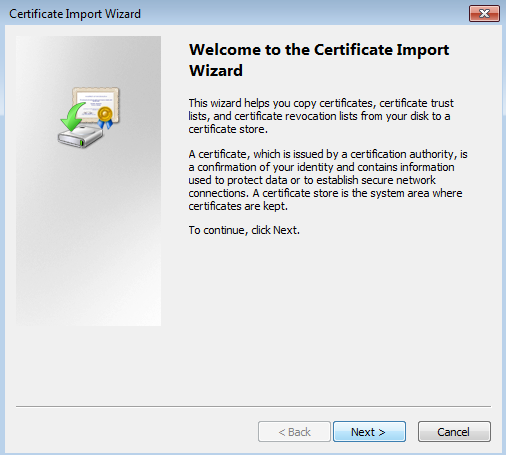
Certificate Import Wizard
- Click Browse and select the certificate that was saved in the "Save the certificate to a local file" procedure above.
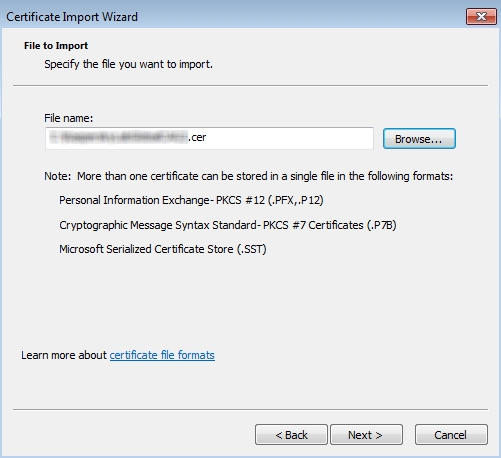
Importing the previously saved certificate
- On the next page of the Certificate Import Wizard, click Next.
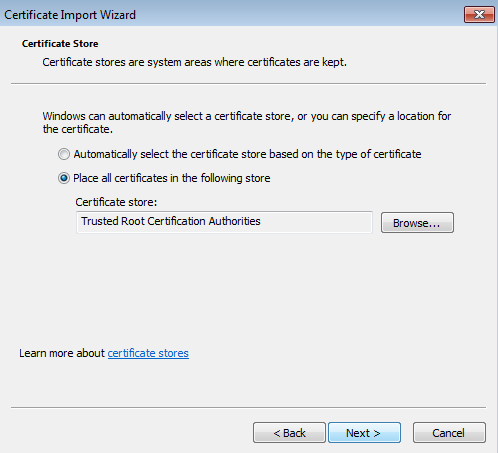
Selecting a certificate store
- On the last page of the Certificate Import Wizard, click Finish.
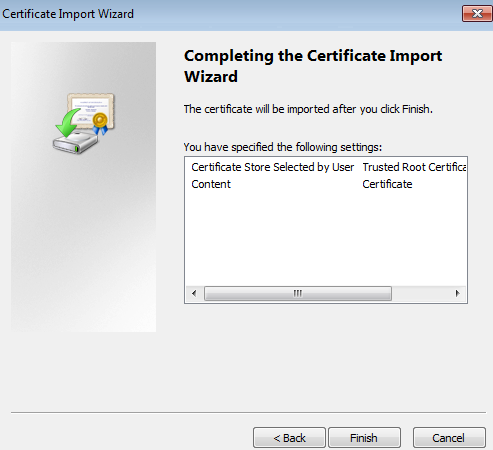
Completing the certificate import
- Close the MMC-based console and restart the browser.
The security problem (untrusted certificate) is resolved, as shown in the figure below.
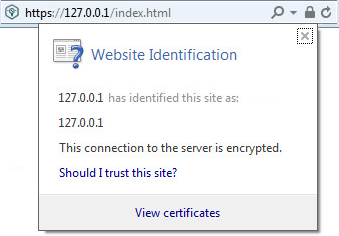
Website identification
Causing a self-signed certificate to be trusted by a browser (Kaspersky Scan Engine GUI opens in Google Chrome)
To make the self-signed certificate for Kaspersky Scan Engine GUI trusted when using Google Chrome:
- Open the
https://127.0.0.1orhttps://localhostaddress in Google Chrome.A warning is displayed in the address bar that the connection to the site is not secure.
- Click the Not secure message.
A window opens with security details about the website.
- Click Certificate to view the certificate information. (When the mouse pauses over Certificate, a Show certificate tooltip appears.)
- In the Certificate window that opens, select the Details tab and click Copy to File to create a local copy of the certificate.
The Certificate Export Wizard starts.
Certificate Export Wizard
- Follow the Wizard instructions.
Use the default Wizard settings during the certificate export.
- After the certificate is saved to a local disk, open it and add it to the Trusted Root Certification Authorities store as described in the procedure for Internet Explorer.
- Restart the browser.
Causing a self-signed certificate to be trusted by a browser (Kaspersky Scan Engine GUI opens in Mozilla Firefox)
You add Kaspersky Scan Engine GUI to the list of Mozilla Firefox trusted sites so that the browser will not display warnings about the certificate.
Removing a certificate from the list of trusted ones
After you have reconfigured or uninstalled Kaspersky Scan Engine, old certificates are no longer used by Kaspersky Scan Engine. You can remove them from the list of trusted certificates.
To remove a certificate from the list of trusted certificates:
- Open the Certificates management console by running the following command:
certmgr.msc - In the tree pane, select Trusted Root Certification Authorities > Certificates.

Certificates management console
- In the results pane, right-click the added certificate and select Delete.
