Step 2. Installing ArcSight Forwarding Connector
April 11, 2024
ID 167564
This section describes how to install ArcSight Forwarding Connector.
ArcSight Forwarding Connector is a component of HP ArcSight and is not included in Kaspersky CyberTrace. You can receive this application in one of the following ways:
- Contact the HP support team to get ArcSight Forwarding Connector.
- Contact a Kaspersky Technical Account Manager (TAM) to get ArcSight Forwarding Connector.
To install ArcSight Forwarding Connector:
- Run the ArcSight Forwarding Connector installation application.
- Select the ArcSight Forwarding Connector installation directory (hereinafter referred to as
%ConnectorInstallDir%). - After the installation files are unpacked, select Add a Connector.
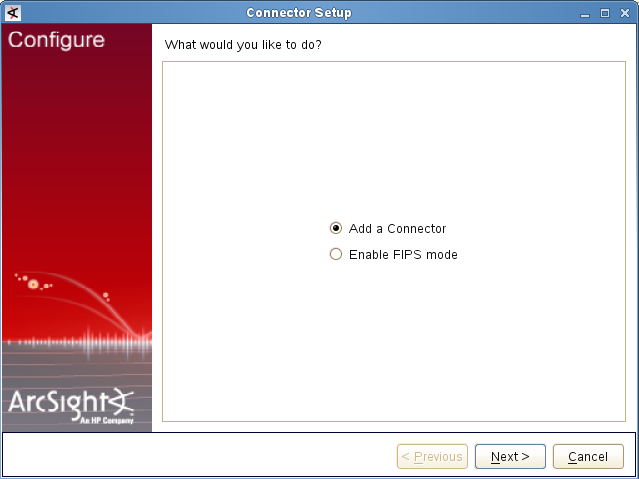
Adding a connector
Click Next.
- In the Type drop-down list, select ArcSight Forwarding Connector (Enhanced).

Selecting the connector type
Click Next.
- Specify the following connection parameters of ArcSight Source Manager:
- Host Name
ArcSight Source Manager host.
- Port
ArcSight Source Manager port (by default, it is
8443). - User Name
User name of the account intended for use by ArcSight Forwarding Connector (by default, it is
FwdCyberTrace).You can also specify a user other than
FwdCyberTrace. To do so, specify a custom ArcSight user in the ArcSight Forwarding Connector settings. - Password
Password for the account intended for use by ArcSight Forwarding Connector (by default, it is
KasperskyLab!).
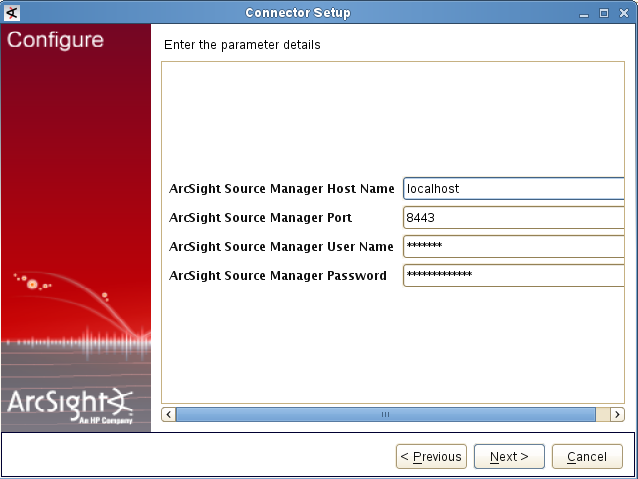
ArcSight Source Manager parameters
If an authentication error occurs (user name or password is incorrect), we recommend that you verify the
FwdCyberTraceuser is present in ArcSight Console. If not, create it manually.Click Next.
- Host Name
- If valid connection parameters are specified, import the required certificate.
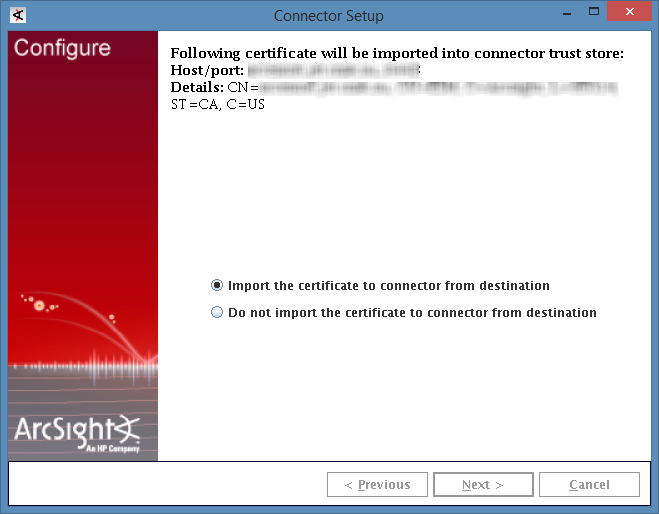
Importing the certificate
Click Next.
- Specify CEF Syslog as the event format that will be used for events sent to Kaspersky CyberTrace Service.
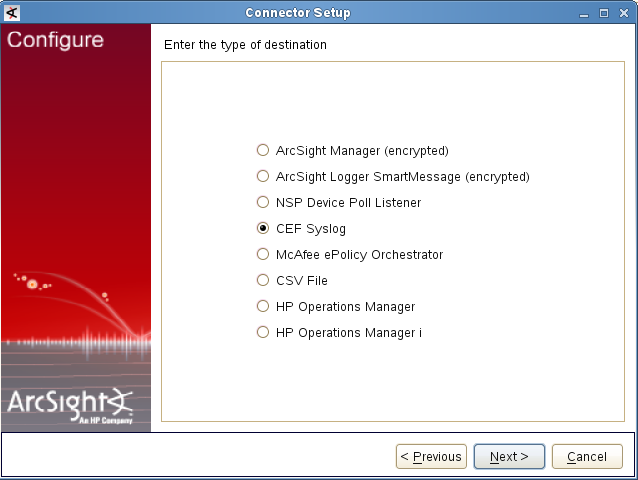
Specifying event format
Click Next.
- Specify the IP address (or host) and port that Kaspersky CyberTrace Service will listen on for events. Specify Raw TCP as the protocol.
The IP address and port are the same as specified on the Settings > Service tab of Kaspersky CyberTrace Web. By default,
127.0.0.1:9999is used as the IP address and port for receiving events from ArcSight.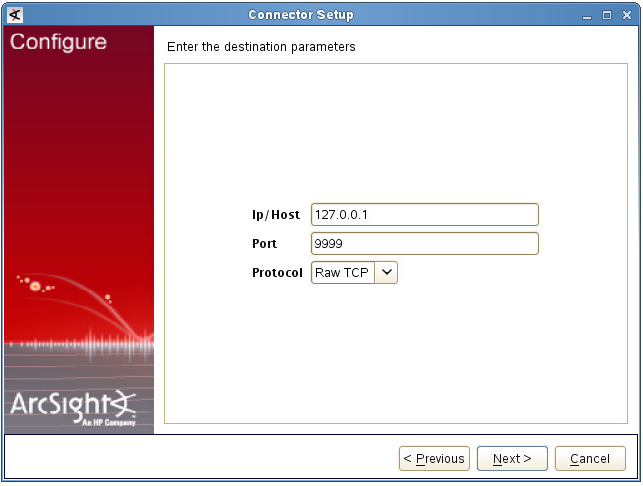
Specifying event destination
Click Next.
- Specify the details of the new ArcSight Forwarding Connector object: the name (arbitrary value permitted), location (arbitrary value permitted), location of the device that will send events to the connector (arbitrary value permitted, can be empty), and comment about the connector (arbitrary value permitted, can be empty).
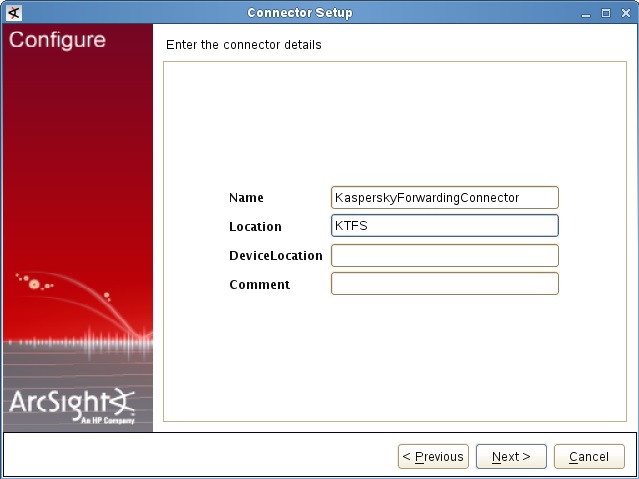
Connector details
Click Next.
- Install the ArcSight Forwarding Connector service.
- If you do not run the Connector Setup Wizard as root, a warning will be displayed.
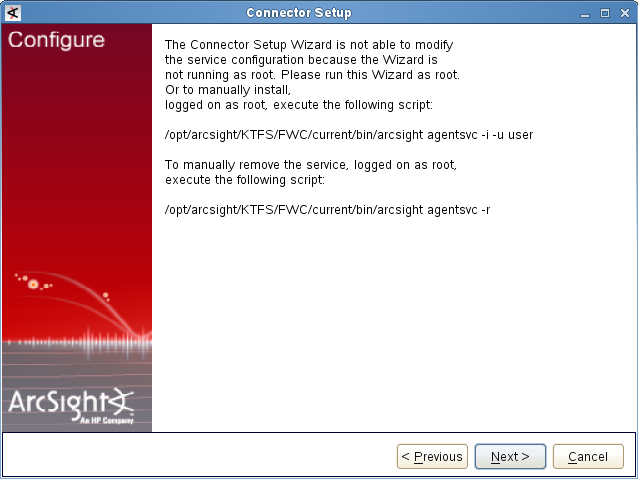
Warning about user privileges
You can either run the Connector Setup Wizard as root, or run the following command as root:
%ConnectorInstallDir%/current/bin/arcsight agentsvc -i -u $username -sn $service_nameHere
$usernameis the name of the operating system user that will run the service.$service_nameis the service name.We recommend that you set the service name to be the same as the connector name.
Log file
%ConnectorInstallDir%/current/logs/agent.logwill contain messages about the installation process.Skip the next step, which describes how to specify the service parameters.
- If you run the installation as root, select Install as a service.
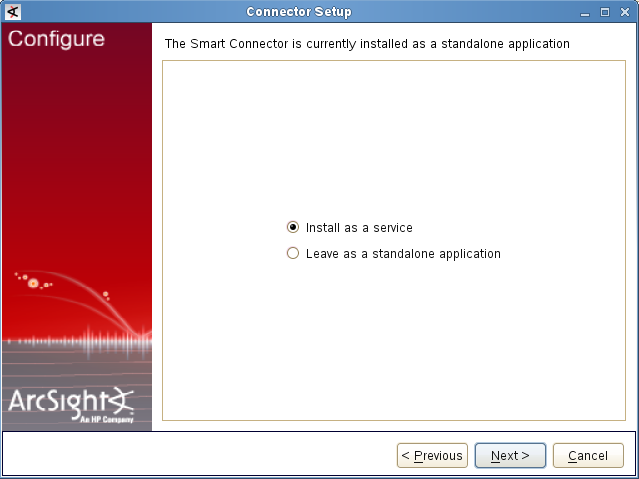
Choosing installation mode
Click Next.
- Specify the service parameters.
We recommend that you set the service name to be the same as the connector name.
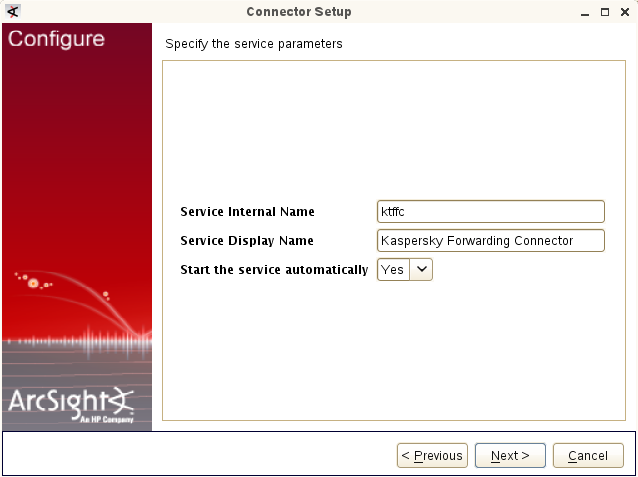
Specifying service parameters
Click Next.
After this, the Connector Setup Wizard informs you that the new forwarding connector is installed.
- Make sure that the connector is running (see the section about ArcSight troubleshooting on how you can do this). If it is not running, start it by using the following command:
/etc/init.d/arc_%FORWARDING% startHere
%FORWARDING%is the name of the connector.
If the forwarding connector sends a large amount of events (more than 1000 events per second) to Kaspersky CyberTrace Service, we recommend that you do the following: in the %ConnectorInstallDir%/current/user/agentagent.wrapper.conf file, set the wrapper.java.maxmemory field to 512 and restart the forwarding connector.
