Kaspersky CyberTrace
- About Kaspersky CyberTrace
- What's new
- About feeds and certificates
- Installation and integration guides
- Hardware and software requirements
- Getting started
- Part 1: Installing Kaspersky CyberTrace
- Part 2: Integrating Kaspersky CyberTrace with an event source
- Integration with Splunk
- Integration steps (Splunk)
- Single-instance integration (Splunk)
- About the single-instance integration scheme
- Step 1. Installing Kaspersky CyberTrace App (single-instance deployment)
- Step 2 (optional). Configuring Kaspersky CyberTrace App (single-instance deployment)
- Step 3 (optional). Configuring the lookup script (single-instance deployment)
- Step 4. Performing the verification test (Splunk, single-instance integration)
- Distributed integration scheme (Splunk)
- About the distributed integration scheme
- Step 1. Installing Forwarder and Search Head apps
- Step 2. Configuring Forwarder and Search Head apps (distributed deployment)
- Step 3 (optional). Configuring the lookup script (distributed deployment)
- Step 4. Performing the verification test (Splunk, distributed integration)
- Integration with ArcSight
- Integration steps (ArcSight)
- Before you begin (ArcSight)
- Standard integration (ArcSight)
- Integration schemes (ArcSight)
- Step 1. Importing the ARB package
- Step 2. Installing ArcSight Forwarding Connector
- Step 2 (alternative). Installing ArcSight Forwarding Connector by using the console
- Step 3. Configuring Feed Service for interaction with ArcSight
- Step 4. Performing the verification test (ArcSight)
- Integration with QRadar
- Integration steps (QRadar)
- Standard integration (QRadar)
- About the standard integration scheme (QRadar)
- Step 1. Configuring QRadar to receive latest updates
- Step 2. Sending a set of events to QRadar
- Step 3. Forwarding events from QRadar to Feed Service
- Step 4. Performing the verification test (QRadar)
- Step 5. Retrieving custom event properties
- Step 6. Creating a search filter for CyberTrace events
- Step 7 (optional). Displaying events in a dashboard
- Step 8 (optional). Creating notifications about incoming service events
- Step 9 (optional). Installing Kaspersky Threat Feed App
- Step 10 (optional). Enabling the indexes of the added custom event properties
- Step 11 (optional). Configuring Kaspersky Threat Feed App
- Integration with RSA NetWitness
- Integration steps (RSA NetWitness)
- Before you begin (RSA NetWitness)
- Standard integration (RSA NetWitness)
- About the standard integration scheme (RSA NetWitness)
- Step 1. Forwarding events from RSA NetWitness
- Step 2. Sending events from Feed Service to RSA NetWitness
- Step 3 (optional). Importing a meta group for browsing fields filled by Feed Service
- Step 4 (optional). Importing Feed Service rules to RSA NetWitness
- Step 5 (optional). Importing a preconfigured report to RSA NetWitness
- Step 6 (optional). Importing preconfigured charts and a dashboard to RSA NetWitness
- Step 7. Performing the verification test (RSA NetWitness)
- Integration with LogRhythm
- Step 1. Adding a Custom Log Source type
- Step 2. Importing Kaspersky CyberTrace rules and events
- Step 3 (optional). Adding Kaspersky CyberTrace events
- Step 4 (optional). Adding Kaspersky CyberTrace rules
- Step 5. Adding Kaspersky CyberTrace policy
- Step 6. Adding a log source to System Monitor Agent
- Step 7. Configuring log forwarding to Kaspersky CyberTrace
- Step 8 (optional). Creating alerts about incoming Kaspersky CyberTrace service events
- Step 9 (optional). Displaying alert events in LogRhythm
- Integration with Splunk
- Checking data generated by other SIEM and non-SIEM solutions
- User guides
- Administrator guides
- Advanced guides
- Distribution kit contents
- Managing the installation on Linux systems
- Managing the installation on Windows systems
- CyberTrace Web and SSL certificates
- Configuring Feed Service
- Watchdog module workflow
- Feed Service in ReplyBack mode
- Features of event processing by Feed Service
- Limitations on Feed Service incoming events
- Using Log Scanner
- Upgrading Kaspersky Threat Feed Service to CyberTrace
- Upgrading Kaspersky CyberTrace from a previous version
- Uninstalling Kaspersky CyberTrace
- Extra scenarios
- Separate installation of Feed Service and Feed Utility (Windows)
- Separate installation of Feed Service and Feed Utility (Linux)
- Managing Feed Service from the command line (Windows)
- Managing Feed Service from the command line (Linux)
- Integration with QRadar when QRadar cannot get updates
- Specifying custom ArcSight user in ArcSight Forwarding Connector settings
- Samples and custom applications
- Troubleshooting
- Risk mitigation
- AO Kaspersky Lab
- Information about third-party code
- Trademark notices
Specifying the log source type
Perform the following procedure only if you had to add Feed Service to QRadar as a log source manually because you did not have the latest QRadar updates. Use the procedure to specify the Log Source Type
property of the added custom event properties.
To specify the log source type of the added custom event properties:
- In QRadar, select Admin and under Data sources, in the Events section, select Custom Event Properties.
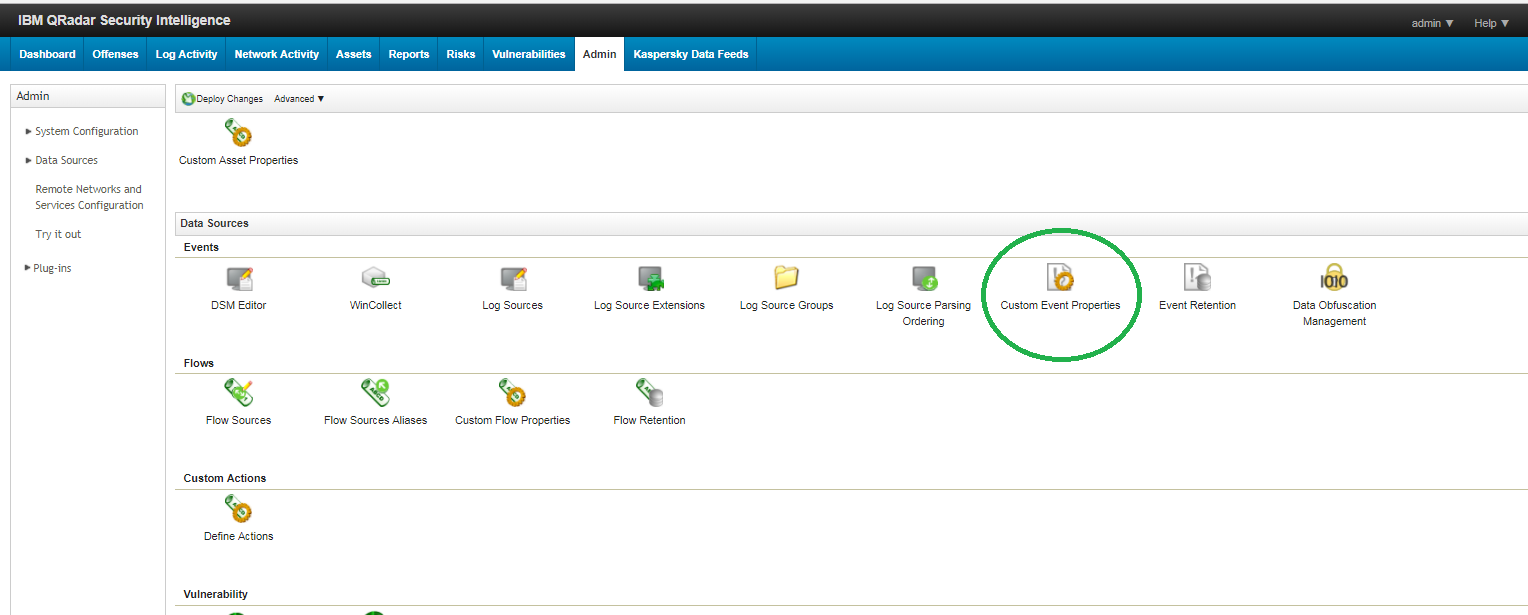
Admin tab of QRadar Console
The Custom Event Properties window opens.
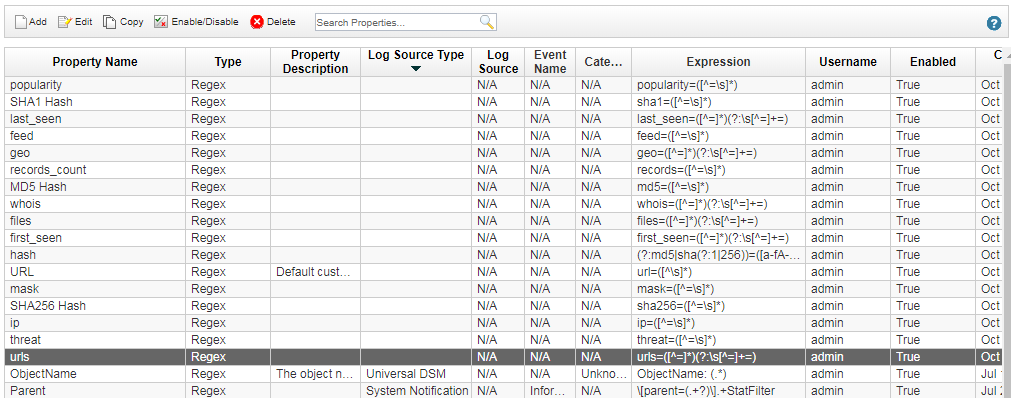
Custom event properties
- For each custom event property perform the following steps:
- Select the property.
- Click Edit.
A Custom Event Property Definition window opens.
- In the Log Source Type drop-down box, select Universal LEEF.
- Select the Existing Property option.
The Existing Property option was selected before you changed the value in the Log Source Type drop-down box. But after you changed the log source type, the New Property option was selected. Therefore, you have to select the Existing Property option again.
- Click Save.
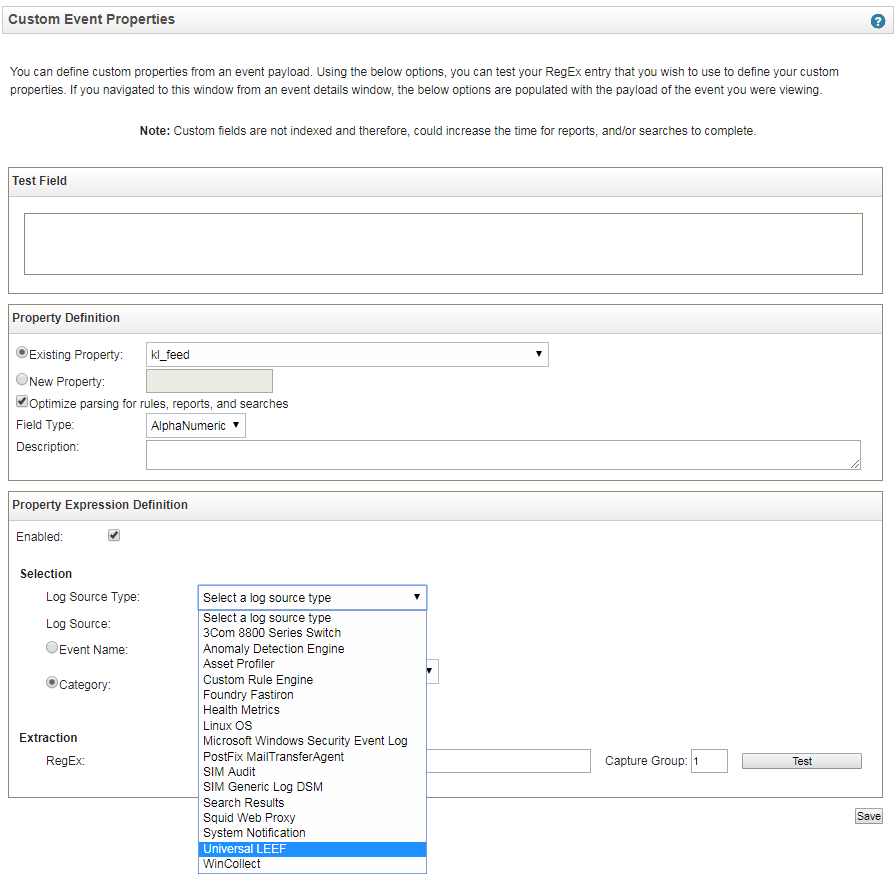
Custom event property definition
The log source type of every custom event property will now be Universal LEEF.